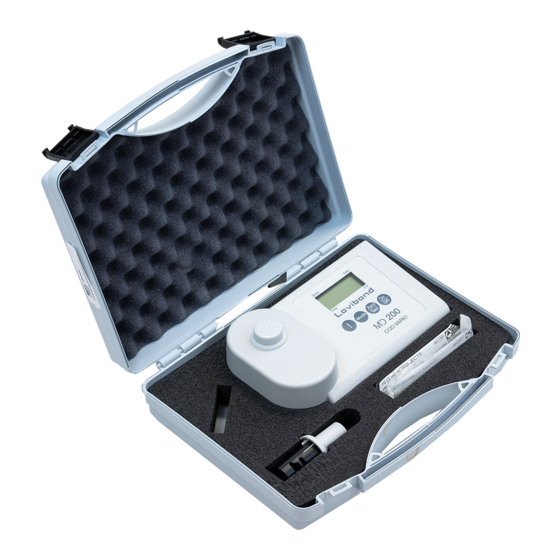
Lovibond MD200 Instruction Manual
Tintometer group photometer-system
Hide thumbs
Also See for MD200:
- Instruction manual (160 pages) ,
- Manual of methods (369 pages) ,
- Additional features & benefits (17 pages)
Table of Contents
Advertisement
Lovibond
Tintometer
®
Photometer-System MD200
CSB • COD • DCO • COD • DOC
Bedienungsanleitung
DE
Seite 4–15
Instruction Manual
GB
Page 16–27
Mode d'emploi
FR
Page 28–39
www.lovibond.com
Water Testing
®
Group
IT
Istruzioni d'uso
Pagina 40–51
Instrucciones
ES
Página 52–63
Instruções de Serviço
PT
Página 64–75
Advertisement
Table of Contents

Related Manuals for Lovibond MD200


Summary of Contents for Lovibond MD200
- Page 1 Lovibond Water Testing ® Tintometer Group ® Photometer-System MD200 CSB • COD • DCO • COD • DOC Bedienungsanleitung Istruzioni d‘uso Seite 4–15 Pagina 40–51 Instruction Manual Instrucciones Page 16–27 Página 52–63 Mode d‘emploi Instruções de Serviço Page 28–39 Página 64–75...
-
Page 2: Seite
CE-Konformitätserklärung / Declaration of CE-Conformity Déclaration de conformité CE / Dichiarazione di conformità CE / CE-Declaración de conformidad ——————————————————————————————————————— Hersteller / manufacturer / fabricant / produttore / fabricante: Tintometer GmbH / Schleefstraße 8-12 / 44287 Dortmund / Deutschland ——————————————————————————————————————— Produktname / Product name / Nom du fabricant / Nome del prodotto / Nombre del productor: MD 200 ———————————————————————————————————————... -
Page 3: Important Information
Important Information Important disposal instructions for batteries and accumulators EC Guideline 2006/66/EC requires users to return all used and worn-out batteries and accumulators. They must not be disposed of in normal domestic waste. Because our products include batteries and accumulators in the delivery package our advice is as follows : Used batteries and accumulators are not items of domestic waste. -
Page 4: Table Of Contents
Contents • Functional description ..........18 Display backlight . -
Page 5: Functional Description
Functional description – General notes Display backlight Press the [ !] key to turn the display backlight on or off. The backlight is switched off automatically during the measurement. Recall of stored data If the instrument is switched on, press the [!] key for more than 4 se- conds, then release the [!] key to access the recall menu. -
Page 6: Method Notes
• Ensure proper disposal of reagent solutions. • Material Safety Data Sheets: available on request. (Internet: www.lovibond.com) Chemical method notes: Method: The organic material present in the sample is oxidised by a standard amount of a potassi- um dichromate oxidising mixture. After oxidation is complete, the excess of this reagent is measured photometrically. -
Page 7: Cod Vario
Methods COD vario Select the appropriate vial for the desired range: Reagent Form of reagent/Quantity Order-No. CSB VARIO LR 0 - 150 mg/l 1 Set (25 tests) 2420720 CSB VARIO MR 0 - 1500 mg/l 1 Set (25 tests) 2420721 CSB VARIO HR 0 - 15000 mg/l 1 Set (25 tests) -
Page 8: Guidelines For Photometric Measurements
Methods The display shows the following: 0.0.0 After zeroing remove the vial from the adapter. Place the sample in the adapter (Note 2 – 4) making sure that the marks are aligned. Zero Press the [ZERO/TEST] key. Test The "Range" symbol flashes for approx. 3 seconds. R ANGE The result appears in the display. -
Page 9: Menu Options
Menu options Menu selections Press the [MODE] key and hold. Mode Switch the unit on using the [ON/OFF] key. Allow the 3 decimal points to be displayed before releasing the [MODE] key. The [!] key allows for selection of the following menu points: diS recall stored data Store Date... -
Page 10: Setting Date And Time
Menu options notch for data transfer The IRiM Module and the connected printer/PC must be ready. Press PrtG the [MODE] key to start the transmitting, the instrument displays “PrtG” (Printing) for approx. 1 second followed by the number of the first data set and its transmission. -
Page 11: Calibration Mode
Calibration Mode Store Date User calibration Time Note: user calibration (Display in calibration mode) factory calibration (Display in calibration mode) After confirming the selection with the [MODE] key the instrument will show CAL/LR. Scroll through ranges using the [MODE] key. Place the blank in the adapter making sure that the marks are aligned. -
Page 12: Factory Calibration Reset
Calibration Mode Factory calibration reset Resetting the user calibration to the original factory calibration will reset all methods and ranges. Store Date A user calibrated method is indicated by an arrow while the test result RESULT is displayed. Time To reset the calibration press both the [MODE] and [ZERO/TEST] key Zero Mode and hold. -
Page 13: Technical Data
Technical Data Technical Data Instrument double wavelength, automatic wavelength selection, direct reading colorimeter Light source: LEDs, interference filters (IF) and photosensor in transparent cell chamber. Wavelength specifications of the IF: 430 nm = 5 nm 610 nm = 6 nm Wavelength accuracy ±... -
Page 14: Operating Messages
Operating messages – Error codes Operating messages Hı Measuring range exceeded or excessive turbidity. Result below the lowest limit of the measuring range. Replace batteries, no further tests possible. btLo Battery capacity is too low for the display backlight; measurement is still possible. Store Date A user calibrated method is indicated by an arrow while the test result...
Need help?
Do you have a question about the MD200 and is the answer not in the manual?
Questions and answers