Rain Bird ESP-LXD Installation, Programming & Operation Manual
Hide thumbs
Also See for ESP-LXD:
- Troubleshooting manual (28 pages) ,
- Programming manual (32 pages) ,
- Installation & troubleshooting manual (38 pages)
Table of Contents
Advertisement
Quick Links
Download this manual
See also:
Troubleshooting Manual
Advertisement
Table of Contents

Related Manuals for Rain Bird ESP-LXD


Summary of Contents for Rain Bird ESP-LXD
- Page 1 ESP-LXD Controller Installation, Programming & Operation Guide...
- Page 2 To be in compliance with FCC regulations, the user must use shielded cables and connectors and install them per instructions. For technical assistance contact Rain Bird at 800 RAINBIRD (1-800-724-6247) U.S. and Canada Visit us on the web at www.rainbird.com...
-
Page 3: Table Of Contents
Station Setup ...................20 Programming Checklist ................9 Flow Sensors Setup ................22 Set Up Hardware ..................9 Set Up Rain Bird Flow Sensor ............22 Set Up Programs ...................9 Set Up Custom Flow Sensor ............23 Set Up Programs (Optional) ............9 Set Watering Start Times ..........25 Review Setup ..................9... - Page 4 Select Programs To Adjust ............49 Delay Watering ...............50 Introduction to Flow ............77 Rain Delay ....................50 FloZones Overview................77 Calendar Day Off ...................51 ESP-LXD Flow Management Features .........77 Water Windows ..................52 FloManager Overview ..............77 Set Up Water Window ..............52 FloWatch Overview ..............77 Watering Cycles ..............53...
- Page 5 Electrical Requirement Code of Magnetic Solenoid ..129 OFF ................110 Master Valve and Pump Set-up Tips .......... 130 Adjust Display Contrast ..............110 Using a Field Decoder With a Pump Start Relay ..... 130 Turn Off 2-Wire Path ................110 Close Master Valves ................112 ESP-LXD Controller...
- Page 6 this page intentionally left blank...
-
Page 7: Section A - Introduction & Overview
Section A - Introduction & Overview Controller Features The ESP-LXD controller has a variety of advanced features to help you Welcome to Rain Bird manage water efficiently, including: l Flow, power, and priority management Thank you for purchasing your new state-of-the-art Rain l 2-Wire and controller-based diagnostics Bird ESP-LXD controller. -
Page 8: Controls, Switches And Indicators
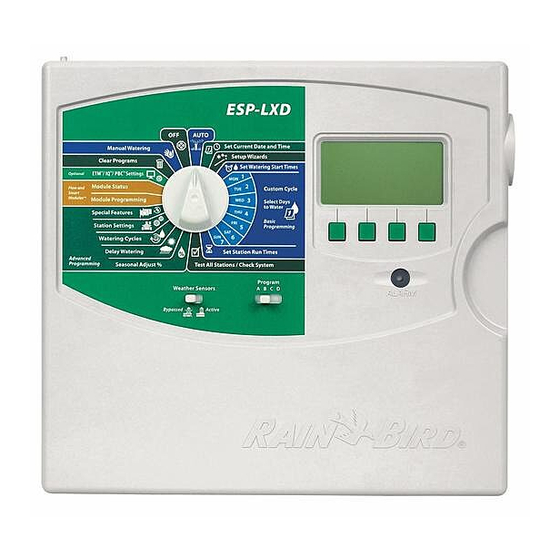
Controls, Switches and Indicators Display Displays time of day during normal operation; shows commands Key operational features of the ESP-LXD Controller front panel: during programming; shows active station and remaining run Programming Dial time during watering Used for programming and to turn the controller on and off. -
Page 9: 2-Wire Path Overview
AWG cable is 1.65 miles (2.66 Km). The ESP-LXD utilizes a 2-Wire electrical path, upon which decoders can NOTE: The ESP-LXD controller has 8 connections for up to four be attached at any location. This allows greater design flexibility and separate 2-Wire paths. -
Page 10: Loop Pattern
2.63 16.93 10.52 10 AWG 1.02 Ohms/1000’ 6.72 4.18 26.89 16.71 ESP-LXD Controller Valve Boxes (Typical) 2-Wire splice at branch take-offs allow easy breaking of loop for troubleshooting Critical Path Total cable length of the loop’s critical path (maximum 6.61 miles (10.63 km) using... -
Page 11: Decoders
Programming Backup Cartridge (PBC-LXD). See Section E for more details. The ESP-LXD controller can also interface to a local sensor, such as a rain shutoff device. The local weather sensor connects directly to the ESP- LXD-M50 module via a separate wired or wireless connection rather than through a Sensor Decoder connected to the 2-Wire path. -
Page 12: Basic Operation
Valves (Stations) The ESP-LXD lets you set a delay between stations. For example, if you set a one minute delay, station 1 will run until finished, followed by Valves (or stations) operate at times as specified by irrigation programs. a one minute delay. Then station 2 will run, followed by another one The controller sends signals to the appropriate decoder, powering minute delay, and so on. -
Page 13: Programming Overview
Irrigation Controller Definitions the Programming Guide instructions for more details. Programs Locate the Programming Guide that came with the ESP-LXD The process of telling the controller exactly when and for how long controller. you want to water. The controller opens and closes the remote control valves according to a program you set. -
Page 14: Apply Decoder Address Labels
Remote Programming Apply Decoder Address Labels The ESP-LXD controller can be programmed while operating under Follow the instructions to apply station, master valve, flow and battery power. weather sensor decoder address labels in the appropriate fields on the Programming Guide. -
Page 15: Programming Checklist
Programming Checklist Set Up Programs (Optional) Set seasonal adjust ............. Page 47 When programming the ESP-LXD controller for the first time, it is recommended that you complete the following steps in order. Create a water window ............. Page 52 For your convenience a check-off box is provided for each step. -
Page 16: Auto
OFF position when all irrigation is canceled. Turn the controller dial to AUTO. To cancel a currently running program, turn the controller dial to OFF for three seconds and then return the dial to AUTO. ESP-LXD Controller... -
Page 17: Alarm Conditions
Next button if necessary, to advance to the next page. NOTE: Take the appropriate action to address each alarm condition. When all alarms have been addressed, the alarm light on the front panel will no longer be illuminated. ESP-LXD Controller... -
Page 18: Resetting The Controller
Resetting the Controller Use a pen or pencil to depress the RESET button. Sometimes you may want to reset (or reboot) the ESP-LXD controller. The “Rain Bird” screen appears, confirming reset. Using the controller’s reset feature does not change or delete the programs you have loaded into the controller. -
Page 19: Section B - Basic Programming
NOTE: Be sure to set the hour correctly to either AM or PM. l Press and HOLD buttons to accelerate settings for hours and minutes. Press the + and – buttons to set the current minute; then press Next. ESP-LXD Controller... -
Page 20: Program Select Switch
Select Program Up to five different valve types are supported by ESP-LXD, set up as V1, On the controller front panel, slide the Program Select switch under V2, V3, V4, and V5. - Page 21 NOTE: The default quantity of solenoids is 1, however some Guide for future reference. decoders can control 2 solenoids. Press the + and – buttons to see the models of Rain Bird valves which the ESP-LXD supports. Select your valve type (if present); then press Next.
-
Page 22: Master Valves Setup
The Master Valve Setup screen appears. Press the + and – buttons to enter the desired MV number; then press Next. The ESP-LXD supports up to 5 Master Valves or pumps. Each MV must be connected to a Field Decoder and set up in the controller. Both Normally Open master valves (NOMVs) and Normally Closed master valves (NCMVs) are supported. - Page 23 MV can only be assigned to a single FloZone. The Shared MVs screen shows the other MVs associated with the selected FloZone. Repeat this process to set up additional master valves. Be sure to note each MV on your Programming Guide for future reference. ESP-LXD Controller...
-
Page 24: Weather Sensors Setup
The Weather Sensor Setup screen appears. Press the + and – buttons to enter the desired weather sensor number; then press Weather sensors are not required for the ESP-LXD controller, but they Next. increase functionality by allowing you to prevent or pause irrigation based on changing weather conditions. -
Page 25: Weather Sensors Bypassed/Active Switch
The Weather Sensors switch activates or bypasses all installed weather Rain Prevent sensors on your system Wind Pause On the controller front panel, slide the Weather Sensors switch to Freeze Pause Bypassed (to ignore) or Active (to obey). Soil Moisture Prevent Custom Pause Pause Custom Prevent Prevent ESP-LXD Controller... -
Page 26: Station Setup
The Setup Wizards screen appears. Press the Down Arrow button to select Station Setup then press Next. The Station Setup Wizard tells the ESP-LXD controller how many and what type of stations are used by your irrigation system. The Station Setup screen appears. Press the + and – buttons to enter the desired station number;... - Page 27 Repeat this process to set up additional stations. NOTE: If you have already set up your MVs and FloZones, the MV assignments for the currently selected FloZone will be shown in the bottom portion of the screen. ESP-LXD Controller...
-
Page 28: Flow Sensors Setup
MVs or stations if flow rates exceed set thresholds. The ESP-LXD can support up to five flow sensors. Press the + and – buttons to select the Rain Bird flow sensor model that you’re using. Set Up Rain Bird Flow Sensor Turn the controller dial to Setup Wizards. -
Page 29: Set Up Custom Flow Sensor
Next. then press Next. Press the + and – buttons to set the flow sensor Offset, pressing Next and Back to navigate between the number setting fields; then press Next. ESP-LXD Controller... - Page 30 Press the + and – buttons to enter the MV you wish to assign to the flow sensor. Each assigned FloZone will be shown below the MV field. Repeat this process to set up additional custom flow sensors. Be sure to note each flow sensor on your Programming Guide for future reference. ESP-LXD Controller...
-
Page 31: Set Watering Start Times
Station Run Time into smaller cycle times. If you plan to use Cycle+Soak, only a single Watering Start Time is required for each program. See Section D, Cycle+Soak for more details. ESP-LXD Controller... -
Page 32: Select Days To Water
NOTE: If the desired program is not selected, use the Program The ESP-LXD controller can be programmed to irrigate on different Select switch to change it. See Section B, Program Select Switch days, dates and cycles. Regardless of which Watering Cycle you set, for more details. -
Page 33: Station Run Times
NOTE: Seasonal Adjust % adjustments will adjust the Station Run Time down to the second. For example, if the Run Time is set for 1 minute and the Seasonal Adjust % is set to 50% then the adjusted Run Time equals 30 seconds. ESP-LXD Controller... - Page 34 ESP-LXD Controller...
-
Page 35: Section C - System Diagnostics
Review and confirm scheduled irrigation Programs, Program Run Times and Station Run Times. Confirm Programs The ESP-LXD controller can make calculations and provide feedback on Start Times and total Run Times for programs and stations. Program Summary Review program information for all programs: Turn the controller dial to Test All stations/Check System. -
Page 36: Review Program
Press Next. The Confirm Programs screen appears. Press the Down Arrow The Run Times review screen appears with run times for each button to select Review Program; then press Next. station displayed. Press Next. ESP-LXD Controller... - Page 37 The Weather Sensor Assignment review screen appears with remaining until next watering date displayed. Press Next. stations that use sensor override displayed. Press Next. The Calendar Day Off review screen appears with all selected calendar days off displayed. Press Next. ESP-LXD Controller...
- Page 38 The Maximum Number of SimulStations for controller review screen appears with the maximum number of stations that can operate simultaneously for that controller are displayed. Press Next. The Backup Programs review screen appears with the Contractor Default backup program status displayed. Press Next. ESP-LXD Controller...
-
Page 39: Program Run Time
The Confirm Programs screen appears. Press the Down Arrow Change the Program Select switch and repeat this process to button to select Program Run Time; then press Next. review and confirm Program Run Times for other programs as desired. ESP-LXD Controller... -
Page 40: Station Run Time
Station Run Time calculations. See Section D, The System Diagnostics screen appears with Confirm Programs Cycle+Soak for more details. selected; press Next. The Confirm Programs screen appears. Press the Down Arrow button to select Station Run Time; then press Next. ESP-LXD Controller... -
Page 41: Test All Stations
Once Run is pressed, stations can be monitored and advanced by turning the dial to the AUTO position and using the Adv button. Press the + and – buttons to increase or decrease Run Time minutes for the current station. ESP-LXD Controller... -
Page 42: 2-Wire Path Diagnostics
2-Wire Path Diagnostics Short Finding The ESP-LXD controller can quickly determine if shorts are present on Although finding the exact location of issues in the field often requires the two-wire path. some amount of in-the-field troubleshooting with a clamp meter, the controller has some built-in features to help you narrow down the Turn the controller dial to Test All stations/Check System. - Page 43 NOTE: Use a clamp meter to isolate and repair shorts in the two-wire path. Once repairs are finished, be sure to return to the controller and turn the dial to exit short finding mode. Irrigation can not occur until short finding mode has been cancelled. ESP-LXD Controller...
-
Page 44: Decoder Test
A confirmation screen appears; press Start. Decoder Test The ESP-LXD controller may be able to provide specific information A second confirmation screen appears to confirm the Decoder on particular decoders. Test is In Progress. Turn the controller dial to Test All stations/Check System. - Page 45 ESP-LXD Controller...
-
Page 46: Line Survey
The System Diagnostics screen appears. Press the Down Arrow ** Multiple address station decoders include the FD-202, FD-401 & FD-601 decoders button to select 2-Wire Diagnostics; then press Next. The 2-Wire Diagnostics screen appears. Press the Down Arrow button to select Line Survey; then press Next. ESP-LXD Controller... - Page 47 If the Current or Overload flags read Not OK, short circuits within your 2-Wire path are typically to blame. However, a Not OK Current flag can also be due to one or more misconfigured decoders, and a Not OK Overload flag can be caused by a dead short. ESP-LXD Controller...
-
Page 48: Ping Decoders
The Ping Decoder screen appears with Station Decoder selected. Ping Decoders Press Next to ping a Station decoder (or else press the Down The ESP-LXD controller can provide detailed information on a specific Arrow button to select MV Decoder); then press Next. decoder. - Page 49 The System Diagnostics screen appears. Press the Down Arrow button to select 2-Wire Diagnostics; then press Next. The 2-Wire Diagnostics screen appears. Press the Down Arrow button to select Ping Decoders; then press Next. ESP-LXD Controller...
-
Page 50: Weather Sensor Status
Auto screen. This is not considered an alarm, so the controller The System Diagnostics screen appears. Press the Down Arrow alarm light will not illuminate. button to select Wthr Sensor Status; then press Next. The Weather Sensor Status screen appears, showing installed weather sensors and their current status. ESP-LXD Controller... -
Page 51: Master Valve Status
Turn the controller dial to Test All stations/Check System. The System Diagnostics screen appears. Press the Down Arrow button to select Wthr Sensor Status; then press Next. The MV Status screen appears, showing installed master valves and their current status. ESP-LXD Controller... - Page 52 ESP-LXD Controller...
-
Page 53: Section D - Advanced Programming
Section D - Advanced Programming Adjust Individual Program Turn the controller dial to Seasonal Adjust %. The ESP-LXD controller has a wide variety of advanced but easy-to-use features designed to simplify irrigation. Seasonal Adjust % Seasonal Adjust % allows you to use the heaviest irrigation season as a baseline and adjust to lesser amounts of watering at other times of the year. -
Page 54: Adjust By Month
By Month; then press Next. programs as desired. The Seasonal Adjust by Month screen appears with % Adjust selected; press Next. NOTE: The % Adjust will automatically change to the new month’s percentage setting on the first day of the month. ESP-LXD Controller... -
Page 55: Select Programs To Adjust
The Seasonal Adjust screen appears. Press the Down Arrow button to select By Month; then press Next. The Seasonal Adjust by Month screen appears. Press the Down Arrow button to select Select PGMs; then press Next. ESP-LXD Controller... -
Page 56: Delay Watering
Rain Delay calculates and displays automatically. The ESP-LXD can also be equipped with an optional Rain Bird ET Manager Cartridge to automatically calculate and automate rain shutdown. Ask your Rain Bird distributor for more details or visit the Rain Bird web site, www.rainbird.com. -
Page 57: Calendar Day Off
The Calendar Day off screen appears, showing (up to 5) scheduled calendar days off in chronological order. Unprogrammed days will The ESP-LXD controller can be programmed to suspend irrigation on a show as Unused. particular calendar date, up to 5 different days of the year. -
Page 58: Water Windows
– buttons to set both the Open and Close times to OFF (between 11:59 and 12:00 AM). To set another program, change the Program Select switch to the desired program; a confirmation appears. Repeat this process to set or clear Water Windows for other programs as desired. ESP-LXD Controller... -
Page 59: Watering Cycles
Watering Cycles Custom, Odd, Odd no 31st, Even The process for setting up Custom, Odd, Odd no 31st, and Even The ESP-LXD controller supports a variety of flexible Watering Cycles is very similar. watering day cycle options. Turn the controller dial to Watering Cycles. - Page 60 Change the Program Select switch and repeat this process to set Watering Cycles for other programs as desired. NOTE: Watering day selections carry over to Watering Days dial positions and vice-versa. See Section B, Select Days to Water for more details. ESP-LXD Controller...
-
Page 61: Cyclical Days
Change the Program Select switch and repeat this process to set Cyclical Watering for other programs as desired. NOTE: Watering day selections carry over to Watering Days dial positions and vice-versa. See Section B, Select Days to Water for more details. ESP-LXD Controller... -
Page 62: Station Settings
Station Settings Set Up Cycle+Soak The ESP-LXD controller Cycle+Soak feature allows water to be applied to stations intermittently and without creating complex programs. It can apply to any station and is useful for locations such as hillsides which can be difficult to irrigate effectively. -
Page 63: Set Up Station Delay
The Station Settings screen appears. Press the Down Arrow button to select Station Delay; then press Next. The ESP-LXD controller can be programmed to include a delay between stations. This feature delays the start of the next sequential station in a The Delay Between stations screen appears. -
Page 64: Set Up Simulstations
The Station Settings screen appears. Press the Down Arrow button to select SimulStations; then press Next. To prevent the ESP-LXD controller from irrigating too many stations simultaneously, you can set the maximum number of stations per The Station Settings screen appears with PGM SimulStations program that are allowed to run. -
Page 65: Set Simulstations Tm For Controller
The ESP-LXD Maximum Number of SimulStations screen appears. Set SimulStations for Controller Press the + and – buttons to set the maximum number of irrigation NOTE: The LXD SimulStations settings will supersede program- stations (from 1 to 8) that can operate simultaneously; then press level settings. -
Page 66: Station Sequencing
Station Sequencing Turn the controller dial to Station Settings. The ESP-LXD offers advanced programming features to optimize water windows. The Station Sequencing option allows you to select from two methods of station sequencing for program operation: l Sequence by Station Number (system default). -
Page 67: Section E - Options & Special Features
Backup and Recall Programs The Backup Programs screen appears with Store Programs selected; press Next. The ESP-LXD controller comes standard with a simple to use backup programs feature. Backup Programs allows you to save your programs as Contractor Default and then recall them at a later time. It also includes a Delayed Recall feature that lets you save a normal irrigation schedule as the Backup and then restore it later automatically. -
Page 68: Recall Default Programs
Recall Programs they can not be restored. The Special Features screen appears. Press the Down Arrow button to select Backup Programs; then press Next. The Backup Programs screen appears. Press the Down Arrow button to select Recall Programs; then press Next. ESP-LXD Controller... -
Page 69: Delayed Recall
Turn the controller dial to Special Features. The Special Features screen appears. Press the Down Arrow button to select Backup Programs; then press Next. The Backup Programs screen appears. Press the Down Arrow button to select Delayed Recall; then press Next. ESP-LXD Controller... -
Page 70: Programming Backup Cartridge (Pbc-Lxd)
An optional Programming Backup Cartridge (PBC-LXD) is available for Connector Cable for use with a barcode scanning pen. If you do not the ESP-LXD controller which allows you to create and Restore multiple plan to use the barcode scanning feature right away then store the Backups of irrigation programs. -
Page 71: Installing A Pbc-Lxd
Turn the controller dial to ETM/IQ/PBC Settings to check that the controller has recognized the PBC-LXD. NOTE: There may be a short delay while the ESP-LXD controller Connect the PBC-LXD ribbon cable to the knife-edge connector recognizes the newly installed cartridge for the first time. -
Page 72: Backup Programs To Pbc-Lxd
NOTE: 8 different Backup files are available, with names that are assigned automatically (Backup01 through Backup08). The names cannot be changed but the date and time stamp update automatically whenever a particular file is used. Unused files display as <Unused>. ESP-LXD Controller... -
Page 73: Restore Programs From Pbc-Lxd
The PBC Restore screen appears. Press the + or – buttons to choose a Restore file; then press Next. NOTE: Available files display a creation date and time stamp. Unused files display as <Unused> and are not available for Restore. ESP-LXD Controller... -
Page 74: Decoder Barcode Scanning
Decoder barcode scanning is an optional feature of the Programming Backup Cartridge (PBC-LXD) that lets you set up Field Decoder addresses in the ESP-LXD controller by using a barcode scanning pen to read the removable barcode labels attached to Rain Bird’s field decoders (see Programming Guide instructions for more details). - Page 75 Then gently swing the PBC-LXD up into place, snapping the top-latch. Attach the Barcode Scanning Pen cable’s serial connector (9 pin female) to the PBC-LXD Connector cable’s serial connector (9 pin male). ESP-LXD Controller...
-
Page 76: Set Up Barcode Scanning Pen
Rain Bird recommends using a Unitech MS100-2 barcode pen with 9 pin (female) serial connector. Go to www.ute. com for more details. Locate the Programming Guide that came with the ESP-LXD controller. Then scan Setup Barcode # 2 and again you’ll hear audible beep(s) to confirm that the second scan was successful. -
Page 77: Test Barcode Scanning Pen
Test Barcode Scanning Pen The PBC Main Menu appears. Press the Down Arrow button to select Test Barcode Pen; then press Next. Locate the Programming Guide that came with the ESP-LXD The PBC Test Barcode Pen screen appears with instructions. controller. -
Page 78: Scan Field Decoder Addresses
Test Barcode Scanning Pen process before starting as the test process will not update or replace your decoder addresses. Locate the Programming Guide that came with the ESP-LXD controller. The PBC Main Menu appears. Press the Down Arrow button to select station Setup;... - Page 79 1, if necessary. To scan master valve, flow sensor or weather sensor decoders; from the Scan When Ready screen, press the Type button to select the desired device. Then repeat the scanning process as previously described. ESP-LXD Controller...
-
Page 80: Special Features
Special Features Set Hours Mode You can set the ESP-LXD controller to display time in one of three hours Set Language modes; Auto, AM/PM or 24 Hour. You can set the ESP-LXD controller to one of six supported languages; Turn the controller dial to Special Features. -
Page 81: Nomv Cycling
NOTE: There is no need to cycle Normally Closed Master Valves (NCMVs) open, so they are not included in the selection screen. NCMVs will show as - and can not be changed. Once you advance past the last MV, you will be returned to the Special Features screen. ESP-LXD Controller... - Page 82 ESP-LXD Controller...
-
Page 83: Section F - Flow Management
The ESP-LXD controller flow features can be divided into two different functional groups; FloManager and FloWatch. Introduction to Flow FloManager... -
Page 84: Set Flow Units
Press the + and – buttons to select the desired pipe size measurement (English or metric). To use FloManager or FloWatch with the ESP-LXD controller, you first need to set the measurement units for flow management. Turn the controller dial to Special Features. -
Page 85: Set Up And Use Flomanager
If Station Sequencing was previously set to Station Numbers, then turning FloManager ON will automatically change the setting to Station Priorities. Press Accept to make the change or else press Reject. See Section D, Advanced Programming, Station Sequencing for more details. ESP-LXD Controller... -
Page 86: Set Flow Rates Manually
The Smart Module PGM screen appears with Flow Smart Module selected; press Next. The Flow Smart Module PGM screen appears with Set Flow Rates selected; press Next. Repeat this process to manually set up Flow Rates for additional stations as desired. ESP-LXD Controller... -
Page 87: Set Flozone Tm Rates
If flow sensors are not present it will rely on manually and 2) to select the desired FloZone number; then press - (button entered information; if flow sensors are present it will rely on Learned Flow information, which is typically more accurate. ESP-LXD Controller... -
Page 88: Flowatch Tm
FloWatch Set Up and Use FloWatch The ESP-LXD controller lets you set the flow rates you expect or to FloWatch unleashes the true power of the ESP-LXD controller. FloWatch automatically Learn Flow rates based on real usage. Once flow is... -
Page 89: Enable (Or Disable) Flowatch
This will allow FloWatch to react selected; press Next. appropriately to the SEEF and SELF settings. The Flow Smart Module PGM screen appears. Use the Down Arrow to select FloWatch; then press Next. ESP-LXD Controller... -
Page 90: Seef And Self Settings And Actions
(from 1-10 minutes) that a flow rate must remain at (or above) the threshold before the controller will issue an alarm or take action. Press the + and – buttons to set the Settling Time; then press Next. ESP-LXD Controller... - Page 91 Press the + and – buttons to set the SEEF Action; then press Next. Cycle+Soak station runtimes. A SEEF or SELF condition can not be detected if the SEEF and SELF settling times are equal to or longer than station cycle times. ESP-LXD Controller...
- Page 92 NOTE: SEEF and SELF settings are not active until FloWatch is press Next. activated. You may also wish to temporarily disable FloWatch l Press and HOLD buttons to accelerate settings for hours and occasionally, such as when normal maintenance is occurring. minutes. ESP-LXD Controller...
-
Page 93: Learn Flow
NOTE: You can choose to run the exercise Now or choose a timed selected; press Next. delay of up to 24 hours. The Flow Smart Module PGM screen appears with Set Flow Rates A confirmation screen appears; press Next again to set the Learn selected; press Next. Flow exercise. ESP-LXD Controller... -
Page 94: Learn Flow Automatically (Custom Stations)
NOTE: If the flow rates for one or more stations seem low, check The Flow Smart Module PGM screen appears with Set Flow Rates your flow metering hardware and flow sensor. Low flow readings selected; press Next. can be caused by faulty flow meters or flow sensors. ESP-LXD Controller... - Page 95 The Learn Flow Starting confirmation screen appears, confirming the delay time until the Learn Flow operation will start. NOTE: Station or FloZone flow rates can still be entered manually. See Set Flow Rates Manually in the FloWatch section. ESP-LXD Controller...
-
Page 96: View And Clear Flow Alarms
Note each station which has an alarm, then see Clear Flow Alarms in this section for more details on how to clear flow alarms. The Smart Module Status screen appears with Flow Smart Module selected; press Next. The Flow Module Status screen appears with View Flow Alarms selected; press Next. ESP-LXD Controller... -
Page 97: View Flozone Tm Flow Alarms
Note each station which has an alarm, then See Clear Flow Alarms in this section for more details on how to clear flow alarms. The Smart Module Status screen appears with Flow Smart Module selected; press Next. The Flow Module Status screen appears with View Flow Alarms selected; press Next. ESP-LXD Controller... -
Page 98: Clear Flow Alarms
The Clear Flow Alarms screen appears. Press Yes to clear all station and FloZone flow alarms. The Smart Module Status screen appears with Flow Smart Module selected; press Next. The Flow Module Status screen appears with View Flow Alarms selected; press Next. ESP-LXD Controller... -
Page 99: View Flow Rates
(Learned or User Entered) displays below it. The Smart Module Status screen appears with Flow Smart Module selected; press Next. The Flow Module Status screen appears. Press the Down Arrow button to select View Flow Rates; then press Next. ESP-LXD Controller... -
Page 100: View Flow Rates For Flozones
The Smart Module Status screen appears with Flow Smart Module selected; press Next. The Flow Module Status screen appears. Press the Down Arrow button to select View Flow Rates; then press Next. ESP-LXD Controller... -
Page 101: View And Clear Flow Logs
The Smart Module Status screen appears with Flow Smart Module The confirmation screen appears; press Yes to clear the logs. selected; press Next. The Flow Module Status screen appears. Press the Down Arrow button to select View flow Logs; then press Next. ESP-LXD Controller... -
Page 102: View Current Flow
SEEF or SELF condition (see Setting Up SEEF and SELF for more details). The Smart Module Status screen appears with Flow Smart Module selected; press Next. The Flow Module Status screen appears. Press the Down Arrow button to select View Current flow; then press Next. ESP-LXD Controller... -
Page 103: Clear Flow Rates
The confirmation screen appears; press Next to clear flow rates. Turn the controller dial to Module Programming. The Smart Module PGM screen appears with Flow Smart Module selected; press Next. The Flow Smart Module PGM screen appears with Set Flow Rates selected; press Next. ESP-LXD Controller... - Page 104 ESP-LXD Controller...
-
Page 105: Section G - Auxiliary Operation
Confirm that your ESP-LXD controller recognizes installed to review flow and Weather Sensors. Station Modules. The standard ESP-LXD-M50 module will use two of the four available slots. You can also expand station capacity by 75-150 stations by installing one or two ESP-LXD-SM75 Station Modules. -
Page 106: Clear Programs
The Clear Programs screen appears with Individual Program selected; press Next. The ESP-LXD controller allows you to clear an individual A confirmation screen appears. To clear the selected Program, Program, all of your Programs or Restore the controller to it’s press and hold down the Yes button for four seconds. -
Page 107: Clear All Programs
The Clear Programs screen appears. Press the Down Arrow button to select All Programs; then press Next. A confirmation screen appears. To Clear All Programs, press and hold down the Yes button for four seconds. If you’re not sure, press No. ESP-LXD Controller... -
Page 108: Restore Defaults
Restore Defaults A confirmation screen appears. Restore the ESP-LXD controller’s factory default settings. Turn the controller dial to Clear Programs. CAUTION: Be very careful about using the Restore Defaults option as all previous settings, including decoder addresses, will be permanently cleared from system memory. Consider using the Clear All Programs option instead so that your decoder addresses will not be erased. -
Page 109: Manual Watering
Manual Watering The ESP-LXD controller allows you to manually start a station, a program, or to open a Normally Closed Master Valve (NCMV) to provide water to a FloZone for manual watering. Start Station Manually NOTE: Manual Watering > Start Station will pause currently running programs. -
Page 110: Start Program Manually
The Manual Watering Start Program screen appears. Press Run to start the Program or else press Back to cancel. NOTE: If the desired Program is not selected, use the Program Select switch to change it. See Program Selection in Section A for more details. ESP-LXD Controller... -
Page 111: Mv Water Window
MV Water Window calculates automatically; then press Next. NOTE: To clear a previously set MV Water Window, press the + and – buttons to set both the Open and Close times to OFF (between 11:59 and 12:00 AM). ESP-LXD Controller... - Page 112 Yes button to include the selected MV in the Water Window or press No to exclude it. Press the Next and Back buttons to navigate through the days of the week and repeat the selection process as desired. ESP-LXD Controller...
-
Page 113: Manually Opening A Mv
The Manual Watering screen appears. Press the Down Arrow button to select MV Water Window ; then press Next. The MV Water Window screen appears. Press the Down Arrow button to select Manual MV Open ; then press Next. ESP-LXD Controller... -
Page 114: Test All Stations
Once Run is pressed, stations can be monitored and advanced by turning the dial to the AUTO position and using the Adv button. Press the + and – buttons to increase or decrease Run Time minutes for the current station. ESP-LXD Controller... - Page 115 ESP-LXD Controller...
-
Page 116: Off
Sometimes you may want to turn off the 2-Wire path, such as when Turn off irrigation, master valves or the 2-Wire path. you’re maintaining your system. The ESP-LXD controller lets you do this Adjust Display Contrast automatically so you do not need to un-wire the 2-Wire path from the connection lugs. - Page 117 But while the 2-Wire path is powered down, the controller’s alarm light will be lit and a 2-Wire Path Off A confirmation screen appears. message will be displayed whenever the controller dial is at the OFF or AUTO dial positions. ESP-LXD Controller...
-
Page 118: Close Master Valves
Turn the controller dial to OFF. The All Watering Off screen appears. Press the MV Close button. A confirmation screen appears. To close all master valves, press and hold down the Yes button for four seconds. If you’re not sure, press Back. ESP-LXD Controller... -
Page 119: Section H - Installation
Install the Controller are required for installation. If anything is missing, please contact your distributor before proceeding. This section explains how to mount the ESP-LXD controller on a wall (or mounting surface) and connect the wiring. ESP-LXD controller. NOTE: An optional metal cabinet (LXMM) and pedestal Mounting hardware (5 screws, 5 plastic wall anchors). -
Page 120: Select Location For Controller
120 or 220/240 V AC wiring in conduit 3M DBR/Y Connectors Tape Measure Field wiring in conduit Wire Stripper Wall Wire Nuts Grade Marking Pencil Electric Drill (or Hammer Drill if installing in masonry or concrete wall) Select Controller Location Waterproof Caulking ESP-LXD Controller... -
Page 121: Access Controller Cabinet
Pull it towards you to open the door, swinging it to the left. To open the controller front panel: grasp the crescent-shaped handle on the right-hand-side of the front panel. ESP-LXD Controller... -
Page 122: Mount Controller
Use a tapping tool (or nail) and hammer to tap pilot holes through the five mounting hole marks and into the mounting surface. Then remove the template and drill holes in the mounting surface, installing wall anchors if necessary. ESP-LXD Controller... -
Page 123: Install Modules
Install LXD Decoder Module An ESP-LXD-M50 module is required for operation and is included with every ESP-LXD controller. The ESP-LXD-M50 module powers and provides an interface from the controller to the two wire path. -
Page 124: Install Station Expansion Modules
The ESP-LXD controller comes standard with 50 stations available. This can easily be expanded by adding one or two optional ESP-LXD-SM75 Station Modules. Each station module adds 75 additional stations to increase capacity to 125 or 200 stations. - Page 125 Using a thin blade screwdriver, connect the two wire ends to a controller cabinet. Attach a conduit fitting to the bottom of the set of large two-wire path terminals on the ESP-LXD decoder cabinet; then attach conduit to the fitting.
-
Page 126: Connecting Power To The Controller
Connect Power Source The ESP-LXD controller has an internal transformer that reduces supply voltage (120 VAC in U.S. models; 230 VAC in international models; 240 VAC in Australian models) to 24 VAC to operate the decoders connected to the controller. - Page 127 Once wiring is completed, fill top of conduit with waterproof caulking to prevent insect intrusion into the controller cabinet. 3 wires Verify that all connections are secure. Then replace the cover of the transformer wiring compartment and secure it with the screw. ESP-LXD Controller...
-
Page 128: Complete Installation
Complete Installation Programming Under Battery Power The ESP-LXD controller front panel can operate under battery power for WARNING: To prevent electrical shock, make sure all supply remote programming. This feature is especially useful if the controller power is OFF before completing installation. Electrical shock can is installed in an area that is not easily accessible. -
Page 129: Connect Decoders To Field Wiring
(except when valve-in-head sprinklers WARNING: Use only Rain Bird DB (direct burial) or 3M DBR/DBY are used, which can be directly buried). splice kits for all electrical wiring connections to the 2-Wire path. -
Page 130: Field Decoder Connections
Field Decoder Connections Master Valves and MV Decoders Up to five master valves can be connected to the ESP-LXD controller Splice one decoder blue wire to the 2-Wire path red wire; then through field decoders attached to the two wire path. Master valves splice the other decoder blue wire to the 2-Wire path black wire. -
Page 131: Surge Protection And Grounding
2-Wire path. Splice the blue wires from a Rain Bird LSP-1 to the 2-Wire path in the same manner as the installation of a field decoder detailed above, completing the splices with an approved direct-bury splice kit. -
Page 132: Decoder Managed Flow Sensors
Decoder Managed Weather Sensors Flow sensors are managed with SD-210 sensor decoders attached to In addition to five flow sensors, ESP-LXD can also support three decoder- the 2-Wire path. The ESP-LXD controller can support and manage up to managed weather sensors. Rain Bird SD-210 sensor decoders are used five flow sensors. -
Page 133: Local Weather Sensors
Verifying Field Installation Once some or all field decoders have been installed and programmed into the ESP-LXD controller you can check the electrical portion of the installation even if water is not available to test sprinklers. See Section C, Run a Line Survey for more details. - Page 134 ESP-LXD Controller...
-
Page 135: Appendix
If the solenoid opens but will not stay open, the holding voltage may be too low. Here, you would change the fifth digit of the code. Use the chart above to select a suitable electrical code for special solenoid (valve) types. ESP-LXD Controller... -
Page 136: Master Valve And Pump Set-Up Tips
Address in the master valve Address field. The switch code can vary depending on how your system was installed. NOTE: Rain Bird recommends use of a FD-101 for small pump Below, we will cover some of the more common installations. - Page 137 EN55022 Conducted Emissions EN61000-3-2 EN61000-3-3 EN55014-2: 2001 EN61000-4-2 EN61000-4-3 EN61000-4-4 EN61000-4-5 EN61000-4-6 EN61000-4-8 EN61000-4-11 Rain Bird Corporation Manufacturer’s Name: Manufacturer’s Address: 9491 Ridgehaven Court San Diego, CA 92123 619-671-4048 Irrigation Controller Equipment Description: Requirements for household Equipment Class: appliances, electric tools and...
- Page 138 RAIN BIRD CORPORATION 6991 E. Southpoint Road Tucson, AZ 85756 © 2012 Rain Bird Corporation ® ”Rain Bird”, “SimulStations”, “FloManager”, “FloWatch”, “FloZone” and “Cycle+Soak” are registered trademarks of Rain Bird Corporation. All rights reserved. www.rainbird.com Jan-2012 P/N: 637760-01...
Need help?
Do you have a question about the ESP-LXD and is the answer not in the manual?
Questions and answers