Table of Contents
Advertisement
Quick Links
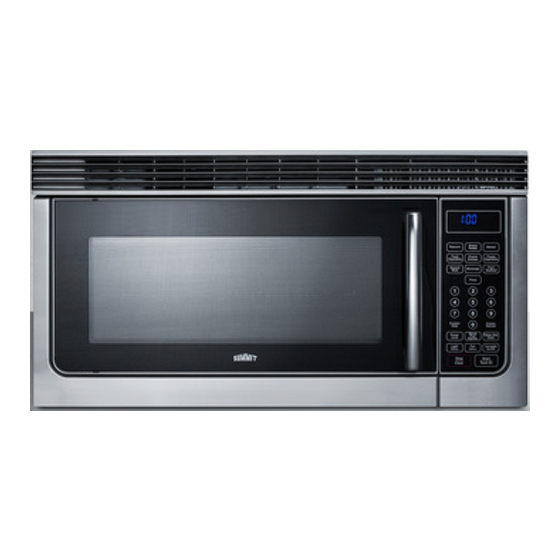
Over-the Range Microwave Oven
OWNER'S INSTRUCTIONS
Please read these instructions carefully before installing and operating the oven.
Record in the space below the SERIAL NO. found on the nameplate on your oven and
retain this information for future reference.
SERIAL NO.: ________________________________________
OTRSS30
Felix Storch, Inc.
Summit Appliance Division
An ISO 9001:2008 registered company
770 Garrison Avenue
Bronx, New York 10474
www.summitappliance.com
Advertisement
Table of Contents

Related Manuals for Summit OTRSS30


Summary of Contents for Summit OTRSS30
- Page 1 Felix Storch, Inc. Summit Appliance Division An ISO 9001:2008 registered company 770 Garrison Avenue Bronx, New York 10474 www.summitappliance.com Over-the Range Microwave Oven OTRSS30 OWNER’S INSTRUCTIONS Please read these instructions carefully before installing and operating the oven. Record in the space below the SERIAL NO. found on the nameplate on your oven and retain this information for future reference.
-
Page 2: Table Of Contents
PRECAUTIONS TO AVOID POSSIBLE EXPOSURE TO EXCESSIVE MICROWAVE ENERGY (a) Do not attempt to operate this oven with the door open since open-door operation can result in harmful exposure to microwave energy. It is important not to defeat or tamper with the safety interlocks. -
Page 3: Important Safety Instructions
IMPORTANT SAFETY INSTRUCTIONS circuit breaker panel. When using electrical appliances, basic safety precautions should be followed, Do not use the cavity for storage purposes. Do not leave paper including the following: products, cooking utensils or food WARNING - To reduce the risk of burns, in the cavity when not in use. - Page 4 water, for example, near a kitchen sink, soft cloth. in a wet basement, near a swimming This equipment generates, uses and 2 5 . pool, or similar locations. can radiate radio frequency energy Do not operate this appliance if it has a and, if not installed and used in 1 6 .
-
Page 5: Unpacking Instructions
UNPACKING INSTRUCTIONS Filter and Exhaust Damper Unpacking and Examining Your Oven Assembly. Read enclosures and Carefully remove oven from carton. SAVE the Owner’s Instructions. SAVE THE CARTON AS IT MAY The feature sticker from the outside MAKE INSTALLATION EASIER. of the door, if there is one. Remove: Check the oven for any damage, such All packing materials from inside... -
Page 6: Grounding Instructions
ELECTRICAL REQUIREMENTS The electrical requirements are 120 Neither Summit nor the dealer can volt 60 Hz, AC only, 20 amp. It is accept any liability for damage to the recommended that a separate circuit oven or personal injury resulting from serving only the oven be provided. -
Page 7: Information You Need To Know
INFORMATION YOU NEED TO KNOW ABOUT YOUR OVEN damage the microwave. ·Use pot holders when handling the NEVER use the oven without the shelf – it may be hot. turntable and support, nor turn the ·Do not use the shelf when cooking turntable over so that a large dish could popcorn. -
Page 8: About Food
ABOUT FOOD DON’T FOOD · Puncture egg yolks before cooking to ·Cook egg in shells. Eggs, prevent ―explosion‖. ·Reheat whole eggs. sausages, · Pierce skins of potatoes, apples, squash, hot fruits & vegetable dogs and sausages so that steam escapes. ·... -
Page 9: About Sensor Cooking
- Center bottom of dish is very hot to pinkness. the touch. - Fish is opaque and flakes easily - Poultry thigh joints move easily. with a fork. - Meat and poultry show no ABOUT SENSOR COOKING ·The proper containers and covers are essential for best sensor cooking. ·... -
Page 10: About Utensils And Coverings
The following coverings are ideal: safe temperatures. Summit ·Paper towels are good for covering responsible for any damage to the oven foods for reheating and absorbing fat when accessories are used... -
Page 11: About Children And The Microwave
ABOUT CHILDREN AND THE MICROWAVE Children below the age of 7 should only use the microwave oven with a supervising person very near to them. Between the ages of 7 and 12, the supervising person should be in the same room. The children must be able to reach the oven comfortably;... -
Page 12: Specifications
SPECIFICATIONS Power Supply 120V AC 60Hz Single phase Power Consumption 1550W Microwave Output Power 1000W Frequency 2450MHz ‖(W)×29 ‖(H)×17 ‖(D) Outside Dimensions ‖(W)×21 ‖(H)×14 ‖(D) Cavity Dimensions Oven Capacity 1.59 cu.ft. Cooking Uniformity Turntable /Stirrer Fan System Weight Approx. (net) 60.0lb / (gross) 68.8lb... -
Page 13: Features Diagram
FEATURES DIAGRAM 1. Door Safety Lock System 2. Oven Window 3. Wave Guide 4. Roller Ring 5. Shaft 6. Control Panel 7. Glass Turntable... -
Page 14: Control Panel Features
CONTROL PANEL FEATURES DISPLAY SCREEN Cooking time, Lock indicator, timer, defrost sign and help information are displayed. CUSTOM HELP Information is available to help the user with cooking. COMPU DEFROST Easy settings to defrost according to weight entered. POWER LEVEL Use to set cooking power level. -
Page 15: Basic Controls
BASIC CONTROLS Before operating your new microwave 80%(P-80) Medium High oven, please read and understand this 60%(P-60) Medium operation manual completely. 40%(P-40) Medium Low 20%(P-20) Low/Defrost SIGNALS DURING OVEN SETTINGS 0% (P-00) ONE SIGNAL: Oven accepts the entry. Zero TWO SIGNALS: Oven does not accept the entry, please check and try again. -
Page 16: Stop/Clear
be on; however the turntable can be STOP/CLEAR turned off so that it does not rotate for Touch the STOP/CLEAR pad to: extra large dishes, such as a 13×9×2 Clear previous setting. glass utility casserole. Cancel Timer. casserole on the turntable, press Stop the oven temporarily during TURNTABLE ON/OFF button to turn cooking. -
Page 17: Special Features
SPECIAL FEATURES COMPU COOK For foods shown in the following chart, 3. Touch START/TOUCH ON pad it is not necessary to program the time and the cooking power. It is sufficient to Baked potato, Pizza, Fresh indicate the type of food that you want vegetables, Frozen entrees, Frozen to cook as well as the weight of this vegetables and Ground meat, you can... -
Page 18: Manual Defrost
Suppose you want to defrost Soup. 4. Enter number of cups by touching 1. Touch COMPU DEFROST pad once. number pads from 1 to 6. 2. Touch 6 for Soup. 5. Touch START/TOUCH ON pad. 3. Touch START/TOUCH ON pad. COMPU DEFROST CHART Number Weight Range... -
Page 19: Other Convenient Features
OTHER CONVENIENT FEATURES MINUTE PLUS/EXPRESS Minute Plus/Express allows you to cook at 100% by simply touching the MINUTE PLUS/EXPRESS pad. You can also extend cooking time by touching the MINUTE PLUS/EXPRESS pad during manual cooking to add 1 minute each; the longest cooking time is 99 minutes 99 seconds. -
Page 20: Custom Help
CUSTOM HELP CUSTOM HELP provides hints for 3 features which make it easy to use the oven because specific instructions are provided in the Interactive Display. 1. WEIGHT HINT Press CUSTOM HELP once, the screen will show you the weight range of Compu Defrost. 2. -
Page 21: Care And Cleaning
CARE AND CLEANING Exterior Waveguide Cover The outside surface is pre-coated steel The waveguide cover is located on the and plastic. Clean the outside with mild ceiling in the oven cavity. It is made from soap and water; rinse and dry with a soft mica so requires special care. - Page 22 louver disengage (See Range Light illustration.) 1. To replace light bulbs, first disconnect 3. Pull the louver away from the unit. power to the oven at the circuit breaker 4. Change the charcoal filter. panel or by unplugging. 5. Carefully push the louver back into place 2.
- Page 23 NOTES...
-
Page 24: Limited Warranty
LIMITED WARRANTY 90-DAY LIMITED WARRANTY Within the 48 contiguous United States, for 90 days from the date of purchase, when this appliance is operated and maintained according to instructions attached to or furnished with the product, warrantor will pay for factory-specified parts and repair labor to correct defects in materials or workmanship.
Need help?
Do you have a question about the OTRSS30 and is the answer not in the manual?
Questions and answers