Table of Contents
Advertisement
Quick Links
Please read these instructions carefully before installing and operating the oven.
In the space below, record the SERIAL NO. found on the nameplate on your oven. Keep this
manual in a safe place for future reference.
SERIAL NO.: ________________________________
Please save sales receipt for warranty.
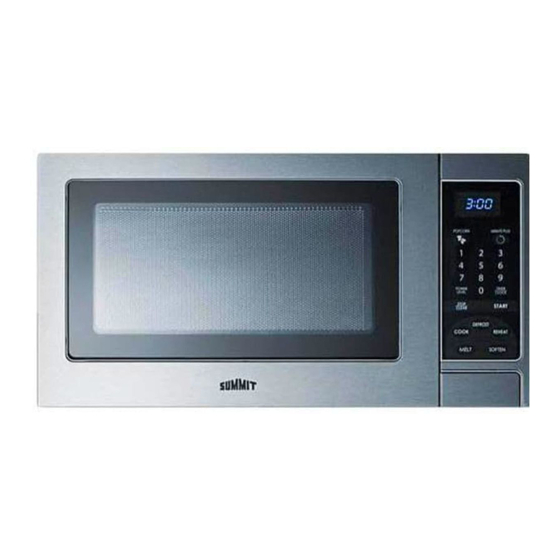
Microwave Oven
Model SCM853
User's Manual
Felix Storch, Inc.
Summit Appliance Division
770 Garrison Avenue
Bronx, New York 10474
www.summitappliance.com
Advertisement
Table of Contents

Related Manuals for Summit SCM853


Summary of Contents for Summit SCM853
-
Page 1: Microwave Oven
Felix Storch, Inc. Summit Appliance Division 770 Garrison Avenue Bronx, New York 10474 www.summitappliance.com Microwave Oven Model SCM853 User's Manual Please read these instructions carefully before installing and operating the oven. In the space below, record the SERIAL NO. found on the nameplate on your oven. Keep this manual in a safe place for future reference. -
Page 2: Table Of Contents
1. Do not attempt to operate this oven with the door open since open-door operation can result in harmful exposure to microwave energy. It is important not to defeat or tamper with the safety interlocks. 2. Do not place any object between the oven front face and the door or allow soil or cleaner residue to accumulate on sealing surfaces. -
Page 3: Important Safety Instructions
When using electrical appliances, basic safety precautions should be followed, including the following: WARNING - To reduce the risk of burns, electric shock, fire, injury to persons or exposure to excessive microwave energy: Read all instructions before using the appliance. Read and follow the specific "PRECAUTIONS TO AVOID POSSIBLE EXPOSURE TO EXCESSIVE MICROWAVE ENERGY"... - Page 4 15. Do not store or use this appliance outdoors. Do not use this product near water, for example, near a kitchen sink, in a wet basement, near a swimming pool, or similar locations. 16. Do not operate this appliance if it has a damaged cord or a plug, if it is not working properly or if it has been damaged or dropped.
-
Page 5: Installation Guide
1. Make sure that all the packing materials are removed from the inside of the door. 2. Check the oven for any damage, such as misaligned or bent door, damaged door seals and sealing surface, broken or loose door hinges and latches and dents inside the cavity or on the door. If there is any damage, do not operate the oven but contact qualified service personnel. -
Page 6: Utensils Guide
1. If you have any questions about the grounding or electrical instructions, consult a qualified electrician or service person. 2. Neither Summit nor the dealer can accept any liability for damage to the oven or personal injury resulting from failure to observe the electrical connection procedures. -
Page 7: Cooking Techniques
Plastic — Use only if labeled "Microwave Safe". Other plastics can melt. NOT RECOMMENDED — Glass jars and bottles Regular glass is too thin to be used in a microwave. It can shatter and cause damage and injury. Paper bags — These are a fire hazard, except for popcorn bags that are designed for microwave use. Styrofoam plates and cups —... -
Page 8: Specifications
TANDING Foods cooked in the microwave build up internal heat and continue to cook for a few minutes after heating stops. Let foods stand to complete cooking, especially foods such as cakes and whole vegetables. Roasts need this time to complete cooking in the center without overcooking the outer areas. -
Page 9: Part Names
1. Door Safety Lock System 2. Oven Window 3. Shaft 4. Roller ring 5. Door Release Button 6. Control Panel 7. Wave Guide (Please do not remove the mica plate covering the wave guide) 8. Glass tray... -
Page 10: Control Panel
DISPLAY WINDOW Indicates clock, cooking time, etc. MINUTE PLUS Press to set the oven to start cooking quickly and to increase the cooking time. NUMBER PADS Press to set clock, cooking time or enter food weight. POWER Press to select microwave power level. TIMER/CLOCK Press to set the timer function and to set the oven clock. -
Page 11: How To Set The Oven Controls
Each time a button is touched, a beep will sound to acknowledge the touch. When the oven is first plugged in, press STOP/CLEAR to enter into standby mode. ETTING THE CLOCK To enter the digital clock time, press the TIMER/CLOCK pad once and then press the number pads to set the time of day. -
Page 12: Defrost
Suppose you want to set the timer for 30 minutes. 1. In standby mode, press number pads to enter “30:00”. 2. Press TIMER/CLOCK to confirm. Note: You can press STOP/CLEAR once to cancel this function. EFROST The oven allows the defrosting of Ground Meat, Steaks/Chops, Boneless Poultry and Bone-in Poultry. The time and the defrosting power are adjusted automatically once the weight of food is programmed. -
Page 13: Child Lock
HILD Use to prevent unsupervised operation of the oven by little children. The CHILD LOCK indicator will show on the display screen, and the oven cannot be operated while the CHILD LOCK is set. To set the CHILD LOCK: Press and hold the STOP/CLEAR pad for 3 seconds. A beep sounds and the LOCK indicator lights. - Page 14 Press SOFTEN Food Code Press Number Pad Weight Once 1 pint(470ml) Once Ice Cream Twice 1/2 gallon(1.9L) COOK In standby mode, press COOK pad once. The display shows “Food”. Press number pad 1 to 4 to select different food as shown below. Press number pad to select unit.
-
Page 15: Cleaning And Care
1. Turn off the oven and remove the power plug from the wall socket before cleaning. 2. Keep the inside of the oven clean. When food splatters or spilled liquids adhere to oven walls, wipe them with a damp cloth. Mild detergent may be used if the oven gets very dirty. Avoid the use of spray and other harsh cleaners as they may stain, streak or dull the door surface. -
Page 16: Limited Warranty
ONE-YEAR LIMITED WARRANTY Within the 48 contiguous United States, for one year from the date of purchase, when this appliance is operated and maintained according to instructions attached to or furnished with the product, warrantor will pay for factory-specified parts and repair labor to correct defects in materials or workmanship.
Need help?
Do you have a question about the SCM853 and is the answer not in the manual?
Questions and answers