Table of Contents
Advertisement
Available languages
Available languages
Quick Links
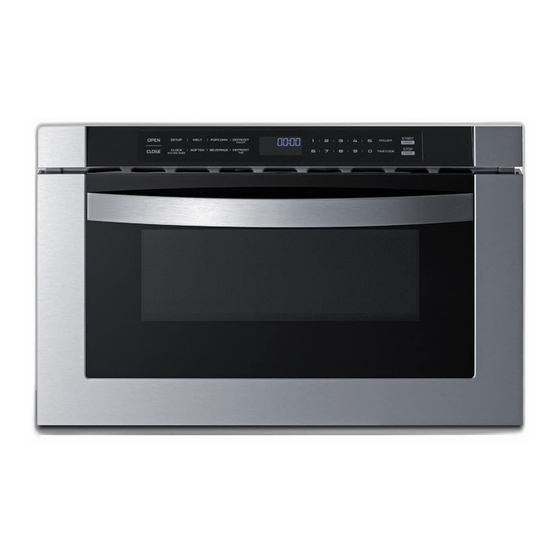
Microwave
INSTRUCTION MANUAL
BEFORE USE, PLEASE READ AND FOLLOW ALL
SAFETY RULES AND OPERATING INSTRUCTIONS AS
Write Serial Number here:
______________________
Oven/ micro-ondes
Model/ Modèle:
MDR245SS
SHOWN IN THIS MANUAL.
Felix Storch, Inc.
An ISO 9001:2015 registered
company
Summit Appliance Division
770 Garrison Avenue
Bronx, NY 10474
www.summitappliance.com
Advertisement
Table of Contents

Related Manuals for Summit MDR245SS


Summary of Contents for Summit MDR245SS
- Page 1 BEFORE USE, PLEASE READ AND FOLLOW ALL SAFETY RULES AND OPERATING INSTRUCTIONS AS SHOWN IN THIS MANUAL. Felix Storch, Inc. An ISO 9001:2015 registered company Write Serial Number here: Summit Appliance Division 770 Garrison Avenue ______________________ Bronx, NY 10474 www.summitappliance.com...
-
Page 2: Precautions To Avoid Possible Exposure To Excessive Microwave Energy
(2) HINGES AND LATCHES (broken or loosened) (3) DOOR SEALS AND SEALING SURFACES (d) The oven should not be adjusted or repaired by anyone except properly qualified service personnel. Specifications Model MDR245SS Rated Voltage 120V~ 60Hz Microwave Input 1500W Microwave Output... -
Page 3: Important Safety Instructions
IMPORTANT SAFETY INSTRUCTIONS When using electrical appliances basic safety precautions should be followed, including the following: WARNING - To reduce the risk of burns, electric shock, fire, injury to persons, or exposure to excessive microwave energy: 1) Read all instructions before using the appliance. 2) Read and follow the specific instructions: "... - Page 4 THIS COULD RESULT IN VERY HOT LIQUID SUDDENLY BOILING OVER WHEN THE CONTAINER IS DISTURBED OR A UTENSIL IS INSERTED INTO THE LIQUID. To reduce the risk of injury to persons: • Do not overheat the liquid. • Stir the liquid both before and halfway through heating it. •...
-
Page 5: Grounding Instructions
GROUNDING INSTRUCTIONS This appliance must be grounded. In the event of an electrical short circuit, grounding reduces the risk of electric shock by providing an escape wire for the electric current. This appliance is equipped with a cord having a grounding wire with a grounding plug. The plug must be plugged into an outlet that is properly installed and grounded. -
Page 6: Materials You Can Use In A Microwave Oven
UTENSILS CAUTION - Personal Injury Hazard Tightly closed utensils could explode. Closed containers should be opened, and plastic pouches should be pierced before cooking. See the instructions on "Materials you can use in microwave oven or be avoided in a microwave oven."... -
Page 7: Materials To Be Avoided In A Microwave Oven
Materials you can use in a microwave oven Utensils Notes Plastic Microwave-safe only. Follow the manufacturer* instructions. Should be labeled "Microwave Safe". Some plastic containers soften, as the food inside gets hot. "Boiling bags" and tightly closed plastic bags should be slit, pierced, or vented as directed by the package. -
Page 8: Setting Up Your Oven
SETTING UP YOUR OVEN Names of Oven Parts and Accessories Remove the oven and all materials from the carton and oven cavity. Your oven comes with the following accessories: A) Control Patch B) Control Box C) Right Mounting Plate D) Cavity E) Handle F) Windows G) Door Frame... -
Page 9: Drawer Installation
Drawer Installation 1. Place the drawer adjacent to the wall or cabinet opening. Plug the power supply cord into the electrical outlet. 2. Carefully guide the drawer into the prepared opening. Avoid pinching the cord between the oven and the wall. 3. -
Page 10: Countertop Installation
Countertop Installation Remove all packing material and accessories. Cabinet: Remove any protective film found Examine the oven for any damage such as on the microwave oven cabinet surface. dents or broken door. Do not install if oven is Do not remove the light brown Mica cover damaged. -
Page 11: Clearances And Dimensions
Clearances and Dimensions • • Dimensions that are shown in Check the location where the Figure 1 must be used. Given Microwave Drawer will be dimensions provide minimum installed for proper electrical clearance. Locate the supply • electrical outlet in the shaded Your oven can be built into a area in the upper left-hand cabinet or wall by itself or... - Page 12 Microwave Drawer Measurements Figures 1 and 2 contain many Microwave Drawer measurements for reference when planning the drawer's location. This Microwave Drawer can be installed below any electric or gas wall oven. *Can also be installed using an electrical outlet in an adjacent cabinet within the area where the provided electrical cord can reach.
-
Page 13: Anti-Tip Block
Electrical Outlet Anti-Tip Block Figure 3 Figure 4 NORMAL INSTALLATION STEPS The electrical requirements are a 120- ANTI-TIP BLOCK INSTALLATION volt, 60Hz, AC only,15 amp. or more INSTRUCTIONS protected electrical supply. It is recommended that a separate circuit To reduce the risk of tipping the serving only this appliance be drawer, the Anti-Tip block must be provided. -
Page 14: Operation
OPERATION Control Panel and Features (10) (11) (12) (1) Open (7) Time Defrost (2) Setup (8) Number keys (3) Auto Menu (9) Power (4) Weight Defrost (10) Start/ +30sec. (5) Close (11) Time Cook (6) Clock/Kitchen timer (12) Stop/Cancel... - Page 15 OPERATION 1. Power On (1) When the microwave oven is plugged into an outlet, the buzzer sounds once. The screen will display "WELCOME". Then the oven will enter standby mode. The screen will display “00:00". (2) In standby mode, the screen will display the current time if the clock has been set.
- Page 16 4. Microwave Cooking Function 11 power levels are available. Level Power 100% 90% Display PL100 PL90 PL80 PL70 PL60 PL50 PL40 PL30 PL20 PL10 PL00 (1) Press "TIME COOK" button, Screen will display "00:00". "FUNCTION" will light. Press number buttons to input the cooking time. The maximum cooking time is 99 minutes 99 seconds.
- Page 17 7. Time Defrost Function (1) Press the "DEFROST TIME" button. Screen displays "TIME DEFROST". And "FUNCTION" will light. (2) Press number buttons to enter the defrosting time between 00:01-99:99. (3) Press "START/+30SEC." to start defrosting. The buzzer will sound once. The defrosting time begins to count down.
- Page 18 Display Weight Menu 1(STICH) BUTTER Butter/Margarine 2(STICHS) 3(STICHS) CHOCOLA Chocolate Cheese CHEESE Marshmallows MARSHMA 11. Auto Menu--Soften (1) Press the "SOFTEN" button. Screen displays "BUTTER". "AUTO MENU" indicator will light. (2) Continue to press the "SOFTEN" button, "BUTTER", "ICE-CRE" or "CHEESE" will display in order.
-
Page 19: Lock Function For Children
12. Buzzer On/Off (1) Press the "SETUP" button. Screen displays "BUZ OFF". (2) Press the "START/+30SEC." button. The oven will enter standby mode. The buzzer is turned off. No beep will sound. (3) Press the "SETUP" button. Screen displays "BUZ ON". (4) Press the "START/+30SEC."... -
Page 20: Troubleshooting
MAINTENANCE Troubleshooting Check your problem by using the chart below and try the solutions for each problem. If the microwave oven still does not work properly, contact the nearest authorized service center. TROUBLE POSSIBLE CAUSE POSSIBLE REMEDY a. Electrical cord for the a. - Page 21 NOTES...
-
Page 22: Limited Warranty
(Metallic) which is known to the State of California to cause cancer. For more information go to www.P65Warnings.ca.gov Note: Nickel is a component in all stainless steel and some other metallic compositions. Summit Appliance Division of Felix Storch, Inc. An ISO 9001:2015 registered company 770 Garrison Avenue Bronx, NY 10474 www.summitappliance.com... -
Page 23: Caractéristiques
CHARNIÈRES ET LOQUETS (cassés ou desserrés) JOINTS DE PORTE ET SURFACE D’ÉTANCHÉITÉ Le four ne doit pas être réglé ou réparé par quelqu’un qui n’est pas un personnel de dépannage qualifié. Caractéristiques MDR245SS Modèle : Tension Nominale : 120V~ 60Hz Puissance Nominale d’Entrée... -
Page 24: Consignes De Sécurité Importantes
CONSIGNES DE SÉCURITÉ IMPORTANTES Lors de l’utilisation d’appareils électriques, des précautions de sécurité de base doivent être respectées, notamment les suivantes : ATTENTION — Pour réduire les risques de brûlures, d’électrocution, d’incendie, de blessures ou d’exposition à une énergie microonde excessive : Lisez toutes les instructions avant d’utiliser l’appareil. - Page 25 N’utilisez pas la cavité à des fins de rangement. Ne laissez pas de produits en papier, d’ustensiles de cuisine ou de nourriture dans la cavité lorsqu’elle n’est pas utilisée. Les liquides, tels que l’eau, du café ou du thé, peuvent surchauffer au-delà du point d’ébullition sans avoir l’air de bouillir.
-
Page 26: Instructions De Mise À La Terre
INSTRUCTIONS DE MISE À LA TERRE Cet appareil doit être mis à la terre. En cas de court-circuit, la mise à la terre réduit le risque d’électrocution en fournissant un fil d’échappement pour le courant électrique. Cet appareil est équipé avec un fil électrique ayant un conducteur et une prise de terre. La fiche doit être branchée dans une prise correctement installée et mise à... - Page 27 USTENSILES ATTENTION — Risque de blessure corporelle Les ustensiles hermétiquement fermés peuvent exploser. Les récipients fermés doivent être ouverts et les sachets en plastique doivent être percés avant la cuisson. Voir les instructions dans "Matériaux que vous pouvez utiliser dans un four à micro- ondes".
- Page 28 Ustensiles Remarques Allant au four à micro-ondes uniquement. Utiliser pour couvrir les Enveloppe en aliments pendant la cuisson pour retenir l’humidité. Ne pas plastique laisser l’enveloppe en plastique toucher les aliments. Sûr pour le micro-onde uniquement (thermomètres à viande ou Thermomètres gâteau).
- Page 29 INSTALLATION DE VOTRE FOUR Noms des pièces et accessoires du four Retirer le four et tous les matériaux du carton et dans le four. Votre four est fourni avec les accessoires suivants: A) Panneau de contrôle B) Boîtier de commande C) Plaque de montage de droite D) Cavité...
-
Page 30: Installation Du Tiroir À Micro- Ondes
INSTALLATION DU TIROIR À MICRO- ONDES Bride de montage Figure 5 près du mur ou de l’ouverture de l’armoire. Branchez le 1.Placez le tiroir à micro-ondes cordon d’alimentation à une prise électrique. 2.Accompagnez avec soin le four à tiroir dans l’ouverture que vous avez préparé. Évitez d’écraser le cordon entre le four et la paroi. - Page 31 Installation sur comptoir Retirer tout le matériel d’emballage et les Armoire : Retirer le film de protection du accessoires. four à microondes Examiner le four pour les dommages tels qui est fixé à la cavité du four pour que la porte ébréchée ou cassée. NE PAS protéger le magnétron.
- Page 32 DIMENSIONS ET ESPACEMENTS • • Vérifiez que l’endroit où le micro-onde à Utilisez les dimensions illustrées à la figure 1. Les dimensions indiquées fournissent tiroir sera installé est bien alimenté en l’espacement minimal. Repérez la prise électricité. • électrique dans la zone hachurée et dans Votre four peut être intégré...
- Page 33 DIMENSIONS DU TIROIR À MICRO- ONDES Les figures 1 et 2 fournissent de nombreuses mesures du micro-ondes à tiroir données à titre de référence pour choisir l’emplacement d’installation du tiroir. Ce micro- ondes à tiroir peut être installé sous un four électrique ou à...
-
Page 34: Prise Électrique
PRISE BLOC ANTI- ÉLECTRIQUE RENVERSEMENT Les besoins en électricité sont de PROCÉDURE D’INSTALLATION seulement 120 CA 60Hz 15A ou exigent NORMALE INSTRUCTIONS une alimentation électrique plus D’INSTALLATION DU BLOC ANTI- protégée. Nous vous recommandons de brancher l’appareil sur un circuit séparé. RENVERSEMENT Le four à... -
Page 35: Panneau De Commande Et Caractéristiques
FONCTIONNEMENT Panneau de commande et caractéristiques (10) (11) (12) (1) Ouvrir (7) Durée de décongélation (2) Installation (8) Touches numériques (3) Menu Auto (9) Puissance (4) Poids de décongélation (10) Démarrer/+30 s (5) Fermer (11) Cuisson minutée (6) Horloge/minuteur de cuisine (12) Arrêter/annuler... - Page 36 FONCTIONNEMENT Mise sous tension Dès que vous branchez le microonde à une prise électrique, l’avertisseur sonne une fois. L’écran affiche "WELCOME". Le four passera en mode veille. L’écran indique "00:00". En mode veille, l’écran affiche l’heure actuelle si vous l’avez réglée. Sinon, il indique "00:00".
- Page 37 Fonction de cuisson au microonde 11 niveaux de puissance sont à votre disposition. Niveau Puissance 100 % 90% Affichage PL100 PL90 PL80 PL70 PL60 PL50 PL40 PL30 PL20 PL10 PL00 : l’écran affiche et l’indicateur Appuyez sur la touche "TIME COOK"...
- Page 38 Appuyez sur les touches numériques pour saisir la durée de décongélation entre "00:01" et "99:99". Appuyez sur la touche "START/+30SEC" pour démarrer la décongélation. L’avertisseur sonne une fois. Le compte à rebours de décongélation démarre. Une fois la cuisson terminée, l’avertisseur sonne cinq fois et l’indication "FINISH"...
- Page 39 Menu Affichage Poids 1 (STICH) Beurre/margarine BUTTER 2 (STICHS) 3 (STICHS) Chocolat CHOCOLA Fromage CHEESE Guimauves MARSHMA Menu Auto — Ramollir Appuyer sur la touche "SOFTEN". L’écran affiche "BUTTER". L’indicateur s’allume. "AUTO MENU" Appuyez de nouveau sur la touche "SOFTEN", l’écran affiche "ICE-CRE"...
-
Page 40: Autres Spécifications
FONCTION DE VERROUILLAGE POUR ENFANTS Verrouillage : en mode veille, appuyez sur la touche "STOP/CANCEL" pendant 3 secondes. Le four sera verrouillé pour éviter toute manipulation par des enfants. L’écran affichera l’heure actuelle si vous l’avez réglée. Sinon, il indique "00:00". Déverrouillage : en mode verrouillé, appuyez sur la touche "STOP/CANCEL"... -
Page 41: Dépannage
MAINTENANCE Dépannage Recherchez votre problème dans le tableau ci-dessous et essayez les solutions proposées pour le résoudre. Si le four à microondes ne fonctionne toujours pas correctement, contactez le centre de service agréé le plus proche. PROBLÈME CAUSES POSSIBLES SOLUTIONS POSSIBLES Branchez l’appareil à... -
Page 42: Garantie Limitée
D’ADAPTATION, DE SORTE QUE CES EXCLUSIONS OU LIMITATIONS PEUVENT NE PAS S’APPLIQUER À VOUS. CETTE GARANTIE VOUS CONFÈRE DES DROITS JURIDIQUES SPÉCIFIQUES ET VOUS POUVEZ AVOIR D’AUTRES DROITS QUI VARIENT D’UN ÉTAT À L’AUTRE. Summit Appliance Division of Felix Storch, Inc. An ISO 9001:2015 registered company...
Need help?
Do you have a question about the MDR245SS and is the answer not in the manual?
Questions and answers