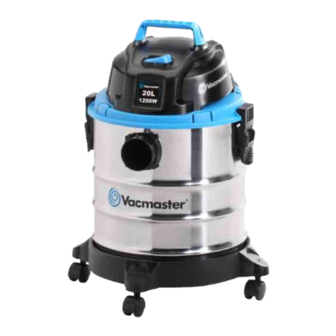
Summary of Contents for Vacmaster VMVQ1218S
- Page 1 Wet/Dry Vacuums Operator’s Manual 1250W / 20L Model No. VMVQ1218S FOR YOUR SAFETY Read and understand this manual before use. Keep this manual for future reference. IPX4...
-
Page 2: Table Of Contents
………………………...…………….……………… Instaling&Cleaning Foam Filter ………………………….…………….…………… Troubleshooting …………...……………………………………………….………… ENVIRONMENTAL PROTECTION …………………………..…………….……… Thank you for purchasing this Vacmaster wet/dry vacuum cleaner. Feel ® confident that with Vacmaster you are obtaining a high quality product ® engineered for optimal performance. This vacuum is capable of picking up liquids and dry materials. -
Page 3: Safety Instructions And Warnings
Use this Wet/Dry Vac only as described in this manual. To reduce the risk of personal injury or damage to your Wet/Dry Vac, use only Vacmaster recommended accessories. ® Household Type SAVE THIS MANUAL FOR FUTURE REFERENCE. - Page 4 return it to a service center. • Do not pull or carry by cord, use cord as handle, close a door on cord, or pull cord around sharp edges or corners. • Do not run Wet/Dry Vac over cord. • Do not handle plug or the Wet/Dry Vac with wet hands.
-
Page 5: Double Insulation Instructions
When using as blower: • Direct air discharge only at work area. • Do not use Wet/Dry Vac as a sprayer. • Do not direct air at bystanders. • Keep children away when blowing. • Use safety goggles. DOUBLE INSULATION INSTRUCTIONS This Wet/Dry Vac is double-insulated, eliminating the need for a separate grounding system. -
Page 6: Specitications
WARNING: SERVICING OF DOUBLE-INSULATED Wet/Dry VACUUMM WITH A DOUBLE-INSULATED Wet/Dry VAC, TWO SYSTEMS OF INSULATION ARE PROVIDED INSTEAD OF GROUNDING. NO GROUNDING MEANS IS PROVIDED ON A DOUBLE-INSULATED APPLIANCE, NOR SHOULD A MEANS FOR GROUNDING BE ADDED. SERVICING A DOUBLE INSULATED WET/DRY VACUUMUUM REQUIRES EXTREME CARE AND KNOWLEDGE OF THE SYSTEM, AND SHOULD BE DONE ONLY BY QUALIFIED SERVICE PERSONNEL. -
Page 7: Location Of Parts
LOCATION OF PARTS Remove entire contents from carton. Check each item against the contents list. Contents List Description………………..… QTY Vac Assembly ………………….. Hose ………………………..….. Floor Nozzle ………………...….. Extension Wands ………………. Foam Sleeve Filter ………..… Crevice Tool ………………...….. Dust Bag ………………….…….. Reusable Cloth Filter ………….. -
Page 8: General Assembly Instructions
GENERAL ASSEMBLY INSTRUCTIONS WARNING: DO NOT PLUG IN POWER CORD TO POWER OUTLET, MAKE SURE PLUG IS DISCONNECTED BEFORE ASSEMBLING THE WET/DRY VAC GENERAL ASSEMBLY Verify that the power cord is disconnected from the outlet (Fig. 1). Undo the clasps (Fig. 2). Lift the top section off the container (Fig. -
Page 9: Dry Vacuum Operation
DRY-VACUUM OPERATION DRY VACUUMING WARNING: BE SURE TO READ, UNDERSTAND, AND APPLY INFORMATION, ENTITLED ‘SAFETY INSTRUCTIONS & WARNINGS’. VACUUM IN AREAS WITH FLAMMABLE GASES, VAPORS, OR EXPLOSIVE DUSTS IN THE AIR. FLAMMABLE GASES OR VAPORS INCLUDE BUT ARE NOT LIMITED TO; LIGHTER FLUID, SOLVENT TYPE CLEANERS, OIL-BASE PAINTS, GASOLINE, ALCOHOL OR AEROSOL SPRAYS. - Page 10 Verify that the power cord is disconnected from the outlet (Fig. 1). In order to prepare your vacuum for dry vacuuming, verify that the dust filter is clean and dry. Place the dust filter over the basket filter and centre it. Push down until the mounting ring of the dust filter is positioned against the ribs of the top section (Fig.
-
Page 11: Wet Vacuum Operation
WET-VACUUM OPERATION WET VACUUMING WARNING: BE SURE TO READ, UNDERSTAND, AND APPLY INFORMATION, ENTITLED ‘SAFETY INSTRUCTIONS & WARNINGS’. VACUUM IN AREAS WITH FLAMMABLE GASES, VAPORS, OR EXPLOSIVE DUSTS IN THE AIR. FLAMMABLE GASES OR VAPORS INCLUDE BUT ARE NOT LIMITED TO; LIGHTER FLUID, SOLVENT TYPE CLEANERS, OIL-BASE PAINTS, GASOLINE, ALCOHOL OR AEROSOL SPRAYS. -
Page 12: Blowing Operation
Remember! The foam filter must be removed after wet vacuuming, and a dust filter must be installed before dry vacuuming again. IMPORTANT! When vacuuming large quantities of liquids, do not immerse the nozzle completely in the liquid; leave a gap at the tip of the nozzle opening to allow air inflow. -
Page 13: Maintenance
WARNING! IF THE HOSE IS STILL BLOCKED AFTER A FEW SECONDS, TURN OFF THE UNIT AND CLEAR THE HOSE MANUALLY. MAINTENANCE WARNING: DO NOT PLUG IN POWER CORD TO POWER OUTLET. MAKE SURE PLUG IS DISCONNECTED BEFORE CHANGING AND CLEANING FILTERS. Verify that the power cord is disconnected from the outlet (Fig. -
Page 14: Instaling&Cleaning Dust Filter
to clean. Handle the filter carefully when removing it for cleaning and replacing it. Check the filters for tears or small holes, a small hole can let dust pass through and out of the cleaner. Do not use a filter with holes or tears, replace it immediately. WARNING! ALWAYS DISCONNECT THE PLUG FROM THE POWER OUTLET BEFORE REMOVING THE POWER HEAD FROM CONTAINER. -
Page 15: Instaling&Cleaning Foam Filter
INSTALLING & CLEANING FOAM SLEEVE FILTER Installing Foam Sleeve Filter 1. Verify that the power cord is disconnected from the outlet. (fig.1) 2. Remove power head and place in upside down position. Follow instructions to remove cloth filter. 3. Carefully slide foam sleeve filter down over the filter cage making sure the whole cage is covered. -
Page 16: Troubleshooting
TROUBLESHOOTING WARNING! REDUCE RISK ELECTRIC SHOCK-UNPLUG BEFORE TROUBLESHOOTING Symptom Possible Causes Corrective Action Vacuum will not operate. 1) No power supply. 1) Check power supply – cord, breakers, fuses. 2) Faulty power cord. 2) Check the power cord and repair it or replace it if necessary. 3) Container full of liquid.


Need help?
Do you have a question about the VMVQ1218S and is the answer not in the manual?
Questions and answers