Table of Contents
Advertisement
Advertisement
Table of Contents

Related Manuals for TESTO 816-1


Summary of Contents for TESTO 816-1
- Page 1 816-1 Sound Level Meter Instruction Manual...
-
Page 3: Table Of Contents
6.1. Cleaning the instrument ..............22 6.2. Changing batteries ................ 22 6.3. Calibrating / adjusting the instrument ..........22 testo 816-1 software ................23 7.1. System requirements ..............23 7.2. Installing the drivers / software ............23 7.3. Connecting the instrument to the PC ..........23 7.4. - Page 4 1 Contents 7.6. Real Time..................26 7.7. Data Logger .................. 28 Tips and assistance ................29 8.1. Questions and answers ..............29 8.2. Accessories and spare parts ............30...
-
Page 5: Safety And The Environment
> Only perform maintenance and repair work on this instrument that is described in the documentation. Follow the prescribed steps exactly. Use only original spare parts from Testo. > Protect the instrument from rain and humidity. Make sure that no fluids get into the microphone. -
Page 6: Protecting The Environment
> Dispose of faulty rechargeable batteries / spent batteries in accordance with the valid legal specifications. > At the end of its useful life, send the product to the separate collection for electric and electronic devices (observe local regulations) or return the product to Testo for disposal. -
Page 7: Specifications
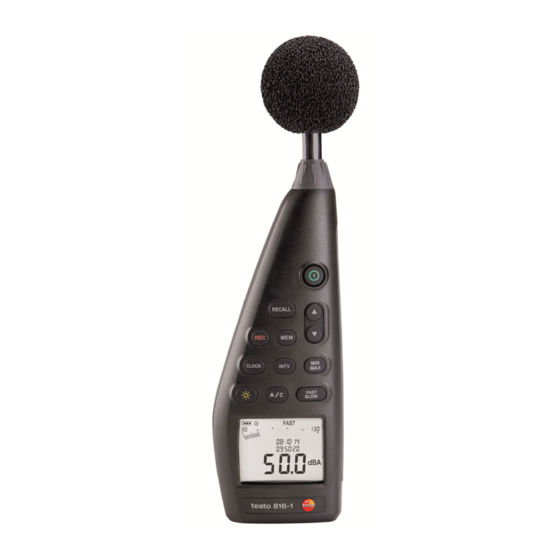
3 Specifications Specifications 3.1. The testo 816-1 is a sound level meter with a measuring range of 30 to 130 dB, two time weightings, two frequency weightings, minimum / maximum value function, individual value storage and measurement series storage. Measurement configurations and results are shown on the LCD display. - Page 8 Dimensions 272 × 83 × 42 mm (L x W x H) Weight 390 g (including batteries) Laws, guidelines, IEC 61672-1 Class 2, ANSI S 1.4 Type 2 standards ISO 9001:2008 Warranty 2 years Warranty terms: see www.testo.com / warranty...
- Page 9 3 Specifications Directional characteristics of the microphone Directional characteristics of the sound level meter...
- Page 10 3 Specifications Effect of the windscreen Frequency weighting Frequency [Hz] dBA(dB) dBC(dB) Error limits (dB) -50.5 -6.2 ±3.5 31.5 -39.4 -3.0 ±3.5 -26.2 -0.8 ±2,5 -16.1 -0.2 ±2,0 -8.6 ±1,9 -3.2 ±1,9 1000 ±1,4 2000 -0.2 ±2,6 4000 -0.8 ±3,6 8000 -1.1 -3.0...
- Page 11 3 Specifications Absolute pressure dependency Height above sea Pressure [mbar] Offset value [dB] level [m] 0 – 250 1013 – 984 251 – 850 983 – 915 -0.1 851 – 1450 914 – 853 -0.2 1451 – 2000 852 – 795 -0.3 Temperature dependency Values relating to:...
-
Page 12: Product Description
4 Product description Product description... - Page 13 4 Product description Element Description Function On / Off Switch the instrument on / off Individual value Display the stored data of an individual storage data recall value storage. Measurement series Start / stop automatic storage of storage a measurement series. Individual value Carry out manual storage of an individual storage...
- Page 14 4 Product description Display Element Description Function Remaining Remaining lifetime: battery capacity Fully partially discharged Replace battery Automatic Automatic instrument shut-down instrument shut- is activated down Hold minimum / Display the minimum / maximum maximum value value. Time weighting Display of the time weighting configured.
- Page 15 4 Product description Element Description Function Individual value Memory address of the stored storage memory value which is displayed. address Display of stored Stored individual value is individual value displayed. Frequency Display of configured frequency weighting weighting. Reading Display of reading Date Display of date.
-
Page 16: Using The Product
5 Using the product Using the product 5.1. Commissioning Inserting batteries 1. Remove Philips screw from the battery compartment using a screwdriver. 2. Remove battery compartment cover. 3. Insert batteries. Observe the polarity! 4. Put cover back on the battery compartment. 5. -
Page 17: Showing / Hiding The Date / Time
5 Using the product 2. Press the key to set a value, press the key to change to the next value. > Press the key to cancel the process. 5.4. Showing / hiding the date / time > Press the key. -
Page 18: Measuring
5 Using the product 5.8. Measuring Information and recommendations • Sound waves can be reflected off walls, ceilings and other objects. If not handled correctly, the measuring instrument housing and the person conducting the measurement are also disruptive factors within the sound field and can result in incorrect measurement results. -
Page 19: Using The Min / Max Hold Function
5 Using the product during the last measurement cycle was too high. This value may be considerably higher than the actual value of the sound level displayed. Therefore, “Over” may be signalled despite the fact that a sound level within the normal framework of the respective measurement range is shown. -
Page 20: Using Individual Value Storage
5 Using the product 5.10. Using individual value storage Storing an individual value > Press the key. lights up briefly and the individual value is stored under the next available memory address. Displaying a stored individual value > Press the key. -
Page 21: Using Ac / Dc Signal Output
5 Using the product Saving a measurement series When measurement series storage is activated, most functions (individual value storage, storage interval setting, frequency weighting, time weighting) are deactivated. 1. Press the key. lights up and the readings are stored. 2. Press the key again. -
Page 22: Using Pc Interface
6 Maintaining the product 5.13. Using PC interface The RS232 / USB connecting cable is required in order to use the PC interface. Signal output specification: Serial interface, 9600 bps N 8 1. Maintaining the product 6.1. Cleaning the instrument >... -
Page 23: Testo 816-1 Software
7 testo 816-1 software To calibrate, the calibrator is screwed onto the microphone. Switch the sound level meter on and set the time weighting to “Fast” and the frequency weighting to “A”. The calibrator is then switched on by moving the switch to the middle setting (94 dB). -
Page 24: Starting The Software
7 testo 816-1 software 7.4. Starting the software The software's user interface is only available in English 1. Connect the instrument to the PC before starting the software. 2. Click on (Start) | (All) Programs t816-1 | t816-1. 7.5. User interface 7.5.1. -
Page 25: Contents
7 testo 816-1 software Real Time Function Description Start real-time measurement. Stop End real-time measurement. Data Logger Function Description Load Data Load measurement series from the instrument memory into the software. Erase Memory Delete measurement series stored in the instrument memory. -
Page 26: Real Time
7 testo 816-1 software 7.6. Real Time Function for the real-time display of instrument readings. Making settings Function Description Real-Time data Input field: enter the number of readings that no. to be are to be recorded. recorded Real-Time Input field: enter the recording rate. - Page 27 7 testo 816-1 software Function bar Function Description Show / hide bar for displaying the recording information. Show / hide bar for displaying the evaluation information. Standard mouse cursor. Mouse cursor for inserting a cross in the graph. Mouse cursor for inserting a comment in the graph.
-
Page 28: Data Logger
7 testo 816-1 software Saving recorded readings 1. In the main menu, select the File Save function. Windows dialogue box for saving files is opened. 2. Enter a file name and select a file format. In order to be able to display the data later in the software, select the file type .ghf. -
Page 29: Tips And Assistance
(e.g. 0.1 s), not all readings are transferred. If we have not been able to answer your question, please contact your dealer or Testo Customer Service. For contact details, see the back of this document or visit the website www.testo.com / service- contact. -
Page 30: Accessories And Spare Parts
0520 0111 calibration point 94 dB, at different frequencies ISO calibration certificate sound pressure 0520 0411 calibrators For a complete list of all accessories and spare parts, please refer to the product catalogues and brochures or visit our website www.testo.com... - Page 32 SE & Co. KGaA Testo-Straße 1 79853 Lenzkirch Tel.: +49 7653 681-0 Fax: +49 7653 681-100 Email: info@testo.de Internet: www.testo.de 0970 8161 en 02...
Need help?
Do you have a question about the 816-1 and is the answer not in the manual?
Questions and answers