Advertisement
Quick Links
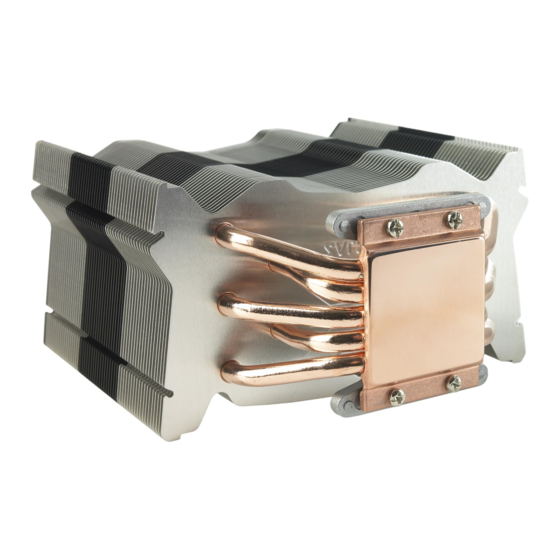
User's Manual
CNPS10X Flex
Intel Socket 1155/1156/1366/775 CPU
AMD Socket AM3/AM2+/AM2/754/939/940 CPU
To ensure safe and easy installation,
please read the following precautions.
www.ZALMAN.com
Core i7
Core i5
Core i3
Core 2 Quad
Core 2 Duo
Core 2 Extreme
Dual Core Pentium
Pentium D
Pentium 4
Celeron D
Phenom Ⅱ
Phenom
Athlon Ⅱ X2
Athlon
Athlon 64
Athlon X2
Athlon 64 X2
Athlon FX
Athlon 64 FX
Opteron
Dual-Core Opteron
Sempron
Ver. 1.2
Advertisement

Subscribe to Our Youtube Channel
Related Manuals for ZALMAN CNPS10X Flex


Summary of Contents for ZALMAN CNPS10X Flex
- Page 1 User’s Manual CNPS10X Flex Intel Socket 1155/1156/1366/775 CPU Core i7 Core i5 Core i3 Core 2 Quad Core 2 Duo Core 2 Extreme Dual Core Pentium Pentium D Pentium 4 Celeron D AMD Socket AM3/AM2+/AM2/754/939/940 CPU Phenom Ⅱ Phenom Athlon Ⅱ X2...
-
Page 2: Specifications
Product design and specifications may be revised to improve quality and performance. Disclaimer) Zalman Tech Co., Ltd. is not responsible for any damages due to external causes, including but not limited to, improper use, problems with electrical power, accident, neglect, alteration, repair, improper installation, or improper testing. - Page 3 ENGLISH 3. Components 1) Common Components Cooler Backplate User’s Manual Side Caps Bolts Fan Fixing Clips Vibration Pads Nuts Thermal Grease Double-Sided Tape (ZM-STG2) Loading Block 2) Intel Components 3) AMD Components Socket 1155/1156/1366/775 Socket AM3/AM2+/AM2 Socket 754/939/940 Intel Clip AMD A Clip AMD B Clip ※...
-
Page 4: Installation Requirements
155㎜ 140㎜ 3) Cooler Orientation Zalman recommends installing the cooler so that the air channeled through the cooler exits thought the rear of this case as shown below. ※ Recommended cooler orientation may differ according to the motherboard model. .COM... -
Page 5: Installation
ENGLISH 5. Installation 1) Intel Socket 1155 / 1156 / 775 and Socket 1366 Installation ① Unfasten the cooler base’s Bolt’s one thread, insert the Intel Clips between the cover and base and refasten the Bolts. Intel Clip Caution Make sure the Intel clip’s holes and the base cover protrusion’s holes are aligned. - Page 6 ENGLISH ③ - ⓐ Socket 775 Remove the tape covering film from the Loading Block’s surface and attach to the Backplate. Loading Block Attach Double-Sided Tape to the installed Loading Block and remove the other side’s cover. Double-Sided Tape Caution Please make note of the Loading Block’s direction.
- Page 7 ENGLISH ④ Align the Backplate’s Nuts to the motherboard Clip Support’s holes and attach the Backplate to the backside of the motherboard. ⑤ Spread about 1/3 of the included Thermal Grease on the CPU and the fasten the Bolts to install the cooler. ⑥...
- Page 8 ENGLISH 2) AMD Socket AM3 / AM2+ / AM2 Installation ① Unfasten the Bolts on the Cooler’s Base one thread, insert the AMD A Clip between the Cover and the Base, and then refasten the Bolts. AMD A Clip Caution Make sure the AMD clip’s holes and the base cover protrusion’s holes are aligned.
- Page 9 ENGLISH ③ Remove the tape covering film from the Loading Block’s surface and attach to the Backplate. Loading Block Attach the Double-Sided Tape to the installed Loading Block and remove the other side’s cover. Double-Sided Tape Caution Please make note of the Loading Block’s direction. ④...
- Page 10 ENGLISH ⑤ Align the Backplate’s Nuts to the motherboard Clip Support’s holes and attach the Backplate to the backside of the motherboard. ⑥ Spread about 1/3 of the included Thermal Grease on the CPU and the fasten the Bolts to install the cooler. ⑦...
- Page 11 ENGLISH 3) AMD Socket 754 / 939 / 940 Installation ① Spread about 1/3 of the included Thermal Grease on the CPU. ② Center the Cooler on top of the CPU and press down on the Clip Lever after fastening the AMD B Clip’s Square End to the Clip Support Lug Slot. Square End Lug Slot ③...
- Page 12 ENGLISH GS1000 / GS1000SE • E-ATX / Standard ATX / microATX Compatible * Supports Intel Dual Xeon server motherboards • UP to 6 Hot Swap HDD Bays * GS1000(3 Standard / 3 Optional) * GS1000 SE(Optional) • Tool-Free HDD Installation •...
Need help?
Do you have a question about the CNPS10X Flex and is the answer not in the manual?
Questions and answers