Table of Contents
Advertisement
Advertisement
Table of Contents

Related Manuals for Kodak PIXPRO ORBIT360 4K


Summary of Contents for Kodak PIXPRO ORBIT360 4K
- Page 1 KODAK PIXPRO ORBIT360 4K/4KVR360 VR CAMERA User Manual...
-
Page 2: Before You Start
All trademarks mentioned in this manual are used for identification purposes only and are properties of their respective owners. This manual provides you with instructions on how to use your new KODAK PIXPRO 3600 VR CAMERA. Every effort has been made to ensure that the contents of this manual are accurate;... - Page 3 For Customers in the U.S.A. Federal Communication Commission Interference Statement This device complies with Part 15 of the FCC Rules. Operation is subject to the following two conditions: (1) This device may not cause harmful interference and (2) this device must accept any interference received, including interference that may cause undesired operation. This equipment has been tested and has been found to comply with the limits for a Class B digital device, pursuant to Part 15 of the FCC Rules.
- Page 4 Electromagnetic compatibility and Radio Spectrum Matters (ERM); ElectroMagnetic Compatibility (EMC) standard for radio equipment; Part 17: Specific conditions for Broadband Data Transmission Systems Sintai Optical (Shenzhen) Co., Ltd., declares that this [KODAK PIXPRO 4KVR360 and BLUETOOTH Remote] is in compliance with the essential requirements and other relevant provisions of Directive 1999/5/EC.
- Page 5 SAR Statement A minimum separation distance of zero cm must be maintained between the user’s body and the device, including the antenna during body-worn operation to comply with the RF exposure requirements in Europe. To comply with the RF Exposure requirements or limitations in Europe, third-party belt-clips, holsters or similar accessories used with this device should not contain any metallic components.
-
Page 6: Safety Notes
Safety Notes Product Notes: • Do not disassemble or attempt to repair this product by yourself. • Do not handle this product improperly. This product may be damaged or permanently broken if dropped, punctured or crushed. • Avoid directly touching the lens elements. Please use a professional soft lens cleaning cloth together with a gentle lens cleaning agent to wipe and clean the camera lenses for optimal performance. • Do not use corrosive, alcoholic or organic solvent containing agents to clean this product. • Do not use or store this product in high temperature environments. • Do not expose the lenses to strong light sources (e.g. direct sunlight, etc.) for extended periods of time. • Do not use or store the product in a strong magnetic field environment. • If the product is quickly transferred from a low temperature to a higher temperature environment, water condensation may occur inside the product due to physical changes. - Page 7 Memory Card Notes: • The memory card referred to in this user manual is a microSD card, microSDHC card or microSDXC card, class 10 or higher. • Please keep the memory card clean and dry. • When inserting a memory card, make sure the notch direction of the card matches the notch direction of the memory card mark near the camera's card slot. Never force the memory card into the card slot. • Before using any brand new memory card, please format the memory card first. • A photo or video taken with the product will be stored in a folder that is automatically generated on the memory card. Do not store photos or videos that were not taken using the product in these folders, in case the files cannot be recognized during normal playback. • Directly editing the data on the memory card is not recommended. Always copy the data to your computer first before editing.
-
Page 8: Table Of Contents
Contents Before You Start ............................ 1 Safety Notes ............................5 Contents .............................. 7 Getting Ready ............................9 Standard Parts and Accessories Included ......................9 Camera Part Names ............................10 Mounting / Removing Lens Covers ........................11 Installing the Battery ............................12 Installing a Memory Card ............................13 Charging the Battery ............................14 Main Camera Interface ........................16... - Page 9 General Settings ................................28 BLUETOOTH Remote Control-D ..........................31 User Interfaces ..........................36 Micro USB Interface ............................36 Charging Your Camera ................................36 Using an External Power Supply ..............................36 Data Transmission ..................................36 Webcam ......................................38 Micro HDMI Interface: ............................40 Wi-Fi Mode ..........................42 Appendices ............................46 Specifications ..............................46 Prompts and Warning Messages ........................49 Trouble Shooting ..............................51...
-
Page 10: Getting Ready
Getting Ready Standard Parts and Accessories Included: Your product packaging should contain the camera you purchased along with the following standard parts and accessories. If anything is missing or appears to be damaged, please contact our customer service center. (The AC Adapter style will vary according to the power requirements from different countries or regions. -
Page 11: Camera Part Names
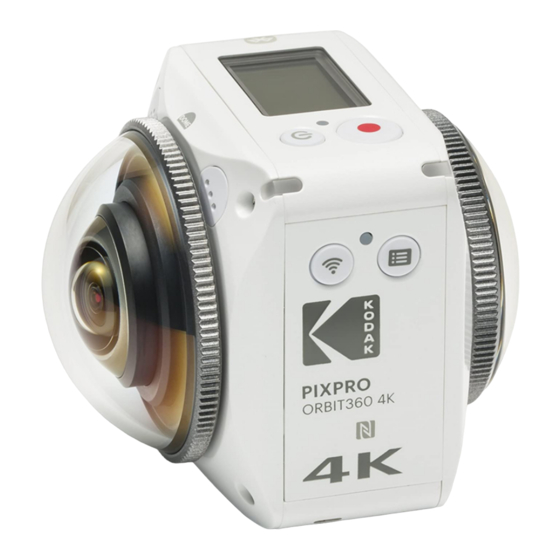
Camera Part Names Speaker Wi-Fi Indicator Wi-Fi Button / Direction Button (down) / Remote Control Pairing (press and hold) Lens B (235 Degrees) Lens Status Indicator B Power Button Status Indicator BLUETOOTH Logo / Mark Exterior Microphone (Stereo) Video Recording Button / Photo Shooting Button / OK Button Lens A (155 Degrees-VR Mode [2:1]) (197 Degrees-Front Mode [16:9]) -
Page 12: Mounting / Removing Lens Covers
Mounting / Removing Lens Covers: Removing lens covers: Attaching lens covers: Turn the clear, protective lens cover counter clockwise following the illustrations Turn the lens covers clockwise and firmly tighten the lens covers as illustrated below until it separates from the ORBIT360 4K/4KVR360. below. -
Page 13: Installing The Battery
Installing the Battery: 1. Open the Battery Cover Door Slide the battery cover lock to the left ① , then slide the open switch of the battery cover door downward ② . 2. Insert the Battery Insert the Li-ion battery into the battery compartment in the direction of the arrow ③... -
Page 14: Installing A Memory Card
Installing a Memory Card: Open the battery cover door, then insert the memory card into the card slot as shown in the illustration below (note the direction of the memory card opening). Push the bottom end of the memory card with your fingertip into the slot completely and close the battery cover door. A memory card (microSD / microSDHC / microSDXC) is essential to recording and saving 3600 photos and videos and is not included in the product packaging. -
Page 15: Charging The Battery
Charging the Battery: Please use the supplied battery charger and AC adapter to charge the Li-ion battery in an ambient temperature ranging from 50˚F to 95˚F or 10˚C to 35˚C. Charging the Battery with Induded Battery Charger: 1. Place the battery into the battery charger according to the direction illustrated below. Use the Micro USB cable to connect the battery charger to the AC adapter then plug the AC adapter into an electrical outlet. - Page 16 Charging the Camera via a Computer: 1. Place the battery into the camera. 2. Use the Micro USB cable to connect the camera (in the "off" position) to your computer. 3. The indicator light will remain orange while it is charging. The indicator light will go out once charging is completed and the battery is fully charged. The camera cannot be recharged when its power is on.
-
Page 17: Main Camera Interface
Main Camera Interface Main Camera Interface Introduction: 1. Camera Mode Movie Mode Snap Shot Photo Mode High-Speed Movie Mode Burst Mode Memory Card 3. Movie Size: 4. Battery Status 1970 4K UItra Wide 5. Display Mode: 3600 Spherical / 2350 Round (Dome) Mode / 4K [16:9] Full Frame 6. -
Page 18: Power On / Off
Power On / Off Power On: When the power is off, press the button for one second or more to turn the camera on. Power Off: When the power is on, press the button for one second or more to turn off the product. If the product cannot be powered off normally, you can remove the battery from the camera to force it to power off. -
Page 19: Camera Mode Introduction
Camera Mode Introduction In the main camera interface, press and hold the (up) button to enter the mode selection interface. Press the (up) or (down) button to select any one mode; press the button to enter and confirm the mode of the current interface. 4 modes are available: Movie Mode , Snap Shot Photo Mode , High-Speed Movie Mode... -
Page 20: Snap Shot Photo Mode
Snap Shot Photo Mode Enable photo shooting. This mode is suitable for shooting photos in most conditions. Operation method: Press the button to take a photo. High-Speed Movie Mode This camera shoots ultra-high speed movies and plays back with normal 30fps speed. Operation method: Press the button to start recording. -
Page 21: Menu Introduction
Menu Introduction: 1. In the main camera interface, press and hold the (up) button to enter the interface menu. There are 2 options: All Shooting Mode Settings ( ) and General Settings . Press the (up) or (down) button to select the desired setting and press the button to enter the corresponding sub-menu interface. -
Page 22: All Shooting Mode Settings
All Shooting Mode Settings ( The Sub Menu for all shooting modes and settings: Movie Setting Photo Setting High-Speed Movie Setting Burst Setting Menu Interface Sub-Menu Interface settings... - Page 23 Below is an illustration of the recording setting menu for an example. The operating settings of all optional shooting modes have the same menu entry flow and menu access as shown below: -3.0、-2.7、-2.3、-2.0、-1.7、-1.3、-1.0、-0.7、-0.3、+0.0、+0.3、+0.7、+1.0、+1.3、+1.7、+2.0、+2.3、+2.7、+3.0 Menu Sub-Menu Selectable Options...
- Page 24 Display Mode Set image storage format. There are 3 options: Stitched 3600 Spherical / VR Mode 235° 360° 360° 155° Global...
- Page 25 2350 Round (Dome) Mode 235° 360° 1970 4K UItra Wide Full Frame Mode [16:9] 4K [16:9] Full Frame Mode...
- Page 26 Movie Size Video Resolution Settings: VR 3600 Spherical / VR Mode (2:1) The selectable video resolution options vary for different video shooting modes and are subject to actual user • 3840×1920 (24fps) selections that will determine final playback and the saved video file resolution. •...
- Page 27 Self Timer: Setting the self-timer function: There are 3 options: • Self Timer - Off • Self Timer - 2 sec • Self Timer - 10 sec Electronic Image Stabilization (EIS): Setting the Electronic Image Stabilization (EIS) function: There are 2 options: • Enable • Shooting Modes Number of Recording Pixels EIS Setting 7360x3680 360°...
- Page 28 Motion Detection: Motion detection means if the camera detects moving objects entering into view, it will automatically start recording. During the recording process, if there is no moving object detected for 10 continuous seconds, the recording will pause automatically. There are 2 options: •...
- Page 29 Color: Set Image Color. There are 3 options: • Normal • Black and White • Vivid White Balance: White balance means the user can adjust the color temperature under different light sources to help ensure that the colors in photos and videos are reproduced as accurately as possible. There are 6 options: •...
-
Page 30: General Settings
General Settings X.XX Menu Sub-Menu Selectable Options... - Page 31 Audio / Sound Set the audio / sound levels of the camera. There are 4 options: • Sound Off • Sound 1 • Sound 2 • Sound 3 Automatic Power Off When this function is enabled, if there is no action taken within a set time frame (except while recording or connected to Wi-Fi), the camera will automatically power off.
- Page 32 Format Format will clear all data stored on the memory card and will fully erase all photos and videos stored on the card. There are 2 options: • Confirm • Cancel To select , press the button to start formatting the card and return to the sub-menu interface after completion. Reset Settings Reset settings will recover and reinstall all standard product settings to the factory defaults (except for date and time).
-
Page 33: Bluetooth Remote Control-D
BLUETOOTH Remote Control-D Remote Control View Specifications Model: RR-BK04 Dimension:30×20×13.7mm BLUETOOTH Signal Test Button Weight: 27±2g (including battery) 2. Connect / Shooting Indicator Dust Proof: IP6X Recording / Shooting Button Temperature: -10° to 40°C Humidity: 0~90% Battery: Button Cell CR2032 Before Using: Pull the insulating strip completely out prior to operating the remote control. - Page 34 Installing the Battery: Use a screwdriver to remove the screw on the backside of the remote control by turning it counterclockwise (Fig. 1). Open the battery cover and insert the battery (Fig. 2), close the battery cover and rotate the screw in the opposite direction to tighten down. Negative Screw Battery Cover...
- Page 35 Pairing the Camera Via BLUETOOTH Remote Control: 1. Pair the camera to the remote control This method is for one remote control to one camera: With the camera turned on, press the button for 2 seconds to enter the pairing mode. Press and hold the buttons simultaneously on the remote control until pairing is successful.
- Page 36 While attempting to pair, the remote control should be held close to the camera. 2. Press the button on the remote control to start shooting or recording and press the button again to stop recording. Other parameters in the camera will remain the same as initially set. 3.
- Page 37 Successful Pairing Between the Camera and the Remote Control: 1. BLUETOOTH signal test press the button. The camera will power off or on by pressing and holding the button for 1.5 seconds or more. 2. Using the mini remote control, all settings or parameters set in the camera's menus for shooting or recording will remain the same as initially set. Upon successful pairing, both the remote control and camera will remember the BLUETOOTH information.
- Page 38 BLUETOOTH Remote Control-C This remote control device can be used to remotely control the camera from a distance. The remote control is optional. If you wish to purchase one, contact your retailer to buy or visit kodakpixpro.com for our online store. The optional wrist strap is provided to wear the remote control if desired.
- Page 39 Pairing the Camera Via BLUETOOTH Remote Control: 1. Pair the camera to the remote control This method is for one remote control to one camera: With the camera turned on, press the button for 2 seconds to enter the pairing mode. Press and hold the buttons simultaneously on the remote control until pairing is successful.
- Page 40 While pairing, the remote control should be held close to the camera. 2. Set the desired shooting mode (movie mode or snap / shot photo mode ) and the display mode (VR , Round (Dome) or Front Other parameters are set the same as the current settings of the camera at the same mode. 3.
- Page 41 Successful Pairing Between the Camera and the Remote Control: 1. To test if the camera's powered on or whether the remote control is paired successfully, press the button. The camera will power off by pressing and holding the button for more than 1.5 seconds. 2.
-
Page 42: User Interfaces
User Interface Micro USB Interface Charging Your Camera: Using an External Power Supply In the case of low battery power or when a long-term power supply is needed, an external power supply (AC adapter, vehicle power supply, portable power supply or other power unit) can be used instead of a battery. The camera settings for functions, photography and other operation can be performed normally. When powered on, use the Micro USB cable to connect the camera to an external power supply. - Page 43 The folder structure of a microSD card on which this camera has performed recording is as follows: ● Folder numbers range from 100 to 999. Four alphabetic characters indicate the camera lens type. Five or eight alphabetic characters indicate the file type. ORBIT360 4K The character shows the camera lens type used in the shot: VR: 3600 Spherical / VR Mode : _...
-
Page 44: Webcam
Webcam: Connect the camera and computer via a Micro USB cable to use the ORBIT360 4K/4KVR360 as a Webcam. 1. Download the drivers for the APP “PIXPRO 360 VR Webcam” from the official KODAK PIXPRO website and install it onto the computer as prompted on your computer's screen. Americas Europe http://kodakpixpro.com/Americas/ http://kodakpixpro.com/Europe/ support/downloads.php support/downloads.php 2. Set the USB connection mode to from the camera's menu. - Page 45 5. Change any desired settings and click on “OK” to exit. The image size can be adjusted on your computer. If you choose a resolution of 1280×720, the image will be displayed in an aspect ratio of [16:9]. This function supports Windows 7 and higher OS. (Graphics GPU must support Direct 3D 10.) Applicable Video Software: SKYPE™.
-
Page 46: Micro Hdmi Interface
Micro HDMI Interface: To connect your camera to a TV, use a Micro HDMI cable (sold separately). After the connection is successful, the files on the memory card of the camera should be displayed on the television, while is displayed on Liveview the camera's LCD. - Page 47 Playback Functionality from your TV's and Remote Control: 1. Press the left and right keys to switch between the folders and files on your camera's Micro SD card. 2. Press the button to return to main menu. 3. Press the button to hide or display the TV screen information.
-
Page 48: Wi-Fi Mode
For iOS devices, search and download the APP "PIXPRO 360 VR Remote Viewer" in APP Store and install it by following the instructions on your smart device's interface. ● Personal Computers: Download the "PIXPRO 360 VR Suite" (for Mac or Windows) installation package from the official KODAK PIXPRO website and install it on your computer by following the prompts on the interface. Americas Europe http://kodakpixpro.com/ http://kodakpixpro.com/Europe/... - Page 49 Connecting your Camera to Smart Device (or Personal Computer) with Wi-Fi: Operation Method: 1. Camera: 2. Smart Device or Personal Computer: Check SSID (Service Set Identifier) (PIXPRO-ORBIT360_XXXX / PIXPRO- When you enable Wi-Fi mode, the camera will automatically search nearby 4KVR360_KXXXX) and password (initial password: 12345678) indicated on Wi-Fi hotspots.
- Page 50 If the Wi-Fi connection is dropped while recording, the camera will continue to record and will enter the connection free recording mode. When displays in the interface, press the button and press the (up) or (down) button to select . Then press the button to exit the Wi-Fi connection mode.
- Page 51 Connecting Camera to Smart Device with NFC 1. These instructions are to enable NFC connection on your smart device. 2. Use your smart device to lightly touch the NFC mark on the ORBIT360 4K/4KVR360 camera. If the smart device has a prompt tone or vibration that means the connection is successful.
-
Page 52: Appendices
Appendices Specifications: Design and specifications are subject to change without notice. Type 1/2.3" BIS CMOS Image Sensor A Effective Pixels 20.68 Megapixels Total Pixels 21.14 Megapixels Focal Length 1.633mm Equivalent to 35mm film 9.18mm F Number F2.4 Lens Construction 7 groups 8 elements Lens A Focus Fix Focus... - Page 53 27MP: 7360x3680 (2:1) Stitched 15MP: 5520x2760 (2:1) VR Mode / 3600 Spherical 27MP: 7360x3680 (2:1) Global 15MP: 5520x2760 (2:1) Still Image 13MP: 3680x3680 (1:1) Round (Dome) Mode / 2350 Dome 8MP: 3840x2160 (16:9) Front Mode / 1970 4K Ultra Wide 9MP: 3525x2644 (4:3) (2:1) 3840×1920/24fps...
- Page 54 Freeze-proofing -10°C 1.0 inch TN LCD (With Backlight) Level Gauge 3 Axis ISO Sensitivity Auto (100~1600) (Photo) Auto (100~800) (Movie) Exposure Metering Method Artificial Intelligence AE (AiAE) Exposure Control Method Program AE Burst Supported White balance Auto White Balance, Daylight, Cloudy, Fluorescent, Incandescent, Underwater Internal Memory: No Recording Media microSD / microSDHC / microSDXC Card (Up to 256GB Support)
-
Page 55: Prompts And Warning Messages
Prompts and Warning Messages: Message Description Recommended Action There are too many files, which may cause a delay in powering on. After copying the files to your computer, choose to delete or reformat Micro SD When pressing the button for recording, the memory card cannot be accessed Card. - Page 56 Message Description Recommended Action The camera is set to "Mass Storage" device and is connecting to the computer via No action required. USB. The camera is set to "Webcam" and is connecting to the computer via USB. No action required. Connecting to a HDMI device.
-
Page 57: Trouble Shooting
Trouble Shooting: Problem Possible Causes Recommended Action Charge the battery. The battery has been depleted. Camera does not turn on Follow the charging instructions in the manual to The battery is installed incorrectly. properly install the battery. There could be smudges or dirt on the camera's Blurred Images Clean carefully with a clean, lint-free, dry cloth. - Page 58 Special Accessories There are different accessory options available for the ORBIT360 4K/4KVR360 cameras. Accessory bundle packs will vary by retailer and international regions. To purchase additional optional PIXPRO accessories separately, please contact your local retailer or visit kodakpixpro.com for for a complete list of available accessories.
- Page 59 Standard Housing-C: For use with other accessories when waterproofing is not required Installation Method: 2. Open the locking arm of the standard housing and place the camera inside housing as shown in diagram below. Press the top cover of the fixed mount 1.
- Page 60 Flat Adhesive Mount-A: For sticking onto a skateboard or other flat Curved Adhesive Mount-A: For sticking onto a helmet or other objects curved objects Installation Method: There are two types of adhesive mounts: flat and curved. You should select your desired adhesive mount based on the shape of the object you intend to mount your camera to.
- Page 61 Bar Mount-A: For mounting on bicycle handlebars, posts, rods and other tube-like objects Installation Method: 2. Assemble and install the standard housing ( 58). 1. Align the bar clamp to the handlebar or tube shaped post and rotate the screws clockwise to tighten. 3.
- Page 62 Suction Cup Mount-A: For attachment to smooth surfaces, such as glass Installation Method: 3. Carefully clean the suction mount bottom and the smooth mounting surface 1. Assemble and install the standard housing ( 58). before attaching the suction cup. Press the handle down to suction to your 2.
- Page 63 Vented Helmet Strap Mount-A: For mounting on objects like bicycle helmets Installation Method: 2. Lay out the strap before threading both ends into the helmet. Thread both 1. Align the locator pole on the mount to the locator hole on the camera and ends of the band into the buckle, then press down on the buckle clamp to align the screw on the mount to the camera's screw socket.
- Page 64 Head Strap Mount: For wearing on one’s head Installation Method: 1. Assemble the standard housing ( 58). 2. Insert the base of the standard housing to the mount before using the setscrew to fully tighten. 3. Place the band around your head and adjust to desired fit.
- Page 65 For taking selfies or 360° shooting and recording Selfie Stick and Remote Control Mount: Always use caution when using. Do not use the hand-held selfie stick when on a bicycle, motorized vehicle or in other unsafe scenarios. Installation Method: 3. Twist the selfie stick sections counterclockwise in accordance with the 1.
- Page 66 4. To install the remote control and clip mount to the handle, snap and lock the remote control in to the clip and attach to the selfie stick pole as shown in diagram below: 5. Attach the included wrist strap to the handle of the selfie stick. Wrap wrist strap around your wrist when in use.
- Page 67 © 2017 JK Imaging Ltd. All Rights Reserved. The Kodak trademark, logo and trade dress are used under license from Eastman Kodak Company. All other logos, products or company names that are referred to in this document are trade names, trademarks or registered trademarks of their holders. The holders are not affiliated with JK Imaging Ltd., our products or our website.
Need help?
Do you have a question about the PIXPRO ORBIT360 4K and is the answer not in the manual?
Questions and answers