
Related Manuals for Benefon ESC


Summary of Contents for Benefon ESC
- Page 1 BENEFON ESC! Owner’s Manual All rights reserved. © Benefon Oyj, 2002. Publication number: YZ2400-4* UBER-1017 - Page 1...
- Page 2 B e s t i m m u n g e n d e r R i c h t l i n i e 1 9 9 9 / 5 / E C e r f ü l l t . Benefon Oyj Μ...
-
Page 3: Quick Guide
QUICK GUIDE ENDING A CALL •To end a call, press POWER ON/OFF IGNORING A CALL •Press for a few seconds. •If you do not want to answer an incoming call, EMERGENCY CALL TO LOCAL EMERGENCY press NUMBER (E.G. 112) CORRECTING ERRORS •Press •Correct typing errors by pressing CLEAR... - Page 4 TURNING THE GPS RECEIVER ON/OFF •You can return to stand-by mode from all menu levels by pressing . Another way: first 1. In stand-by mode or on the navigator pages, en- enter the main menu by pressing , in MENU ter the by pressing Quick menu...
- Page 5 4. You will later find the calls and messages in DELETING ALL MESSAGES FROM INBOX OR their respective menus, Recent calls Mes- OUTBOX AT ONCE sages , in GSM menu 1. In stand-by mode, press . Find Messag- Other received message types (such as received with Press SELECT...
- Page 6 KEY FUNCTIONS FOR THE T9 SHORT MESSAGES function display shows verify the word and make space cursor moving forward turn the T9 mode on/off § change the character forms change the language available languages 1-2 sec. verify the compound word ACCEPT scroll the alternative words or sub-menu selection list in the sub-menu...
-
Page 7: Table Of Contents
Turning the phone on ....... 17 INTRODUCTION........7 Turning the phone off ....... 18 Changing the language ......18 BENEFON ESC! ..........7 SOME KEY FEATURES ..........7 OVERVIEW............19 T9 text input technology ......8 Stand-by mode .......... 19 Global Positioning System (GPS).... - Page 8 NEW CALL..............34 MOVEMENT............50 CONFERENCE CALL ............ 34 SELECTING A CALL ............. 35 QUICK MENU..........51 ENDING A CALL............35 PICKING A WAITING CALL .......... 35 KEYPAD LOCK ..........51 DROPPING A WAITING CALL........35 LOCKING THE KEYPAD ..........51 MUTING A CALL ............
- Page 9 SETTINGS ............69 GSM MODULE ............... 81 GPS ............82 Environments ..........69 MAP DETAILS ............... 82 EDITING NORMAL ENVIRONMENT......70 POSITIONING ..............84 EDITING SILENT, DISCREET, COURSE ALERTS ............85 NOISY AND NIGHT ENVIRONMENTS ......71 LEFT AND RIGHT DATA FIELD........86 CAR KIT ENVIRONMENT ..........
- Page 10 DELETING A PHONE BOOK ENTRY ......97 Network selection........114 Storing a phone number ......97 Call diverts..........114 KEYING IN A NEW NUMBER (DIVERT) ALL ............... 114 IN STAND-BY MODE............. 98 (DIVERT) BUSY ............115 ADDING A NEW NUMBER (DIVERT) NOT ANSWERED .........
- Page 11 ROUTES ............126 REQUESTING SERVICE ........137 CREATING A NEW ROUTE .......... 126 REQUESTING AGPS ........138 SETTING DESTINATION..........127 VIEWING THE MAP............127 UPDATING POSITION ........138 WAYPOINT LIST: VIEWING AND EDITING..........128 SKIPPING ROUTE POINT........ 138 SENDING A ROUTE ............128 CLEARING DESTINATION ......
- Page 12 PORTABLE HANDS FREE EHE70....145 PIN code............. 151 PIN2 code........... 152 PLUG-IN HANDS FREE GMA70 ...... 145 PUK code ........... 152 BENEWIN PRO WITH NMEA 0183 CABLE ..146 PUK2 code ..........152 LIGHT HOLDER KGC70 ........147 Phone code ..........152 Network code..........
-
Page 13: Introduction
•Mobile Map Service: download maps to the munication instrument you phone using any PC with Internet browser will never get lost with. •Friend Find: track and find another Benefon Esc! navigation phone This phone is designed for use on the GSM (Global •send waypoints and routes to other Benefon Esc! -
Page 14: T9 Text Input Technology
If there is more than one word possible for the key combination, T9 will choose the most commonly Benefon Esc! is able to translate and use the chang- used word and also allow selection from a list. ing position information from the satellites up to... -
Page 15: New Services
Esc! and the eas. Maps are provided by Genimap and other lead- Help desk service. The free maps are re-download- ing suppliers of geographical data. -
Page 16: More Services To Come
While the actual risk varies greatly NEW LOCATION SERVICES according to the conditions and the driver, it is Benefon Esc! utilizes Mobile Phone Telematics Pro- advisable to strictly adhere to all eventual Euro- tocol (MPTP) and Mobile Maps Service Protocol... -
Page 17: Radio Frequency (Rf) Energy
•Magnetic fields: Benefon Esc! contains small •Medical devices: Remember that any personal magnetic components. Even though the mag- medical devices (such as hearing aids or pace-... -
Page 18: Gps And Map Data
•Roadways and other map data are constantly cle seller to determine the proper shielding. being modified, so the maps in your Benefon Esc! may not always reflect the latest changes. No •Computers: Remember that using the phone warranty, express or implied, is given for com- close to a computer may cause interference. -
Page 19: Emergency Calls And Messages
Emergency calls and messages Benefon Esc! is and aid and should never be relied upon as an only emergency device. Its functionality is dependent on GSM network and GPS satellites which may not be available at all times. The unique combination of GSM and GPS features does, however, make Benefon Esc! helpful in ur- gencies as long as one does not depend one’s life... -
Page 20: Quick Start
QUICK START WHAT TO DO FIRST Inserting the SIM card First remove the battery. 2. Insert the card into the holder. Check that the 1. Slide the SIM card holder to the right. Lift the cut corner is at the lower left corner of the holder into an upright position. -
Page 21: Inserting The Rubber Seal
Inserting the rubber seal Rubber tab Installing the rubber seal is optional. Please note, 3. Close the holder by pushing it towards the however, that the phone is splash proof only when phone. Slide the holder back to the left until it the rubber seal is inserted correctly in the phone. -
Page 22: Fitting The Battery
Fitting the battery Bottom cover Bottom connector 3. Lift the cap on the top of the rubber tab. 1. Place the bottom of the battery into the small hollows at the bottom of the phone. 4. Fit the battery into place as described in the next chapter. -
Page 23: Removing The Battery
Removing the battery Initializing the phone Before starting to use the phone for the first time, please note the following: •The battery of the phone should be charged overnight before taking the phone into use for the first time. •The battery will reach its full capacity only after a couple of charging - discharging times. -
Page 24: Turning The Phone Off
Searching for networks... message. ESC! logo, Once you have turned your phone on, you can time, date and some symbols are also dis- change the language in the Main menu played. -
Page 25: Overview
OVERVIEW INDICATORS G P S i n d i c a t o r Stand-by mode The GPS indicator consists of a satellite symbol and When the phone is turned on, it enters the stand- a bar graph. by mode shown below. Searching Sleeping Position... - Page 26 •When the GPS receiver is in Economy At inter- are shown and the phone symbol is greyed. vals mode, and it has searched and found posi- When you are roaming, i.e. in an area of a network tion at the latest attempt, the bars are shown other than your own, the symbol is shown in the greyed.
- Page 27 D i s p l a y i n d i c a t o r s diverted to another phone number or to a voicemail service. The type of service depends Some of the following symbols may be shown in on your network operator.
-
Page 28: Navigator Pages
P o s i t i o n p a g e Position page shows various data fields related The four navigator pages of Benefon Esc! can be to your present position and time. The status of in- used for GPS navigation, with or without a map. - Page 29 Monday 21.01.2002 Normal Speed Odometer Speed Time Track Bearing FI NETWORK Destination MENU Next Last Phone (stand-by mode) ETA next ETA last Speed Time Date Time MENU MENU Movement Dawn Elevation Coordinates > Satellites < MENU MENU Guide Position UBER-1017 - Page 29 QUICK START: OVERVIEW...
-
Page 30: Menus
Menus Each menu has a title, an icon and some menu items. You can select one of these items by high- Most features of Benefon ESC! can be accessed via lighting it with and pressing menus. There are four of these: Main menu, Quick You can exit a menu by pressing menu, and GSM and GPS-specific menus. -
Page 31: Keypad
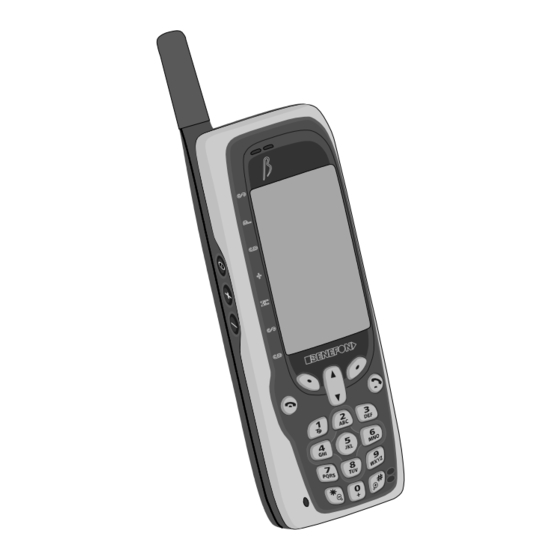
G S M m e n u •Skip route point •Clear destination The menu items of the GSM menu are •Reset meters. •Phone book •Messages Keypad •Recent calls •Network services •Help desk. G P S m e n u GPS menu can be accessed through the Naviga- tor pages as follows: in stand-by mode first press a <... -
Page 32: Alphanumeric Keys And T9
§ Power on/off. Press and hold to turn the Hash. Press to switch between upper case let- phone on or off. ters, lower case letters and numbers when writing text, or to zoom in when viewing a > < Adjustment keys. Press to adjust earpiece vol- map. -
Page 33: Emergency Key
•Special characters: By pressing for a few EMERGENCY KEY seconds, all the special characters are available. § The hash key ( ) is also used as an emergency You may select a row of characters with , and key, so that pressing and holding it for five seconds make the final selection by pressing the numeric starts making emergency calls and sending emer- key, which corresponds the desired character. - Page 34 the phone book, please see the chapter GSM menu, Phone book, Storing a phone number. • If you wish to make a direct call to an ISDN sub- number or store the sub-number in your phone book, key in the string as follows: key in the §...
-
Page 35: Characters Available
CHARACTERS AVAILABLE Ä ä Å å Æ æ à ß Ç É é è Ì Ñ ñ Ö ö ø ò Ø ß Ü ü ù UBER-1017 - Page 35 QUICK START: OVERVIEW... -
Page 36: Brief Overview Of Phone Use
BRIEF OVERVIEW OF 2. Enter the country code, the area code (without the first number), and the phone number. PHONE USE 3. Press If the network operator does not implement this MAKING A CALL function and you try to make a call by using the + character, a message Illegal will be displayed. - Page 37 Redial 5. By pressing you will enter the sub- memory SELECT menu where you can store the number or re- Delete all move it from redial memory. 14:12 Benefon 12:02 John Swirl 11:08 +358277400 Redial memory Save QUIT SELECT Delete 1.
-
Page 38: Quick Dialling
Quick dialling RECEIVING A CALL The quick dialling function works on the phone When your phone receives a call, it rings and the book memory slot numbers 2...9. text Call is coming is shown. If you have set the phone to be silent, the text will still be shown normally. -
Page 39: Answering A Call
Answering a call ACTIVE CALL •To answer, press . If Anykey answer is turned When a call is in progress, the display will look like on in the Main menu under Settings the one below. § you can also answer by pressing , or indicator •If you do not wish to answer an incoming call,... -
Page 40: Advanced Options During A Call
You can adjust earpiece volume during a call by You can also make a new call by dialling the num- > < pressing . However, adjusting the volume ber directly, without selecting New call first. is not possible if the microphone is muted. All calls are shown in the active call display and can be selected there with . -
Page 41: Selecting A Call
SELECTING A CALL To pick up a waiting call, do as follows: When there are several simultaneous calls, you can 1. Use to select the waiting call and press make one of them active as follows: LECT 1. Use to select a call and press SELECT 2. -
Page 42: Muting A Call
ENDING CALLS MUTING A CALL 1. Press to access the Call menu MENU To end a call, press . When the call ends, the GSM indicator will return to the usual hook-down 2. Use to select Mute and press . Calls will position. -
Page 43: Incoming Traffic
Remember that a mobile phone connection is not guaranteed in all conditions. Rough terrain or large buildings may limit the operation of your Thursday PIN code phone. Never completely rely on a mobile phone 13.4.2002 for essential communications. Enter code Emergency call Press ’Ok’... - Page 44 W a y p o i n t s ( q) •To call the phone number of the unanswered call, press A waypoint can be received as a message from an- other Benefon ESC! phone. •To save the phone number, press SAVE For further information, please see the chapter...
- Page 45 A route and its waypoints can be received as one or A position update refreshes the position of a friend more messages from another Benefon ESC! phone. point in your phone. A tracking update works sim- ilarly, but it is a part of a series of updates, i.e.
-
Page 46: Use Without A Sim Card
USE WITHOUT A SIM CARD A Friend Find request may be a position request or a tracking request. Benefon ESC! can be used even when a SIM card By sending a position request, another Benefon has not been inserted. Most GPS features, calen- ESC! user may ask you to send a position update. -
Page 47: Brief Overview Of Navigator Use
Positioning the GPS antenna Satellites You should lift the GPS antenna so that it faces open sky whenever you want to use any of Benefon Esc!’s position dependent features. The antenna needs an unobstructed view of the sky. The signals sent by the GPS satellites do not penetrate solid objects such as people, buildings, rocks, or heavy tree cover. -
Page 48: Turning The Gps Receiver On Or Off
Turning the GPS receiver on or off • Low power . Satellites are tracked at slightly longer intervals. While this mode has the You need to turn on the GPS receiver to make po- lowest power consumption, it may not be sition determination possible. -
Page 49: Gps Reception
When using the GPS receiver for the first time, do determination is shown by the bars in the indica- as follows: tor. The more bars the better the accuracy. 1. Go to an open site outdoors, with unobstruct- You can also view the status of individual satellites ed view of the sky. -
Page 50: Initializing The Gps Receiver
You can also wake up the GPS receiver manually as 4. Use , and follows: move the pointer on the map to your present position. 1. Make sure that the GPS antenna has an unob- structed view of the sky. The GPS receiver does 5. -
Page 51: Using The Navigator Pages
USING THE NAVIGATOR PAGES The navigator pages of this phone are: navigator page shows your position and surroundings on a map. • page • Guide page • Position page • Movement page. Data Speed Time fields You can access and browse the different navi- gator pages through the Main menu, as follows: scale Bearing... - Page 52 •Friend points mark the known positions of •Bearing ( ) is the direction to your destina- other Benefon ESC! phones. They are shown as a tion, if any. It is given in degrees. symbol ( ) accompanied by some identify- ing text.
-
Page 53: Pointing Mode
GPS and Pointer GSM equipment of Benefon ESC!. Based on posi- tion information and the short message service (SMS), they make functions such as accurate locat- 1 2 3 ing or tracking a friend possible. -
Page 54: Guide
GUIDE The guide is dependent on movement, and the compass ring will be blank when the phone is not Guide page gives you steering guidance when moving. It is not a magnetic compass, and should you are navigating to a destination. not be relied on as one. -
Page 55: Position
POSITION used for navigation, while grey bars signify satel- lites that are still being locked to. Position page shows various data fields related Depending on currently used GPS operating mode, to your present position, time, and satellite status. the satellite status text buffer may also show, how old the last found position is. -
Page 56: Movement
MOVEMENT Many data fields on this page are dependent on movement, so they will be blank when you are not Movement page shows various data fields relat- moving or when the GPS receiver is unable to de- ed to your movement and destination. termine your position. -
Page 57: Quick Menu
QUICK MENU LOCKING THE KEYPAD When the phone is in stand-by mode or in one of the navigator pages, you can open the Quick menu by pressing . The first item to be selected de- Monday Quick menu pends on the direction of your keypress: 21.01.2002 •If you press upwards, the first item to be high-... -
Page 58: Unlocking The Keypad
4. As you lock the keypad, you will automatically While the keypad is locked, pressing will exit the Quick menu . The left function key will set the lights on for 10 seconds. This way, you are then have the text able to see how to unlock the keypad even when it UNLOCK is dark. -
Page 59: Selecting An Environment
SELECTING AN ENVIRONMENT An environment is a combination of tone and light settings made suitable for particular situations. For information about editing the environment set- tings, please see the instructions in the chapter Main menu, Settings, Environments. In this menu you can turn on the environment you wish to use. -
Page 60: Main Menu
MAIN MENU •Use to scroll through the menu items and sub- menus. •To select one of the items, press . This way, you can enter sub-menus, activate commands and turn options on or off. •Press to return to the previous menu QUIT Monday Main menu... -
Page 61: Alarm Clock
Alarm clock Current alarm settings are displayed in the Alarm clock menu. There are four alarm settings which In this menu, you can turn the alarm clock on or you can adjust. off and adjust its settings. Press to open the Alarm clock from the SELECT... -
Page 62: Alarm Clock Alert
S e l e c t i n g s n o o z e i n t e r v a l By selecting Snooze and pressing CHANGE can determine whether the phone alerts you re- Alarm clock peatedly, e.g. every 10 minutes. Select the desired option and press Once If you do not want to use the snooze option at all,... -
Page 63: Notepad
Notepad Notepad can be used for writing and saving short notes. Notepad Notepad and press to open the Notepad SELECT Delete all from the Accessories menu. You will enter a menu I remember| titled Notes which contains several notes. <empty note> <empty note>... - Page 64 Turning T9 mode on or off Writing compound words Press . When the T9 mode is on, the symbol When writing a compound word, you are assumed is shown on the display. to press after each part of the word un- ACCEPT til the whole compound word has been entered.
- Page 65 Beeping sounds In case you try to do an illegal action, such as con- tinue writing the note when there is no space left, Notepad or press a key that does not match to the keystroke sequence entered, the T9 will beep and ignore the 1 2 3 action.
- Page 66 If the word is still incorrect, find an alternative W r i t i n g a n o t e i n s p e l l i n g m o d e word with The editing tools are basically the same in spelling mode and in T9 mode.
-
Page 67: Calendar
Calendar The main calendar page shows a calendar page for one month. Each day that has any calendar entries You can write down your own appointments, is marked with a small black triangle in its lower events and anniversaries in the calendar. Remind- left corner. -
Page 68: Viewing All Entries (Agenda)
•Select Go to date by pressing . Key in ADDING A NEW CALENDAR ENTRY CHANGE the date you wish to view and press By selecting New entry you can add a new event to your calendar. VIEWING ALL ENTRIES (AGENDA) C h a n g i n g e n t r y t e x t By selecting Agenda,... -
Page 69: Viewing A Calendar Entry (Agenda)
•To make the entry apply only once, mark Once VIEWING A CALENDAR ENTRY highlighting it and pressing (AGENDA) CHANGE •To make the entry apply on selected days, mark To view a calendar entry with details, select a Day the desired days by highlighting them with view and then the item Agenda by pressing... -
Page 70: Calendar Alert
Calculator •Select Edit and press SELECT Editing a calendar entry is done just like adding a With the calculator you can perform the basic new one. For further information, please see the mathematical operations such as addition, subtrac- chapter Adding a new calendar entry above. tion, multiplication, and division. - Page 71 & •The , and can alternatively be keyed in The accuracy of the calculation is up to 6-digits. by subsequent presses of the key. Similarly, When needed, the result will be displayed with the § can be keyed in with exponent (for example: the result 1234567 is dis- played as 1.23457E6).
-
Page 72: Games
Games Scoring •Hit an enemy bomb: 1 point. Press to open the Games list from the SELECT Accessories menu. •Hit an enemy ship: 5 points. •Start a game by pressing SELECT BLASTER MASTER •Pause or finish a game by pressing The idea is to clear a mine field of mines without •Continue a paused game by using to select... -
Page 73: Worm
WORM Key functions The idea is to control a worm around the display, •Move the piece by pressing eating small cookies and avoiding walls. The worm •Preview the complete picture by pressing will grow and gain speed with each cookie it eats. §... -
Page 74: Labyrinth
Key functions LABYRINTH The idea is to walk through the labyrinth starting •Release the ball by pressing , or from the upper left corner, going to the lower right •Move left with wide steps by pressing corner as fast as possible. Only part of the labyrinth •Move left normally by pressing is displayed at once, in fact the whole labyrinth is much larger. -
Page 75: Tictactoe
SETTINGS TICTACTOE The idea is to add crosses in the grid, taking turns You can access the settings of the phone via the with your opponent. The winner of the game is the Settings menu. The settings are divided into sub- one who first manages to get five marks in a row. -
Page 76: Editing Normal Environment
can customize these environments to your own E d i t i n g i n c o m i n g c a l l , a l a r m , needs, if you so desire. m e s s a g e s o r c a l e n d a r s e t t i n g s Select either Incoming call Alarm... -
Page 77: Editing Silent, Discreet, Noisy And Night Environments
1. Select Ringing mode and press •To have the lights always on, select CHANGE •To have the lights automatically turn on 2. Select either Fixed Increasing and press when keys are pressed or important notifi- cations are displayed, select Automatic Keeping lights constantly on will rise the power C h a n g i n g u s e o f v i b r a t i o n consumption of the phone considerably. -
Page 78: Car Kit Environment
CAR KIT ENVIRONMENT CREATING NEW ENVIRONMENT In this menu you can set one of the environments To create an environment of your own, select to be the default environment for the car kit. Each At most two additional environments can be made. time when you connect the phone to a car kit, the default car kit environment will be turned on auto- N a m i n g t h e e n v i r o n m e n t... -
Page 79: Deleting An Environment
User interface E d i t i n g y o u r o w n e n v i r o n m e n t You can edit your own environment in the same This menu contains settings that have to do with way as the default environments, by selecting it the general outlook and functionality of the with... -
Page 80: Adjusting Contrast
ADJUSTING CONTRAST S c r e e n s a v e r d i s p l a y In this menu you can adjust display contrast. 1. Select Contrast and press CHANGE 2. Use to set the contrast level. Press The screen saver display can be exited by pressing >... -
Page 81: Time Settings
Time settings DATE This item allows you to set the date manually. This menu allows you to set the time, time zone Please note, however, that the date will always be and date. automatically set if you are using Satellite time The time information determined here is used to- (see the following instructions). -
Page 82: Time Zone
Units TIME ZONE The GPS satellites broadcast Coordinated Univer- Units menu allows you to set the measurement sal Time (UTC), the standard time common to ev- systems for distance, speed and elevation and cur- ery place in the world. To make automatic clock rency unit for call cost counters. -
Page 83: Elevation
Power ELEVATION 1. Select Elevation and press CHANGE In this menu you can make the phone turn itself on and off at specified times. 2. Select the units you wish to use for elevation measurements: Meters, Imperial feet . Press Press to open the Power... -
Page 84: Gsm
M e s s a g e t y p e In this sub-menu you can choose the kind of mes- This menu contains settings related to calls and sage type you are processing from these options: messages. text, fax, X.400, email, ermes, or data. Press to open the menu from... -
Page 85: Broadcast Setup
BROADCAST SETUP M e s s a g e t y p e s This menu contains settings related to broadcast If you have turned on the option Accept broad- messages. casts , all kinds of general messages can be broad- cast to you. -
Page 86: Anykey Answer
M e s s a g e l a n g u a g e s DIALLING PREFIX As a default setting, broadcast messages will be A dialling prefix is sent to the network before any broadcast in all possible languages. To ignore the dialled number. -
Page 87: Redial Memory
REDIAL MEMORY GSM MODULE If the Redial memory is turned on, the last dialled In this menu you can turn the GSM module on or numbers are stored into memory. These numbers off. can be recalled by pressing in stand-by mode 1. -
Page 88: Gps
S h o w d a t a f i e l d s This option allows you to specify whether you In this menu you can adjust map and navigation want to see the two additional data fields on the settings. - Page 89 S h o w t r a c e P r e f e r r e d m a p t y p e This option allows you to specify whether you When you have more than one map loaded into want to see the trace left by your movement on the your phone, the most accurate one available for map.
-
Page 90: Positioning
POSITIONING •In one of the pre-defined grid formats. •In User UTM grid . In case you need to use a grid When using the mobile phone positioning along which is not available in the list, you can create a with some separate map, e.g. a paper map, the GPS user UTM grid to match your paper map. -
Page 91: Course Alerts
COURSE ALERTS C o n f i r m a r r i v a l In this menu, you can set up alerts to be used when This option allows you to specify whether you you are going off course, or arriving at your desti- want to confirm the arrival to a point on a route be- nation. -
Page 92: Left And Right Data Field
LEFT AND RIGHT DATA FIELD D a t a f i e l d c o n t e n t s You can see two data fields on the Guide Speed: Current ground speed. navigator pages. In these two menus, you can spec- Average speed: Average ground speed. -
Page 93: Nmea Output
ETA at next (Estimated Time of Arrival): Estimated NMEA OUTPUT time of arrival at next waypoint on route; or at In this menu you can turn the NMEA output on or waypoint or friend used as destination. off. This phone supports the NMEA protocol, which is used for transferring position data be- ETA at last: Estimated time of arrival at last way- tween the phone and some navigation systems, e.g. -
Page 94: Reset Position
If you need assistance when using your Benefon can also recall the number from your phone Esc! phone and maps, you can send a help request book. The number is needed for sending an to Benefon Esc! Help desk service. A technical sup- AGPS request. -
Page 95: Emergency Calls To Pre-Determined Numbers
Emergency calls to EDIT MESSAGE pre-determined numbers You can specify the short message that will be au- tomatically sent to numbers specified in the call list In a case of dire emergency, it is useful to have in case of emergency. your phone send your position information and make calls to pre-determined phone numbers at a The emergency message will always contain your... -
Page 96: Making Emergency Calls
A d d i n g a n e m e r g e n c y c a l l keys. To add a prefix, press . Press •Scroll and check the other options by pressing To add the first call to the list, press INSERT Press and key in the receiver´s phone... -
Page 97: Security
Security You have then fifteen seconds to cancel the opera- tion by pressing . If you do not do this, CANCEL This menu contains settings related to managing or if you press , the emergency cycle will be security codes. started. -
Page 98: Change Pin Code
1. Select Ask phone code and press CHANGE PIN2 CODE CHANGE turn this option on or off. In this menu you can change the PIN2 code in your SIM card. You need the PIN2 code for setting and 2. You will be asked for the phone code. Key it in resetting functions in the Call cost menu, and also... -
Page 99: Fixed Dialling (Fdn)
Reset default settings FIXED DIALLING (FDN) Fixed Dialling Numbers (FDN) is a special phone Use this option if you wish to restore all settings to book in which you can only store a few numbers. factory default settings. This reset will also restore The amount of numbers depends on your SIM all environments to their default values. -
Page 100: Gsm Menu
GSM MENU PHONE BOOK You can store phone numbers in the phone book entries on the SIM card. The actual number of en- tries and the length of names and numbers which Monday GSM menu can be stored on the SIM card depends on the 21.01.2002 card’s storage capacity. -
Page 101: Recalling A Phone Number
Search Search Phone book Memory AB Ab ab 12 T9 243 free AB Ab ab 12 T9 012 reserved slot Benefon Name Meadow Simon list Rockfeld Thomas Swirl Susan Torrent Samuel QUIT READ CLEAR READ... -
Page 102: Editing A Phone Book Entry
If you stop on a name for a few seconds, you will see the phone number associated with the name. The memory slot taken up by the name is always Phone book shown in the small tab. entry 1. If you wish to make a call, press Number +358001234567 2. -
Page 103: Deleting A Phone Book Entry
Storing a phone number •By selecting Move, the information stored in the original phone book entry will be You have several ways to store phone numbers into lost. As a result of that, the old slot will be the phone book. You can: freed. -
Page 104: Keying In A New Number In Stand-By Mode
KEYING IN A NEW NUMBER ADDING A NEW NUMBER IN STAND-BY MODE IN THE NAME LIST 1. When the phone is in stand-by mode, key in the 1. In stand-by mode, press and then desired number and press to select Phone book SAVE SELECT... -
Page 105: Messages
MESSAGES If there are neither new nor read incoming messag- No incoming messages is displayed and the The Short Message Service (SMS) is a network fea- menu cannot be entered. ture. •Press to enter the Messages menu. SELECT RECEIVING A NEW MESSAGE •Press to cancel the operation and return QUIT... -
Page 106: Reading And Processing An Incoming Message
If you wish to delete all the messages displayed in Write and edit the text as follows: this list, select the option Delete all with •To remove letter(s), press shortly. CLEAR press . Confirm the deletion by pressing •To add letters into text, press again, or cancel the operation by pressing •To add special characters into text, press a few seconds. - Page 107 •By selecting Send , you can send the message To send the message, press SEND without saving a copy of it for yourself. If there is SMS transmission failure, the text Error •By selecting Send and save , you can send the in sending will be displayed.
- Page 108 If there is SMS transmission failure, the text Error Saving a picked number into the phone book in sending will be displayed. In this case, make sure 1. First, key in the desired name and press the receiver’s phone number (including prefix) and message box number are correct and there is 2.
- Page 109 P i c k c o o r d i n a t e s 3. When you are finished, press . Save the DONE waypoint by pressing or cancel the op- With this option you can pick any coordinates the eration by pressing message may contain, and save them as a waypoint.
-
Page 110: Outbox
Outbox READING OR PROCESSING OWN MESSAGES In this menu you can read, edit, and forward any of 1. Select one of the messages with the help of your own messages you have saved. You can also and press SELECT pick phone numbers and coordinates from a mes- sage for further use, or delete messages either one 2. - Page 111 a few seconds. Use to select a line and then •By selecting Send and save , you can send the press the numeric key, which corresponds to the edited message and also save it to your SIM card. desired character. •By selecting Send with position , you can send a...
- Page 112 F o r w a r d P i c k n u m b e r Use this option if you wish to send a selected mes- With this option you can pick a phone number sage to a new receiver. Forwarded messages are from the message and save it in your phone book not stored as extra copies in SIM card.
- Page 113 Changing memory slot Changing waypoint symbol The free memory slots are listed. Select a •Use to select a line and press the slot with and press numeric key, which corresponds to the desired symbol. 3. When you are finished, press .
-
Page 114: Broadcasts
Broadcasts set on the option Accept broadcast messages Broadcast setup menu. Cell broadcasts are general messages, which are Press to open the Broadcasts menu. broadcast to all receivers within a particular re- SELECT gion. They may contain advertisements, local If there are neither new nor read broadcast mes- weather reports and information about road traf- sages, No broadcast messages... -
Page 115: Call Voice Mail
Write message If you wish to delete all the messages displayed in this list, select the option Delete all with In this menu you can: press . Confirm the deletion by pressing again, or cancel the operation by pressing •write new messages •edit postponed messages. -
Page 116: Writing A Message
1. Press to enter the Write message for a few seconds. Select a line with . Press the SELECT menu. numeric key, which corresponds to the desired character. 2. Select one of the postponed messages with •To make space, use and press SELECT •With... -
Page 117: Sending And Saving The Message
SENDING AND SAVING THE MESSAGE Key in a number and press , or press SEND to look for one in the phone book. SEARCH You have four options to choose from: send and save, send only, send with position, and postpone. Recall a phone number from the phone book as follows: •By selecting... -
Page 118: Recent Calls
RECENT CALLS PROCESSING UNANSWERED CALLS The unanswered call list contains all the unan- This menu and its sub-menus allow you to keep swered calls. The calls are sorted in order from the track of unanswered and received calls. newest to the oldest. •Press to enter the Recent calls... -
Page 119: Received Calls
Call counters You can also process single calls as follows: •To call a number in the list, press Information about call durations is shown at the bottom of the Recent calls menu. •To save a phone number from the list, select a call and press . -
Page 120: Network Services
NETWORK SERVICES Select the desired option with and press The phone will register with the chosen network. This menu and its sub-menus allow you to access The * symbol indicates that use of the operator is various network services such as call diversions, not allowed. -
Page 121: (Divert) Busy
Press , and confirm your choice by of the number (e.g. Divert "All" active to Benefon pressing again. As a sign of diverting all calls, an arrow ( ), will be displayed when the phone is returned to stand- by mode. -
Page 122: Call Barrings
Call barrings 4. Key in the network code and press 5. When finished, press to return to the In this menu you can bar both outgoing and incom- QUIT Call barrings menu. ing calls. Please note that call barring also affects call diverts. -
Page 123: Incoming Calls
Call waiting INCOMING CALLS The second section of the menu allows you to set If a call is in progress and you have an incoming barrings that concern incoming calls only. call, the network will notify you if you have the call waiting option turned on. -
Page 124: Last Call Cost
1. Press to enter the Call cost menu. cy in the Main menu , under Settings, Units, Curren- SELECT 2. You will see a menu with the items Last call tal calls Money left, Maximum units , and Price/ R e s e t t i n g t h e c o s t o f t o t a l c a l l s Unit 1. -
Page 125: Price/Unit
other non-chargeable calls can be made. If you try PRICE/UNIT to make or receive a chargeable call under these Charging information is calculated and stored as conditions, the text No money will be displayed. charging units. Units are independent of any cur- rency. -
Page 126: Help Desk
HELP DESK If you need assistance in using your Benefon Esc! phone or maps, you can send a help request, con- taining your current position and preferred lan- guage, to Benefon Esc! Help desk service. After a while, a technical support person will give you a call. -
Page 127: Gps Menu
GPS MENU •To select one of the items, press . This way, you can enter sub-menus, activate commands and turn options on and off. •Press to return to the previous menu QUIT level from a sub-menu. Speed Time GPS menu Waypoints [28] WAYPOINTS... -
Page 128: Creating A New Waypoint
again, or cancel the operation by Editing waypoint title pressing Key in a new title and press •To change the order in which waypoints are listed, select Order and press . Way- CHANGE Changing waypoint symbol points can be ordered by title, proximity, or sym- Select a line with and press the numeric bol. -
Page 129: Setting Position
You can trick the phone into believing that the se- SENDING A WAYPOINT lected waypoint is your current position. This is You can send a waypoint to another Benefon ESC! useful e.g. when you want to use the map while phone. -
Page 130: Requesting A Route
•Scroll through the phone book with over, the service provider may charge you for send- until the correct number is selected. ing the route. •Press This service is only available from certain service providers. 4. Press SEND Please note that waypoint is sent as a short mes- VIEWING THE MAP sage, so the price of a regular short message will be 1. -
Page 131: Editing
3. The selected waypoint, its label and symbol will in new coordinates by pressing the numeric move along with the pointer on the map. Coor- keys. Press when ready. dinates are displayed on the top of the display. 4. When you are finished with editing the way- point, press DONE EDITING... -
Page 132: Routes
ROUTES Initially, there are no waypoints on a new route, but you can add and remove them as you like. A route is a combination of two or more waypoints, combined to define a course of travel. Routes are Adding a waypoint used for navigation purposes as destinations. -
Page 133: Setting Destination
You can set a route to be used as destination. Bene- 2. Select Show on map and press fon ESC! will then give you directions to navigate SELECT the route, from point to point. 3. You will see a map, with the first waypoint of the selected route shown in the middle. -
Page 134: Waypoint List: Viewing And Editing
SENDING A ROUTE want by pressing CANCEL You can send a route with all its waypoints to an- other Benefon ESC! phone. MEASURING LENGTH 1. Select a route from the list. Press 1. Select a route from the list and press... -
Page 135: Renaming
The basic principle of the Friend Find functions is when done. storing the positions of other Benefon ESC! phones in a Benefon Esc!, along with other infor- DUPLICATING mation such as their speed and direction of move- ment. This information can later be updated by 1. -
Page 136: Friend List
Friend list updates whenever desired, but tracking can also be requested by another phone. Friend Find menu item in GPS menu has some The following restrictions apply to sending and re- additional information after it: [FF] is the number ceiving tracking updates: of all friend points stored in the memory. -
Page 137: Tracking Info
TRACKING INFO 3. If there is enough memory, you will be asked for the phone number of the friend. Key it in If you are being tracked by another phone, you can and press . You can also recall a number find out information about this as follows: from the Phone book... -
Page 138: Setting Destination
SETTING DESTINATION culations of the GPS. You can set any friend point to be used as destina- tion. Benefon ESC! will then give you directions to 1. Select a friend point from the list and press navigate to that point. -
Page 139: Sending A Position Update
6. Tracking will start. Your phone will automati- 4. Your position will be updated in the receiving cally send tracking updates at the set interval, Benefon ESC! phone. until you either cancel the sending, or the re- ceiver requests to stop it, or the set number of REQUESTING A POSITION UPDATE updates have been sent. -
Page 140: Cancelling Sending
CANCELLING SENDING CANCELLING A TRACKING REQUEST Once you have started sending tracking updates to You may request a phone to stop sending you a phone, the phone will go on tracking until you tracking updates at any time. stop it manually, or the set number of updates have 1. -
Page 141: Requesting A Route
REQUESTING A ROUTE SHOWING ON MAP You can request a service provider to send you a 1. Select a friend point from the list and press route to the selected point. This is done as follows: SELECT 1. Select a friend point from the list and press 2. -
Page 142: Deleting
MAPS Editing waypoint title Remove characters by pressing CLEAR You can view and manipulate the maps in the Key in a new title and press phone’s memory by accessing them via this menu. Maps menu item in GPS menu has some addi- Changing waypoint symbol tional information after it: [MM]... -
Page 143: Sending Sms With Coordinates
SENDING SMS WITH 3. You will then be able to enter some text. Key it in with the alphanumeric keys and press COORDINATES LECT You can send the coordinates of your present posi- 4. You will be requested to choose the type of ser- tion as a part of a short message. -
Page 144: Requesting Agps
SKIPPING ROUTE POINT the services. The services are only available from certain service providers. Use this option if your current destination is a route and you want to skip a route point. REQUESTING AGPS 1. Press to enter the GPS menu. You can request the service provider to send you 2. -
Page 145: Resetting Meters
RESETTING METERS To reset the speed and odometer information in your phone, do as follows: 1. Press to enter the GPS menu 2. Use to select Reset meters . Press SELECT 3. Select which meters you want to reset. Turn the options on and off by selecting them with and pressing CHANGE... -
Page 146: Battery
BATTERY At temperatures below -25°C the battery will not supply power and the phone cannot be used. Upon warming up, the phone will function properly again. FITTING AND REMOVING Use of the phone is prevented at temperatures Fitting: Place the bottom of the battery into the above +60°C to ensure equipment safety. -
Page 147: Mains Chargers
Also, the battery may not reach full ca- phone, but is also available from the assortment of pacity. Benefon accessories. When charging, the display will repeatedly show Other charger types are introduced in the chapter the "liquid level" rising from top to bottom. -
Page 148: Charging Times
CARE AND MAINTENANCE tomatically. To reset the battery indicator to correspond with the "new" battery, you must Note, that if you use an old battery, the continuous charge the "new" battery until it is full. operating time is less than when using a new bat- tery. -
Page 149: Disposal
(for further information, please see the •Only allow service personnel authorised by chapters GPS menu and Brief overview of navi- Benefon to service your phone. gator use, Map, Pointing mode ). •Use the Screen saver . -
Page 150: Accessories
(230 V) of the charger. This is a short introduction about the accessories available for this phone. You may also check www.benefon.com for a complete list of accesso- CIGARETTE LIGHTER CHARGER ries. CCS-71-12... -
Page 151: Portable Hands Free Ehe70
PORTABLE HANDS FREE EHE70 PLUG-IN HANDS FREE GMA70 +12 V The portable hands free kit is designed to make the With the plug-in hands free car kit, using the use of the phone easier in various working situa- phone is easier and safer while driving. tions. -
Page 152: Benewin Pro With Nmea 0183 Cable
With the plug-in hands free car kit you can also save the phone book, phone settings, short mes- charge the battery of your phone by using your ve- sages, environments, and calendar data. hicle’s cigarette lighter. The BeneWin Pro also includes some additional functions, such as settings for maps, routes, and waypoints as well as settings for telematics. -
Page 153: Light Holder Kgc70
LIGHT HOLDER KGC70 BICYCLE HOLDER The bicycle holder holds your phone steadily in place on your bike’s handlebar so it can be easily viewed while riding. CARRYING CASE The light holder holds your phone steadily in place A carrying case can be used for carrying the phone. when you are driving. -
Page 154: External Gps Antenna
EXTERNAL GPS ANTENNA CROSS-COUNTRY ANTENNA The cross-country (power) antenna can be used to replace the regular GSM antenna. It is useful in ar- eas where the GSM network signal strength is weak. The external (active) GPS antenna can be used when reliable satellite signals for navigation are needed. -
Page 155: Appendixes
APPENDIXES upright position and let it dry. It is recom- mended that a dealer or service personnel check that the phone functions properly. CARE AND MAINTENANCE •Clean the phone with a soft cloth, dampened •Dust and dirt may damage the moving parts of slightly with mild soapy water. -
Page 156: If You Lose Your Sim Card
If your phone does not function blocked. In that case the text Card blocked will be displayed. Contact your network operator to get a Make sure that new SIM card. •your phone is turned on •you are in the network operator's coverage area If you lose your SIM card •the malfunction is not caused by the Call barring... -
Page 157: Searching For Network
In any unclear situation, you are always welcome A phone without a SIM card can be used to make to contact your dealer, an authorized Benefon ser- only emergency calls, although many other fea- vice centre or the network operator. -
Page 158: Pin2 Code
PUK2 code ommended you keep the request on. You can change the PIN code in the menu. The PUK2 code is used to open the disabled PIN2 If the correct PIN code is not entered after three at- code. The 8-digit PUK2 code is supplied with the tempts the SIM card will be disabled. -
Page 159: Network Code
Network code Service provider You need a network code for certain network ser- The service provider is an organization which pro- vices, e.g. call barring. The network code (4 digits) vides telecommunication services to the users. The is supplied by your network operator. service provider can also be a network operator. -
Page 160: Route
Route Destination A route is a combination of two or more waypoints, Benefon Esc! can give you navigational guidance to combined to define a course of travel. Routes are a point or along a route. That point or route is used for navigation purposes as destinations. -
Page 161: Menu Charts
MENU CHARTS QUICK MENU LOCK KEYPAD QUICK MENU FULL POWER LOW POWER TURN THE GPS ECONOMY RECEIVER ON OR OFF AT INTERVALS SELECT AN NORMAL ENVIRONMENT SILENT FOR USE NOISY DISCREET NIGHT CAR KIT UBER-1017 - Page 161 MENU CHARTS:... - Page 162 MAIN MENU MAIN MENU ACCESS TO STAND-BY MODE... PHONE FOUR NAVIGATOR PAGES: DISPLAY MAPS, COMPASS, AND DATA FIELDS RELATED TO NAVIGATION. ONCE ALSO ACCESS TO GPS-MENU, AND MAIN MENU GUIDE MONDAY POSITION TUESDAY MOVEMENT WEDNESDAY THURSDAY TURN ON OR OFF FRIDAY ADJUST WAKE UP TIME ACCESSORIES...
- Page 163 SETTINGS ADD NEW NAME AN ENVIRONMENT MAIN MENU ENVIRONMENTS NORMAL BASED ON:_ SILENT NOISY EDIT AN ENVIRONMENT: DISCREET NIGHT PHONE SELECT TONE CAR KIT INCOMING CALL ALARM ADJUST VOLUME GUIDE CALENDAR SELECT RINGING MODE POSITION USER INTERFACE LANGUAGE MESSAGES MOVEMENT CONTRAST VIBRATION ACCESSORIES...
- Page 164 X PCS FREE PHONE BK ENTRIES GSM MENU PHONE BOOK ENTRY: X PCS RESERVED ENTER NUMBER ADD NEW ENTRY ENTER NAME ENTER NAME.. EDIT PHONE BOOK PHONE BOOK NAME LIST SELECT MEMORY SLOT DELETE REPLY/EDIT DELETE ALL INBOX MESSAGES READ SELECTED FORWARD INBOX INBOX MESSAGE LIST...
- Page 165 TITLE ADD A NEW WAYPOINT GPS MENU SET AS DESTINATION SYMBOL WAYPOINTS SET AS POSITION DELETE ALL WAYPOINTS COORDINATES SMS WITH COORDS ORDER SEND WAYPOINT WAYPOINT LIST REQUEST ROUTE INITIALLY BLANK, ADD FIRST SHOW ON MAP ADD A NEW ROUTE EDIT WAYPOINT ROUTES...
- Page 166 UBER-1017 - Page 166 MENU CHARTS:...
-
Page 167: Cyrillic Character Set
Cyrillic characters can be used with these func- tions, whenever alpha keys are normally available: This guide includes some additional information •Short messages and specifications applying to the Benefon Esc! phone model sold in some market areas of Eastern •Phone book Europe. - Page 168 For further information, please see the chapter Quick start, 3. Highlight the desired character set with Overview, Keypad in the Benefon Esc! Owner‘s Manual. press UBER-1017 - Page 168 CYRILLIC CHARACTER SET...
- Page 169 CYRILLIC CHARACTERS Б б В в Г г Ґ ґ Е е Д д Ё ё Ж ж З з Є є И и Й й К к Л л І і Ї ї М м Н н О о П...
Need help?
Do you have a question about the ESC and is the answer not in the manual?
Questions and answers