
Related Manuals for Contec IPC-PT/MV15 Series


Summary of Contents for Contec IPC-PT/MV15 Series
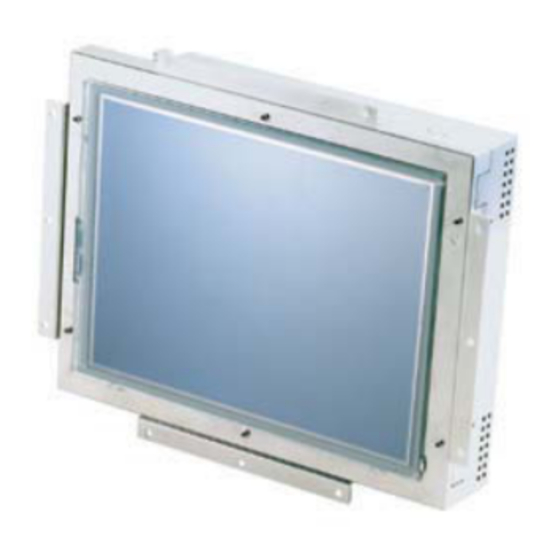
- Page 1 IPC Series Panel PC with Windows CE .NET 4.2 IPC-PT/MV15 Series IPC-PT/LS15 Series Hardware Manual CONTEC CO.,LTD.
-
Page 2: Trademarks
No part of this document may be copied or reproduced in any form by any means without prior written consent of CONTEC CO., LTD. CONTEC CO., LTD. makes no commitment to update or keep current the information contained in this document. -
Page 3: Table Of Contents
Table of Contents Copyright ..............................i Trademarks .............................. I Table of Contents............................ ii INTRODUCTION Features .............................1 Customer Support ............................2 Web Site............................2 Limited One-Year Warranty ........................2 How to Obtain Service ..........................2 Liability..............................2 Safety Precautions ...........................3 Safety Information..........................3 Handling Precautions ........................3 OVERVIEW Specifications............................7 External Dimensions..........................10 EACH COMPONENT FUNCTION Component Locations........................11... - Page 4 Setup of OS operation (SW2) ......................26 DIP switch for applications (SW3)....................26 COM2 RS-422A/485 transfer mode setting DIP-SW (SW4)............26 HARDWARE SETUP Installation Requirements ......................27 Card removal prevention fitting ....................28 AC adapter code removal prevention fitting................. 28 Back light exchange ........................
- Page 5 Hardware Manual...
-
Page 6: Introduction
XIP & memory loading boot function enabling quick startup in shortest about 10 seconds Installed "CONTEC Manager" for system development support (such as scheduling, FTP server, autorun). Expansion unit [IPC-PAC(PCI)-C1] available as an option to add one short-size PCI board... -
Page 7: Customer Support
You can download updated driver software and differential files as well as sample programs available in several languages. Note! For product information Contact your retailer if you have any technical question about a CONTEC product or need its price, delivery time, or estimate information. Limited One-Year Warranty CONTEC Interface boards are warranted by CONTEC CO., LTD. -
Page 8: Safety Precautions
1. Introduction Safety Precautions Understand the following definitions and precautions to use the product safely. Safety Information This document provides safety information using the following symbols to prevent accidents resulting in injury or death and the destruction of equipment and resources. Understand the meanings of these labels to operate the equipment safely. - Page 9 1. Introduction CAUTION Take the following precautions when handling this product. - Do not use or store the product in a location exposed to extremely high or low temperature or susceptible to rapid temperature changes. Example: - Exposure to direct sun - In the vicinity of a heat source - Do not use the product in extremely humid or dusty locations.
- Page 10 - Be sure to turn off the power before plugging or unplugging any expansion board or connector. - CONTEC reserves the right to refuse to service a product modified by the user. - In the event of failure or abnormality (foul smells or excessive heat generation), unplug the power cord immediately and contact the sales representative you purchased the product from or the CONTEC Information Center.
- Page 11 1. Introduction Hardware Manual...
-
Page 12: Overview
2. Overview 2. Overview Specifications Functional Specifications Table 2.1. Functional Specifications Type IPC-PT/MV15DC1-4E IPC-PT/LS15DC1-4E LCD type LCD type 10.4-inch TFT color LCD (640 x 480) 12.1-inch TFT color LCD (800 x 600) Number of colors 65536 Touch panel Resolution 4096 x 4096 (emulated in 640 x 480 mode) 4096 x 4096 (emulated in 800 x 600 mode) Detection method Analog resistive Type SH-4 HD6417751RBP 240MHz... - Page 13 2. Overview Installation Environment Requirements Table 2.2. Installation Environment Requirements Item Specification Ambient specifications Operating temperature 0 - 50ºC Storage temperature -10 - 60ºC Operating humidity 20 - 85%RH(no condensation) Floating dust particles Not to be excessive Corrosive gases None Line-noise Line noise Signal line: 1kV (EN61000-4-4 Level3, IEC1000-4-4 Level 3)
- Page 14 2. Overview Display Optical Specifications Table 2.3. IPC-PT/MV15DC1-4E Parameter Condition Min. Typ. φ = 180° View angle 35deg 45deg (Vertical) φ = 0° 55deg 70deg Display. CR⊇5 Monochrome View angle φ = +90° 60deg 70deg (Horizontal) φ = -90° 60deg 70deg Contrast Display.
-
Page 15: External Dimensions
2. Overview External Dimensions IPC-PT/MV15DC1 series M3 TAP (Maximum tapping length:4mm) φ4.5 M4 TAP (Maximum tapping length:5mm) [mm] Figure 2.3. External Dimensions < IPC-PT/MV15DC1 series > IPC-PT/LS15DC1 series M4 TAP (Maximum tapping length:5mm) φ4.5 241.5 M3 TAP (Maximum tapping length:4mm) [mm] Figure 2.4. -
Page 16: Each Component Function
3. Each Component Function 3. Each Component Function Component Locations PCMCIA Sound RESET POWER LED KeyBoard COM1 Function switch F1, F2, F3 COM2 PCI expansion unit AC adapter jack connector cover +12VDC power connector Refer to the software manual for the function switches and POWER LED. Figure 3.1. - Page 17 3. Each Component Function Table 3.1. Component Identification Component Function F1, F2, F3 Function Switch POWER LED Power supply ON display LED +12 VDC power connector +12 VDC dedicated power connector AC adapter jack +12 VDC AC adapter jack PCI expansion unit connector cover Used to attach the PCI expansion unit and to set SW2, SW3, SW4, and JP5 PCMCIA PCMCIA card slot...
-
Page 18: Serial Port Interface (Com1, Com2)
3. Each Component Function Serial Port Interface (COM1, COM2) The PANECON-PC is equipped with two RS-232C-compliant serial port connectors (Serial Port 1: COM1 and Serial Port : COM2). Table 3.2. COM1 Serial Port Inter Connector Main unit connector D-SUB 9-pin(Male) No.4-40UNC Inch screw Pin No. -
Page 19: Switching Com2 Between Rs-232C And Rs-422A/485
3. Each Component Function Switching COM2 between RS-232C and RS-422A/485 To switch between RS-232C and RS-422A/RS-485, change the settings of both of JP5 and SW4’s bit 5. Setting procedure (JP5) -RS-232C setting (Factory setting) -RS-422A/485 setting Figure 3.2. Setting procedure (JP5) Table 3.4. -
Page 20: Com2 Rs-422A/Rs-485 Data Transmission Mode Setting
3. Each Component Function COM2 RS-422A/RS-485 data transmission mode setting The data transmission mode setting switch (SW4) can be used to switch between half-duplex and full-duplex and between RTS and CTS in full-duplex mode. Set the appropriate data transmission mode depending on the remote device to which to connect this board. Set the transmission mode using from the bit 6 - bit 8. -
Page 21: Terminating Resistor Setting
3. Each Component Function Terminating resistor setting When inserting a terminator, use the terminator setting switch (SW4). Set the terminator depending on the remote device to which to connect the board. The board contains a 100Ω resistor as a terminator. See Figure 3.5 for the presence or absence of a terminator for connection to the party line. - Page 22 3. Each Component Function Illustrated below are the peripheral circuits for the data transmission mode setting and terminator setting switches. ST16C550 equivalent Terminator 1/2W 100Ω TxD+ SOUT TxD- 47kΩ 6.2kΩ RxD+ RxD- 6.2kΩ 47kΩ 47kΩ 6.2kΩ CTS+ CTS- 6.2kΩ 47kΩ RTS+ RTS- Figure 3.6.
-
Page 23: Ethernet (Utp)
3. Each Component Function Ethernet (UTP) Table 3.7. Ethernet connector (RJ-45) Connector RJ-45 LINK Signal name Remarks Pin No. Transmitted data (+) output Transmitted data (-) output Received data (+) input N.C. Not connected N.C. Not connected Received data (-) input N.C. -
Page 24: Keyboard Interface (Kb)
3. Each Component Function Keyboard Interface (KB) Table 3.8. KB connector Connector type MINI-DIN 6-pin Pin No. Signal name Remarks KBD DATA MOUSE DATA Vcc (+5V) With fuse(max. 1.6A) KBD CLK MOUSE CLK Note: A commercially available PS/2 branch cable is required to use a PS/2 mouse. Product example: KB-PSY02K3 (SANWA SUPPLY) Note: Use connector 1 for keyboard and connector 2 for mouse. -
Page 25: Pcmcia (Pcmcia)
3. Each Component Function PCMCIA (PCMCIA) PCMCIA compliant card slots are provided [TYPE II × 2 (TYPE III × 1) size]. Slot 1 Slot 2 Figure 3.7. Slot Numbers and Locations CAUTION A type III card should be inserted into slot 2. Attaching the card removal prevention fitting PCMCIA Card Figure 3.8. -
Page 26: Usb Port
3. Each Component Function USB port The PANECON-PC is equipped with USB interface channels. Table 3.10. USB connector Pin No. Signal name DATA+ DATA- General-purpose I/O ports (I/O) The unit has three channels of general-purpose insulated I/O port. Refer to the software manual for programming this ports. Table 3.11. - Page 27 3. Each Component Function Specifications [Input section] Input specification : Photocoupler-insulated current drive input Input resistance : 3kΩ Number of input signals Input protection circuit : Reverse-connection protection diode provided Input response time : Within 100µsec External circuit power supply : 12 - 24VDC(±10%) [Output section] Output specification...
- Page 28 3. Each Component Function External Connection PI_PCOM 3k Ω 10k Ω 1/2 Ω External power supply (12V - 24VDC) Input PI(0) - PI(2) contact I/O connector Figure 3.9. In circuit (External circuit) load P_PO(0) - P_PO(2) External power supply 330Ω PC357 (Max.
-
Page 29: Power Input Connector
3. Each Component Function Power input connector AC adapter jack +12VDC power connector Figure 3.11. Power input connector 12-VDC dedicated power connector Table 3.12. Dedicated power input connector Pin No. Signal name Connector type : B4PS-VH(JST) Applicable housing : VHR-4N(JST) Applicable contact : SVH-21T-P1.1(JST) +12VDC +12VDC... -
Page 30: External Speaker Output Terminal
3. Each Component Function External Speaker Output Terminal Connector: HSJ1456-010330 (HOSIDEN) Table 3.14. External Speaker Terminal Pin No. Signal name Remarks Analog signal(R) Speaker(Right) Analog signal(L) Speaker(Left) 1pin 2pin R Analog signal 3pin L Analog signal Applicable connector: Small jack of φ3.5 mm Full-scale output level 1.0Vrms(Typ.) Touch Panel The PANECON-PC is equipped with an analog touch panel that enables keyboard-less, mouse-less... -
Page 31: Setup Of Os Operation (Sw2)
3. Each Component Function Setup of OS operation (SW2) This switch sets OS operation. For details, refer to the software manual. Default setting 1 2 3 4 5 6 7 8 Default setting of DIP switch Figure 3.13. Setup of OS operation CAUTION Use this setting for normal operation. -
Page 32: Hardware Setup
4. Hardware Setup 4. Hardware Setup Installation Requirements To maintain the ambient temperature within the installation environment requirement range, provide a gap of 30mm or more between the main unit and any adjacent equipment. Side view Panel 30mm or more(above) Bottom view 30mm or more(Side) Interface surface... -
Page 33: Card Removal Prevention Fitting
4. Hardware Setup Card removal prevention fitting (1) Insert a PC card. (2) Clip the pawl on the bottom of the fitting into the long slot on the PANECON-PC unit. (3) Use a screw to attach the top of the fitting. PCMCIA Card Figure 4.2. -
Page 34: Back Light Exchange
Back light exchange The backlight used in the LCD module has a limited life. When it expires and requires replacement, contact your local CONTEC sales office. Attaching the Fitting Used to Attach to the Main Unit When installing on a STUD installation panel... - Page 35 4. Hardware Setup When using installation panel with screw holes Tree-point screw and washer assembly 6-M3x20 (supplied) Sealing washer 6-M3 (supplied) Installation panel Waterproof packing (supplied) M3 Washer / Spring washer / Nut (supplied) Figure 4.4. Example attachment < 2 / 2 > Hardware Manual...
- Page 36 4. Hardware Setup Panel cut dimensions Figure 282±0.3 130±0.3 6-M3 STUD (Or 6-φ4) 4-R1 or less 216±0.3 [mm] Figure 4.5. Panel cut dimensions figure < IPC-PT/MV15DC1-4E > 308 ± 0.3 130 ± 0.3 8-M3 STUD (Or 6- φ 4) 4-R1 or less 252 ±...
-
Page 37: Removing The Pci Expansion Unit Connector Cover
4. Hardware Setup Removing the PCI expansion unit connector cover The PCI expansion unit connector cover on the back must be removed when you install the PCI expansion unit or set SW2 - SW4 and JP5. (1) Undo the 2 flat-head screws and remove the cover. Figure 4.7. -
Page 38: List Of Options
PCI expansion unit - IPC-PAC(PCI)-C1 : 1 slot expansion unit for PCI half size Manual - IPC-PT/15SH4-HMJ : Hardware manual (Japanese) for IPC-PT/MV15 series, and IPC-PT/LS15 series - IPC-SH4CE4-SMJ : Software manual (Japanese) for IPC-PT/MV10 series, IPC-PT/LS10 series, IPC-PT/MV15 series, and IPC-PT/LS15 series... - Page 39 3-9-31, Himesato, Nishiyodogawa-ku, Osaka 555-0025, Japan Japanese http://www.contec.co.jp/ English http://www.contec.com/ Chinese http://www.contec.com.cn/ No part of this document may be copied or reproduced in any form by any means without prior written consent of CONTEC CO., LTD. [04072005] [08022004] Management No. A-46-908 [04112005_rev2] Parts No. LYDZ011...
Need help?
Do you have a question about the IPC-PT/MV15 Series and is the answer not in the manual?
Questions and answers