
Related Manuals for FitLogic YK-ET1403A


Summary of Contents for FitLogic YK-ET1403A
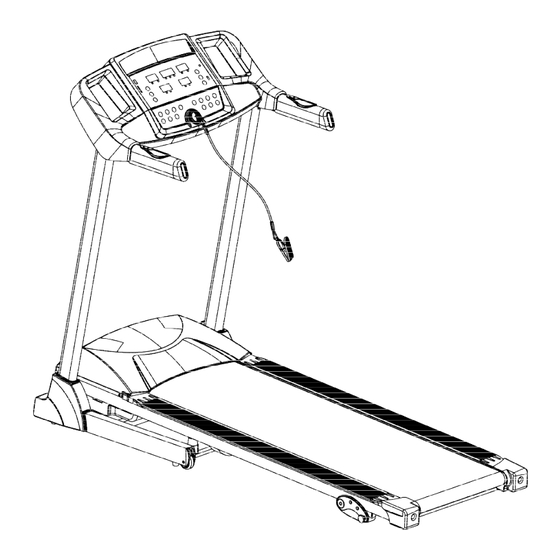
- Page 1 INSTRUCTION MANUAL PLEASE READ THIS MANUAL CAREFULLY BEFORE USING AND SAVE IT FOR FUTURE REFERENCE.
-
Page 2: Table Of Contents
CONTENT Safety Precautions ------------------------------------------------------------------------------------------------------------------------- 2 Assembly Steps -----------------------------------------------------------------------------------------------------------------------------4 Folding Steps -------------------------------------------------------------------------------------------------------------------------------- 7 Technical Data -------------------------------------------------------------------------------------------------------------------------------8 Operation Instruction -----------------------------------------------------------------------------------------------------------------------9 Instructions for Use -----------------------------------------------------------------------------------------------------------------------14 Maintenance --------------------------------------------------------------------------------------------------------------------------------17 Explosive Drawing ------------------------------------------------------------------------------------------------------------------------18 Part List --------------------------------------------------------------------------------------------------------------------------------------19 [键入文档的引述或关注点的摘要。您可将 文本框放置在文档中的任何位置。请使用... -
Page 3: Safety Precautions
Safety Precautions Thank you for purchasing this treadmill, it has been designed and manufactured to give you many years of trouble free service. You may already be familiar with using a similar product but please take the time to read these instructions which have been written to ensure that you get the very best from your purchase. - Page 4 Keep the treadmill away from excessive moisture and dust. Before using the treadmill, check the nuts and bolts are securely tightened. The safety level of the treadmill can be maintained only if it is examined regularly for damage and wear. Replace defective components immediately, do not use the treadmill until they have been replaced.
-
Page 5: Assembly Steps
Assembly Steps The following are the part when you open the package. Package list: Description Specification Description Specification mainframe left column serrated washer right column Inner hex pan head bolt M8×15 display S=13、14、15 cross solid wrench left column cover 5# inner hex wrench right column cover Assembly tools: 5# inner hex wrench 5mm... - Page 6 Step 1: 1. Open the package and put the mainframe on the floor. Step 2: 2. Please fix the left & right column (4) , (5) to the mainframe with part (39) and (55). And then connect trunk cable with the lower-cable please.
- Page 7 Step 4: 4. Fix the left and right column cover (33)\ (34) to the column. ATTENTION:Please confirm complete assembly as the require above and lock all the bolt. Do the following operation after checking everything is OK. Before you use the treadmill, please read the instruction carefully.
-
Page 8: Folding Steps
Folding Steps When folding: Hold the running deck which showed in “A” position and then push it in the arrow direction until you hear a “bang” voice from the bumper B. Unfolding: Hold the A position and kick the bumper B and then pull it down automatically. -
Page 9: Technical Data
Technical Data Assembly size (mm) 1580×707×1240 Power 1.5HP Folding size (mm) 960×707×1410 Max output 2.0HP Running area (mm) 1220×400 Input currency 5.0A N.W. 47.5 KGS Speed range 0.8--12km/h Incline Max loading 100KG LED window speed time distance calorie pulse [键入文档的引述或关注点的摘要。您可将 文本框放置在文档中的任何位置。请使用... -
Page 10: Operation Instruction
Operation Instruction 1. Window Display: “CAL” window: Display the exercising calorie data from 0 to 999. When use the countdown mode the data will count from the target data down to 0.0 until the machine stop slowly, after 5 sec the machine will go to standby mode. - Page 11 can change the data by pressing “-SPEED +”and then press the “START” key. “START” key which is for activating the machine. You can start the machine anytime when the machine is switched on and the safety key is in correct position. “STOP”...
- Page 12 6. Built-in Program: There are total 9 programs built in the machine. Press the PROGRAM key to choose your favorite program form P1-P9. Press “SPEED +”“SPEED-” to change the preset time. Press the START key to start the built-in program. There are 10 stages in each program and each exercising time=preset time/10. There will be a beep sound when entering next stages.
- Page 13 enter into F-1、F-2、F-3、F-4、F-5 (F-1 sex, F-2 age, F-3 height, F-4, weight, F-5 body fat test), press “SPEED+”、“SPEED-” to change the date of F1-4 and after that press MODE to enter into F-5 body fat and meanwhile hold the handle pulse for 2-3 sec, it will display your body fat. Body fat is suitable both for male and female.
- Page 14 B. Check the switch, overload protection and the cable between the driver and the voltage transformer are ok or not and make sure the connection is good. C. Check the connection between the driver and display is ok or not and. D.
-
Page 15: Instructions For Use
Instructions for Use Conditioning Guidelines: The following guidelines will help you to plan your exercise program. Remember that correct nutrition and adequate rest are essential for successful results. If you’re beginning an exercise program, you should check with your doctor if: You have been diagnosed with heart problems, high blood pressure or any other medical condition. - Page 16 • Warm-up for 5 or 10 minutes with gentle movements like walking or swinging your arms in a circle and then stretch the muscles you’ll use during your work-out. The treadmill will mainly exercise the thigh and calf muscles. • Increase the pace and resistance to slightly harder than comfortable and exercise for as long as you can.
- Page 17 Thigh Stretch: Hamstring Stretch: • • Stand on right leg and take Keep front straight, hold of the left ankle with the hands on bent leg (thigh). left hand, drawing the foot up Push down and out until you close behind to the hips. begin to feel the stretch in •...
-
Page 18: Maintenance
Maintenance Warning: Before cleaning the machine please make sure the power has been switched off. Cleaning: Wipe away the dust on the belt, running board and side footboard as excess dust may increase the frictional on the belt and cause damage to the machine. It is recommended to clean the machine once a month. -
Page 19: Explosive Drawing
Explosive View [键入文档的引述或关注点的摘要。您可将 文本框放置在文档中的任何位置。请使用... -
Page 20: Part List
Part List Description Specification Description Specification Bottom mainframe Non metallic hex nut I Mainframe Non metallic hex nut I Display support frame Cross pan head tapping screw ST4.2×20 Left column Class C hex bolt M8×35 Right column Pan head inner hex bolt M8×15 Motor seat frame Pan head inner hex bolt... - Page 21 Standard cable Elliptical cap Running deck Cover for wheel Switch Cap for left side rail Overload protector Cap for left side rail Magnetic ring Taper cushion Magnetic core Filter optional Cross recessed pan head M5×12 Inductance screw [键入文档的引述或关注点的摘要。您可将 文本框放置在文档中的任何位置。请使用...
Need help?
Do you have a question about the YK-ET1403A and is the answer not in the manual?
Questions and answers