
Related Manuals for AnaJet SP-200


Summary of Contents for AnaJet SP-200
-
Page 1: Service Manual
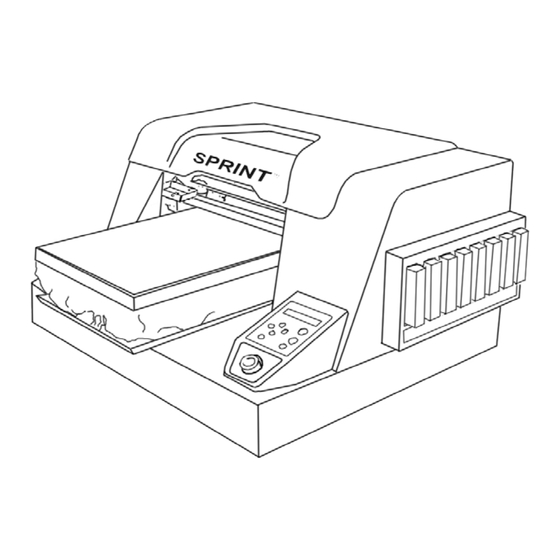
AnaJet SP-200 SPRINT Digital Apparel Printer Service Manual Version 1.02.0 AnaJet Inc. - Page 2 AnaJet SP-200 SPRINT Digital Apparel Printer Formatted: Spanish (Mexico) Service Manual Formatted: Spanish (Mexico) Ver 12.0 AnaJet Inc. Copyright © 2009 AnaJet Inc. All rights reserved. Reproduction in any form is prohibited.
-
Page 3: Revision History
REVISION HISTORY: REVISION DESCRIPTION DATE INITIAL RELEASE 30 OCT 2009 UPDATED WITH REV A & REV B CHANGES 30 MAR 2010... -
Page 4: Table Of Contents
TABLE OF CONTENTS INTRODUCTION ..................... 1 ADJUSTMENTS ....................1 LCD Character Contrast & Backlight Brightness ..........1 Table Position Sensor Tab ..................2 Encoder Sensor Adjustment ................... 5 Obstruction Sensor ....................7 Lubrication ....................... 8 2.5.1 Linear Guide Rails ....................8 2.5.2 Ball Bearing Guide Rails ........ - Page 5 3.2.18 Table Drive Belt Subassembly ................. 39 3.2.19 Motor Belt ......................41 3.2.20 Clutch & Encoder Assembly ................41 3.2.21 Maintenance Station ..................42 APPENDIX I - REPLACEMENT PARTS ............45 APPENDIX II – CIRCUIT DIAGRAMS ............47 Connector Diagram ....................47 Wiring Diagram .....................
-
Page 6: Introduction
1 Introduction This manual is to be used in conjunction with AnaJet SP-200 Sprint Printer User Manual. All operational instructions, normal printer maintenance and troubleshooting guides can be found in the User Manual. This Service Manual is intended to aid AnaJet distributor’s technical and service personnel in providing maintenance and basic repair service to their customers. -
Page 7: Table Position Sensor Tab
To adjust the backlight brightness, use a nonconductive flat bladed screwdriver inserted thru the Rear Access Hole in the electronics enclosure cover and into the trimpot located on the controller PCBA. Clockwise rotation will increase the brightness. 2.2 Table Position Sensor Tab If the printing start position varies or there is mis-registration when printing on black fabric the Table Position Sensor Tab may be out of adjustment. - Page 8 Photos 2.2-1 & 2 4.2.Turn on the printer main power switch on the rear of the unit. 5.3.Press the TABLE key on the Control Panel. This drives the Table assembly that is supported by the Slider to the rear stop position.
- Page 9 6.4.Observe the location of the Slider relative to the Rear Bumper. The Slider should just touch the Bumper. If there is a gap or the slider is pressed hard against the Rear Bumper, loosen the two 6-32 screws holding the Sensor Tab and adjust it until the Slider just touches the Rear Bumper.
-
Page 10: Encoder Sensor Adjustment
2.3 Encoder Sensor Adjustment If printing becomes erratic or an error condition occurs check the Encoder Sensor adjustment by doing the following: The Encoder Sensor is very static sensitive, use CAUTION antistatic protective equipment. 1. Remove the Rear Enclosure cover by removing the seven 6-32 screws on the flanges and four 6-32 screws on the bottom panel, see 2.2. - Page 11 Encoder Sensor PCBA 5 Circuit Encoder FFC Adapter Assy Oscilloscope Probe Photo 2.3-1 Figure 2.3-1 7. Change the horizontal time to 100us. The ideal waveforms are shown in figure 2.3- 2. The pattern should be evenly split between high and low states. The two channels should be shifted ¼...
-
Page 12: Obstruction Sensor
Figure 2.3-2 8. If the patterns are not as shown above, loosen the two 6-32 screws holding the Sensor Mount and adjust the Sensor until the ideal waveforms are attained. Observe the Encoder Disk through the hole in the Chassis Rear Bracket to insure that the Encoder Disk does not rub against the three Sensor Mount Guide Pins. -
Page 13: Lubrication
7. Move the gage block to the right side of the table. 8. Check the laser angular alignment with the alignment line. 9. Recheck the alignment at the left side. 10. Move the gage block out of the laser beam. 11. - Page 14 Formatted: Not Highlight Comment [MSOffice3]: Picture does not show folded cover guide rails Photo 2.5.1-1...
-
Page 15: Carriage Shaft
2.5.2 Carriage Shaft 1. Normally the Carriage Shaft does not need lubrication. However if the unit has been operation in a severe environment the Carriage Shaft may need lubrication. 2. To lubricate, move the Carriage to the center of the Carriage Shaft, see User Manual for procedure to release the Carriage. -
Page 16: Parts Replacement
3 Parts Replacement Always disconnect the power cable before starting any parts replacement. Use antistatic protective equipment such as wrist straps WARNING when handling electronic assemblies. Read the MSDS sheet before handling inks and cleaning solution. Avoid skin contact with cleaning solution and inks. Wear protective goggles to protect eyes from ink and cleaning solution. -
Page 17: Damper Disassembly
Printhead. If there are persistent problems with ink flow the Dampers and Tubes should be inspected and replaced as required. There are eight Dampers and Tubes in the printer, one for each ink channel. See Photo 3.2.1-1 FILTER Photo 3.2.1-1 3.2.1.1 Damper Disassembly 1. - Page 18 Formatted: Not Highlight Photo 3.2.1.1-1.5 4. Remove the Damper Retainer. 5. Lift the Dampers to be replaced one at a time straight up out of the Print Head Carriage using a flat blade screwdriver under the tab above the Print Head Nozzle on the left side of the Damper.
- Page 19 Formatted: Not Highlight Formatted: Not Highlight Formatted: Not Highlight Photo 3.2.1.1-2 6. Do not press on the diaphragm on the right side of the Damper. Inspect the Damper for dried ink on the o-ring at the bottom that provides a seal on the Print Head Nozzle.
- Page 20 Photo 3.2.1.1-3 7. Also inspect the Damper for evidence of caked pigment in the area behind the Damper Diaphragm. 8. Further inspect the filter for clogging. See Photo 3.2.1.1-4 Damper Diaphragm Photo 3.2.1.1-4 9. Replace the Damper if any of these condition exists.
-
Page 21: Damper Replacement
3.2.1.2 Damper Replacement The O-rings should never be fitted on the ink supply tubes with bare hands. Doing so may CAUTION cause the O-rings to deteriorate, which will result in ink leaking and air bubbles getting mixed into the ink. Wear latex or nitrile gloves while handling the O-rings. - Page 22 Photo 3.2.1.3-1.5 Photo 3.2.1.3-1.5b...
- Page 23 Remove the eight hex fittings from the backside of the Cartridge Bays. See photo 3.2.1.3-2. Formatted: Numbered + Level: 1 + Numbering Style: 1, 2, 3, … + Start at: 1 + Alignment: Left + Aligned at: 0.25" + Tab after: 0.5"...
-
Page 24: Ink Tube Replacement
Photo 3.2.1.3-46 3.2.1.5 Ink Tube Replacement Replacement Ink Tubes may be supplied with or without Dampers attached. If Dampers are not attached, follow the steps in 3.2.1.2 and then do the following: 1. Install an O-ring by moistening it with cleaning solution and press the end of the tube through the O-ring. -
Page 25: Wiper Blade
3. Reassemble the new Ink Chip Holder ink chipICH module by reversing the above steps. Insure that the Ink Chip Holder is seated in front of the ridge at the bottom of the Carriage and against the contacts at the front of the Carriage. 3.2.3 Wiper Blade Formatted: Not Highlight If the Wiper Blade appears damaged replacement may be required. -
Page 26: Print Head
4. Repeat for the other central notch, releasing the other retaining tab. The Wiper Blade should now be free to lift out of the housing. The Wiper Blade housing is very fragile; do not pull on the Wiper Blade with excessive force. 5. - Page 27 Formatted: Not Highlight Remove the Ink Chip Holder, see 3.2.2. See Photo 3.2.4.1-1. Photo 3.2.4.1-1 3.2.Release the Carriage and move it away from the right side of the chassis, see User Manual. 4.3.Remove the Flat Flex Cable (FFC) Guide from the Carriage by releasing the three tabs on the right side.
- Page 28 FFC Guide Photo 3.2.4.1-2 Formatted: Not Highlight 5.4.Remove the three M2.6 X 8 screws securing the Print Head. Lift the Print Head straight up to remove. See Photo 3.2.4.1-3.
-
Page 29: Reassembly
Comment [MSOffice7]: Need new photo of Sprint carriage Formatted: Not Highlight Formatted: Not Highlight 1 - M2.6 X 8 2 - M2.6 X 8 3 - M2.6 X 8 Photo 3.2.4.1-3 6.5.Disconnect the two FFC from the removed Printhead. 3.2.4.2 Reassembly 1. - Page 30 Foam Pad Photo 3.2.4.2-1 2. Check that the Foam Dam is properly positioned on the right guide pin. See Photo 3.2.4.2-1. Comment [MSOffice8]: Need Sprint photo Foam Dam Photo 3.2.4.2-1 3. Reassemble the Print Head by reversing the removal steps. While tightening the screws press the Print Head toward the rear of the unit.
-
Page 31: Control Panel
3.2.5 Control Panel The LCD is very static sensitive, use antistatic CAUTION protective equipment. Formatted: Not Highlight Comment [P9]: Need name/type of new screws 1. Remove the four two Phillips (+) s6-32 button head cap screws that hold the Control Panel to the printer body Panel using a 5/64 hex Allen wrench. -
Page 32: Lcd
3. Remove the 2 pin connector from the LCD backlight cable. Remove the flat flex cable from the Control panel cable. Formatted: Not Highlight Disconnect the 2-2pin ground cables from the Control Panel 6. Unscrew the green and white leads from the Print Button Assembly 4.7.Unscrew the two green ground leads from the front body panel screw. -
Page 33: Ink Led Panel
Formatted: Not Highlight Formatted: Not Highlight Formatted: Not Highlight Photo 3.2.7-1 4. Slide the Ink Bay Bezel back about ¼ inch until the top retaining tabs are free. 5. Pull the Ink Bay Bezel to the right and off of the Chassis. Use caution to avoid damaging the Ink LED Panel flex cable. -
Page 34: Ink Pcba
3.2.9 Ink PCBA The Ink PCBA is static sensitive, use antistatic CAUTION protective equipment. Formatted: Not Highlight 1. Remove Front Body Panel by removing the two front retaining screws and two rear screws securing the front body panel. See Photo 3.2.10-1 and 3.2.10-2 One front Formatted: Not Highlight retaining screw is to the left, behind the Front Body Panel. - Page 35 Formatted: Not Highlight Formatted: Not Highlight Photo 3.2.10-2 2.4.Remove the Bezel, see 8.2.5. 3.5.Remove the ink tubes from the 4 upper Ink Tube Clamps if so equipped or rRemove the fixed end of the Tube Carrier from the Tube Carrier Bracket. 4.6.Remove the Dampers from the Carriage, see 3.2.1.
-
Page 36: Control Pcba
Formatted: Not Highlight Formatted: Not Highlight Formatted: Not Highlight Photo 3.2.10-24 8.10. Slide the Ink Delivery System forward and out of the Main Chassis. 9.11. Reassemble the Ink Delivery System by reversing the removal steps. 3.2.11 Control PCBA The Control PCBA is static sensitive, use CAUTION antistatic protective equipment. - Page 37 Photo 3.2.11-1 Remove the four M3 screws from the back of the Electronics Box. See Photo 3.2.11-2. Formatted: Indent: Left: 0.65", Numbered + Level: 1 + Numbering Style: 1, 2, 3, … + Start at: 1 + Alignment: Left + Aligned at: 0.25" + Tab after: 0.5"...
- Page 38 Photo 3.2.11-2 4.5.Remove the M3 screw from the right Electronics Box Bracket. Formatted: Not Highlight 5.6.Remove the M3 screw from the left side of the Electronics Box. See Photo 3.2.11- Formatted: Not Highlight Formatted: Not Highlight Photo 3.2.11-3 6.7.Remove the two No. 6 sheet metal screws from the top and left front of the Electronic Box Cover.
-
Page 39: Print Engine Pcba
9.10. Remove the Control PCBA from the 4 adhesive based mounts. 10.11. Reassemble the new Control PCBA by reversing the above steps. See Appendix, Wiring Diagram, for connector designations. Formatted: Not Highlight 3.2.12 Print Engine PCBA The Print Engine is static sensitive, use CAUTION antistatic protective equipment. -
Page 40: Main Power Supply
Formatted: Not Highlight Formatted: Centered Formatted: Not Highlight Formatted: Not Highlight Photo 3.2.12-1 3. Remove the 4 M3 screws from the Print Engine PCBA. 4. Reassemble the new Print Engine PCBA by reversing the above steps. See Appendix, Wiring Diagram, for connector designations. 3.2.13 Main Power Supply 1. -
Page 41: Encoder Sensor Pcba
5. Unsolder the black and white AC power wires, note the polarity for reassembly. 6. Reassemble the new Main Power Supply PCBA by reversing the above steps. Formatted: Not Highlight 3.2.14 Encoder Sensor PCBA Formatted: Not Highlight The Encoder Sensor is very static sensitive, use CAUTION Formatted: Not Highlight antistatic protective equipment. -
Page 42: Power Panel
Encoder Cover E-Ring & Washer Sensor Mount Screw Photo 3.2.14-1 10. Carefully lower the Sensor Mount away from the Encoder Disk and unplug the 5 circuit Sensor FFC. 11. Remove the two No. 2 screws that hold the Encoder Sensor PCBA. 12. -
Page 43: Fuse Replacement & Voltage Reconfiguration
Photo 3.2.15-1 2. Slide the Power Panel out of the Main Enclosure. 3. 110 volt models (Model FP-125ASP-200-A): Disconnect the black, white and green AC power wires from the inlet module. Note the connector positions of the wires. 4. 220/240 volt models (Model 125SP-200-B): Disconnect the black and white AC power wires from the transformer. -
Page 44: Vdc Power Supply
Formatted: Centered, Indent: Left: 0.5", No bullets or numbering Photo 3.2.16-1 4. Check the 2 fuses in the module either visually or with an ohmmeter. Replace as required. 5. On 220/240 volt units the red voltage module may be inserted to configure the unit for operation at either 115 volts or 220/240 volts. - Page 45 5. Remove the two screws at the front edge of the slider that attach the belt tooth clamp and spacer. 6. Remove the 2 screws at the center of the slider that retain the rear adjuster. 7. Remove the belt and rear adjuster from the printer. 8.
-
Page 46: Motor Belt
3.2.19 Motor Belt 1. Remove the Rear Enclosure cover by removing the 7 6-32 screws on the flanges and four 6-32 screws on the bottom panel. Slide the Rear Enclosure off. 2. Remove the Table Drive Belt from the rear pulley, see 3.2.18. 3. -
Page 47: Maintenance Station
Formatted: Centered 3.2.20-1 5. Unsolder the Clutch and solder the new Clutch to the 2 wires. Polarity of the wires is not important. Apply shrink tubing or electrical tape over the splices. 6. Reinstall the Clutch and Encoder parts by reversing the above steps. Apply a small amount of synthetic grease to the shaft right end under the clutch pulley. - Page 48 4.5.Remove the M3 screws from the front mounting boss and from the small side bracket, see photo 3.2.21-1. Photo 3.2.21-1 5.6.Remove the M3 screws retaining the orange ground wire and from the rear mounting boss, see photo 3.2.21-2. Unplug the four pin connector from the motor cable.
- Page 49 Photo 3.2.21-3 7.8.Rotate the Maintenance Station front end down and then slide it out the front of the unit. 8.9.Install the new Maintenance Station by reversing the above steps.
-
Page 50: Appendix I - Replacement Parts
4 Appendix I - Replacement Parts The following are recommended replacement parts: Damper 100540 Tube Nut 100395 O-ring 100541 Wiper Blade 100562-S Comment [D13]: I don’t know how to handle the Tube Set (set of 8 tubes) 100586 tube sets, there are 11 variations of tubes & dampers. Tube &... - Page 51 Ink ChipICH HolderModule 100561101097 Maintenance Station 100600101184 Ink Bay Assembly with Dampers 100569...
-
Page 52: Appendix Ii - Circuit Diagrams
Formatted: Not Highlight 5 Appendix II – Circuit Diagrams Comment [P14]: Verify that all the diagrams 5.1 Connector Diagram still apply to the sprint. Formatted: Not Highlight... -
Page 55: Wiring Diagram
Formatted: Not Highlight 5.2 Wiring Diagram Formatted: Not Highlight Formatted: Not Highlight... -
Page 56: Power Panel Wiring Diagram
Formatted: Not Highlight 5.3 Power Panel Wiring Diagram 5.3.1 115 VAC... -
Page 57: 220/240 Vac
Formatted: Not Highlight 5.3.2 220/240 VAC... -
Page 58: Schematics
Formatted: Not Highlight 5.4 Schematics 5.4.1 Control PCBA... -
Page 63: Ink Pcba
Formatted: Not Highlight 5.4.2 Ink PCBA... - Page 65 MAGENTA 4.7K XTAL1 +3.3V XTAL2 CYAN PB5(MOSI) A26596-ND PA7(ADC7) RESET% PA6(ADC6) RESET% PA5(ADC5) PB7(SCK) PA4(ADC4) PB6(MISO) 9 10 PA3(ADC3) BLACK PA2(ADC2) PA1(ADC1) PA0(ADC0) Title ANAJET INC. Size Number Revision LED BOARD ATMEGA16L Date: 8-Nov-2006 Sheet of File: C:\Chase\LED_BOARD\LED_Board.ddb Drawn By:...
Need help?
Do you have a question about the SP-200 and is the answer not in the manual?
Questions and answers