Table of Contents
Advertisement
Advertisement
Table of Contents

Summary of Contents for WERTHEIM SE 9500
-
Page 1: User Manual
User Manual Extractor... -
Page 2: Specifications
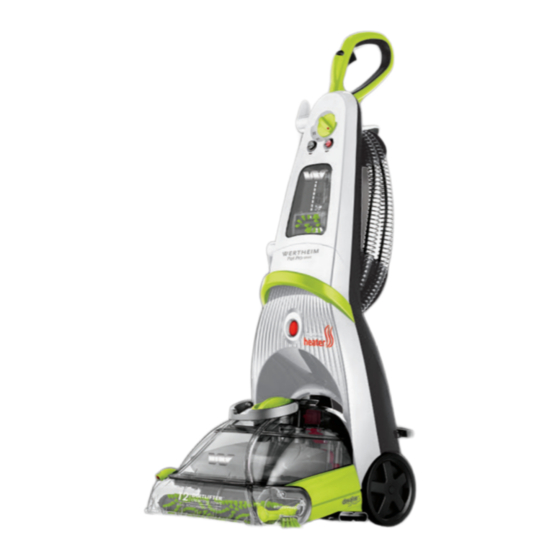
Formula Tank Easy to Carry Handle IntroductIon Heat Indicator Light Lower Base Congratulations on your purchase of your new Wertheim extractor. Please carefully read this instruction manual, and keep it available for ReadyTools Dial ™ future use, so that you may take best advantage of the many useful Tank Carry Handle features of the Wertheim extractor. - Page 3 BEForE You BEGIn SAFEtY InStructIonS Please read these instructions thoroughly read all instructions before using this extractor. This will ensure you obtain full benefit from your new extractor. WARNING! To reduce the risk of fire, electric shock, Keep this instruction manual in a handy place for future reference. or injury when using an electrical appliance, basic precautions should always be followed, including This product must be operated in accordance with these instructions.
- Page 4 SAFEtY InStructIonS (cont’d) 11. If the supply cable is damaged, it must be replaced by the 26. do not use to pick up flammable or combustible liquids, such as manufacturer, its service agent or similarly qualified persons in order petrol, or use in areas where they may be present. to avoid a hazard.
- Page 5 The CleanShot feature gives you the ability to tackle tough stains with the Your Wertheim SE9500 deep cleaner is a home cleaning system that uses the push of a button. Cleaning formula is sprayed in a concentrated stream, power of heat, brushes, and cleaning formula to get the deep down dirt for penetrating the stain and allowing for better cleaning focus.
- Page 6 Flow Gauge Flow Gauge InStructIonS For uSE CleanShot™ CleanShot™ (cont’d) Before You Begin cleaning (cont’d) Before You Begin cleaning Dry Aire™ Dry Aire™ IMPORTANT: Do not use the carpet shampooer as a dry vacuum. 2-In-1 WAtEr tAnK Our 2-in-1 water tank full capacity system is designed note: Vacuum carpet thoroughly.
-
Page 7: Carpet Cleaning
Tough Stain Brush TurboBrush InStructIonS For uSE (cont’d) Before You Begin cleaning (cont’d) cArPEt clEAnInG Crevice Tool Spraying Assembling Your cleaner IMPORTANT: Do not use the carpet shampooer as a dry vacuum. Holder Crevice Tool WArnInG: do not PluG thE StEAm clEAnEr Into An Tough ElEctrIcAl outlEt durInG ASSEmBlY. - Page 8 InStructIonS For uSE (cont’d) Before You Begin cleaning (cont’d) cArPEt clEAnInG (con’d) Leaving the filled bottom of the tank on a flat surface, only manoeuvre the FLOOR top of the tank. FLOOR CLEANING FLOOR Power CLEANING Power Switch CLEANING To attach the top part of the tank to the bottom, carefully hook the lip on Switch Heater Switch Power...
- Page 9 InStructIonS For uSE (cont’d) Before You Begin cleaning (cont’d) 18. Fill the heavy duty bladder with hand warm tap water. Remember to secure cArPEt clEAnInG (con’d) the tank latch in the back and test to make sure it is secure before picking 13.
- Page 10 InStructIonS For uSE (cont’d) Important! If using to clean upholstery, check upholstery tags. 11. Coil flex hose around the tool caddy. A. Check manufacturer’s tag before cleaning. “W” or “WS” on the tag 12. Empty 2-in-1 water tank and rinse out, following the instructions on means you can use your SE9500.
- Page 11 mAIntEnAncE WArnInG: AlWAYS unPluG PoWEr cord From ElEctrIcAl machine care (cont’d) outlEt BEForE PErFormInG AnY SErVIcE on ExtrActor. Before you place the cleaned 2-in-1 water tank back onto the machine, simply unscrew the floor nozzle using a Phillips head machine Storage screwdriver.
- Page 12 mAIntEnAncE (cont’d) Small Belt removal & replacement Small Belt removal & replacement (cont’d) Occasional replacement of one or both belts may become necessary. Remove the clear end cap by unscrewing the two black screws. If that is needed, please follow the instructions below. Take care not to drop the screws into the unit.
- Page 13 mAIntEnAncE AccESSorIES (cont’d) Brush removal & large Belt replacement (cont’d) Stain trapper tool Spraying crevice tool Place small belt over back roller and metal cog. Place pivot arm in place and screw in place using the silver screw. Re-attach clear end cap by tightening with the black screws. Return front nozzle to front of unit, by latching from underneath and then securing with a screw.
-
Page 14: Troubleshooting
trouBlEShootInG trouBlEShootInG (cont’d) Service problems that appear to be major can often be solved easily. You Problem cause remedy can be your own troubleshooter by reviewing this guide. All other servicing 1. ReadyTools™ dial may be at 1. Set ReadyTools™ dial to either should be done by an authorised service agent or qualified technician. - Page 15 AUS: 1800 815 270, NZ: (09) 263 7573, Monday – Friday, quality and the failure does not amount to a major failure.” 9am-5pm EST. Email: enquiries@wertheim.net.au SAVE tImE, rEGIStEr WArrAntY onlInE! www.wertheim.net.au and www.wertheim.co.nz 1606319...
Need help?
Do you have a question about the SE 9500 and is the answer not in the manual?
Questions and answers