Table of Contents
Advertisement
Quick Links
Advertisement
Table of Contents

Related Manuals for Epson SureColor P5000


Summary of Contents for Epson SureColor P5000
- Page 1 ® ® Epson SureColor P5000 User's Guide...
-
Page 3: Table Of Contents
Contents Epson SureColor P5000 User's Guide ....................... 9 Introduction to Your Printer........................10 Printer Features ..........................10 Optional Equipment and Replacement Parts................. 10 Notations Used in the Documentation ....................11 Printer Part Locations......................... 11 Product Parts - Front ........................12 Product Parts - Top/Inside ...................... - Page 4 Borderless Paper Type Compatibility ....................54 Printing from a Computer ......................... 56 Printing with Windows ........................56 Selecting Basic Print Settings - Windows ..................56 Paper Configuration Options - Windows ................... 60 Advanced B&W Photo Options - Windows................61 Print Quality Options - Windows ....................62 Color Management Options - Windows ..................
- Page 5 Checking Ink and Maintenance Tank Status with Windows ............. 121 Checking Ink and Maintenance Tank Status on a Mac..............122 Purchase Epson Ink Cartridges and Maintenance Tanks..............123 Ink Cartridge and Maintenance Tank Part Numbers..............124 Removing and Installing Ink Cartridges.................... 125 Replacing Maintenance Tanks ......................
- Page 6 Checking the Nozzles Using the Product Control Panel ............139 Checking the Nozzles Using a Computer Utility ..............140 Print Head Cleaning ........................142 Cleaning the Print Head Using the Product Control Panel ............142 Cleaning the Print Head Using a Computer Utility..............144 Using the Powerful Cleaning Utility....................
- Page 7 Prints are Scuffed or Smeared ....................181 Margins Appear in Borderless Roll Prints ..................182 Too Much Ink is Consumed ......................183 Where to Get Help..........................183 Technical Specifications ........................185 Windows System Requirements ...................... 185 Mac System Requirements ......................186 Paper Specifications ........................
-
Page 9: Epson Surecolor P5000 User's Guide
Epson SureColor P5000 User's Guide Welcome to the Epson SureColor P5000 User's Guide. For a printable PDF copy of this guide, click here. -
Page 10: Introduction To Your Printer
Optional Equipment and Replacement Parts Parent topic: Introduction to Your Printer Optional Equipment and Replacement Parts You can purchase genuine Epson ink, paper, and accessories from an Epson authorized reseller. To find the nearest reseller, visit proimaging.epson.com (U.S.) or proimaging.epson.ca... -
Page 11: Notations Used In The Documentation
Where to Buy button. Or call 800-GO-EPSON (800-463- 7766) in the U.S. or 800-807-7766 in Canada. Option or part Part number Replacement ink maintenance tank (maintenance box 1) T6190 Replacement borderless maintenance tank (maintenance box 2) T6191 Additional 2"/3"... -
Page 12: Product Parts - Front
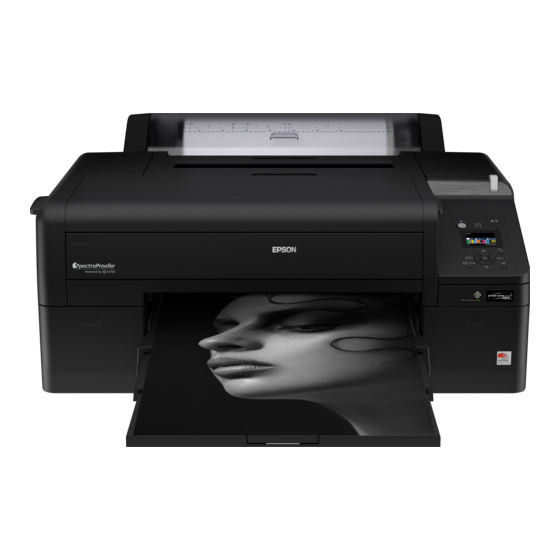
Parent topic: Introduction to Your Printer Product Parts - Front Front cover Ink cartridge cover (left) Paper cassette Output tray Borderless maintenance tank (maintenance box 2) Paper eject support Front manual feeder Ink cartridge cover (right) Control panel Alert light Parent topic: Printer Part Locations... -
Page 13: Product Parts - Top/Inside
Product Parts - Top/Inside Roll paper spindle holders Roll paper cover Roll paper feeder Edge guide Paper support... -
Page 14: Product Parts - Rear/Spindle
Rear manual feeder Printer cover Print head Ink cartridges Ink maintenance tank (maintenance box 1) Parent topic: Printer Part Locations Product Parts - Rear/Spindle Rear access unit Roll paper holder unit connector USB port Airflow vents... -
Page 15: Control Panel Parts
Ethernet/LAN port Status lights AC inlet Removable paper stop (black) Removable paper stop (gray) Spindle 3-inch core adapters Borderless printing spacer Parent topic: Printer Part Locations Control Panel Parts... - Page 16 power light power button LCD screen paper feed and up arrow button Black ink/maintenance button paper source and left arrow button paper feed and down arrow button Menu and right arrow button paper cut button load paper button OK button pause/cancel button pause/cancel light Check ink light...
- Page 17 Status messages Paper source The icon indicates the current paper source settings. The number appears when a Custom Paper setting is selected. : Roll paper with Auto Cut enabled : Roll paper with Auto Cut disabled : Cut sheet paper Ink cartridge status : Amount of ink remaining in the cartridge : Ink level is low...
- Page 18 Platen gap setting : Narrow : Standard : Wide : Wider : Widest Parent topic: Printer Part Locations...
-
Page 19: Media Handling
See these sections to load and handle media on your product. Roll Paper Handling Cut Sheet Handling Creating Custom Paper Configurations Available Epson Papers Borderless Paper Type Compatibility Roll Paper Handling See these sections to load, cut, and remove roll paper in your product. -
Page 20: Installing The Roll Media Adapter - 3-Inch Core
2. Push out the two hooks on the black paper stop and remove the gray adapter from the paper stop. 3. To remove the gray adapter from the other paper stop, slide it off the spindle. Parent topic: Roll Paper Handling Installing the Roll Media Adapter - 3-inch Core For roll paper with a 3-inch core, you need to install the roll media adapter onto the paper stop to match the core size of your roll paper. -
Page 21: Loading Roll Paper On The Spindle
2. Align the triangles on the gray adapter with the triangles on the paper stop and press until the hooks click into place. 3. Insert the other gray adapter onto the spindle and attach it to the other paper stop. Parent topic: Roll Paper Handling Loading Roll Paper on the Spindle... - Page 22 2. Remove the black paper stop from the spindle. 3. Insert the spindle into the roll paper core so that the end of the roll paper is facing towards you. 4. Press the roll paper against the fixed paper stop until that there is no gap between the paper stop and the roll paper.
-
Page 23: Installing The Borderless Spacer
5. Insert the black paper stop onto the spindle and press in until there is no gap between the paper stop and the roll paper. Parent topic: Roll Paper Handling Installing the Borderless Spacer When you perform borderless printing on roll paper, you may need to install the borderless spacer. Note: Only 2-inch core media is supported when using the borderless spacer. -
Page 24: Loading Roll Paper
2. Slide the spacer all the way onto the spindle until it reaches the gray paper stop on the other end. Make sure the holes in the spacer and paper stop line up exactly. Parent topic: Roll Paper Handling Related references Borderless Paper Type Compatibility Loading Roll Paper You can load roll paper with a 2- or 3-inch core and a width of up to 17 inches (43 cm). - Page 25 5. Place the roll paper in the printer as shown (the black end of the spindle goes on the left). 6. Press the load paper button on the control panel. 7. Insert the leading edge of the roll paper into the rear manual paper feeder until a message on the LCD screen tells you to press the load paper button.
- Page 26 9. Close the roll paper cover. Note: To prevent dust from accumulating inside the printer, always keep the roll paper cover closed unless you are loading or unloading media. 10. On the screen that appears, select one of the following settings: •...
- Page 27 Spectroproofer, raise the paper eject support. This prevents paper from curling up in the output tray, which can cause paper jams and print head strikes. Parent topic: Roll Paper Handling Related references Available Epson Papers Roll Paper Options - Windows...
-
Page 28: Cutting Roll Paper
Paper Specifications Related tasks Removing Roll Paper Selecting Roll Paper Settings - Mac Cutting Roll Paper The printer has a built-in cutter that can automatically cut most paper types, or you can cut your prints manually. To switch between cutting methods, press the paper source button on the control panel or adjust the auto cut settings in the printer driver. -
Page 29: Cutting Roll Paper Manually
Cutting Roll Paper Manually You can keep your prints on the roll until you manually cut them. Note: The built-in cutter may not be able to cut some types of media. In addition, heavy or thick media types may damage or dull the cutter, requiring more frequent replacement. 1. -
Page 30: Removing Roll Paper
Removing Roll Paper When you finish printing on roll paper, you should remove it from the printer to avoid indenting or creasing the paper. 1. Open the roll paper cover. 2. Press the load paper button to release the paper. The paper rewinds automatically. Note: Make sure the roll paper is rewound completely before removing it from the printer. -
Page 31: Cut Sheet Handling
4. Remove the black paper stop from the spindle as shown. 5. Remove the roll paper from the spindle. 6. Place the roll paper in its original package. Note: Store roll paper on its end or horizontally (if the packaging end-caps are installed). Never store roll paper on its edge, as a flat spot can develop and lead to imaging artifacts on the prints. -
Page 32: Loading Cut Sheets In The Paper Cassette
Loading Cut Sheets in the Paper Cassette Loading Cut Sheets in the Rear Manual Feeder Loading Cut Sheets in the Front Manual Feeder Adjusting the Platen Gap Parent topic: Media Handling Loading Cut Sheets in the Paper Cassette You can print on a variety of paper types and sizes up to 17 inches (43 cm) wide and 0.1 inch (0.27 mm) thick from the paper cassette. - Page 33 5. Slide out the paper cassette, then pull it all the way out. Note: If you are loading paper that is 13 × 19 inches (330 × 483 mm) or larger, pull the lever in the paper cassette to extend it as far as possible and expand the slider all the way to the edge of the paper cassette.
- Page 34 6. Slide the edge guides outward. 7. Fan through a stack of paper, then gently tap it on a flat surface to even the edges. 8. Load the paper with the printable side facedown and short edge first. Place the paper all the way back in the paper cassette and next to the right edge.
- Page 35 9. Slide the edge guides against the paper, but not too tightly.
- Page 36 10. Insert the paper cassette and push it firmly into the printer. Note: If you loaded paper that is 13 × 19 inches (330 × 483 mm) or larger, install the paper cassette cover, aligning the arrows as shown. This cover is important to limit dust from accumulating on cut sheets in the paper cassette and will help reduce print head maintenance and cleanings.
- Page 37 11. Replace the output tray.
- Page 38 12. Adjust the output tray to fit your paper size. A4 paper: Slide out the third extension, raise the paper stopper, and push the extension back in. A3 paper: Pull out the third extension and raise the paper stopper. Super A3 or larger paper: Pull out the second and third extensions and raise the paper stopper.
-
Page 39: Loading Cut Sheets In The Rear Manual Feeder
Parent topic: Cut Sheet Handling Related references Available Epson Papers Paper Specifications Loading Cut Sheets in the Rear Manual Feeder Use the rear manual feeder to load one cut sheet at a time up to 0.3 inch (0.79 mm) thick. - Page 40 4. Open and extend the paper support. 5. Adjust the edge guide to fit the paper width.
- Page 41 7. Extend the output tray as necessary to support the sheet as it comes out of the printer. 8. Press the paper feed button on the control panel to feed the paper through the printer. Parent topic: Cut Sheet Handling Related references Available Epson Papers Paper Specifications...
-
Page 42: Loading Cut Sheets In The Front Manual Feeder
Loading Cut Sheets in the Front Manual Feeder Use the front manual feeder to load one cut sheet at a time up to 0.06 inch (1.5 mm) thick. 1. Make sure the printer is turned on. 2. On the control panel, press the paper source button. - Page 43 7. Align the edge of the paper with the guide line on the output tray. 8. Press the load paper button to feed the paper through the printer. 9. Extend the output tray to support the paper as it comes out of the printer. Do not raise the paper stopper or paper may be ejected incorrectly.
-
Page 44: Adjusting The Platen Gap
Parent topic: Cut Sheet Handling Related references Available Epson Papers Paper Specifications Adjusting the Platen Gap If the print quality is not satisfactory when printing on very thin or very thick media, you may need to adjust the Platen Gap setting to adjust the gap between the media and the print head. -
Page 45: Creating Custom Paper Configurations
Printer Setup Menu Settings Creating Custom Paper Configurations You can create and store up to 10 custom paper configurations for use in printing on non-Epson paper or paper that is not supported by the Epson printer driver. Note: Custom paper configurations are based on the existing Uni-D and Bi-D print head alignment. For best results, perform the print head alignment using Epson Doubleweight Matte Paper, Epson Enhanced Matte Paper, or Epson Ultra Premium Photo Paper Luster. - Page 46 • Cotton paper with a rough surface: Fine Art Paper • Special media such as film, cloth, poster board, or tracing paper: Others 8. Press the left arrow button to return to the Custom Paper menu. 9. Select Platen Gap and press the right arrow button. 10.
-
Page 47: Printing A Custom Paper Configuration List
Parent topic: Creating Custom Paper Configurations Related references Paper Menu Settings Available Epson Papers You can purchase genuine Epson ink, paper, and accessories from an Epson authorized reseller. To find the nearest reseller, visit proimaging.epson.com (U.S.) or proimaging.epson.ca (Canada), select... - Page 48 Where to Buy button. Or call 800-GO-EPSON (800-463- 7766) in the U.S. or 800-807-7766 in Canada. Note: Paper/media availability varies by country. Paper Type Size Part number Sheet count Epson Legacy Platine Letter (8.5 ×...
- Page 49 13 × 19 inches (330 × 483 mm) S042300 17 × 22 inches (432 × 559 mm) S042301 Epson Velvet Fine Art Paper Letter (8.5 × 11 inches S041636 [216 × 279 mm]) 13 × 19 inches (330 × 483 mm) S041637 17 ×...
- Page 50 13 × 19 inches (330 × 483 mm) S045590 17 × 22 inches (432 × 559 mm) S045591 Epson Metallic Photo Paper Luster Letter (8.5 × 11 inches S045516 [216 × 279 mm]) 13 × 19 inches (330 × 483 mm) S045517 17 ×...
- Page 51 Paper Type Size Part number Sheet count Epson Premium Photo Paper Letter (8.5 × 11 inches S041286 Glossy [216 × 279 mm]) A3 (11.7 × 16.5 inches S041288 [297 × 420 mm]) 13 × 19 inches (330 × 483 mm) S041289 Letter (8.5 ×...
- Page 52 16.5 × 23.4 S041079 inches (420 × 594 mm) 17 × 22 inches (432 × 559 mm) S041171 Epson Proofing Paper White 13 × 19 inches (330 × 483 mm) S045115 Semimatte 13 inches (300 mm) × 100 feet S042002 1 roll (30.5 m)
- Page 53 13 × 19 inches (330 × 483 mm) S041605 17 × 22 inches (432 × 559 mm) S041908 Epson UltraSmooth Fine Art Paper 13 × 19 inches (330 × 483 mm) S041896 17 × 22 inches (432 × 559 mm) S041897 Epson Watercolor Paper Radiant 13 ×...
-
Page 54: Borderless Paper Type Compatibility
Examples of Borderless Paper Types • Epson Singleweight Matte Paper • Epson Doubleweight Matte Paper • Epson Premium Glossy Photo Paper (250) • Epson Premium Glossy Photo Paper (170) • Epson Premium Semimatte Photo Paper (250) • Epson Premium Luster Photo Paper (260) - Page 55 Borderless Roll Paper Widths • 10 inches (254 mm) • 11.8 inches (300 mm) • 13 inches (330 mm) • 14 inches (356 mm) • 16 inches (406 mm) • 17 inches (432 mm) Borderless Roll Paper Widths for 2-inch Core Media (requires use of the borderless spacer) •...
-
Page 56: Printing From A Computer
Note: If you have an Internet connection, it is a good idea to check for updates to your product software on Epson's support website. If you see a Software Update screen, select Enable automatic checking and click OK. The update scans your system to see if you have the latest product software. Follow the on-screen instructions. - Page 57 3. If necessary, select your product name as the printer you want to use. Note: You may also need to select Preferences, Properties, Print Settings, or Printer Properties to view your print settings. You see the Main tab of your printer settings window: 4.
- Page 58 5. If you are using non-Epson paper or media and you need to fine-tune its performance, select the Media Type setting that is closest to the paper you loaded, click the Paper Config button, and adjust the paper configuration options as necessary.
- Page 59 15. To see a preview of how your document or photo will print, select Print Preview. (The preview appears after you click Print but before printing starts.) 16. To layout multiple print jobs for printing all at once, select Layout Manager. Paper Configuration Options - Windows Advanced B&W Photo Options - Windows Print Quality Options - Windows...
-
Page 60: Paper Configuration Options - Windows
Paper Configuration Options - Windows Select any of the available Paper Configuration options to fine-tune the quality of your print. Color Density Adjusts the ink saturation level. -
Page 61: Advanced B&W Photo Options - Windows
Drying Time per Print Head Pass Pauses print head movement for up to 5 seconds after each pass to allow ink to dry. This lets you print with non-Epson media and avoid smearing the ink. Paper Feed Adjustment Modifies the speed of the paper feeding to compensate for banding in the direction of the print head. -
Page 62: Print Quality Options - Windows
white print. Click on any portion of the color wheel or enter corresponding values to customize the tone (hue) to add to your print. The closer you select to the edge of the wheel, the more color you add. Brightness Adjusts the overall lightness and darkness of your image. - Page 63 If you select Automatic as the Mode setting, you can choose from these options: Charts and Graphs Intensifies colors and lightens the midtones and highlights of an image. EPSON Standard (sRGB) Increases the contrast in images. Note: This is the standard mode for most photos and documents when not using an ICC profile.
-
Page 64: Advanced Color Controls - Windows
Parent topic: Selecting Basic Print Settings - Windows Advanced Color Controls - Windows If you selected Custom as the Mode setting and Color Controls from the dropdown menu, you can click the Advanced button to select detailed settings. The Color Controls screen lets you specify values for adjusting brightness, contrast, saturation, and individual Cyan, Magenta, and Yellow color tones. -
Page 65: Roll Paper Options - Windows
Roll Paper (Banner) Selects roll paper loaded in the roll paper holder for a series of continuous images without any margin space between them. Paper Cassette Selects the paper in the cassette. Manual Feed Selects the paper in the front or rear manual feeder. Parent topic: Selecting Basic Print Settings - Windows Roll Paper Options - Windows... - Page 66 • Normal Cut: Creates a margin at the top and bottom of your image. These margins vary by media type and may be changed from their defaults using custom media settings. • Single Cut: Prints images within the same print job end-to-end with no gap between them. Borderless images may overlap slightly.
- Page 67 • Double Cut: Increases the space between each image and trims each print individually, providing the cleanest edge with no image overlap for borderless printing. Auto Rotate Automatically positions the image or file to fit the roll paper. When Auto Rotate is selected, select the width of the paper as the Roll Width setting.
-
Page 68: Using Layout Manager - Windows
Using Layout Manager - Windows Layout Manager lets you create a poster or display by dragging multiple pieces of print data created in different applications onto one sheet of paper for printing. - Page 69 You can also place the same print data multiple times as shown here.
- Page 70 You can place print data in different sizes and orientations to maximize media usage, as shown here.
- Page 71 You can place print data on roll paper as shown here. 1. Open the file you want to print in your application. 2. Select the print command in your application.
- Page 72 3. Select Layout Manager on the Main tab and choose an option for the Size setting that matches the size of the document in your application. Note: You select the size of the paper you are printing on in a later step. 4.
- Page 73 6. Do the following to arrange objects on the Layout Manager screen: • Drag pages to move and resize them. • Use the tool buttons and the Object menu to align and rotate pages. • Resize and replace whole pages in the Preference or Arrangement Settings screens. Note: See the Layout Manager screen help for details.
-
Page 74: Selecting Print Layout Options - Windows
Selecting Print Layout Options - Windows You can select a variety of sizing and layout options for your document or photo on the Page Layout tab. • To change the orientation of your printed document or photo, select the Portrait or Landscape checkbox. -
Page 75: Reduce/Enlarge Options - Windows
• To change the size of your printed document or photo, select the Reduce/Enlarge checkbox and select sizing options. • To print multiple pages on one sheet of paper, or print one image on multiple sheets of paper, select the Multi-Page checkbox and select the options you want. •... -
Page 76: Selecting Additional Settings - Windows
Poster Prints one image on multiple sheets of paper to create a large poster with or without borders. Click the Settings button to select the layout and guideline options. Parent topic: Selecting Print Layout Options - Windows Selecting Additional Settings - Windows You can run maintenance utilities and select additional settings that apply to all the print jobs you send to your product. - Page 77 • Head Cleaning to clean the print head if you notice banding or gaps in your printouts. • Print Head Alignment to align the print head if printouts appear grainy or out of focus. • Epson Status Monitor 3 to check the printer's status.
-
Page 78: Printing Your Document Or Photo - Windows
• Epson LFP Remote Panel 2 to optimize printer settings and create and manage custom paper configurations. This option is available only if Epson LFP Remote Panel 2 is installed. - Page 79 You see your application's Print window, such as this one: 2. Click OK or Print to start printing. Checking Print Status - Windows Parent topic: Printing with Windows...
-
Page 80: Checking Print Status - Windows
Checking Print Status - Windows During printing, you see this window showing the progress of your print job. It allows you to control printing and check ink cartridge status. • To cancel printing, click Cancel. • To see print jobs waiting to print or to cancel printing, click Print Queue. Parent topic: Printing Your Document or Photo - Windows Saving, Sharing, and Customizing the Printer Settings... - Page 81 2. Click Save/Del at the top of the Main or Page Layout tab in your printer software. You see a window like this: 3. Verify that your settings are correct, enter a name for the group of settings in the Name field, and click Save.
-
Page 82: Saving And Sharing Media Settings - Windows
Related tasks Selecting Basic Print Settings - Windows Printing Your Document or Photo - Windows Saving and Sharing Media Settings - Windows You can save and share settings you have selected for a particular media type so you can use them for future print jobs. -
Page 83: Editing Print Setting Displays - Windows
4. Do the following as necessary: • Select the name of a media setting as the Media Type setting and use it to print. • To export the settings, click Custom Settings, select the name of the media settings, click Export, select a location, and enter a file name. - Page 84 You see this window: 3. Select the item you want to edit. 4. Order or group items in the List box as follows: • To move and reorder items, drag and drop them in the list. • To add a new group (folder), click Add Group. •...
-
Page 85: Selecting Default Print Settings - Windows
5. Click Save. Parent topic: Saving, Sharing, and Customizing the Printer Settings Selecting Default Print Settings - Windows When you change your print settings in a program, the changes apply only while you are printing in that program session. If you want to change the print settings you use in all your Windows programs, you can select new default print settings. -
Page 86: Changing The Language Of The Printer Software Screens
3. Select the print settings you want to use as defaults in all your Windows programs. 4. Click OK. These settings are now the defaults selected for printing. You can still change them as needed for printing in any program session. Parent topic: Printing with Windows Related tasks... - Page 87 You see these options: 4. Select the language you want to use as the Language setting. 5. Click OK to close the printer software window. The printer software screens appear in the language you selected the next time you access them. Parent topic: Printing with Windows...
-
Page 88: Changing Automatic Update Options
You can print with your product using any Mac printing program, as described in these sections. Note: If you have an Internet connection, it is a good idea to check for updates to your product software on Epson's support website. -
Page 89: Selecting Basic Print Settings - Mac
Selecting Basic Print Settings - Mac Selecting Print Layout Options - Mac Selecting Roll Paper Settings - Mac Selecting Advanced Media Control Settings - Mac Managing Color - Mac Sizing Printed Images - Mac Selecting Printing Preferences - Mac Printing Your Document or Photo - Mac Parent topic: Printing from a Computer Selecting Basic Print Settings - Mac... - Page 90 You see the expanded printer settings window for your product: Note: The print window may look different, depending on the Mac OS version and the application you are using. 5. Select the Copies and Pages settings as necessary. Note: If you do not see these settings in the print window, check for them in your application before printing.
- Page 91 6. Select the size of the paper you loaded as the Paper Size setting. • To print a borderless photo, select the Borderless checkbox or a paper size with a Borderless option. You can also create a custom paper size, but the highest available Output Resolution setting is limited to Fine - 360 dpi.
- Page 92 12. Select one of the following as the Print Mode setting: • Select EPSON PrecisionDot for any type of photographic printing. • Select Advanced B&W Photo to print black-and-white photos on certain types of photo paper.
-
Page 93: Advanced Color Settings - Mac
• Charts and Graphs: Performs color correction based on the sRGB space. Click the Advanced Color Settings tab to use advanced color controls. • EPSON Standard (sRGB): Increases the contrast in images. Click the Advanced Color Settings tab to use advanced color controls. - Page 94 You can specify values for adjusting gamma, brightness, contrast, saturation, and individual Cyan, Magenta, and Yellow color tones. • Advanced B&W Photo...
- Page 95 You can select any of the available options. Color Toning Adds tone (hue) to your black-and-white output. The default is Neutral, which provides a neutral tonal scale print. You can also choose other popular presets such as Cool, Warm, and Sepia. Note that the presets affect the target in the tone color circle.
-
Page 96: Output Resolution Settings - Mac
Highlight Tonality Controls tonality only in the highlight areas of your image. Max Optical Density Adjusts the overall density or focus of the print. Create a soft focus print by lowering the density setting. Highlight Point Shift Helps reduce gloss differential on glossy media by adding density to the highlights of your image. Parent topic: Selecting Basic Print Settings - Mac Output Resolution Settings - Mac... -
Page 97: Selecting Print Layout Options - Mac
Finest Detail Sharpens edges on vector-based data including text, graphics, and line art. (This setting does not affect photographs.) Note: Enabling Finest Detail may decrease the print speed. Parent topic: Selecting Basic Print Settings - Mac Selecting Print Layout Options - Mac You can select a variety of layout options by selecting Layout from the pop-up menu on the print window. - Page 98 You see this window: Note: Some settings may not be available, depending on the Roll Paper option you selected for your Paper Size. 2. Select one of the following Auto Cut Settings: • Off: Select this option to cut your prints manually. •...
- Page 99 • Single Cut: Prints images within the same print job end-to-end with no gap between them. Borderless images may overlap slightly. • Double Cut: Increases the space between each image and trims each print individually, providing the cleanest edge with no image overlap for borderless printing. 3.
-
Page 100: Selecting Advanced Media Control Settings - Mac
Borderless Paper Type Compatibility Selecting Advanced Media Control Settings - Mac If you are using non-Epson media and need to fine-tune its print quality, select Advanced Media Control from the pop-up menu. Select the available options as necessary. Note: Before adjusting the Advanced Media Control settings, select the Media Type setting that is closest to the paper you are using. -
Page 101: Advanced Media Control Options - Mac
Drying Time per Print Head Pass Pauses print head movement for up to 5 seconds after each pass to allow ink to dry. This lets you print with non-Epson media and avoid smearing the ink. Paper Feed Adjustment Modifies the speed of the paper feeding to compensate for banding in the direction of the print head. -
Page 102: Color Matching Options - Mac
Prints using standard color profiles for your product and paper to help match image colors. You can customize the conversion method and filter settings on the ColorSync pop-up menu in the print window. EPSON Color Controls Lets you manage color using controls in your printer software or turn off color management. Parent topic:... -
Page 103: Sizing Printed Images - Mac
Sizing Printed Images - Mac You can adjust the size of the image as you print it by selecting Paper Handling from the pop-up menu on the Print window. • To collate multiple copies into sets of documents, select the Collate pages checkbox. •... -
Page 104: Printing Preferences - Mac
You see a screen like this: 4. Select any of the available printing options. 5. Click OK. Printing Preferences - Mac Parent topic: Printing on a Mac Printing Preferences - Mac You can select from these settings on the Options tab. Maintenance Call Notification Alerts you if the maintenance tanks are nearing capacity or need to be replaced. -
Page 105: Printing Your Document Or Photo - Mac
Establish bidirectional communication Allows the product to communicate with the computer. Do not change the default setting unless you experience issues when using a shared printing pool. Default media type Select the Media Type that you want to use as the default in the printer driver. Parent topic: Selecting Printing Preferences - Mac Printing Your Document or Photo - Mac... - Page 106 Click Print at the bottom of the print window. Checking Print Status - Mac Parent topic: Printing on a Mac Related tasks Selecting Basic Print Settings - Mac...
-
Page 107: Checking Print Status - Mac
Checking Print Status - Mac During printing, you can view the progress of your print job, control printing, and check ink status. 1. Click the printer icon when it appears in the Dock. You see the print status window: 2. Select the following options as necessary for your Mac OS version: •... -
Page 108: Using The Control Panel Menus
Using the Control Panel Menus Follow the instructions in these sections to access the printer menu system and select settings. Accessing the Printer's Menus Maintenance Menu Settings Paper Menu Settings Printer Setup Menu Settings Printer Status Menu Settings Network Setup Menu Settings Preferences Menu Settings Administrator Menu Settings Accessing the Printer's Menus... - Page 109 Setting Options Description Nozzle Check Printless Nozzle Check Displays the nozzle status on the LCD screen. Print Check Pattern Prints a nozzle check pattern. Head Cleaning Check and Clean Nozzle Checks the nozzle status and cleans any clogged nozzles. All Nozzles Normal Lets you clean all or selected nozzles based...
-
Page 110: Paper Menu Settings
Setting Options Description Adjust Cut –3 to 3 mm Lets you adjust the Position cutter position in increments of 0.008 inch (0.2 mm) from –0.12 to 0.12 inch (–3 to 3 mm). Change Black Photo Blk to Matte Blk Lets you switch between black ink Matte Blk to Photo Blk types. - Page 111 Setting Options Description Paper Type Photo Paper Select the loaded Epson media. Proofing Paper Fine Art Paper Matte Paper Plain Paper Others CUSTOM PAPER Lists the custom paper configurations that you have created. NO PAPER SELECTED Select to control paper type using only your printer software settings.
- Page 112 Paper Type menu, the loaded roll paper is fed automatically. Set to Off if using Epson UltraSmooth Fine Art Paper . Refresh Margin — Lets you automatically trim the leading...
- Page 113 Options Description Platen Gap Adjusts the gap between the media and the print head. Standard: select for most media. Wide or Wider: select if printouts are smeared. Thickness Pattern When creating a custom paper configuration, lets you print patterns to determine the thickness of the custom paper: Select the pattern number with the least misalignment.
-
Page 114: Printer Setup Menu Settings
High if paper wrinkles during printing. Remove Skew Lets you enable paper skew reduction. Parent topic: Using the Control Panel Menus Related references Available Epson Papers Related tasks Loading Roll Paper Creating Custom Paper Configurations Related topics Cutting Roll Paper... - Page 115 Setting Options Description Platen Gap Narrow Adjusts the gap between the media and the print head. Standard Standard: select for most media. Wide Narrow: select if head alignment does Wider not completely align the print head. Widest Wide, Wider, or Widest: select if printouts are smeared.
- Page 116 Setting Options Description Auto Nozzle Auto Cleaning Periodically Automatically runs a nozzle check and Check Setting cleans the print head if necessary. Every Job Periodically: checks the nozzles occasionally. Every Job: checks the nozzles after every print job. Note: Even if you select Off as the Auto Cleaning Setting option, the printer runs an automatic nozzle check (and may clean the print head) when...
-
Page 117: Printer Status Menu Settings
Displays the printer's firmware version. Print Status Sheet Prints a sheet listing the current printer settings. Calibration Date Displays the date that the Epson Color Calibration Utility was last run, if applicable. Total Prints Displays the total number of pages printed since initial setup. -
Page 118: Preferences Menu Settings
Setting Options Description Network Settings Hide Displays or hides information for the rest of the menu items. Show IP Address Setting Auto Determines whether IP addresses are obtained automatically through DHCP or Panel manually. Select Panel to enter an IP address, subnet mask, and default gateway address. - Page 119 Setting Options Description Maintenance Alert Disable No alerts are set. The alert light flashes when ink is low. Maintenance Box The alert light flashes when Maintenance Box 1 or 2 is full. Ink or Maint Box The alert light flashes when ink is low or Maintenance Box 1 or 2 is full.
-
Page 120: Administrator Menu Settings
Administrator Menu Settings The Administrator Menu lets you select administrative settings and control who can access the settings. Setting Options Description Powerful Cleaning All Nozzles Lets you clean all or selected colors, based on the nozzle check pattern. Various colors Use this setting only if you still have clogged nozzles after running multiple head cleanings from the Maintenance... -
Page 121: Replacing Ink Cartridges And Maintenance Tanks
LCD screen, the tank is at the end of its service life and you need to replace it. Note: Please dispose of your used Epson branded ink cartridges and maintenance tanks responsibly and in accordance with local requirements. If you would like to return your used ink cartridges and maintenance tanks to Epson for proper disposal, please go to epson.com/recycle... -
Page 122: Checking Ink And Maintenance Tank Status On A Mac
2. Replace or reinstall the maintenance tank or ink cartridge as indicated on the screen. Note: If any of the ink cartridges installed in the product is broken, incompatible with the product model, or improperly installed, Epson Status Monitor will not display an accurate ink status. Parent topic:... -
Page 123: Purchase Epson Ink Cartridges And Maintenance Tanks
You can purchase genuine Epson ink, paper, and accessories from an Epson authorized reseller. To find the nearest reseller, visit proimaging.epson.com (U.S.) or proimaging.epson.ca (Canada), select your product series and product, and click the Where to Buy button. Or call 800-GO-EPSON (800-463- 7766) in the U.S. or 800-807-7766 in Canada. -
Page 124: Ink Cartridge And Maintenance Tank Part Numbers
Note: This product uses only genuine Epson-brand cartridges. Other brands of ink cartridges and ink supplies are not compatible and, even if described as compatible, may not function properly. The cartridges included with the printer are designed for printer setup and not for resale. After some ink is used for charging, the rest is available for printing. -
Page 125: Removing And Installing Ink Cartridges
Parent topic: Purchase Epson Ink Cartridges and Maintenance Tanks Removing and Installing Ink Cartridges Make sure you have your replacement cartridges handy before you begin. You must install new cartridges immediately after removing the old ones. Note: Replace all expended ink cartridges. You cannot print if any of the ink cartridges are expended or any ink slots are empty. - Page 126 4. Pull out the ink cartridge. Note: Dispose of used cartridges carefully. Do not take the used cartridge apart or try to refill it. Warning: If ink gets on your skin, wash it thoroughly with soap and water. If ink gets into your eyes, flush them immediately with water.
- Page 127 6. Insert the new cartridge with the arrow facing up and push it in until it clicks into place. Caution: Do not remove and re-insert cartridges more often than necessary. Doing so can break the needle valve seal and allow air to enter the ink tubes, damaging the nozzles. 7.
-
Page 128: Replacing Maintenance Tanks
Parent topic: Replacing Ink Cartridges and Maintenance Tanks Related concepts Purchase Epson Ink Cartridges and Maintenance Tanks Replacing Maintenance Tanks The maintenance tank absorbs ink used in maintenance operations such as head cleaning and switching between black ink types. Your product contains two separate maintenance tanks. Replace the specified maintenance tank when you see a message on the LCD screen. - Page 129 1. Press the right ink cartridge cover to open it. 2. Use the handle on the bottom of the maintenance tank to carefully pull it out of the product without tilting the tank. Warning: If ink gets on your skin, wash it thoroughly with soap and water. If ink gets into your eyes, flush them immediately with water.
- Page 130 4. Insert the new maintenance tank in the slot. 5. Place the used maintenance tank in the bag supplied with the new tank and seal the bag. 6. Close the ink cartridge cover. Note: Dispose of used maintenance tanks carefully.
-
Page 131: Replacing The Borderless Maintenance Tank
Parent topic: Replacing Maintenance Tanks Related concepts Purchase Epson Ink Cartridges and Maintenance Tanks Related references Optional Equipment and Replacement Parts Replacing the Borderless Maintenance Tank Replace the borderless maintenance tank (maintenance box 2) inside the printer. 1. Lift the edge of the output tray to remove it. - Page 132 3. Use the handle on the bottom of the maintenance tank to carefully pull it out of the product without tilting the tank. 4. Remove the new maintenance tank from the package. Caution: Do not touch the chip on the side of the maintenance tank or you may damage the product.
- Page 133 5. Insert the new maintenance tank and push it firmly in the slot. 6. Place the used maintenance tank in the bag supplied with the new tank and seal the bag. Warning: If ink gets on your skin, wash it thoroughly with soap and water. If ink gets into your eyes, flush them immediately with water.
- Page 134 7. Return the lock lever to the locked position. 8. Replace the output tray. Note: Dispose of used maintenance tanks carefully. Parent topic: Replacing Maintenance Tanks Related concepts Purchase Epson Ink Cartridges and Maintenance Tanks Related references Optional Equipment and Replacement Parts...
-
Page 135: Switch Black Ink Type
Switch Black Ink Type Your product comes with Matte Black and Photo Black ink cartridges. Although both cartridges must be installed for your product to work, it can print using only one type of black ink at a time. You can switch the black ink type, depending on the type of media you load. This process consumes some ink, so you should avoid switching black ink more often than necessary and select a default black ink type for the type of media you print on most often. - Page 136 • Epson Velvet Fine Art Paper • Epson Exhibition Watercolor Paper Textured • Epson Watercolor Paper Radiant White • Epson UltraSmooth Fine Art Paper 325 gsm • Epson Exhibition Canvas Matte • Epson Exhibition Canvas Natural Matte • Epson Photo Quality Self-adhesive Sheets •...
- Page 137 • Epson Metallic Photo Paper Luster Parent topic: Switch Black Ink Type Related references Available Epson Papers...
-
Page 138: Adjusting Print Quality
Adjusting Print Quality If your print quality declines, you may need to run a utility to clean or align the print head. If running these utilities does not solve the problem, you may need to replace the ink cartridges. Print Head Maintenance Print Head Alignment Print Head Maintenance If your printouts become too light, or you see dark or light bands across them, you may need to clean the... -
Page 139: Checking The Nozzles Using The Product Control Panel
2. Press the right arrow button to select Nozzle Check. 3. Press the OK button to select Printless Nozzle Check. The nozzle check begins. 4. Do one of the following: • If there no nozzle clogs are detected, press the OK button to return to the main screen. •... -
Page 140: Checking The Nozzles Using A Computer Utility
Print head is clean Print head needs cleaning 8. Do one of the following: • If there are no gaps, select Exit and press the OK button. • If there are gaps or the pattern is faint, select Head Cleaning and press the OK button. 9. - Page 141 You see a window like this: 5. Click Print. The nozzle pattern prints. 6. Check the printed pattern to see if there are gaps in the lines. Note: Use at least a 10× eye loupe to examine the pattern for any missing or deflected dots or segments.
-
Page 142: Print Head Cleaning
Print head is clean Print head needs cleaning 7. If there are no gaps, click Finish. If there are gaps or the pattern is faint, clean the print head. Parent topic: Print Head Nozzle Check Related tasks Cleaning the Print Head Using a Computer Utility Print Head Cleaning If print quality has declined and the nozzle check pattern indicates clogged nozzles, you can clean the print head. - Page 143 4. Press the down arrow button to select Head Cleaning and press the right arrow button. 5. Press the up or down arrow button to select one of the following: • To check for clogs followed by an automatic cleaning, select Check and Clean Nozzle and press the right arrow button.
-
Page 144: Cleaning The Print Head Using A Computer Utility
Print head is clean Print head needs cleaning 11. Follow the instructions on the screen to clean the print head, check the nozzles, and repeat the process as necessary. If you don’t see any improvement after running three Normal level cleanings and a Heavy level cleaning, you may need to perform a Powerful Cleaning from the Administrator menu. - Page 145 You see a window like this: 5. Click Start to begin the cleaning cycle. When the cleaning cycle is finished, the power light stops flashing and a confirmation screen appears. Caution: Never turn off the product during a cleaning cycle or you may damage it. 6.
-
Page 146: Using The Powerful Cleaning Utility
Print head is clean Print head needs cleaning If you don’t see any improvement after running a nozzle check from the computer utility, then run a Heavy level cleaning from the product's control panel. If you still don't see any improvement, you may need to perform a Powerful Cleaning from the Administrator menu. -
Page 147: Print Head Alignment
9. Print another nozzle check pattern to view the results of the cleaning. If nozzles are still clogged, turn off the printer and leave it off overnight. If nozzles are still clogged after some time, contact Epson for support. Parent topic:... -
Page 148: Aligning The Print Head Automatically Using A Computer Utility
Print Head Cleaning Aligning the Print Head Automatically Using a Computer Utility You can automatically align the print head using a utility on your Windows computer or Mac. 1. Load roll paper or cut sheet paper in this size or larger: A4 (8.3 × 11.7 inches [210 × 297 mm]). 2. -
Page 149: Aligning The Print Head Automatically Using The Product Control Panel
5. Click Next, then click OK to begin automatic print head alignment. If your product is not properly aligned, perform a manual head alignment on the printer's control panel. Parent topic: Print Head Alignment Aligning the Print Head Automatically Using the Product Control Panel You can automatically align the print head using the control panel on your product. - Page 150 1. Load roll paper or cut sheet paper in this size or larger: A4 (8.3 × 11.7 inches [210 × 297 mm]). 2. Make sure the correct paper type and paper thickness are selected. Use plain paper or transparent or colored paper for manual print head alignment. 3.
- Page 151 9. After each alignment sheet is printed, view the LCD screen for instructions on selecting the best pattern in each pattern set. 10. Check the printed patterns and choose the number representing the pattern in which the white lines are the most evenly spaced, then press the OK button. If your product is not properly aligned, select a different alignment method and repeat the process.
-
Page 152: Maintenance And Transportation
Maintenance and Transportation See the instructions in these sections to maintain your printer for optimum results, or to move or transport your printer. Cleaning Your Product Replacing the Cutter Moving or Transporting Your Product Cleaning Your Product To keep your product working at its best, you should clean it regularly (about once a month). Note: Do not use a hard brush, benzene, alcohol, or paint thinner to clean the product or you may damage it. - Page 153 6. Gently wipe the light blue areas in the direction indicated by the arrow. Note: Do not touch the gray areas (the rollers or the ink absorption pads) or your prints may be soiled. Caution: Be careful not to touch the ink tubes inside the product. 7.
-
Page 154: Cleaning The Roll Paper Feed Slot
8. If paper particles have accumulated in the holes on the platen, use a toothpick or similar tool to push them through. 9. Close the printer cover. 10. Use a soft, clean cloth to remove any dust or dirt from the outside of the product. 11. - Page 155 (U.S.) or proimaging.epson.ca (Canada), select your product series and product, and click the Where to Buy button. Or call 800-GO-EPSON (800-463- 7766) in the U.S. or 800-807-7766 in Canada. 1. Turn on the printer. 2. Press the paper source button on the control panel to select Paper Type.
-
Page 156: Replacing The Cutter
Note: Do not touch the adhesive on the sheet (the dark gray area). 7. With the adhesive facing toward you, insert the cleaning sheet on the left side of the printer until it reaches the end of the roll paper feed slot, then pull it out. Repeat this two to three times. Repeat for the center and right side of the roll paper feed slot. - Page 157 2. Open the left and right ink cartridge covers. 3. Open the printer cover.
- Page 158 4. Use a Phillips-head screwdriver to remove the four screws securing the front cover, then remove the front cover.
- Page 159 5. Press in on the tab on the cutter cover, release it, and pull down on the cutter cover to open it. 6. Loosen the screw holding the cutter in place and carefully remove the cutter. Warning: Keep the cutter out of the reach of children. The blade is sharp and can cause injury.
- Page 160 7. Align the pin on the new cutter with the hole in the product and insert it. Tighten the cutter screw securely. 8. Close the cutter cover as shown and press it in until it clicks into place. Note: If you removed the optional SpectroProofer, reinstall it. See the instructions that came with the SpectroProofer for details on installing it.
- Page 161 9. Replace the front cover. Insert and tighten the four screws. 10. Close the printer cover. 11. Close the left and right ink cartridge covers. Parent topic: Maintenance and Transportation Related references Optional Equipment and Replacement Parts...
-
Page 162: Moving Or Transporting Your Product
Moving or Transporting Your Product If you need to move or transport your product, prepare it as described here. Caution: During transportation and storage, follow these guidelines: • Avoid tilting the product, placing it vertically, or turning it upside down; otherwise ink may leak. •... - Page 163 5. Have two people lift the printer by placing their hands in the indentations on the left and right sides as shown. Warning: This product is heavy and requires two people to move it. 6. Place the product in its original packing materials, if possible, or use equivalent materials with cushioning around the product.
-
Page 164: Solving Problems
Ink Cartridge Expended Replace the ink cartridge with a new one. Replace ink cartridge. Ink Cartridge Alert Replace the ink cartridge with a genuine Epson ink cartridge that can be used with this printer. Please use genuine Epson ink cartridges. - Page 165 LCD screen message Condition/solution Ink Cartridge Alert Select Decline to replace the ink cartridge with a genuine Epson ink cartridge that can be used with this printer. Selecting Accept may void Non-genuine cartridge! Epson's warranty. Quality of non-genuine ink may vary.
- Page 166 • Make sure you that you have not loaded transparent or colored media, tracing paper, plain paper, Epson Enhanced Matte Posterboard, or paper that is more than 0.04 inch (1 mm) thick. • Make sure the printer is not exposed to direct, bright light (such as direct sunlight) while performing an automatic print head alignment.
- Page 167 LCD screen message Condition/solution Paper Setting Error Press the pause/cancel button and select Job Cancel, then remove the paper from the paper cassette. Print using the front or rear manual feeder, This paper cannot be depending on the paper thickness. loaded from paper cassette.
- Page 168 LCD screen message Condition/solution Cleaning Error Select Yes. Replace the maintenance tank (in the ink cartridge compartment) with a new one to continue cleaning. Not enough empty space in maint box 1. Continue cleaning? Nozzle Clog Detected Not enough empty space in maint box 1.
- Page 169 LCD screen message Condition/solution Check and Clean Nozzle Press the OK button to clear the message. Select Print Check Pattern from the Maintenance menu. This feature is not available now. Print the check pattern in the nozzle check menu. Printless Nozzle Check This feature is not available now.
- Page 170 If the message still appears, contact Epson for support. Maintenance Request A part used in the printer is nearing the end of its service life. Contact Epson for support and provide them with the displayed maintenance request code. Replace Part The error persists until you replace the requested part.
-
Page 171: Solving Printer Problems
Turn off the printer, disconnect the power cable from both the outlet and the service. printer, and reconnect them. Turn the printer on and off several times. If the same call for service is displayed on the LCD screen, contact Epson for support and provide them with the displayed service code. Parent topic:... -
Page 172: Printer Does Not Turn On
LCD Screen Shuts Off Parent topic: Solving Problems Printer Does Not Turn On If the printer does not turn on, try these solutions: • Make sure the power cable is securely connected. • Make sure the power outlet works by connecting the power cable for another electronic device. Parent topic: Solving Printer Problems LCD Screen Shuts Off... -
Page 173: Cannot Print Over A Network
• If you connected your printer to a USB hub, make sure it is a first-tier hub. If it still does not print, connect your printer directly to your computer instead of the hub. • Make sure the USB hub is recognized correctly on the computer. Disconnect all USB hubs from the computer and connect the printer directly to the computer's USB port. -
Page 174: Solving Paper Problems
• If you see the message Motor Self Adjustment on the product's LCD screen, the printer is adjusting its internal motor. Wait a few moments for the message to disappear and do not turn off the printer. Parent topic: Solving Printing Problems Related concepts Print Head Nozzle Check Print Head Cleaning... -
Page 175: Roll Paper Jam Problems
Related references Paper Menu Settings Paper Specifications Related topics Roll Paper Handling Cut Sheet Handling Roll Paper Jam Problems If roll paper has jammed in the printer, follow the steps here to clear the jam. 1. Open the roll paper cover. 2. - Page 176 4. Remove the jammed paper from the roll paper feeder and/or the front manual feeder. 5. Open the printer cover and remove any other jammed paper as necessary. 6. Close the front cover. 7. Turn the printer off and back on again. 8.
-
Page 177: Cut Sheet Paper Jam Problems In The Paper Cassette
Cut Sheet Paper Jam Problems in the Paper Cassette If cut sheet paper has jammed in the paper cassette, follow the steps here to clear the jam. 1. Remove the output tray and paper cassette. 2. Remove any jammed paper from the front of the printer. -
Page 178: Cut Sheet Paper Jam Problems In The Front Or Rear Manual Feeder
3. If paper is jammed in the rear of the printer, remove the rear unit. Push the tabs toward each other, then pull out the unit. Remove any jammed paper. 4. Replace the rear unit. Push it into the printer firmly until you hear a click. 5. -
Page 179: Solving Print Quality Problems
• If nozzles are still clogged after head cleaning at the strongest level, leave the product turned off overnight and check the nozzles again. If you still cannot clear the nozzles, contact Epson support. • If the printer has not been used for a long time, nozzles may be dried and clogged. Turn the printer on... -
Page 180: Overall Print Quality Is Poor
• Align the print head. • Make sure you are using genuine Epson ink cartridges. If you use non-Epson ink cartridges, the print result may be faint or the color of the printed image may be inaccurate because the remaining ink level is not correctly detected. -
Page 181: Lines Are Misaligned
Solving Print Quality Problems Related concepts Print Head Nozzle Check Print Head Cleaning Print Head Alignment Purchase Epson Ink Cartridges and Maintenance Tanks Related references Print Quality Options - Windows Color Management Options - Windows Output Resolution Settings - Mac... -
Page 182: Margins Appear In Borderless Roll Prints
• If you are using non-Epson media, make sure you create a custom paper configuration for the media. • Make sure the Paper Size Check setting is set to On, or the printer may print outside the edges of the loaded paper and smear ink on the back of the print. -
Page 183: Too Much Ink Is Consumed
Selecting Advanced Media Control Settings - Mac Where to Get Help Epson provides technical support and information on the installation, configuration, and operation of professional printing products through the Epson Preferred Limited Warranty Plan. Dial (888) 377-6611, 6 AM to 6 PM, Pacific Time, Monday through Friday. Days and hours of support are subject to change without notice. - Page 184 You can purchase genuine Epson ink, paper, and accessories from an Epson authorized reseller. To find the nearest reseller, visit proimaging.epson.com (U.S.) or proimaging.epson.ca (Canada), select your product series and product, and click the Where to Buy button. Or call 800-GO-EPSON (800-463- 7766) in the U.S. or 800-807-7766 in Canada. Parent topic: Solving Problems...
-
Page 185: Technical Specifications
Technical Specifications These sections list the technical specifications for your product. Note: Epson offers a recycling program for end of life Epson products. Please go to this site (U.S) or this site (Canada) for information on how to return your Epson products for proper disposal. -
Page 186: Mac System Requirements
Note: Since the quality of any particular brand or type of paper may be changed by the manufacturer at any time, Epson cannot guarantee the quality of any non-Epson brand or type of paper. Always test a sample of paper stock before purchasing large quantities or printing large jobs. - Page 187 Cut sheet paper Size A4 (8.3 × 11.7 inches [210 × 297 mm]) A3 (11.7 × 16.5 inches [297 × 420 mm]) 13 × 19 inches (330 × 483 mm) A2 (16.5 × 23.4 inches [420 × 594 mm]) Letter (8.5 × 11 inches [216 × 279 mm]) Legal (8.5 ×...
-
Page 188: Printable Area Specifications
Thickness 0.003 to 0.02 inch (0.08 to 0.5 mm) Note: Maximum thickness is reduced to 0.02 inch (0.45 mm) when using the optional SpectroProofer. Parent topic: Technical Specifications Printable Area Specifications Note: When printing borderless, quality may decline in the expanded printable area. Cut sheet paper Left/right/top/bottom margin: 0.12 inch (3 mm) minimum Printable length: 10 inches (254 mm) to 24 inches (610 mm) -
Page 189: Ink Cartridge Specifications
Glossy Photo Paper (250), Epson Premium Semigloss Photo Paper (250), Epson Premium Luster Photo Paper (260), and Epson Premium Semimatte Photo Paper (250). ** The maximum printable length using the Epson driver is 49.2 feet (15 m). To print longer images, you need to use third-party banner printing software. -
Page 190: Dimension Specifications
print settings, paper type, frequency of use, and temperature. For print quality, a variable amount of ink remains in the cartridge after the "replace cartridge" indicator comes on. Pigment ink Standard Edition: Cyan, Light Cyan, Vivid Magenta, Vivid Light Magenta, Yellow, Orange, Green, Light Light Black, Light Black, Photo Black, Matte Black. -
Page 191: Electrical Specifications
Weight 114.6 lb (52 kg) (without ink cartridges or optional equipment) Parent topic: Technical Specifications Electrical Specifications Power supply rating 100 to 240 V Rated frequency range 50/60 Hz Input frequency range 49.5/60.5 Hz Rated current 0.7 to 0.4 A Power consumption Printing: 52 W (55 W with optional SpectroProofer installed) (ISO/IEC24712) -
Page 192: Interface Specifications
Interface Specifications USB Interface Hi-Speed USB-Compatible with the Universal Serial Bus Specifications Revision 2.0 Network Interface 10BASE-T/100BASE-TX /1000BASE-T (use a Category5/5e or higher shielded twisted pair cable) Parent topic: Technical Specifications Safety and Approvals Specifications United States Safety: UL60950-1 EMC: FCC part 15 Subpart B class B Canada Safety: CAN/CSA C22.2 No. -
Page 193: Notices
Notices Check these sections for important notices about your product. Note: Epson offers a recycling program for end of life Epson products. Please go to this site (U.S) or this site (Canada) for information on how to return your Epson products for proper disposal. - Page 194 ampere rating of all devices plugged into the wall outlet does not exceed the wall outlet's ampere rating. • If damage occurs to the plug, replace the cord set or consult a qualified electrician. If there are fuses in the plug, make sure you replace them with fuses of the correct size and rating. •...
-
Page 195: Ink Cartridge Safety Instructions
Note: The lithium batteries in this product contain Perchlorate Material - special handling may apply. Click here for details. Parent topic: Important Safety Instructions Ink Cartridge Safety Instructions • Keep ink cartridges out of the reach of children and do not drink the ink. •... -
Page 196: Fcc Compliance Statement
, PrecisionCore , and SpectroProofer are registered trademarks and EPSON Exceed Your Vision is a registered logomark of Seiko Epson Corporation. Epson Store is a service mark of Epson America, Inc. Mac and OS X are trademarks of Apple Inc., registered in the U.S. and other countries. -
Page 197: Copyright Notice
Seiko Epson Corporation. The information contained herein is designed only for use with this Epson product. Epson is not responsible for any use of this information as applied to other products. -
Page 198: Copyright Attribution
Contact your legal advisor for any questions regarding copyright law. Parent topic: Copyright Notice Copyright Attribution © 2017 Epson America, Inc. 5/17 CPD-52925R1 Parent topic: Copyright Notice...
Need help?
Do you have a question about the SureColor P5000 and is the answer not in the manual?
Questions and answers