Table of Contents
Advertisement
Available languages
Available languages
Read all instructions BEFORE
assembly and USE of product.
KEEP INSTRUCTIONS FOR
FUTURE USE.
Lea todas las instrucciones ANTES
de armar y USAR este producto.
CONSERVE LAS INSTRUCCIONES
PARA USO FUTURO.
Polly® Progres5 Relax
5-in-1 Multichair
Owner's Manual
Manual del propietario
IS0143.ES
©2016 Artsana USA, INC.
5/16
Advertisement
Table of Contents

Related Manuals for Chicco POLLY PROGRESS RELAX


Summary of Contents for Chicco POLLY PROGRESS RELAX
- Page 1 Read all instructions BEFORE assembly and USE of product. KEEP INSTRUCTIONS FOR FUTURE USE. Lea todas las instrucciones ANTES de armar y USAR este producto. CONSERVE LAS INSTRUCCIONES PARA USO FUTURO. Polly® Progres5 Relax 5-in-1 Multichair Owner's Manual Manual del propietario IS0143.ES ©2016 Artsana USA, INC.
- Page 2 WARNING: Failure to follow the warnings and the instructions throughout this booklet could result in serious injury or death. Each mode Components has specific warnings, make sure to read and understand the warnings in Componentes each mode. ADVERTENCIA: El incumplimiento de las advertencias e instrucciones en este folleto puede ocasionar lesiones graves o la muerte.
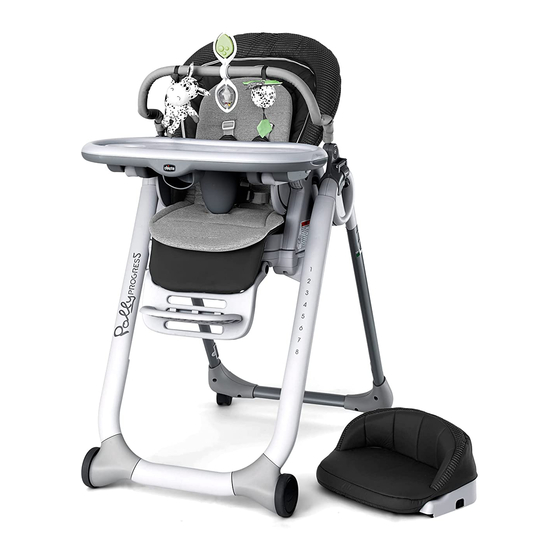
- Page 3 Components Components Componentes Componentes Footrest Apoyapiés Toy Bar Barra de juegos Tray Bandeja Toys Juguetes Tray Liner Cubrebandeja Insert Portabebés Seat Pad and Shoulder Pads Almohadilla del asiento y almohadillas para los hombros Youth Stool Seat Pad Almohadilla del asiento de la banqueta para niños...
- Page 4 Leg Rest Setup Setup Montaje del apoyapiernas Montaje 3. To extend the Leg Rest, push in on 1. Open the Chair Base by squeezing both buttons on either side and turn the release buttons on both handles. the Leg Rest out. Then pull out the back leg slightly and push down until it locks into The Leg Rest can be adjusted to 3...
- Page 5 Footrest Assembly Seat Pad Assembly Ensamblaje del apoyapiés Ensamblaje de la almohadilla del asiento 4. To attach the Footrest, insert the 5. Place the Seat Pad on the Seat. Footrest into the groove on the Leg Make sure to slide the backrest into Rest and rotate down to snap it into the top of the Seat Pad, as shown.
- Page 6 Backrest Extension Assembly Height Adjustment Ensamblaje de la extensión del respaldo Ajuste de la altura 7. If Backrest Extension is removed, 9a. The height of the High Chair and insert both hooks into the slots on the Youth Stool can be adjusted. There front of the Backrest.
- Page 7 Shoulder Strap Adjustment Height Adjustment Ajuste de la correa para los hombros Ajuste de la altura 10. To provide a better fit for your 9b Push down on the Chair Base to child the Shoulder Straps can be make sure that it is secure. adjusted to two heights on the CHECK Backrest as shown.
- Page 8 • El modo silla alta se recomienda para vienen con el producto. is recommended for children up to expressly approved by Chicco. niños de hasta 36 meses de edad, o • No sujete cintas, cordones ni otros 36 months old, or for children who que pesen menos de 40 libras (18.
- Page 9 HIGH CHAIR Mode HIGH CHAIR Mode Modo SILLA ALTA Modo SILLA ALTA WARNING ADVERTENCIA Make sure both compartments are Asegúrese de que ambos compartimentos properly closed to assure seat locks estén cerrados correctamente para asegurar onto chair frame. que el asiento trabe en el armazón de la silla. 11b.
- Page 10 Insert Use HIGH CHAIR Mode Uso del accesorio Modo SILLA ALTA WARNING ADVERTENCIA 14. To use the Insert, undo the safety Do not adjust the recline of the high No ajuste la reclinación de la silla alta harness and remove the shoulder chair with your child in it.
- Page 11 Adjusting Safety Harness Adjusting Safety Harness Ajuste del arnés de seguridad Ajuste del arnés de seguridad WARNING ADVERTENCIA 16. The safety harness can be Prevent serious injury or death from Evite las lesiones graves o la muerte released by pressing the button on sliding out, falls, or tipping over.
- Page 12 Adjusting Safety Harness Tray Use Ajuste del arnés de seguridad Uso de la bandeja 17. The length of the Shoulder Straps 18. To attach the Tray line it up with can be adjusted by pulling on the the arms on the Seat and press down adjustment buckles to tighten or until it snaps into place.
- Page 13 Tray Use Tray Use Uso de la bandeja Uso de la bandeja 19. The Tray can be adjusted to 3 20. The Tray can be stored on the different positions. To adjust the Tray back of the Rear Legs, as shown. squeeze the handle on the front of the Tray and slide it forward or backwards.
- Page 14 Toy Bar Toy Bar Barra de juegos Barra de juegos Toy Bar should only be used when the High Chair is reclined and the "CLICK" Footrest is fully extended. "CLIC" 21. Attach the toy bar to the Chair 22. Then secure the Toy Bar to the Base Handles.
- Page 15 • Do not use this booster seat as a expressly approved by Chicco. del niño. El respaldo se debe reclinar standalone chair, it can only be used...
- Page 16 • No agregue al producto ninguna pieza que • No utilice este asiento para dar de comer no haya sido suministrada o aprobada por como silla independiente, solo puede Chicco. utilizarse cuando está sujetado a una silla de comedor de tamaño estándar.
- Page 17 High-Back BOOSTER Mode High-Back BOOSTER Mode Modo ASIENTO ELEVADO con respaldo alto Modo ASIENTO ELEVADO con respaldo alto 25. Flip the Seat over and pull open 26. Thread both black Lower Booster both strap compartments. Remove Seat Straps into the slots on the both the Rear and Lower Booster Seat compartments, as shown.
- Page 18 High-Back BOOSTER Mode High-Back BOOSTER Mode Modo ASIENTO ELEVADO con respaldo alto Modo ASIENTO ELEVADO con respaldo alto WARNING ADVERTENCIA 28. Fasten the black Lower Booster Seat The booster seat must be used in El asiento elevado debe ser utilizado "CLICK"...
- Page 19 Low-Back BOOSTER Mode Low-Back BOOSTER Mode Modo ASIENTO ELEVADO con respaldo bajo Modo ASIENTO ELEVADO con respaldo bajo 29b. Wrap the Seat Pad around the Backrest, as shown. Then zip the zipper on the back of the Seat Pad. 29b. Coloque la almohadilla del asiento alrededor del respaldo, como se muestra.
- Page 20 Low-Back BOOSTER Mode Low-Back BOOSTER Mode Modo ASIENTO ELEVADO con respaldo bajo Modo ASIENTO ELEVADO con respaldo bajo 30. Make sure the Backrest is in an 31. Flip the Seat over and pull open upright position. both strap compartments. Remove both the Rear and Lower Booster Seat Remove the Seat from the Chair Base Straps from the compartments.
- Page 21 Low-Back BOOSTER Mode Low-Back BOOSTER Mode Modo ASIENTO ELEVADO con respaldo bajo Modo ASIENTO ELEVADO con respaldo bajo WARNING ADVERTENCIA 33. Fasten the black Lower Booster Seat The booster seat must be used in El asiento elevado debe ser utilizado Straps, passing them underneath the the upright position only by children en posición vertical solo por niños que...
- Page 22 YOUTH STOOL Mode YOUTH STOOL Mode Modo BANQUETA PARA NIÑOS Modo BANQUETA PARA NIÑOS 35a. Slide the Seat Pad over the Youth Stool Seat. Flip the Seat over; wrap the fabric sleeve around the front edge of the Seat, as shown (35b). Fold and tuck all 3 of the plastic tabs into the correct slots on the Seat bottom.
- Page 23 YOUTH STOOL Mode YOUTH STOOL Mode Modo BANQUETA PARA NIÑOS Modo BANQUETA PARA NIÑOS WARNING ADVERTENCIA WARNING ADVERTENCIA Avoid falls. Never use in youth stool Evite caídas. Nunca lo use en el modo Always remove footrest in youth stool Retire siempre el apoyapiés en el modo mode without youth stool base attached.
- Page 24 YOUTH STOOL Mode Storage Modo BANQUETA PARA NIÑOS Almacenamiento 39. To remove the Youth Stool Base 38. Always lock the rear wheels squeeze both buttons on either side before using the Youth Stool. of the Youth Stool Base and rotate up to remove.
- Page 25 Storage Storage Almacenamiento Almacenamiento 41. To store the Leg Rest, push in on 43. To store the Chair Base squeeze both buttons on either side and push both of the release buttons on both the Leg Rest all the way back into its handles and pull up until it locks into storage position.
- Page 26 Periodically check the product for loose screws, worn parts, torn material or Para asegurarse de que los stitching. Replace or repair the parts as needed. Use only Chicco replacement parts. compartimentos cierren To avoid friction that may prevent the correct operation of the product, ensure that correctamente, coloque la correa all the movable plastic parts placed along the metal frame are clean of dust and dirt.
- Page 27 Reemplace o repare las piezas en caso de que sea necesario. Use únicamente piezas de repuesto Chicco. Para evitar 1826 William Penn Way la fricción que puede impedir el correcto funcionamiento del producto, asegúrese Lancaster, PA 17601 de que todas las piezas móviles de plástico junto al marco metálico estén libres de...
- Page 28 www.chiccousa.com...
Need help?
Do you have a question about the POLLY PROGRESS RELAX and is the answer not in the manual?
Questions and answers