Table of Contents
Advertisement
Advertisement
Table of Contents

Subscribe to Our Youtube Channel
Related Manuals for Studiomaster digiLiVE 16


Summary of Contents for Studiomaster digiLiVE 16
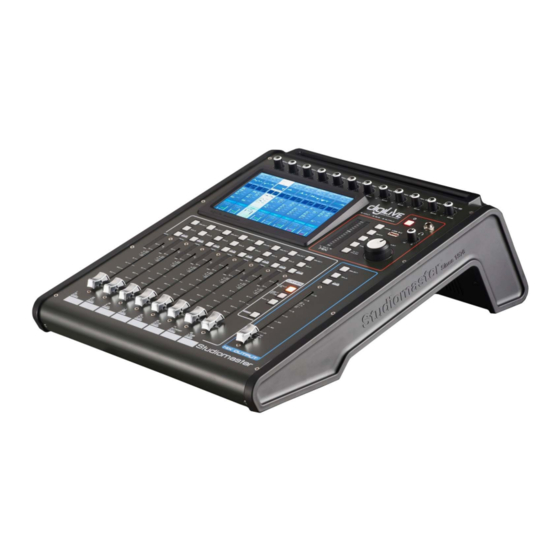
- Page 1 16 Digital Mixing Console User Guide Issue 1.0...
-
Page 2: Table Of Contents
Contents INTRODUCTION........................3 READ THE USER GUIDE ....................... 3 SAFETY INSTRUCTIONS ...................... 4 Input Channel ........................5 MIC Channel ........................5 Input Stage Sub-page ....................6 Parametric EQ Subpage ....................7 Dynamics Subpage ......................9 Bus Send Subpage......................12 Channel Output Subpage ....................13 Stereo Channel .........................14 ... -
Page 3: Introduction
The ergonomic and lightweight design coupled with ultra reliable build quality makes the digiLiVE 16 a pleasure to work with, leaving you to concentrate on the show and not the equipment! READ THE USER GUIDE The Studiomaster design philosophy has always been to provide the controls and features the user needs, reducing clutter, making operation intuitive. -
Page 4: Safety Instructions
SAFETY INSTRUCTIONS READ THIS BEFORE YOU USE YOUR PRODUCT Before connecting the A.C. power cord make sure the digiLiVE operating voltage is suitable for your local supply : 100-240V AC 50/60Hz. Only use the A.C. power cord / mains lead and universal voltage power supply supplied with this product. -
Page 5: Input Channel
Input Channel The digiLiVE 16 features 12 mono input channels, two analogue stereo inputs, one stereo S/PDIF and one stereo USB input for playback. The front panel buttons INPUT 1-8 and INPUT 9-12 ST-USB select the corresponding input section. When pressing INPUT 1-8, the... -
Page 6: Input Stage Sub-Page
② EQ Shows a parametric EQ graph representing the EQ settings. ③ Dynamics Shows a gate and compressor graph. ④ Bus Send Shows send status: the busses being sent to along with its level and Pan value. ⑤ Output Stage Displays the name, Pan value, Solo, Mute, fader- and meter level information. -
Page 7: Parametric Eq Subpage
④ Delay Press to enable the delay, default is disabled. Adjust the delay time using the main encoder on the control panel or by the soft-encoder on the touch screen (fine tuning can be activated by pressing and holding down the main encoder). The delay can be adjusted from 0 ms to 200 ms, default is 0ms. - Page 8 ① Switch Channels Press the arrow-buttons, to choose the previous or next channel within the same layer ② Bypass Single press for EQ Bypass, press again to switch EQ back on. Default is no Bypass ③ Flat Single press to flatten all EQ bands; this cannot be reverted. ④...
-
Page 9: Dynamics Subpage
Dynamics Subpage The dynamics consist of a gate and compressor which can be setup independent from each other. ① Switch Channels Press the arrow-buttons, to choose the previous or next channel within the same layer ② Library The library allows to save and load user settings for the Dynamics. Tap the dropdown button and select a library entry from the list to load its settings. - Page 10 Threshold: Changes the Gate’s threshold in the range from -80 dB to 0 dB. Default is -80 dB. Any signals lower than the threshold will be reduced by the value set in Depth observing the attack, hold and release times. Hold (hold-time): can be set between 2 ms and 2000 ms, default is 2 ms.
- Page 11 Default is pre-EQ of the actively selected channel so by default all channels work independent using their own signal as a control for the compression. ⑥ Bypass Single press for full Dynamics Bypass (Gate and Compressor), press again to switch Dynamics back on.
-
Page 12: Bus Send Subpage
Bus Send Subpage Each input channel can send signals to 4 mono busses (1-4), 4 stereo busses (5-8) and master L/R. ① Channel Switch Press the arrow-buttons, to choose previous or next channel within the same layer ② Bus-send enable Press a bus button to send the active channel there, press again to disable the send. -
Page 13: Channel Output Subpage
Channel Output Subpage Panning and level into master as well as Solo / Mute can be set here. ① Switch Channel Press the arrow-buttons, to choose previous or next channel within the same layer ② PAN control Controls the panning into master LR. Default is 50|50 (middle). The PAN value can be changed through the on-screen encoder or by turning the main encoder on the control panel. -
Page 14: Stereo Channel
This displays the pre-fader level of the signal, so regardless the setting of the fader, signal will be shown here if present. Stereo Channel Like the MIC channels, the two stereo inputs also include five modules: Input, EQ, Dynamics, Bus Send and Output. Single clicking a module will bring up a sub-page with further options. -
Page 15: Stereo Input Stage Subpage
Stereo input Stage Subpage ① Switch channels Press the arrow-buttons to choose the previous or next channel within the same layer ② SUM Sums left and right input, so both sides of the stereo channel will contain the same (mono) signal. -
Page 16: Parametric Eq Subpage
main encoder). The frequency ranges from 16 Hz to 400 Hz, with 16 Hz being default. ⑥ Insert Press an effect module button to insert it prior to the channels EQ. Each effect module can only be inserted in one place and the input channels allow for only one effect module to be inserted. -
Page 17: Output Busses
Output busses digiLiVE 16 allows to mix into 14 output busses in total – 4 Mono (Bus 1~4), 4 Stereo (Bus 5~8) and Master L/R. In fact, there is another stereo bus for monitoring through SOLO, which can be switched as pre- or post-fader listen (PFL/AFL). -
Page 18: Input Stage Subpage
① Input Stage Shows the physical output assigned to each bus as well as the insert status of effect inserts. ② EQ Shows a parametric EQ graph representing the EQ settings. ③ Input Source Displays the send status and level from each channel as a bar-graph. For clarity, only channels with an enabled send to a given bus are shown here. - Page 19 The text label of the bus indicates the physical output socket it is assigned to – e.g. OUT 1 being socket 1 on the back of the console etc.. The assignment can be setup in SETUP→PATCH. ① Switch Channel Press the arrow-buttons to choose the previous or next bus within the same layer ②...
- Page 20 Press an effect module button to insert it prior to the busses EQ. Each effect module can only be inserted in one place and while the input channels allow for only one effect module to be inserted, all busses allow for two effect modules inserted subsequently with the order of the modules being determined by the order of selection.
-
Page 21: Parametric Eq Subpage
Parametric EQ Subpage The EQ features a 4-band full parametric EQ that can easily be set up on screen via touch. ① Switch Channels Press the arrow-buttons, to choose the previous or next channel within the same layer ② Bypass Single press for EQ Bypass, press again to switch EQ back on. - Page 22 Gain, Frequency and Q can be adjusted using the on-screen soft-encoder by selecting it through touch and subsequently “dragging” it to point towards the desired value. The selected soft-encoder can also be adjusted using the blue-lit main encoder on the front panel.
-
Page 23: Output Stage Subpage
Output Stage Subpage Delay, Panning / Balance and level into master as well as Solo / Mute can be set here. ① Switch Channel Press the arrow-buttons, to choose previous or next channel within the same layer ② Delay Press to enable the delay, default is disabled. - Page 24 This is a copy of the hardware button on the front-panel. Press to enable or disable sent to the solo monitor bus. ⑤ Mute Like Solo, this is a copy of the hardware button on the front-panel. Press to mute or unmute the channel, which will effectively mute or unmute all pre- and post-fader sends of the active channel to all busses, including master lr.
-
Page 25: Setup Page
Setup page The page contains Information, Sample Rate, Delay Unit, System, WiFi, Remote and Brightness. ① Information System Version shows the version of APK, DSP and other software on this console. IP Address shows the IP address of the console. ②... - Page 26 Please make sure the WiFi dongle (supplied with the console) is plugged into one of the USB ports on the console. Single press“SetupWifi”→“More” →“Portable hotspot” →“Set up Wi-Fi hotspot” A window will pop up like below Please enter the network name in Network SSID, for example “Digilive16”(as in the picture) Set the password in Security, for example“1234567890”...
- Page 27 Single press“Save” to save the setup for WiFi, press “BACK” on the panel to get back to the mixing console interface. IPAD settings as below: 1. Download the App Digilive from App Store and install it on your pad. 2. Select the network “Digilive16” which was previously configured on the mixing console, on the WIFI interface on your iPad.
- Page 28 WiFi is now successfully connected. ⑥ Brightness, Adjust the brightness of the touch screen. Six units to indicate the level of brightness, the default is three units. After rebooting the system, the unit of brightness is always what you set before you had powered off the console last time.
-
Page 29: Maintenance Page
Maintenance Page ① Update from USB Software updates will be availble for download from www.studiomaster.com, it is recommended to periodiacally check for updates, or email enquiries@studiomaster.com to request latest updates. To update, copy the downloaded digiliveupdate.zip file to a USB stick and insert into the digiLiVE console USB socket. -
Page 30: Patch Page
Debugging mode, not recommended to non-professional users. ④ Android Home Screen Debugging mode, not recommended to non-professional users. ⑤ Import Settings Debugging mode, not recommended to non-professional users. ⑥ Export Settings Debugging mode, not recommended to non-professional users. ⑦ Calibrate Screen - Disabled on certain software versions Touch screen calibration function. -
Page 31: Meter Page
① Default In Default mode, Bus1- Bus 5R are assigned to OUT 1 ~ OUT 6, Master L and Master R are assigned to OUT 7-8, S/PDIF OUT and USB OUT。 ② Custom Switch to custom mode after single pressing “Custom1 2 3” buttons. Single press “ ”... -
Page 32: Fx Page
the default. Signal level mode displayed can be changed with a button press. On the right side of signal level of outputs you can see the bus names which are assigned to the outputs. FX page The Effects has 8 modules, which are 2 Modulation, 2 Delay, 2 Reverb and 2 15-band GEQ. Each module can be inserted to an input processing channel or bus processing channel only once. -
Page 33: Modulation Subpage
Modulation Subpage Single press “Modulation1 or 2” button in the FX Subpage to access the Modulation parameter Subpage shown below. ① Module Selection Single press left right selection button, to choose FX module (Modul1-Modul2-Delay1- Delay2-Reverb1- Reverb2-GEQ1-GEQ2)。 ② Type Single press the dropdown button, then choose a modulation type from the dropdown list— Chorus Slow/Chorus Fast/Flanger Slow/ Flanger Fast/Celeste Slow/Celeste Fast/Rotor Slow/Rotor Fast. -
Page 34: Delay Subpage
Freq:ranges from 20 Hz to 200 Hz, with a default @ 100 Hz. Adjust the Frequency by turning the main encoder or on the touch screen (fine tuning can be activated by pressing the main encoder knob). Double press the parameter frame to set it as default. ⑤... - Page 35 ① Module Selection Single press the left right selection button, to choose FX module:(Modul1-Modul2-Delay1- Delay2-Reverb1- Reverb2-GEQ1-GEQ2)。 ② Type Single press the dropdown button, then choose a delay type from the dropdown list—One Echo 1/4,Two Echo 1/8,Three Echo 1/16,Three Echo 1/16 Delayed,Four Echo 1/16,One Echo 1/4 with 4 Reflect.
- Page 36 or on the touch screen (fine tuning can be activated by pressing the main encoder knob). Double press the parameter frame to set it as default. Freq:ranges from 1.5 KHz to 15 KHz, with a default @ 6.3 KHz. Adjust the Frequency by turning the main encoder or on the touch screen (fine tuning can be activated by pressing the main encoder knob).
-
Page 37: Reverb Subpage
Reverb Subpage Single press “Reverb1 or 2” button in the FX Subpage to access the Reverb parameter Subpage shown below. ① Module Selection Single press the left right selection button, to choose FX module(Modul1-Modul2-Delay1- Delay2-Reverb1- Reverb2-GEQ1-GEQ2)。 ② Type Single press the dropdown button, then choose a wanted reverb from the dropdown list— —Hall Bright/Hall Warm/ Room Bright/ Room Warm /Plate Bright/ Plate Warm。... - Page 38 Freq:ranges from 20 Hz to 200 Hz, with a default @ 100 Hz. Adjust the Frequency by turning the main encoder or on the touch screen (fine tuning can be activated by pressing the main encoder knob). Double press the parameter frame to set it as default. ⑤...
-
Page 39: Geq Subpage
GEQ Subpage Single press “GEQ1 or 2” button in the FX Subpage to access the GEQ (Graphic Equaliser) parameter Subpage shown below. ① Module Selection Single press the left right selection button, to choose FX module:(Modul1-Modul2-Delay1- Delay2-Reverb1- Reverb2-GEQ1-GEQ2)。 ② Library Save or load user’s EQ settings. -
Page 40: Scenes Page
9-15:Single press the button, to control the gains of frequency points with 7 faders on the panel. Scenes Page The page contains Scene List and operations for scenes, which are complete "snapshots" of all settings on the digiLiVE 16. - Page 41 ① Scene List Scene List contains number (No)、selection (Sel), name (Name) and create/update time (Time). Select a scene through a single press which will be highlighted with "Sel" (select) illuminated. ② Operation Delete:Delete scenes. When selecting a scene, single press the button, a dialog pops up“Are you sure you want to delete this scene?”,single press“Yes”...
-
Page 42: Recorder Page
try again.”. Up:move scene upward. When select a scene, single press the button to move selected scene upward, one press for one row. Down:move scene downward. When select a scene, single press the button to move selected scene downward, one press for one row. Prev:browse previous scene. -
Page 43: Monitor Page
② Meter display of playback and record Display meter of Playback and Record in real time ③ Playback list Display playlist in the USB drive, single press a soundtrack to play it. ④ Record Record switch is OFF as default, and the sound source to be recorded is taken from the Master L/R, single press the record button to record the audio content of Master L/R bus to the USB drive in .WAV format. - Page 44 Destination:press the bus in the list to enable the bus to which Oscillator signal transmits ② Monitor/Phones On the upper right of the digiLiVE 16 front panel there is a Phone jack connector, and an analogue potentiometer knob for controlling the volume of the headphones. A pair of TRS ¼”...
-
Page 45: Service Information
Service Information If you have a problem with your Studiomaster product or think it has developed a fault, contact your local dealer or distributor for service details. Should it be recommended you return the product to your nearest Studiomaster Service Centre you must first contact them. -
Page 46: Digilive16 Specifications
digiLiVE16 SPECIFICATIONS Input Characteristics Output impedance of signal generator:150Ω Input Input Impedance Connector Maximum Input Sensitivity Range 1.5KΩ MIC INPUT +16 dBu 60dB (Balanced) +60dBu LINE INPUT 10KΩ TRS(Balanced) +30 dBu +40dBu ST INPUT 10KΩ TRS(Balanced) +22dBu 40dB +20dBu Output Characteristics Output Output Connector... -
Page 47: Specifications
Input Function Function Parameter Phase Normal/Reverse Delay 0 msec to 200 msec HPF Frequency= 20Hz to 600 Hz Slope= 12 dB/Oct Insert 2Modul/2Delay/2Reverb/2GEQ 4 Band Equalizer Frequency= 20 Hz to 20 kHz Gain= –18 dB to +18 dB Q= 0.5 to 10.0 Output Function Low/ Low Mid/ High Mid/ High (4 Band) Function Parameter Mode:Bypass/Flat Delay 0 msec to 200 msec Library: Preset 1~Preset 16 Insert 2Modul/2Delay/2Reverb/2GEQ Gate Threshold= –80dB to 0dB 4 Band Equalizer Frequency= 20 Hz to 20 kHz Attack=0.5msec to 100 msec Gain= –18 dB to +18 dB Release=2msec to 2sec Q= 0.5 to 10.0 Hold=2msec to 2sec Low/ Low Mid/ High Mid/ High Depth= –80dB to 0dB (4 Band) Compressor Threshold= –80dB to 0dB ... - Page 48 STUDIOMASTER Unit 11, Torc:MK, Chippenham Drive, Milton Keynes MK10 0BZ, United Kingdom Tel: +44 (0)1908 281072 Email: enquiries@studiomaster.com Web: www.studiomaster.com ...
Need help?
Do you have a question about the digiLiVE 16 and is the answer not in the manual?
Questions and answers
how to get to android home screen and what is this dev. password?
Accessing the Android home screen on the Studiomaster digiLiVE 16 is a debugging mode and is not recommended for non-professional users. The developer password is not provided in the available information.
This answer is automatically generated