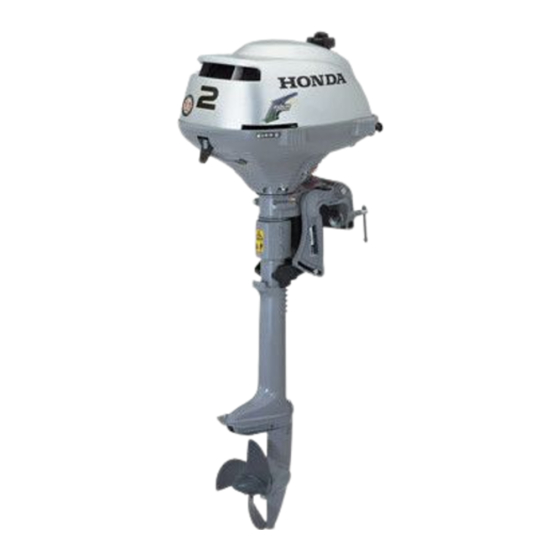
Honda BF2D Owner's Manual
Hide thumbs
Also See for BF2D:
- Owner's manual (91 pages) ,
- Owner's manual (78 pages) ,
- Owner's manual (87 pages)
Table of Contents
Advertisement
Quick Links
Advertisement
Table of Contents
Troubleshooting

Related Manuals for Honda BF2D


Summary of Contents for Honda BF2D
- Page 3 Thank you for purchasing a Honda Throughout this manual, you will see If a problem should arise, or if you Outboard Motor. safety messages proceeded by the have any questions about the following words and symbols. Here’s Outboard Motor, consult an...
- Page 4 ● ● Centrifugal clutch Note that the types of the outboard motor differ according to the countries where they are sold. BF2D is provided with the following types TYPE CODE according to the shaft length, throttle type and Example the equipment whether a centrifugal clutch is installed or not.
- Page 5 Check the type of your outboard ENGINE motor and read this Owner’s Manual SERIAL NUMBER thoroughly before operation. (inside the Texts with no type indication are the engine cover) information and/or procedures common to all types. FRAME SERIAL NUMBER Record the frame and engine serial The frame serial number is stamped numbers for your reference.
-
Page 6: Table Of Contents
CONTENTS 1. SAFETY ..............6. PRE-OPERATION CHECKS ........ . 22 Safety Information ..........Removing/Installing Engine Cover ..... 22 2. SAFETY LABEL LOCATIONS ......Engine Oil Level ..........23 CE mark location ........... Fuel Level ............. 24 3. COMPONENT IDENTIFICATION ...... - Page 7 Storage Position of the Outboard Motor .... . 62 14. TROUBLESHOOTING .......... . 64 15. SPECIFICATIONS ..........66 16. WIRING DIAGRAM ..........69 17. MAJOR Honda DISTRIBUTOR ADDRESSES IN EUROPE ........ . 70 18. INDEX ..............73...
-
Page 8: Safety
Never permit anyone to operate the outboard motor without proper instruction. The engine system will be Stop the engine immediately if Honda outboard motor is heated during operation anyone falls overboard. designed to give safe and and remain hot Do not run the motor while the... - Page 9 SAFETY Do not attempt to modify the Refuel carefully to avoid spilling Carbon Monoxide Poisoning outboard motor. fuel. Avoid overfilling the fuel Hazard Always wear a life-jacket when on tank (there should be no fuel in the Exhaust contains poisonous carbon board.
- Page 10 These labels warn you of potential hazards that can cause serious injury. Read the labels and safety notes and precautions described in this manual carefully. If a label comes off or becomes hard to read, contact your Honda outboard motor dealer for a replacement. HOT CAUTION...
-
Page 11: Safety Label Locations
SAFETY LABEL LOCATIONS CE mark location [BF2.3D] CE MARK Manufacturer and address Dry weight... -
Page 12: Component Identification
COMPONENT IDENTIFICATION STARTER GRIP EMERGENCY STOP SWITCH FUEL FILLER CAP CASE PROTECTOR THROTTLE LEVER ENGINE COVER (Equipped type) OIL FILLER CAP THROTTLE GRIP (inside the engine cover) CHOKE KNOB (Equipped type) OIL LEVEL INSPECTION WINDOW STEERING HANDLE THROTTLE GRIP FRICTION KNOB ENGINE COVER CLAMP SCREW (Equipped type) -
Page 13: Controls
CONTROLS Starter Grip Choke Knob Emergency Stop Switch CHOKE KNOB STARTER GRIP PUSH PULL EMERGENCY STOP SWITCH Use the starter grip to start the engine. When the engine is cold, pull the Press the emergency stop switch to choke knob to start easily. Rich fuel stop the engine. -
Page 14: Throttle Lever/Throttle Grip
CONTROLS Throttle Lever/Throttle Grip THROTTLE LEVER type: Move the throttle lever or the throttle THROTTLE LEVER grip in the directions shown to make the engine run faster or slower. SLOW FAST THROTTLE GRIP type: THROTTLE GRIP FAST SLOW... -
Page 15: Throttle Grip Friction Knob
CONTROLS Throttle Grip Friction Knob Fuel Valve Lever Oil Level Inspection Window FUEL VALVE LEVER THROTTLE GRIP FRICTION KNOB RELEASE OIL LEVEL INSPECTION WINDOW Use the throttle grip friction knob to Turn the fuel valve lever ON to open Use the oil level inspection window cruise at a certain constant speed. -
Page 16: Emergency Stop Switch Lanyard/Clip
CONTROLS Emergency Stop Switch Lanyard/ EMERGENCY STOP Clip SWITCH CLIP EMERGENCY STOP SWITCH LANYARD SPARE EMERGENCY STOP SWITCH CLIP EMERGENCY EMERGENCY STOP SWITCH CLIP EMERGENCY STOP STOP SWITCH SWITCH LANYARD The emergency stop switch lanyard is provided to stop the the emergency stop switch lanyard engine immediately when the securely to the operator. -
Page 17: Tilt Lever
CONTROLS Tilt Lever Anode Metal REAR CARRYING TILT LEVER HANDLE Short shaft type Long shaft type STEERING FRICTION BOLT 75° FRONT CARRYING HANDLE Use the tilt lever to tilt the motor for To return the outboard motor to the shallow water operation, beaching, normal running position, hold the launching, or mooring. -
Page 18: Engine Cover Retaining Strap
CONTROLS Engine Cover Retaining Strap Steering Friction Bolt Transom Angle Adjusting Bolt and Wing Nut STEERING FRICTION BOLT ENGINE COVER RETAINING STRAP ADJUSTING BOLT AND WING NUT The steering friction bolt adjusts Use the retaining strap to hold the engine cover closed. Do not remove steering resistance. -
Page 19: Fuel Filler Cap Vent Knob
CONTROLS Fuel Filler Cap Vent Knob Clamp Screws CLAMP SCREWS FUEL FILLER CAP VENT KNOB FUEL FILLER CAP The vent knob shuts off the fuel tank Use the clamp screws to secure the from the open air. stern brackets to the transom. Before operating the outboard motor, turn the vent knob 2 or 3 turns counterclockwise to open the vent. -
Page 20: Installation
Transom Height We recommend that the outboard motor be installed by an authorized Honda outboard motor dealer. Consult the authorized Honda dealer in your area for the Y-OP (User Optional Parts)/equipments installation and operation. Install the outboard motor at the stern, at the center line of the boat. -
Page 21: Installation Height
INSTALLATION Installation Height When the outboard motor is installed extremely low, water may enter into the engine under case and negatively affect the performance and durability. When installing, check that the WATER SURFACE outboard motor is high enough from the water level to keep the engine under case from waves, splash, etc. -
Page 22: Motor Attachment
INSTALLATION Motor Attachment Motor Angle (Cruising) INCORRECT INCORRECT CAUSES BOAT TO ‘‘PLOW’’ CAUSES BOAT TO ‘‘SQUAT’’ STERN BRACKET O.K. SAFETY ROPE CLAMP SCREW Attach the stern bracket to the transom and tighten the clamp screws. CORRECT GIVES MAXIMUM PERFORMANCE While operating the boat, check Install the outboard motor at the best The trim angle differs according to the tightness of the clamp screws... - Page 23 INSTALLATION Motor Angle Adjustment 〈 〉 Adjust the outboard motor so that it is perpendicular to the water surface (i.e. axis of the propeller is parallel with the water surface). ADJUSTING BOLT AND WING NUT Loosen the wing nut to free the adjusting bolt.
-
Page 24: Pre-Operation Checks
PRE-OPERATION CHECKS The BF2D/BF2.3D is the 4-stroke, Removing/Installing Engine Cover forced air cooled outboard motor Do not operate the outboard ENGINE COVER which uses automotive unleaded motor without the engine cover. STRAP gasoline with a Research Octane Exposed moving parts can Number of 91 or higher (a Pump cause injury. -
Page 25: Engine Oil Level
Recommended oil Inspection and Refilling 〈 〉 〈 〉 Use Honda 4-stroke oil or an Engine oil is a major factor equivalent high detergent, premium affecting engine performance quality motor oil certified to meet or and service life. Nondetergent exceed U.S. automobile and low quality oils are not manufacturer’s requirements for... -
Page 26: Fuel Level
PRE-OPERATION CHECKS Oil capacity: Fuel Level FUEL TANK 0.25 L (0.26 US qt, 0.22 lmp qt) FUEL FILLER CAP VENT KNOB Do not overfill the engine oil. Check the engine oil after refilling. Excessive engine oil as well as the insufficient oil could cause damage to the engine. -
Page 27: Gasoline Containing Alcohol
Honda. There warranty. Honda cannot endorse Do not smoke or allow flames are two types of gasohol : one ‘‘... -
Page 28: Other Checks
PRE-OPERATION CHECKS Other Checks Check the following items: The anode metal helps to protect the The propeller and cotter pin for outboard motor from corrosion The possibility of corrosion damage or looseness. damage; it must be exposed directly damage is increased if the anode The steering handle for impaired to the water whenever the motor is in metal is painted over or allowed to... -
Page 29: Starting The Engine
STARTING THE ENGINE Starting the Engine FUEL FILLER CAP VENT KNOB FUEL VALVE LEVER OPEN Exhaust contains poisonous carbon monoxide which can cause unconsciousness and may lead to death. Never run the outboard motor in a closed garage or confined area. - Page 30 STARTING THE ENGINE EMERGENCY STOP SWITCH CLIP SPARE EMERGENCY STOP SWITCH CLIP EMERGENCY EMERGENCY STOP STOP SWITCH SWITCH LANYARD Engage the emergency stop switch clip located at one end of the If the operator does not attach The engine will not start unless the emergency stop switch lanyard the emergency stop switch emergency stop switch clip is...
- Page 31 STARTING THE ENGINE THROTTLE LEVER type: CHOKE KNOB THROTTLE LEVER START PULL START THROTTLE GRIP type: THROTTLE GRIP When the engine is cold or ambient temperature is low, pull the choke knob to the ON position. (It provides rich fuel mixture to START the engine.) START...
- Page 32 STARTING THE ENGINE CHOKE KNOB Do not allow the starter grip to Direction to pull snap back against the engine. Return it gently to prevent damage to the starter. Do not pull the starter grip while the engine is running, as that PUSH may damage the starter.
-
Page 33: Emergency Starting
STARTING THE ENGINE Emergency Starting RECOIL STARTER ENGINE COVER If the recoil starter does not operate properly for some reasons, the engine can be started using the spare starter rope in the tool kit. 5 mm NUTS Remove the engine cover. Remove the recoil starter by removing the three 5 mm nuts. - Page 34 STARTING THE ENGINE Leave the recoil starter off and STARTER ROPE reinstall the engine cover. Exposed moving parts can cause injury. Use extreme care when installing the engine cover. Do not operate the outboard motor without the engine cover. Wind the spare starter rope clockwise around the pulley, and then pull it straight out to start the engine.
-
Page 35: Troubleshooting Starting Problems
STARTING THE ENGINE Troubleshooting Starting Problems SYMPTOM POSSIBLE CAUSE REMEDY The engine does not start. Emergency stop switch clip is not engaged. Engage the emergency stop switch clip. (page 28) Throttle lever or throttle grip is not in the Move the throttle lever or the throttle grip to the START position. -
Page 36: Operation
OPERATION Operation Steering STEERING FRICTION BOLT Break-in Procedure Break-in operation allows the mating surfaces of the moving parts to wear evenly and thus ensures proper performance and longer outboard motor life. Break-in your new outboard motor as follows. For the first 10 hours of operation, run the outboard motor at low speed, avoid prolonged full-throttle speed, and avoid abrupt operation of the... - Page 37 OPERATION Cruising THROTTLE LEVER Do not operate without the THROTTLE LEVER type: engine cover. Exposed moving parts could cause injury; water may damage the FAST engine. Confirm that the tilt lever is in the ‘‘RUN’’ position. THROTTLE GRIP type: For best performance, passengers and equipment should be distributed THROTTLE GRIP evenly to balance the boat.
- Page 38 OPERATION Reversing the Outboard Motor THROTTLE LEVER type: THROTTLE LEVER SLOW SLOW THROTTLE GRIP type: THROTTLE GRIP FRICTION KNOB THROTTLE GRIP To reverse direction, turn the outboard motor 180 and then pivot the tiller handle as shown. SLOW For the throttle grip type, be careful not to hold and move the SLOW throttle grip when pivoting the...
-
Page 39: Tilting The Motor
OPERATION Tilting the Motor TILT LEVER REAR CARRYING HANDLE Tilt the motor to prevent the propeller and gear case from hitting the bottom when the boat is beached STEERING FRICTION or stopped in shallow water. BOLT 75° FRONT CARRYING HANDLE Stop the engine (page ) and turn If the motor is tilted in the... - Page 40 OPERATION Mooring 〈 〉 To avoid damaging the motor, use the utmost care when mooring a boat, especially when its motor is tilted up. Don’t allow the motor to strike against the pier or other boats.
-
Page 41: Shallow Water Operation
If you always altitudes, have an authorized and gear case from hitting the bottom operate the outboard motor at Honda outboard motor dealer (see page ). With the motor tilted altitudes higher than 1,500 m (5,000 return the carburetor to original up, operate the motor at low speed. - Page 42 STOPPING THE ENGINE Stopping the Engine THROTTLE LEVER type: THROTTLE LEVER EMERGENCY STOP SWITCH SLOW SLOW THROTTLE GRIP type: THROTTLE GRIP EMERGENCY EMERGENCY STOP STOP SWITCH SWITCH LANYARD CLIP In an emergency; SLOW Disengage the emergency stop switch clip from the emergency stop switch by pulling the emergency stop switch SLOW lanyard.
-
Page 43: Stopping The Engine
STOPPING THE ENGINE EMERGENCY FUEL CAP VENT KNOB STOP SWITCH FUEL VALVE LEVER FUEL FILLER CAP Push the emergency stop switch Close the fuel cap vent knob. until the engine stops. After sailing with the throttle fully Remove the emergency stop open, cool down the engine by switch lanyard and store it. -
Page 44: Transporting
TRANSPORTING Transporting Be careful not to spill fuel. Spilled fuel or fuel vapor may ignite. If any fuel is spilled, make sure the area is dry before storing or transporting the motor. Do not smoke or allow flames or sparks where fuel is drained or stored. - Page 45 TRANSPORTING Transport the motor either vertically Vertical transport or horizontally as shown here when removed from the boat. STERN BRACKET CLAMP SCREW Attach the stern brackets to a Transport the motor as shown motor stand and tighten the clamp above. screws to install the outboard motor securely.
- Page 46 TRANSPORTING Horizontal transport INCORRECT CASE PROTECTOR Rest the motor on the case protectors with the tiller handle folded. Any other transport or storage position may cause damage or oil leakage. If the motor is tilted in the reverse position, crankcase oil will enter the cylinder and may cause difficult starting or may prevent the engine from being...
-
Page 47: Trailering
TRANSPORTING Trailering STEERING FRICTION BOLT TRANSOM SAVER BAR When trailering or transporting the The motor should be trailered in the boat with the motor attached, it is normal running position. If there is recommended that the motor remain insufficient road clearance in this in normal running position with the position, then trailer the motor in the steering friction bolt tightened... -
Page 48: Cleaning And Flushing
CLEANING AND FLUSHING After each use in salt water or dirty water, thoroughly clean and flush the outboard motor. Wash the outside of the outboard motor with clean, fresh water. Be sure the outboard motor is securely mounted. - Page 49 (6 in) above the MAINTENANCE SCHEDULE. anticavitation plate, otherwise the engine will overheat. Use only Honda Genuine parts Shut off the engine before or their equivalents for performing any maintenance. If maintenance or repair. The use...
-
Page 50: Maintenance
MAINTENANCE Tool Kit and Spare Parts Tool Kit The following tools and spare parts are supplied with the outboard motor for maintenance, adjustment, and 10 mm × emergency repairs. EMERGENCY STOP FLAT/PHILLIPS WRENCH SWITCH CLIP SCREWDRIVER TOOL BAG EMERGENCY PLIERS SOCKET WRENCH STARTER ROPE Spare Parts... -
Page 51: Maintenance Schedule
(with clutch type) Lubricate more frequently when used in salt water. These items should be serviced by an authorized Honda Marine dealer, unless you have the proper tools and are mechanically proficient. Refer to the Honda Shop Manual for service procedures. - Page 52 ○ Lubricate more frequently when used in salt water. These items should be serviced by an authorized Honda Marine dealer, unless you have the proper tools and are mechanically proficient. Refer to the Honda Shop Manual for service procedures. For professional commercial use, log hours of operation to determine proper maintenance intervals.
-
Page 53: Engine Oil Change
MAINTENANCE Engine Oil Change Engine Oil Change 〈 〉 OIL FILLER CAP Insufficient or contaminated engine OIL FILLER HOLE oil adversely affects the service life of the sliding and moving parts. Wash your hands with soap and water after handling used oil. Oil change interval: 10 hours after the date of purchase or first month for initial replacement,... -
Page 54: Gear Oil Change
MAINTENANCE Reinstall the engine cover. Gear Oil Change Change the gear oil with the engine stopped and the outboard motor in Oil change interval: the vertical position. 10 hours or 1 month after initial use for initial change, then every 6 months or 50 hours. -
Page 55: Starter Rope Check
If water or contaminated (milky- colored) oil flows out the drain hole when the bolt is removed, have the outboard motor checked by and authorized Honda Marine dealer. Add oil through the oil drain hole until it flows out the oil level hole, then install the oil level bolt and the oil drain bolt. -
Page 56: Spark Plug Service
MAINTENANCE Spark Plug Service SIDE ELECTRODE SOCKET WRENCH To ensure proper engine operation, PLUG GAP: the spark plug must be properly 0.7 mm − gapped and free of deposits. (0.024 − 0.028 in) The spark plug becomes very hot during operation and will remain hot to awhile after stopping the engine. - Page 57 MAINTENANCE Check the sealing washer is in good condition, and thread the plug in by hand to prevent cross threading. After the spark plug is seated, tighten with a spark plug wrench to compress the washer. If installing new spark plug, tighten 1/2 turn after the spark plug seats to compress the washer.
-
Page 58: Lubrication
MAINTENANCE Lubrication THROTTLE ARM Wipe the outside of the engine with a cloth dipped in clean oil. Apply marine anticorrosion grease to the following parts: Lubrication interval: 10 hours or a month after the date of purchase for initial lubrication, then every 50 hours or 6 months. TILT LEVER STEERING HANDLE Apply anticorrosion oil to pivot surfaces where grease... -
Page 59: Shear Pin Change
Remove the broken shear pin and obstruction. replace it with a new one. Install the propeller. Use a genuine Honda cotter pin and bend the pin ends as shown. When replacing, remove the emergency stop switch clip to prevent an accidental startup of the engine. -
Page 60: Servicing A Submerged Motor
If there is a Honda outboard motor engine oil change should be dealership nearby, take the motor performed after running the engine immediately to the dealer. -
Page 61: Emission Control System
Rough idle If the engine fails to start, remove toxic. Honda Motor Co., Ltd. utilizes Misfiring or backfiring during the spark plug, clean and dry the lean carburetor settings and other... -
Page 62: Storage
Draining the Gasoline outboard motor, have your outboard days) is foreseen, drain fuel tank motor serviced by an authorized and carburetor. Honda outboard motor dealer before Gasoline is extremely storage. However, the following flammable, and gasoline vapor can explode, causing serious procedures can be performed by you, the owner, with a minimum of tools. - Page 63 STORAGE DRAIN SCREW FUEL VALVE LEVER Turn the fuel valve lever OFF. Turn the fuel valve lever ON, Remove the fuel filler cap and loosen the carburetor drain screw, drain the gasoline from the fuel and drain the gasoline into a tank into a suitable container.
-
Page 64: Engine Oil
STORAGE Engine Oil Storage Position of the Outboard Vertical storage Change the engine oil. (page Motor Remove the spark plug (see page Store the motor either vertically or horizontally as follows with the ), and remove the clip from the steering handle folded. - Page 65 STORAGE Horizontal storage INCORRECT CASE PROTECTOR Store the motor as shown above. Rest the motor on the case protectors with the tiller handle folded. Any other transport or storage position may cause damage or oil leakage. If the motor is tilted in the reverse position, crankcase oil will enter the cylinder and may cause difficult starting or may...
- Page 66 TROUBLESHOOTING Engine fails to start 〈 〉 Emergency stop switch Engage the clip is not engaged. emergency stop switch clip in place. (page 28) Move the throttle Throttle lever or throttle grip is not in the START lever or the throttle position.
-
Page 67: Troubleshooting
(page 57) (page 23) Unmatched propeller is Consult with an Unmatched propeller is Consult with an selected. authorized Honda selected. authorized Honda outboard motor dealer. outboard motor dealer. Trim angle is not correct. Trim to correct angle. Passengers are not... - Page 68 Transistorized magneto system Lubrication Oil slinger system system Specified oil Engine: API standard SG, SH, SJ, SAE 10W-30 Gear case: API standard (GL-4) SAE 90 outboard motor gear oil Honda outboards are power rated in accordance with ISO8665 (propeller shaft output).
-
Page 69: Specifications
Transistorized magneto system Lubrication Oil slinger system system Specified oil Engine: API standard SG, SH, SJ, SAE 10W-30 Gear case: API standard (GL-4) SAE 90 outboard motor gear oil Honda outboards are power rated in accordance with ISO8665 (propeller shaft output). - Page 70 SPECIFICATIONS Noise and Vibration MODEL BF2D·BF2.3D CONTROL SYSTEM T (Tiller handle) Sound Pressure Level At Operator’s Ear 82 dB (98/37/EC, ICOMIA 39-94) Vibration 6.5 (m/s ) rms (98/37/EC, ICOMIA 38-94) Reference to: ICOMIA Standard: as it specifies the engine operating conditions and measurement conditions.
-
Page 71: Wiring Diagram
WIRING DIAGRAM IGNITION COIL EMERGENCY STOP SWITCH SPARK PLUG BLACK... - Page 72 MAJOR Honda DISTRIBUTOR ADDRESSES For further information, please contact Honda Customer Information Centre at the following address or telephone number: For European AUSTRIA CANARY ISLANDS CZECH REPUBLIC FRANCE Honda Austria Gesellschaft Automocion Canarias, S.A. BG Technik cs, a.s HONDA RELATIONS CLIENTS Mbh.
-
Page 73: Major Honda Distributor
MAJOR Honda DISTRIBUTOR ADDRESSES For further information, please contact Honda Customer Information Centre at the following address or telephone number: For European (continued) HUNGARY LITHUANIA NORWAY REPUBLIC OF BELARUS Mo.Tor.Pedo Co., Ltd. JP Motors Ltd AS Kellox Kamaraerdei út 3 Kubiliaus str. - Page 74 MAJOR Honda DISTRIBUTOR ADDRESSES For further information, please contact Honda Customer Information Centre at the following address or telephone number: For European (continued) For Australian SPAIN UKRAINE AUSTRALIA Greens Power Products S.L. Honda Ukraine LLC Honda Australia Motorcycle Poligono Industrial Congost - 101 Volodymyrska Str.
-
Page 75: Major Honda Distributor Addresses In Europe
..............47 Cleaning and Flushing ........... . 46 Schedule ..............49 Component Identification ..........10 Major Honda Distributor Addresses In Europe .... . 70 Controls ................11 Motor Draining the Gasoline ............ . 60 Angle ................. -
Page 76: Index
INDEX Steering Handle Friction ..........16 Stopping the Engine ............40 Storage ................60 Engine Oil ..............62 Position of the Outboard Motor ........ . 62 Throttle Fixing Knob (Throttle grip type) ....... 13 Grip ................
Need help?
Do you have a question about the BF2D and is the answer not in the manual?
Questions and answers