
Related Manuals for Compuprint 9058D


Summary of Contents for Compuprint 9058D
- Page 1 Rev. 001...
- Page 3 Compuprint advices the customers not to use products for which the compliance to this safety rules are not warranted. Finally seek your dealer or contact a Compuprint office and be sure that are provided you the original Compuprint consumables. A78408098-005...
-
Page 4: Fcc Notes
Compuprint Information FCC Notes This equipment has been tested and found to comply with the limits for a Class B digital device, pursuant to Part 15 of the FCC Rules. These limits are designed to provide reasonable protection against harmful interference when the equipment is operated in a commercial environment. -
Page 5: Safety Information
Safety Information Safety Information The following areas of the printer should be covered for safety reasons: R e ar Tractor C o ve r ASF In stalla tio n Are a C o ve rs Pa pe r Stacker O p enin gs The above openings must always be protected with their cover when the corresponding option is not installed. -
Page 6: Table Of Contents
Choosing a Suitable Location ................ 4 Printer Assembly.................... 5 Removal of the Shipment Locks ..............5 Ribbon Cartridge Installation..............5 Upper Push Tractor Installation (9058D model only) ......9 Host Computer Connection................10 Software Driver Selection ................11 Power Connection..................11 Selecting the Display Language .............. -
Page 7: Table Of Contents
How to Handle the Paper Parking............... 53 g ..................Paper Paths ....................54 Paper Specifications ..................55 Fanfold Paper (9058 and 9058D models) ..........55 Envelopes (9058 model only) ..............55 Cut Sheets (9058 model only) ..............55 Cut Sheets..................... 56 Cut Sheets Loading Modes .............. - Page 8 Table of Contents A78408098-005...
-
Page 9: Printer Features
Getting to Know Your Printer Printer Features The following list describes the main characteristics of your printer: • 24 Needle Print Head • 136 columns • Draft printing at 480 cps, LQ printing at 133 cps • The supported emulations are: IBM Proprinter XL24-XL24E, Personal Printer 2391 and EPSON LQ 1050-2550 •... -
Page 10: Unpacking Your Printer
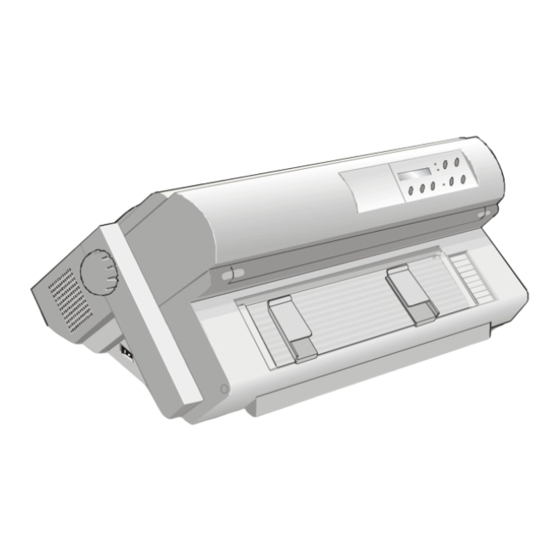
Together with the user manual, the following items are included in the box: Notify any damage to your supplier. C D -R O M U pper P ush Tractor R ibbon C artridge (9058D m odel only ) P ow er Cable Printer Parts Front View 9058 model... -
Page 11: Rear View
Getting to Know Your Printer 9058D model O pe ra tor P a ne l P a pe r K n o b P u sh Trac to rs C over P o w er S w itch Rear View... -
Page 12: Choosing A Suitable Location
Setting Up Your Printer Setting Up Your Printer Choosing a Suitable Location Consider the following points when you choose the location for your printer: • The distance between the printer and the host computer must not exceed the length of the interface cable; •... -
Page 13: Printer Assembly
Setting Up Your Printer Printer Assembly Removal of the Shipment Locks Open all the printer covers and make sure that you remove all the shipment locks from the printer. Ribbon Cartridge Installation Two types of ribbon cartridges are available for this printer, depending on whether the color kit is installed or not. - Page 14 Setting Up Your Printer 3. Open the top cover using the small handles on either side of the top cover. 4. Turn the printer on. The print carriage prepares for ribbon cartridge installation. 4. Before installing ribbon R ibb on Ten sion Kn ob cartridge, turn the ribbon winding knob...
- Page 15 Setting Up Your Printer 5. Align the cartridge pins with the locking grooves on the left and right cartridge supports. The cartridge (black ‘Long Life’ or color) to be used when the color kit is installed has only one groove. 6.
- Page 16 Setting Up Your Printer If the color kit option is installed on your printer insert the white plastic holder onto the color kit as shown in the following figure. R ib b on G uide H o ld er for C olor K it C o lo r K it 7.
-
Page 17: Upper Push Tractor Installation (9058D Model Only)
If you need to replace the used ribbon cartridge, see "Replacing The Ribbon Cartridge". Upper Push Tractor Installation (9058D model only) An additional push tractor is provided with the 9058D printer. This second push tractor unit can be installed in front position (on the lower push tractor). -
Page 18: Host Computer Connection
Setting Up Your Printer 3. The upper push tractor must be installed as shown in figure. 4. If you need to remove the upper push tractor, turn the printer off. Take the connector cable off and press on the internal levers (located in the upper push tractor hooks) to disengage the tractor. -
Page 19: Software Driver Selection
Follow the instructions in the readme file you find on the CD-ROM. In a Windows 95/98 environment, the printer supports the Plug & Play feature. The printer drivers of all Compuprint printers can be found at the Internet Address http://www.compuprint.net... - Page 20 Setting Up Your Printer 1. Make sure the power outlet is near the printer location and easily accessible. Always use a grounded outlet. 2. Make sure that the power switch is in 0 position (OFF). 3. Insert the power cable plug into the printer connector and the other power cable end into a convenient outlet (the figure shows the European version).
-
Page 21: Selecting The Display Language
FUNCTIONS 5. Press the → key to pass to the second level functions: for the 9058 model PAPER OVERLAY for the 9058D model SEQUENCE NONE 6. Press the ↓ key until the menu language is displayed: MENU ENGLISH 7. Press the → key to scroll the menu languages. When the desired language is displayed, press the key to select it. -
Page 22: Configuring The Printer
Configuring the Printer Configuring the Printer Operator Panel Presentation The operator panel enables you to perform many of the printer functions including paper path selections, font selection and the printer setup. R E AD Y L OAD /FF ↓ ↑ MIC R O F EED QUIET PROGRAM... - Page 23 QUIET PRINT ON upper push paper path selected UPPER PUSH (9058D model only). Printing the self-test page. SELF TEST This message appears to indicate that the Shift SHIFT FUNCTION functions of the operator panel keys have been selected pressing the key.
-
Page 24: Indicators
Configuring the Printer Message Description The path has been changed and the printer is PATH CHANGING updating the settings. These messages are displayed when the printer TEAR OFF PAPER receives a paper parking command. Tear off the PARK PAPER fanfold then press the key to park the paper. -
Page 25: Program Key
Configuring the Printer ON LINE Key • ON LINE Normal Function Enables or disables the printer. • If this key is pressed while powering the printer on, the self test is printed; the printout is topped pressing this key again. •... -
Page 26: Shift Key
Configuring the Printer SHIFT Key SHIFT Normal Function Enables the alternative key functions. If the printer is receiving print data, press key before pressing the ON LINE SHIFT key. If no printing data are in the print buffer, pressing the key, the printer goes SHIFT offline. -
Page 27: Macro Key
Configuring the Printer MACRO Key MACRO Normal Function Selects one of the user macros (Macro 1, Macro 2, Macro 3 or Macro 4). If you want to select the displayed macro, wait for 2 seconds without pressing any key and the parameters of this macro will be set PATH Shift Function... -
Page 28: Printer Configuration
Configuring the Printer Printer Configuration The main printer setup parameters can be selected via the operator panel. The setup parameters are divided into the following two printer menus. The Power-On Configuration, that allows a complete configuration at installation time according to the hardware and the emulation types, and the Program Setup that allows you to set the functions that are the most useful in your daily job. -
Page 29: Power-On Configuration
RELEASE KEY message is displayed. As soon as the key gets PROGRAM released, the following message will be displayed: 9058 9058D then, The following figure shows the structure of the Power-On Configuration and how to move inside the Setup. Main Structure... -
Page 30: Parallel Interface
Configuring the Printer Printout of the Printer Settings → or ← PRINT OUT? NO PRINT OUT? YES ↓ PARALL INTERF PRINT OUT? NO The Setup is not printed. PRINT OUT? YES The printer setup is printed showing the currently selected values. The printout starts as soon as you select this value. - Page 31 Configuring the Printer Setting the Interface Parameters Interface Type PRINT OUT? NO PARALL INTERFACE ↓ ↑ → → or ← PARALL INTERFACE I/F 1284 BIDIR → or ← CX PARALLEL I/F ↓ ↓ SERIAL INTERFACE SELECT-IN HOST I/F 1284 BIDIR Bidirectional IEEE 1284 parallel interface.
- Page 32 Configuring the Printer Printer Emulation DEDIC.BUFFER2K ↑ → or ← EMUL. IBM XL24 → or ← EMUL. IBM XL24AGM → or ← EMUL. IBM 2391 → or ← EMUL. EPSON LQ ↓ CHAR. SET CS2 EMUL IBM XL24 The printer uses the IBM Proprinter XL24e emulation.
- Page 33 Configuring the Printer The following national character sets are available: CP437 G CP850 CP851 CP 852 CP 853 CP 437(*) CP 855 CP 857 CP 858 CP 860 CP 862 CP 863 CP 864 CP 865 CP 866 CP 867 CP 876 CP 877 96GREEK...
- Page 34 Configuring the Printer LF Code Behavior AUTO CR NO ↑ → or ← AUTO LF NO → or ← AUTO LF YES → or ← AUTO LF HOST ↓ 20 CPI IBM NO PARALL INTERFACE AUTO LF NO No Automatic LF after CR. AUTO LF YES Automatic LF after CR.
-
Page 35: Serial Interface
Configuring the Printer Serial Interface This menu defines the use of the serial interface and is structured according to the interface specific parameters. Serial Interface Parameters S erial I/F ... S erial I/F No S erial Interface B aud ... B aud 9600 D ata Bits 7 D ata Bits 8... - Page 36 Configuring the Printer Setting the Interface Parameters Interface Type PARALL INTERFACE SERIAL INTERFACE ↑ ↑ → → or ← SERIAL INTERFACE SERIAL I/F NO → or ← SERIAL I/F 232 → or ← SERIAL I/F 422 ↓ ↓ FUNCTIONS BAUD 9600 SERIAL I/F NO The serial interface is disabled.
- Page 37 Configuring the Printer Parity Check DATA BITS 8 ↑ → or ← PARITY NONE → or ← PARITY ODD → or ← PARITY EVEN → or ← PARITY MARK → or ← PARITY SPACE ↓ HANDSHAKE DTR PARITY NONE Data does not have a parity bit, i.e. 8 bit data are transferred and the parity check is disabled.
- Page 38 Configuring the Printer Printer Emulation See description of the parallel interface. EPSON Character Sets See description of the parallel interface. IBM Character sets See description of the parallel interface. EPSON National Character sets See description of the parallel interface. IBM National Character Sets See description of the parallel interface.
- Page 39 P.O n P ath M acro P.O n P ath Last M enu E N G LIS H M enu … 9058D Functions Group Parameters Paper O verly? No Paper O verly? Yes Seque nce ... Seque nce N one...
- Page 40 Only the Paper Overlay No item appears. Paper Loading Sequence This selection appears only if on the 9058 model the automatic sheet feeder is installed or if on the 9058D model the automatic sheet feeder or the upper tractor is installed. PAPER OVERLY NO ↑...
- Page 41 Configuring the Printer SEQUENCE ASF123 This item appears only, if the automatic sheet feeder is installed. The paper is fed from the first bin until this bin is out of paper. Then the paper is fed from the second bin and finally from the third bin. Enable/Disable the Buzzer SEQUENCE NONE ↑...
- Page 42 Configuring the Printer → or ← TEXT DIRECT UNI ↓ GRAPH DIRECT BI Selects the print direction for text. Graphics Print Direction TEXT DIRECT BI ↑ → or ← GRAPH DIRECT BI → or ← GRAPH DIRECT UNI ↓ BAR CODES UNI Selects the print direction for graphics.
- Page 43 Configuring the Printer These items are self explaining. See also “Selecting the Display Language” before in this manual. Resetting to Factory Default Values With the BACK TO MFG function it is possible to reset all items in the Power On Configuration and in the Program Setup to their factory default values. This may be useful if you do not remember the values you set in the menus, or because you simply changed you mind about the settings you have just done.
-
Page 44: Program Setup
Configuring the Printer Program Setup The default values of the various functions are indicated in bold. Entering the Program Setup Press the key when the printer is turned on and is offline or online PROGRAM without printing. The following message will be displayed: PRINT OUT? NO The following figure shows the structure and how to move inside the Program Setup. - Page 45 Configuring the Printer Printout of the Printer Settings → or ← PRINT OUT? NO PRINT OUT? YES ↓ USER MACRO PRINT OUT? NO The Setup is not printed. PRINT OUT? YES The printer setup is printed. The printout starts as soon as you select this value. NOTE: the Program setup printout indicates: •...
- Page 46 Configuring the Printer User Macro Parameters M acro #3 M acro #4 M acro #1 M acro #2 Lin e S p..Lin e S p. 6 lpi L Lin e S p Lock Yes Lin e S p. Lock N o Len gth ...
- Page 47 Configuring the Printer Line Spacing MACRO # 1 ↑ → → or ← MACRO# 1 LINE SP. 6 LPP → or ← LINE SP. 8 LPP → or ← LINE SP. 12 LPP → or ← LINE SP 3L/30MM → or ← LINE SP 4L/30MM →...
- Page 48 Configuring the Printer Top of Form LENGTH Xx ↑ → or ← TOP OF FORM 0 → or ← TOP OF FORM ... → or ← TOP OF FORM xxx ↓ SKIPOVER 0 These items set the top of form. The values range between 0 and the page length - 1.
- Page 49 Configuring the Printer Pitch Selection FONT Draft ↑ → or ← PITCH 5 CPI → or ← PITCH 6 CPI → or ← PITCH 7.5 CPI → or ← PITCH 8.5 CPI → or ← PITCH 10 CPI → or ← PITCH 12 CPI →...
- Page 50 ASF 3 ↓ TEAR NORMAL LOWER PUSH Paper loading with the lower push tractor. UPPER PUSH Paper loading with the upper push tractor (9058D model only). MANUAL FORM Paper loading using the manual single sheet path (9058 model only). PUSH PULL Paper loading using the lower push tractor and the rear pull tractor.
- Page 51 Configuring the Printer Tear-Off Mode LOWER PUSH ↑ → or ← TEAR NORMAL → or ← TEAR AUTOM. → or ← LABELS → or ← NO TEAR ↓ STRONG IMPACT TEAR NORMAL The Tear-Off Function is performed pressing the key when the printer is offline . ONLINE TEAR AUTOM.
- Page 52 Configuring the Printer Paper Perforation When printing on fanfold paper this function allows to move the print head aside the paper when the paper perforation passes between the mylar and the print bar, to avoid paper jams. If the use of single sheets is selected, this item is not displayed.
- Page 53 Configuring the Printer Horizontal Character Tuning AUTOGAP 0 ↑ → or ← TUNING.HORIZ 0 → or ← TUNING.HORIZ ... → or ← TUNING.HORIZ 60 ↓ TUNING.VERT 0 These values adjust the distance between the left paper margin and the first print character.
- Page 54 Configuring the Printer Selecting Another Macro MACRO -> MFG NO ↑ → or ← NEXT MACRO? NO NEXT MACRO? YES ↓ ↓ CONFIG MENU NO MACRO # 1 To pass over to another macro, select NEXT MACRO YES. Pressing the ↓ or ↑ key the item MACRO#1 is displayed, then press the →...
- Page 55 Configuring the Printer Adjusting the Tear-Off Position HEX DUMP NO ↑ → or ← TEAR ADJUST: - 30 → or ← TEAR ADJUST: ... → or ← TEAR ADJUST: +360 ↓ STORE? QUIT TEAR ADJUST: xxxx These values adjust the distance between the Tear-Off Perforation and the Tear-Off Bar.
-
Page 56: How To Select The Paper Path
LOAD LOWER PUSH For the lower push tractor paper path. LOAD UPPER PUSH For the upper push tractor paper path (9058D model only). LOAD MANUAL For the manual cut sheet paper path (9058 model only). LOAD PUSH-PULL For the paper path using the lower push tractor and the optional rear pull tractor. - Page 57 Configuring the Printer 3. Press the → key to select the macro for which you want to set the paper size (MACRO#1,MACRO#2,MACRO#3 or MACRO#4). 4. Once the desired macro is displayed press the ↓ key until the following parameter is displayed: LENGTH xx 5.
- Page 58 Configuring the Printer Selection of the Tear-Off Mode It is now possible to select the Tear-Off Mode. 1. Press the key when the printer is disabled or enabled without PROGRAM printing to enter the Program Setup. 2. Press the ↓ key. The following message is displayed: USER MACRO 3.
-
Page 59: How To Lock/Unlock The Access To The Printer Setups
SHIFT pressed while powering the printer on. As soon as these keys are released, the following messages will be displayed: 9058 9058D then, MENU LOCKED Now the access to the printer setups is locked. If the key is pressed, the... -
Page 60: How To Handle The Paper Parking
Configuring the Printer How to Handle the Paper Parking The paper parking is performed in the following cases: • At power on, if the paper is loaded in a paper path that is not the default one, the parking is performed automatically. •... -
Page 61: Paper Handling
(90 58 an d 9 058D ) Low er Pu sh Tracto r (90 58 and 9058 D) For the 9058D model the upper tractor may be installed, even if it is not used, also when the paper feeding options are used. A78408098-005... -
Page 62: Paper Specifications
Paper Handling Paper Specifications It is important to use the correct paper for obtaining the best performance. See the information table below: Fanfold Paper (9058 and 9058D models) Loading Mode Lower Tractor Upper Tractor Push-Pull (9058D only) (option) Width 76 to 432 mm... -
Page 63: Cut Sheets (9058 Model Only)
Paper Handling Copies 1 Original + 7 Copies Cut Sheets Cut Sheets Loading Modes 9068 plus model Cut sheet loading mode is only available for the 9058 model. Cut sheets can be loaded manually, one at a time using the front manual paper path (manual or automatic loading) or automatically using the ASF option for large quantities of paper. - Page 64 Paper Handling Position the left paper guide on the cut sheet support for the first printing column (position 0). 3. Insert a cut sheet along the left paper guide. Match the right paper guide with the sheet margin. 4. The loading mode of the cut sheet depends on the value set for the QUICK function in the Power-On Configuration: Manual loading mode Make sure that the printer is disabled.
-
Page 65: Fanfold Paper
1. To select the lower tractor paper path press the key until the PATH display shows: LOAD LOWER PUSH • If your printer is the 9058D model , press the key to select the PATH lower tractor paper path. The display shows: PATH CHANGING... - Page 66 2. Open the tractor area cover turning is upwards and lay it on the top of the printer. • If your printer is the 9058D model and the upper tractor is installed, rotate the upper tractor out of the printer.
- Page 67 4. Space the paper guides along the tractor bar. Open the sprocket covers of the left and right sprocket. • If your printer is the 9058D model, insert the fanfold paper between the lower and the upper tractor. A78408098-005...
- Page 68 6. Match the left sprocket for the first printing position with the ninth mark and lock it in place. Adjust the right sprocket gently to remove slack from the paper. • If your printer is the 9058D model, reposition the upper tractor in its initial position. A78408098-005...
- Page 69 Paper Handling 7. Close the tractor area cover. Press the key to load the paper into LOAD/FF the printer. 8. The paper must be loaded as shown in figure. A78408098-005...
-
Page 70: Loading Paper Using The Upper Tractor
Loading Paper Using the Upper Tractor 9058D model Fanfold paper loading mode through the upper tractor is only available for the 9058D model. To load paper in this way, it is necessary to install the upper tractor. See "Installation". 1. Press the key to select the upper tractor paper path. - Page 71 Paper Handling 5. Unlock upper tractor sprockets lowering the sprocket levers. Slide the left sprocket to the first printing column. 6. Space the paper guides along the tractor bar. Open the sprocket covers of the left and right sprocket. 7. Insert the paper perforation on the left and right sprocket pins and close the sprocket covers.
- Page 72 Paper Handling 9. Close the tractor area cover. Press the key to load the paper into LOAD/FF the printer. 10. The paper must be loaded as shown in figure. A78408098-005...
-
Page 73: Loading Paper Using The Lower Push Tractor And The Rear Pull Tractor (Option)
1. Press the key to select the push-pull paper path. The display shows: PATH LOAD PUSH-PULL • If your printer is the 9058D model, press the key to select the PATH push-pull paper path. The display shows: PATH CHANGING •... - Page 74 Paper Handling 3. Take up the slack of the paper exiting from the rear paper slot and rotate the sprocket bar to align the sprocket pins of the rear tractor with the paper perforation. 4. Lock the sprocket covers and lower the sprocket levers.
-
Page 75: Printer Maintenance And Troubleshooting
Printer Maintenance and Troubleshooting Printer Maintenance and Troubleshooting Cleaning the Printer Make sure the printer has been turned off for at least 15 minutes before starting any cleaning operations. Periodic cleaning will help keep your printer in top condition so that it will always provide optimal performance. -
Page 76: Printing The Self Test
Printer Maintenance and Troubleshooting Remove the used ribbon cartridge by lifting it up. Now, you are ready to insert the new ribbon cartridge. See "Ribbon Cartridge Installation" before in this manual. Printing the Self Test At this point you should check if the printer is working well. The self-test printout allows you to check the print quality and printer operations Proceed as follows: 1. -
Page 77: Error Message Description
Printer Maintenance and Troubleshooting Error Message Description Messages Indication Solution A.G.A. NOT OPER. The automatic gap adjustment Press the ON LINE key to reset the error ADJUST THE GAP (A.G.A) is not enabled. condition. Adjust the print head gap to a fixed distance. -
Page 78: Options
Options Messages Indication Solution PAPER JAM A paper jam error condition Check all the paper paths and remove the CHECK ALL PATHS occurs in the paper path. jammed paper. Press the ON LINE key to reset the error condition. PRINT INTEGRITY Anomalous print out because Do not move the platen knob. -
Page 79: Removing The Rear Pull Tractor
Options 3. Replace the ASF cover. 4. Insert the rear pull tractor as shown in figure and the corresponding fixing area covers (with the slot) as shown in figure. 5. Turn the printer on. The paper can be loaded in push-pull mode. See "Loading Paper Using the Lower Push Tractor and the Rear Pull Tractor"... -
Page 80: Automatic Sheet Feeder (Asf)
Options Automatic Sheet Feeder (ASF) The Automatic Sheet Feeder (ASF), located in the rear of the printer, provides fast and automatic single sheet and envelopes loading. The ASF includes: • A paper stacker, which automatically collects the output paper. • A single bin for single sheets (A5, A4, Letter, Legal. -
Page 81: Color Kit
Options Color Kit This printer can print not only in black but also in different colors. For color printing you need the optional color kit shown in the figure below. The color kit is installable by an authorized technician. The color or the black ribbon ‘Long Life’... -
Page 82: Printer Specifications
Printer Specifications Printer Specifications Printing Characteristics Print Head Matrix 24 pins - 0.2 mm Print Head Life 400 mil characters (draft) Print Speed (cps) Draft Quality 10 cpi 12 cpi 15 cpi Throughput (pages/hour) Draft Quality ECMA 132 450 pph 193 pph Print Matrix (horizontal x vertical) Draft... - Page 83 A5 - A4 - A3 - A2 in portrait Letter - Legal – Executive Copies: 1 original + 7 copies Max. thickness 0,635 mm 9058D model Base Configuration Fanfold Paper LOWER PUSH TRACTOR Fanfold width: 76 to 432 mm (3 to 17 inches)
- Page 84 Printer Specifications Emulations - EPSON LQ 1050-2550 - IBM Proprinter XL24-XL24E - IBM Personal Printer 2391 Standard Functions • Automatic print head gap adjustment (AGA) • Automatic paper path switching via operator panel or S/W commands • Paper parking • Plug &...
-
Page 85: Consumables And Options
Printer Specifications Physical dimensions Height 315 mm (12,4 inches) Width 670 mm (26,38 inches) Depth 390 mm (15,35 inches) Weight 18 kg (39,7 lbs) Consumables and Options • Black ribbon cartridge (15 million characters) • “Long life” black ribbon cartridge (20 million characters) •...
Need help?
Do you have a question about the 9058D and is the answer not in the manual?
Questions and answers