Nokia 5800 XpressMusic User Manual
Hide thumbs
Also See for 5800 XpressMusic:
- User manual (254 pages) ,
- Guía del usuario (131 pages) ,
- Getting started (31 pages)
Table of Contents
Advertisement
Available languages
Available languages
Quick Links
Advertisement
Chapters
Table of Contents

Related Manuals for Nokia 5800 XpressMusic


Summary of Contents for Nokia 5800 XpressMusic
- Page 1 Nokia 5800 XpressMusic User Guide Issue 1...
- Page 2 Nokia, Nokia Connecting People, Nokia Original Enhancements logos, and Nokia Care are trademarks or registered trademarks of Nokia Corporation. Nokia tune is a sound mark of Nokia Corporation. Other product and company names mentioned herein may be trademarks or tradenames of their respective owners.
- Page 3 OF ANY KIND, EITHER EXPRESS OR IMPLIED, INCLUDING, BUT NOT LIMITED TO, THE IMPLIED WARRANTIES OF MERCHANTABILITY AND FITNESS FOR A PARTICULAR PURPOSE, ARE MADE IN RELATION TO THE ACCURACY, RELIABILITY OR CONTENTS OF THIS DOCUMENT. NOKIA RESERVES THE RIGHT TO REVISE THIS DOCUMENT OR WITHDRAW IT AT ANY TIME WITHOUT PRIOR NOTICE.
- Page 4 Model number: 5800d-1b Issue 1 EN-US...
-
Page 5: Table Of Contents
Access the menu........20 Remote lock..........39 Touch screen actions......21 Media key..........23 4. Make calls......39 Change the ringing tone.....23 Proximity sensor........39 Nokia support........23 Voice calls ..........39 2. Find help......24 During a call..........40 Voice mailbox ........40 In-device help........24 Answer or reject a call......41 Accessibility solutions......25... - Page 6 9. Music folder......69 for contacts...........57 Copy contacts........58 Music player..........69 SIM services..........58 Play a song or a podcast....70 SIM contacts........58 Playlists..........71 Fixed dialing........58 Podcasts..........71 Transfer music from a 7. Messaging......59 computer..........72 Messaging main view......59 Nokia Music Store.........72 Write and send messages....60 Nokia Podcasting.........73...
- Page 7 Still image capture on-screen controls and indicators.....79 Navigate to the destination....93 Capture settings........79 Update maps........94 Capture images.........80 Nokia Map Loader........94 After capturing an image....81 14. Connectivity......95 Flash and video light......82 Scenes..........82 Data connections and access You in the image — self- points............95...
- Page 8 Manage your accounts......112 World clock........125 Create a post........112 Calendar..........125 Post files from Gallery.......113 Calendar views........125 Calendar toolbar......126 16. Nokia Video Center..113 File manager........126 View and download video clips..113 About File manager......126 Video feeds.........114 Find and organize files....126 My videos..........115 Edit memory card......126 Transfer videos from your PC...115...
- Page 9 Install applications......127 Remove applications......129 Battery........145 Application manager settings..130 RealPlayer ..........130 Battery and charger RealPlayer toolbar......130 information........145 Play video clips........130 Nokia battery authentication Stream content over the air...131 guidelines...........146 Recorder..........131 Authenticate hologram....147 Write notes.........132 What if your battery is not Calculator..........132 authentic?........147 Converter..........132...
-
Page 10: Safety
QUALIFIED SERVICE Only qualified personnel may install or repair this product. ENHANCEMENTS AND BATTERIES Use only approved enhancements and batteries. Do not connect incompatible products. WATER-RESISTANCE Your device is not water-resistant. Keep it dry. © 2008 Nokia. All rights reserved. -
Page 11: About Your Device
You may also access other third-party sites through your device. Third-party sites are not affiliated with Nokia, and Nokia does not endorse or assume liability for them. If you choose to access such sites, you should take precautions for security or content. -
Page 12: Network Services
Contact your service provider for more information. This device supports WAP 2.0 protocols (HTTP and SSL) that run on TCP/IP protocols. Some features of this device, such as such as MMS, browsing, and e-mail, require network support for these technologies. © 2008 Nokia. All rights reserved. -
Page 13: Get Started
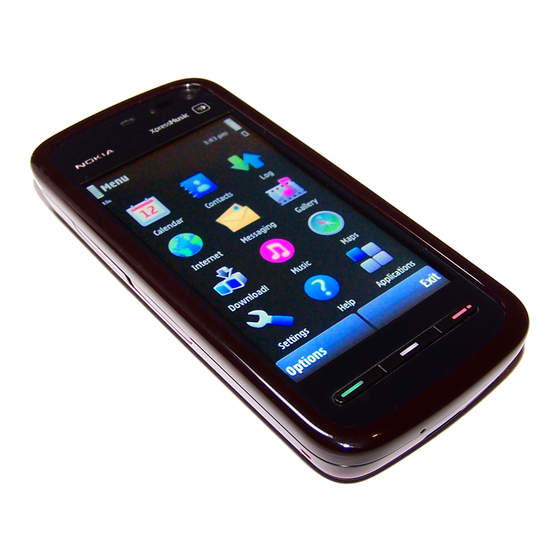
1. Get started Keys and parts 1 — Micro USB connector to connect to a compatible PC 2 — Nokia AV Connector (3.5 mm) for compatible headsets, headphones, and TV- out connectors 3 — Charger connector 4 — Power key 5 —... - Page 14 During extended operation such as an active video call and a high speed data connection, the device may feel warm. In most cases, this condition is normal. If you suspect the device is not working properly, take it to the nearest authorized service facility. © 2008 Nokia. All rights reserved.
-
Page 15: Insert The Sim Card
If the SIM card is not properly in place, the device can only be used in the offline profile. Insert battery Always switch the device off and disconnect the charger before removing the battery. © 2008 Nokia. All rights reserved. -
Page 16: Charge The Battery
1. Connect a compatible charger to a wall outlet. 2. Connect the power cord to the device. If the battery is completely discharged, it may take a while before the charging indicator starts scrolling. © 2008 Nokia. All rights reserved. - Page 17 Tip: Disconnect the charger from the wall outlet when the charger is not in use. A charger that is connected to the outlet consumes power even when it is not connected to the device. © 2008 Nokia. All rights reserved.
-
Page 18: Switch The Device On
The pen stylus is located in the back cover of the device. Important: Use only a stylus approved by Nokia for use with this device. Using any other stylus may invalidate any warranty applying to the device and may damage the touch screen. Avoid scratching the touch screen. -
Page 19: Home Screen
Menu > Settings and Phone > Phone mgmt. > Auto. keyguard > Keypad autolock period. Home screen Home screen is your starting point where you can collect all your important contacts or application shortcuts. © 2008 Nokia. All rights reserved. -
Page 20: Access The Menu
To change the home screen theme or the shortcuts, select Menu > Settings and Personal > Home screen. Access the menu To access the menu, press the menu key. To open an application or folder in the menu, tap it. © 2008 Nokia. All rights reserved. -
Page 21: Touch Screen Actions
To drag, place your finger or the stylus on the screen, and slide it across the screen. Example: To scroll up or down on a web page, drag the page with your finger or stylus. © 2008 Nokia. All rights reserved. - Page 22 The touch screen light is turned off after a period of inactivity. To turn the screen light on, tap it. If the touch screen and keys are locked, tapping the screen does not turn the screen light on. To unlock the screen and keys, slide the lock switch. © 2008 Nokia. All rights reserved.
-
Page 23: Media Key
To find the latest version of this guide, additional information, downloads, and services related to your Nokia product, see www.nokia-latinoamerica.com/ soporte or your local Nokia website. You may find additional detailed information in the Nokia Care Services and Warranty Conditions booklet. Configuration settings service To download configuration settings such as MMS, GPRS, e-mail, and other services for your phone model, see www.nokia-latinoamerica.com/soporte. -
Page 24: Find Help
Nokia Care services If you need to contact Nokia Care services, check the list of local Nokia Care contact centers at www.nokia-latinoamerica.com/ contactenos. Maintenance For maintenance services, find your nearest Nokia Care point at www.nokia- latinoamerica.com/centrosdeservicio. 2. Find help For local services and warranty information, see the separate booklet. -
Page 25: Accessibility Solutions
Accessibility solutions Nokia is committed to making mobile phones easy to use for all individuals, including those with disabilities. For more information, visit the Nokia website at www.nokiaaccessibility.com. Extended user guide An extended version of this user guide is available on the product support pages of the Nokia website. -
Page 26: Settings
If you forget the code and your device is locked, your device will require service and additional charges may apply. For more information, contact a Nokia Care point or your device dealer. -
Page 27: Prolong Battery Life
● Features that use wireless LAN (WLAN), or allowing such features to run in the background while using other features, increase the demand on battery power. WLAN on your Nokia device switches off when you are not trying to connect, not connected to an access point, or not scanning for available networks. To further reduce battery consumption, you can specify that your device does not scan, or scans less often, for available networks in the background. -
Page 28: Free Memory
● Installation files (.sis or .sisx) of applications you have installed. Transfer the installation files to a compatible computer. ● Images and video clips in Gallery. Back up the files to a compatible computer using Nokia PC Suite. © 2008 Nokia. All rights reserved. -
Page 29: Your Device
Transfer content You can use the Switch application to copy content such as phone numbers, addresses, calendar items, and images from your previous Nokia device to your device. The type of content that can be transferred depends on the model of the device from which you want to transfer content. -
Page 30: Display Indicators
OK. Enter the same code on the other device, and select OK. The devices are now paired. Some earlier Nokia devices may not have the Switch application. In this case, the Switch application is sent to the other device as a message. To install the Switch application on the other device, open the message, and follow the instructions on the display. - Page 31 Bluetooth connectivity is on. Data is being transmitted using Bluetooth connectivity. When the indicator is blinking, your device is trying to connect with another device. A USB connection is active. Synchronisation is in progress. © 2008 Nokia. All rights reserved.
-
Page 32: Memory Card
Memory card Use only compatible microSD and microSDHC cards approved by Nokia for use with this device. Nokia uses approved industry standards for memory cards, but some brands may not be fully compatible with this device. Incompatible cards may damage the card and the device and corrupt data stored on the card. -
Page 33: Remove The Memory Card
Do not hold the device near your ear when the loudspeaker is in use, because the volume may be extremely loud. To adjust the volume level when you have an active call or are listening to a sound clip, use the volume key. © 2008 Nokia. All rights reserved. -
Page 34: Shortcuts
Contact with such an antenna affects the communication quality and may cause the device to operate at a higher power level than otherwise needed and may reduce the battery life. © 2008 Nokia. All rights reserved. -
Page 35: Contacts Bar
— Modify contact information. ● — Refresh the contact's web feeds. ● To view past communication events with a contact, select a contact. Select a communication event to view event details. To close the view, select © 2008 Nokia. All rights reserved. -
Page 36: Offline Profile
When you activate the sensors in your device, you can control certain functions by turning the device. Select Menu > Settings and Phone > Sensor settings. Select from the following: ● Sensors — Activate the sensors. © 2008 Nokia. All rights reserved. -
Page 37: Headset
To use the headphones with a remote control unit, connect the unit to the Nokia AV Connector in the device, then connect the headphones to the unit. -
Page 38: Remove The Sim Card
SIM card sideways to slide it out of the slot. Pull the SIM card out. 4. Replace the battery and the back cover. Attach a wrist strap Tip: Attach the plectrum stylus to the device like a wrist strap. © 2008 Nokia. All rights reserved. -
Page 39: Remote Lock
To make a call from the contacts list, select Menu > Contacts. Scroll to the desired name. Or, tap the search field to enter the first letters of the name, and scroll to the © 2008 Nokia. All rights reserved. -
Page 40: During A Call
Many of the options that you can use during a voice call are network services. Voice mailbox To call your voice mailbox (network service), in the home screen, select to open the dialler, and tap and hold 1. © 2008 Nokia. All rights reserved. -
Page 41: Answer Or Reject A Call
To add a new person to the call, make a call to another participant, and add the new call to the conference call. To have a private conversation with one of the participants, select © 2008 Nokia. All rights reserved. -
Page 42: 1-Touch Dial A Phone Number
3. To connect an incoming call or a call on hold with an active call, and to disconnect yourself from the calls, select Options > Transfer. 4. To end the active call, press the end key. 5. To end both calls, select Options > End all calls. © 2008 Nokia. All rights reserved. -
Page 43: Voice Dialing
When you make a video call (network service), you can see a real-time, two-way video between you and the recipient of the call. The live video image, or video image captured by the camera in your device is shown to the video call recipient. © 2008 Nokia. All rights reserved. -
Page 44: During A Video Call
3. To end the video call, press the end key. During a video call To change between showing video or hearing the voice of the caller only, select To mute or unmute the microphone, select © 2008 Nokia. All rights reserved. -
Page 45: Answer Or Reject A Video Call
The loudspeaker is active when you activate video sharing. If you do not want to use the loudspeaker for the voice call while you share video, you can also use a compatible headset. © 2008 Nokia. All rights reserved. -
Page 46: Video Sharing Requirements
Your service provider may send you the settings or give you a list of the needed parameters. To add a SIP address to a contact: 1. Select Menu > Contacts. 2. Open the contact or create a new contact. © 2008 Nokia. All rights reserved. -
Page 47: Share Live Video Or Video Clips
OK to send the invitation. Your device sends the invitation to the SIP address. Sharing begins automatically when the recipient accepts the invitation. Options during video sharing to mute or unmute the microphone © 2008 Nokia. All rights reserved. -
Page 48: Accept An Invitation
● Mute — Mute the sound of the video clip. To end the sharing session, select Stop. To end the voice call, press the end key. When you end the call, video sharing also ends. © 2008 Nokia. All rights reserved. -
Page 49: Log
To view the approximate duration of received and dialed calls, select Call timers. Note: The actual invoice for calls and services from your service provider may vary, depending on network features, rounding off for billing, taxes, and so forth. © 2008 Nokia. All rights reserved. -
Page 50: Packet Data
Handwriting recognition allows you to write characters directly onto the screen using the stylus as a pen. Tap any text input field to enter letters, numbers, and special characters. © 2008 Nokia. All rights reserved. -
Page 51: On-Screen Keyboard
To turn Caps Lock on, tap the key twice. The key will have a line under 5 — Numbers and symbols - Switches between numbers, most commonly used special characters, and alphabet characters in the on-screen keyboard. © 2008 Nokia. All rights reserved. -
Page 52: Handwriting
To delete characters or move the cursor back, swipe from right to left (see Figure 1). To insert a space, swipe from left to right (see Figure 2). © 2008 Nokia. All rights reserved. -
Page 53: Alphanumeric Keypad
Activate predictive text and Writing language. 3 — Text input indicator - Opens a pop-up window, in which you can turn predictive text input modes on or off, change the character case, and switch between letter and number mode. © 2008 Nokia. All rights reserved. -
Page 54: Traditional Text Input
2. To write the desired word, tap the keys 2-9. Tap each key only once for one letter. For example, to write "Nokia" when the English dictionary is selected, tap 6 for N, 6 for o, 5 for k, 4 for i, and 2 for a. -
Page 55: Switch Between Text Modes
● Pen trail width — Change the thickness of the text written with the stylus. ● Writing color — Change the color of the text written with the stylus. © 2008 Nokia. All rights reserved. -
Page 56: Contacts (Phonebook)
Options > Delete. To listen to the voice tag assigned to a contact, select the contact and Options > Voice tag details > Options > Play voice tag. © 2008 Nokia. All rights reserved. -
Page 57: Default Numbers And Addresses
To remove the ringing tone, select Default tone from the list of ringing tones. To view, change or remove the image from a contact, select the contact and Options > Image > View, Change, or Remove. © 2008 Nokia. All rights reserved. -
Page 58: Copy Contacts
Options > SIM numbers > Fixed dial contacts. This option is only shown if supported by your SIM card. You need your PIN2 code to activate and deactivate fixed dialing or edit your fixed dialing contacts. © 2008 Nokia. All rights reserved. -
Page 59: Messaging
Mailbox — Connect to your remote mailbox to retrieve your new e-mail ● messages, or view your previously retrieved e-mail messages offline. Drafts — Draft messages that have not been sent are stored here. ● © 2008 Nokia. All rights reserved. -
Page 60: Write And Send Messages
2. To select recipients or groups from the contacts list, select To. To enter the number or e-mail address manually, tap the To field. 3. In the Subject field, enter the subject of the e-mail. To change the fields that are visible, select Options > Message header fields. © 2008 Nokia. All rights reserved. -
Page 61: Messaging Inbox
1 new message are displayed in the home screen. To open the message, select Show. To open a message in the Inbox folder, select the message. To reply to a received message, select Options > Reply. © 2008 Nokia. All rights reserved. -
Page 62: Multimedia Messages
Mailbox Define e-mail settings Select Menu > Messaging and Mailbox. To use e-mail, you must have defined a valid internet access point (IAP) in the device and have defined your e-mail settings correctly. © 2008 Nokia. All rights reserved. -
Page 63: Open The Mailbox
Retrieve e-mail > New to retrieve all new messages, Selected to retrieve only selected messages, or All to retrieve all messages from the mailbox. To stop retrieving messages, select Cancel. 2. To close the connection and view the e-mail messages offline, select Options > Disconnect. © 2008 Nokia. All rights reserved. -
Page 64: Delete E-Mail Messages
To cancel deleting an e-mail that has been marked to be deleted from the device and server during the next connection ( ), select Options > Restore. Disconnect from the mailbox When you are online, to end the data connection to the remote mailbox, select Options > Disconnect. © 2008 Nokia. All rights reserved. -
Page 65: View Messages On A Sim Card
Some or all message centers or access points may be preset for your device by your service provider, and you may not be able to change, create, edit, or remove them. © 2008 Nokia. All rights reserved. -
Page 66: Text Message Settings
● Access point in use — Select which access point is used as the preferred connection. ● Multimedia retrieval — Select how you want to receive messages. To receive messages automatically in your home network, select Auto in home netw.. © 2008 Nokia. All rights reserved. -
Page 67: E-Mail Settings
Mailbox in the Messaging main view. You can have up to six mailboxes. Select Mailboxes and a mailbox to change the connection settings, user settings, retrieval settings and automatic retrieval settings. Instant messaging Select Menu > Applications > IM. © 2008 Nokia. All rights reserved. -
Page 68: Personalize Your Device
To have a wallpaper image or a slide show of changing images as the background in the home screen, select Wallpaper > Image or Slide show. To change the image displayed in the home screen when a call is received, select Call image. © 2008 Nokia. All rights reserved. -
Page 69: Profiles
You can also use Music player to listen to podcasts. Podcasting is the method for delivering audio or video content over the internet using either RSS or Atom technologies for playback on mobile devices and computers. You can transfer music from other compatible devices to your device. © 2008 Nokia. All rights reserved. -
Page 70: Play A Song Or A Podcast
To modify the balance and stereo image or to enhance the bass, select Options > Settings. To return to the home screen and leave the player playing in the background, press the end key. To close the player, select Options > Exit. © 2008 Nokia. All rights reserved. -
Page 71: Playlists
The podcast menu displays the podcasts available in the device. Podcast episodes have three states: never played, partially played, and completely played. If an episode is partially played, it plays from the last playback position the © 2008 Nokia. All rights reserved. -
Page 72: Transfer Music From A Computer
To purchase music, you first need to register for the service. To access the Nokia Music Store, you must have a valid internet access point in the device. To open Nokia Music Store, select Menu > Music > Music store. -
Page 73: Nokia Podcasting
● Next update time — Define the time of the next automatic update. Automatic updates only occur if a specific default access point is selected and Nokia Podcasting is running. If Nokia Podcasting is not running, the automatic updates are not activated. -
Page 74: Downloads
FM radio to function properly. When you open the application for the first time, you can choose to have the local stations tuned automatically. © 2008 Nokia. All rights reserved. -
Page 75: Manage Radio Stations
To store and organise your images, video clips, sound clips, and streaming links, select Menu > Gallery. Tip: To access the images and video clips view quickly, tap the media key ) to open the media bar, and select © 2008 Nokia. All rights reserved. -
Page 76: View And Organize Files
To set the image as a generic call image, select Set as call image. To set the image as a call image for a contact, select Assign to contact. To set the video clip as a ringing tone, select As ringing tone. © 2008 Nokia. All rights reserved. -
Page 77: Organize Images And Videos
TV-out mode Select Menu > Settings. To view the captured images and video clips on a compatible TV, use a Nokia Video- Out Cable. Before viewing the images and video clips on TV, you may need to configure the TV- out settings for the applicable TV system and TV aspect ratio. -
Page 78: 11. Camera
RealPlayer. All audio, including the active calls, stereo video clip sound, key tone, and ringing tone, is routed to the TV when the Nokia Video-Out Cable is connected to the device. You can use the device microphone normally. -
Page 79: Image Capture
The capture settings return to the default settings after you close the camera. To open the capture settings view before capturing an image or recording a video, select Select from the following: Select the scene © 2008 Nokia. All rights reserved. -
Page 80: Capture Images
Saving the captured image may take longer if you change the zoom, lighting, or color settings. Capture images When capturing an image, note the following: ● Use both hands to keep the camera still. © 2008 Nokia. All rights reserved. -
Page 81: After Capturing An Image
Send to caller) during a call. Delete — Delete the image. ● — Open Gallery ● To use the image as wallpaper in the home screen, select Options > Use image > Set as wallpaper. © 2008 Nokia. All rights reserved. -
Page 82: Flash And Video Light
To copy the settings of another scene, select Based on scene mode and the desired scene. To save the changes and return to the scenes list, select Back. To activate your own scene, select User defined > Select. © 2008 Nokia. All rights reserved. -
Page 83: You In The Image - Self-Timer
Gallery.. The maximum length of a video clip is approximately 30 seconds with sharing quality and 90 minutes with other quality settings. Video recording on-screen controls and indicators The video viewfinder displays the following: © 2008 Nokia. All rights reserved. -
Page 84: After Recording A Video Clip
MPEG4 file format in a multimedia message. To send the video clip to a person you are talking to, select Send to caller) during a call. © 2008 Nokia. All rights reserved. -
Page 85: Positioning (Gps)
A-GPS is a network service. Assisted GPS (A-GPS) is used to retrieve assistance data over a packet data connection, which assists in calculating the coordinates of your current location when your device is receiving signals from satellites. © 2008 Nokia. All rights reserved. -
Page 86: Hold Your Device Correctly
You must have an internet access point defined in the device to retrieve assistance data from the Nokia A-GPS service over a packet data connection. To define an access point for A-GPS, select Menu > Applications > Location and Positioning >... -
Page 87: Position Requests
When you receive a position request, a message is displayed showing the service that is making the request. Select Accept to allow your position information to be sent or Reject to deny the request. Landmarks Select Menu > Applications > Location and Landmarks. © 2008 Nokia. All rights reserved. -
Page 88: Gps Data
Select Menu > Applications > Location and GPS data. Positioning settings Select Menu > Applications > Location and Positioning. Positioning methods ● #Integrated GPS — Use the integrated GPS receiver of your device. © 2008 Nokia. All rights reserved. -
Page 89: 13. Maps
If you browse to an area which is not covered by maps already downloaded in your device, a map for the area is automatically downloaded through the internet. Some maps may be available in your device or memory card. You can also use the Nokia © 2008 Nokia. All rights reserved. -
Page 90: Network Positioning
Map Loader PC software to download maps. To install Nokia Map Loader to a compatible PC, go to http://maps.nokia.com. Tip: To avoid data transfer costs, you can also use Maps without an internet connection, and browse the maps that are saved in your device or memory card. -
Page 91: Display Indicators
To import a location address from the Contacts application, select Options > Search > Addresses > Options > Select from Contacts. If you search for locations without an internet connection, the search results are limited to a radius of 50 km (31 miles). © 2008 Nokia. All rights reserved. -
Page 92: Plan A Route
To save a location to your device, select the location, tap the information are on the top of the map, and select Add to My places. The location is saved in Favorites > My places. © 2008 Nokia. All rights reserved. -
Page 93: View Your Saved Items
To view the selected location on the map, select Show on map. Routes To view the routes you have saved, select Routes. To open the selected route, select Options > Open. Navigate to the destination Select Menu > Maps . © 2008 Nokia. All rights reserved. -
Page 94: Update Maps
You must use the Maps application and browse maps at least once before using Nokia Map Loader, as Nokia Map Loader uses the Maps information to check which version of the maps to download. -
Page 95: 14. Connectivity
Your device can automatically switch between GSM and UMTS networks. GSM networks are indicated with . UMTS networks are indicated with An active high-speed downlink packet access (HSDPA) connection (network service) is indicated with Select from the following: © 2008 Nokia. All rights reserved. -
Page 96: Wi-Fi/Wlan Connection
Features that use Wi-Fi/WLAN, or that are allowed to run in the background while using other features, increase the demand on battery power and reduce the battery life. Your device supports the following Wi-Fi/WLAN features: ● IEEE 802.11b/g standard ● Operation at 2.4 GHz © 2008 Nokia. All rights reserved. -
Page 97: Wlan Connections
Wi-Fi/ WLAN connections. If the search finds WLANs, to create an internet access point (IAP) for a connection and start the web browser using this IAP, select the connection and Start web browsing. © 2008 Nokia. All rights reserved. -
Page 98: Wlan Internet Access Points
Wireless LAN settings Select Menu > Settings and Connectivity > Wireless LAN > Options > Settings. Select from the following: ● Show WLAN availability — Select whether is displayed when a wireless LAN (WLAN) is available. © 2008 Nokia. All rights reserved. -
Page 99: Access Points
After the search, connections that are already available are shown and can be shared by a new access point. If you skip this step, you are asked to select a connection method and to define the settings needed. © 2008 Nokia. All rights reserved. -
Page 100: Create Access Point Groups
Options > Organize > Copy to other dest.. To change the priority of an access point within the group, select Options > Organize > Change priority. © 2008 Nokia. All rights reserved. -
Page 101: Packet Data Access Points
To obtain these addresses, contact your internet service provider. ● Proxy server address — Enter the address of the proxy server. ● Proxy port number — Enter the port number of the proxy server. © 2008 Nokia. All rights reserved. -
Page 102: Wlan Internet Access Points
WEP keys. The same settings must be entered on the WLAN access point device. ● Authentication type — Select Open or Shared for the authentication type between your device and the WLAN access point device. © 2008 Nokia. All rights reserved. -
Page 103: Advanced Wlan Settings
Active data connections Select Menu > Settings and Connectivity > Connection mgr.. In the active data connections view, you can see the open data connections: data calls packet data connections wireless LAN (WLAN) connections © 2008 Nokia. All rights reserved. -
Page 104: Synchronization
You can use the connection to send images, video clips, music and sound clips, notes, transfer files from your compatible PC and print images with a compatible printer. © 2008 Nokia. All rights reserved. -
Page 105: Settings
SIM access. To ensure interoperability between other devices supporting Bluetooth technology, use Nokia approved accessories for this model. Check with the manufacturers of other devices to determine their compatibility with this device. -
Page 106: Security Tips
4. If the other device requires pairing before data can be transmitted, a tone sounds, and you are asked to enter a passcode. The same passcode must be entered in both devices. When the connection is established, Sending data is displayed. © 2008 Nokia. All rights reserved. -
Page 107: Pair Devices
● Set as unauthorized — Connection requests from this device must be accepted separately every time. To cancel a pairing with a device, select Options > Delete. To cancel all pairings, select Options > Delete all. © 2008 Nokia. All rights reserved. -
Page 108: Receive Data Using Bluetooth Connectivity
When the remote SIM mode is on in your device, Remote SIM mode is displayed in the home screen. The connection to the wireless network is turned off, as indicated in the signal strength indicator area, and you cannot use SIM card services or features requiring cellular network coverage. © 2008 Nokia. All rights reserved. -
Page 109: Usb
USB connection mode and from the following: ● PC Suite — Use Nokia PC applications such as Nokia Ovi Suite, and Nokia Software Updater. ● Mass storage — Transfer data between your device and a compatible PC. -
Page 110: Administrative Settings
The packet data settings affect all access points using a packet data connection. Select from the following: ● Packet data connection — If you select When available and you are in a network that supports packet data, the device registers to the packet data © 2008 Nokia. All rights reserved. -
Page 111: 15. Share Online
To subscribe to an online sharing service, go to the service provider's website, and check that your Nokia device is compatible with the service. Create an account as instructed on the website. You receive a user name and password needed to set up your device with the account. -
Page 112: Manage Your Accounts
To set the level of privacy for a file, select Privacy:. To allow everyone to view your file, select Public. To restrict others from seeing your files, select Private. You can define the Default setting on the service provider's website. © 2008 Nokia. All rights reserved. -
Page 113: Post Files From Gallery
4. Select Options > Post to web. 16. Nokia Video Center With Nokia Video Center (network service), you can download and stream video clips over the air from compatible internet video services using a packet data or Wi- Fi/WLAN connection. You can also transfer video clips from a compatible PC to your device and view them in Video center. -
Page 114: Video Feeds
To view and manage your feeds, select Video feeds. Select Options and from the following: ● Feed subscriptions — Check your current feed subscriptions. ● Refresh feeds — Refresh the content of all feeds. © 2008 Nokia. All rights reserved. -
Page 115: My Videos
Transfer your own video clips to Video center from compatible devices using a compatible USB data cable. Video center will display only the video clips which are in a format supported by your device. © 2008 Nokia. All rights reserved. -
Page 116: Video Center Settings
● Preferred memory — Select whether downloaded videos are saved in the device memory or on a compatible memory card. ● Thumbnails — Select whether to download and view thumbnail images in video feeds. © 2008 Nokia. All rights reserved. -
Page 117: 17. Web Browser
To browse web pages without graphics to save memory, select Options > Settings > Page > Load content > Text only. To enter a new web address you want to visit, select Options > Go to > New web page. © 2008 Nokia. All rights reserved. -
Page 118: Browser Toolbar
Settings — Edit the settings. ● Save bkmrk. — Save the current web page as a bookmark. ● Reload — Refresh the web page. ● Overview — View an overview of the current web page. ● © 2008 Nokia. All rights reserved. -
Page 119: Navigate Pages
Installed widgets appear as separate applications in the Applications folder. You can download widgets using the Download! application or from the web. You can also install widgets on a compatible memory card (if available). © 2008 Nokia. All rights reserved. -
Page 120: Content Search
Symbian Signed or have passed the Java Verified testing. To download an item: 1. Select the link. 2. Select the appropriate option to purchase the item (for example, Buy). 3. Carefully read all the information provided. © 2008 Nokia. All rights reserved. -
Page 121: Bookmarks
Web also keeps track of the web pages you visit during browsing. In the Recently visited pages folder, you can view the list of the visited web pages. Empty the cache The information or services you have accessed are stored in the cache memory of the device. © 2008 Nokia. All rights reserved. -
Page 122: Connection Security
Before changing any certificate settings, you must make sure that you really trust the owner of the certificate and that the certificate really belongs to the listed owner. © 2008 Nokia. All rights reserved. -
Page 123: 18. Search
To change your country or region settings to find local search providers, select Options > Country or region. 19. Download! Some features may not be available in your region. Please check the availability with local operator. © 2008 Nokia. All rights reserved. -
Page 124: About Download
Buy. A submenu opens where you can select the version of the item and view price information. The available options depend on the service provider. To download an item that is free of charge, select Options > Get. 20. Other applications Clock Select Menu > Applications > Clock. © 2008 Nokia. All rights reserved. -
Page 125: Alarm Clock
Ensure that the time is correct and matches your time zone. Calendar To open the calendar, select Menu > Calendar. Calendar views To switch between month, week, day, and to-do note view, select Options > Change view > Month view, Week, Day or To-do. © 2008 Nokia. All rights reserved. -
Page 126: Calendar Toolbar
To move and copy files and folders, or to create new folders in the memory, select Options > Organize and the desired option. To sort files, select Options > Sort by and the desired category. Edit memory card Select Menu > Applications > File mgr.. © 2008 Nokia. All rights reserved. -
Page 127: Back Up Files On A Memory Card
Bluetooth connectivity. You can use Nokia Application Installer in Nokia Ovi Suite to install an application to your device. © 2008 Nokia. All rights reserved. - Page 128 1. To locate an installation file, select Menu > Settings and Application mgr.. Alternatively, search installation files using File manager, or select Messaging > Inbox, and open a message that contains an installation file. © 2008 Nokia. All rights reserved.
-
Page 129: Remove Applications
If another software package depends on the software package that you removed, the other software package may stop working. Refer to the documentation of the installed software package for details. © 2008 Nokia. All rights reserved. -
Page 130: Application Manager Settings
Remove — Remove a file from the recently played list. ● Play video clips To play a video clip, select Video clips, and a clip. To list recently played files, in the application main view, select Recently played. © 2008 Nokia. All rights reserved. -
Page 131: Stream Content Over The Air
Recorded sound clips are saved in the Sound clips folder in Gallery. To record a telephone conversation, open recorder during a voice call, and select . Both parties hear a tone every 5 seconds during recording. © 2008 Nokia. All rights reserved. -
Page 132: Write Notes
Phone settings Date and time settings Select Menu > Settings and Phone > Date and time. Select from the following: ● Time — Enter the current time. ● Time zone — Select your location. © 2008 Nokia. All rights reserved. -
Page 133: Language Settings
● Welcome note / logo — Select whether you want to display a note or image when you switch on the device. ● Light time-out — Set how long the light stays on when you stop using the device. © 2008 Nokia. All rights reserved. -
Page 134: Voice Commands
Accessory settings Select Menu > Settings and Phone > Accessories. Some accessory connectors indicate which type of accessory is connected to the device. Select an accessory and from the following: © 2008 Nokia. All rights reserved. -
Page 135: Application Settings
● Default profile — Set the profile that you want activated each time you connect a Nokia Video Connectivity Cable to your device. ● TV screen size — Select the aspect ratio of the TV: Normal or Widescreen for widescreen TVs. -
Page 136: Security Settings
If you forget the PIN or PIN2 code, contact your service provider. If you forget the lock code, contact a Nokia Care point or your service provider. -
Page 137: Certificate Management
Certificates have a restricted lifetime. If "Expired certificate" or "Certificate not valid yet" is © 2008 Nokia. All rights reserved. - Page 138 ● Internet: Yes — The certificate is able to certify servers. ● App. installation: Yes — The certificate is able to certify the origin of a new Java™ application. To change the value, select Options > Change trust setting. © 2008 Nokia. All rights reserved.
-
Page 139: Security Module
If your device has WMDRM-protected content, both the activation keys and the content will be lost if the device memory is formatted. You may also lose the © 2008 Nokia. All rights reserved. -
Page 140: Notification Light
● Automatic redial — Set your device to make a maximum of 10 attempts to connect the call after an unsuccessful call attempt. To stop automatic redialing, press the end key. ● Show call duration — Set the length of a call to be displayed during the call. © 2008 Nokia. All rights reserved. -
Page 141: Call Forward
To change the settings, you need the restricting password from your service provider. Call restriction and call forwarding cannot be active at the same time. When calls are restricted, calls may be possible to certain official emergency numbers. © 2008 Nokia. All rights reserved. -
Page 142: 22. Troubleshooting
A: This is a characteristic of this type of display. Some displays may contain pixels or dots that remain on or off. This is normal, not a fault. Q: Why can't my Nokia device establish a GPS connection? A: Establishing a GPS connection may take from a couple of seconds to several minutes. - Page 143 Q: How do I turn the wireless LAN (WLAN) off on my Nokia device? A: The WLAN on your Nokia device turns off when you are not connected or trying to connect to another access point, or not scanning for available networks. To further reduce battery consumption, you can specify that your Nokia device does not scan, or scans less often, for available networks in the background.
- Page 144 > When needed. If this does not help, switch the device off and then on again. Q: Can I use my Nokia device as a fax modem with a compatible PC? A: You cannot use your device as a fax modem. However, with call forwarding (network service), you can forward incoming fax calls to a fax number.
-
Page 145: Enhancements
Your device is powered by a rechargeable battery. The battery intended for use with this device is BL-5J. Nokia may make additional battery models available for this device. This device is intended for use when supplied with power from the following chargers: AC-8, AC-5. -
Page 146: Nokia Battery Authentication Guidelines
Keep your battery out of the reach of small children. Nokia battery authentication guidelines Always use original Nokia batteries for your safety. To check that you are getting an original Nokia battery, purchase it from a Nokia authorized service center or dealer, and inspect the hologram label using the following steps: ©... -
Page 147: Authenticate Hologram
1, 2, 3 and 4 dots on each side respectively. What if your battery is not authentic? If you cannot confirm that your Nokia battery with the hologram on the label is an authentic Nokia battery, please do not use the battery. Take it to the nearest Nokia authorized service center or dealer for assistance. -
Page 148: Care And Maintenance
● Use chargers indoors. ● Always create a backup of data you want to keep, such as contacts and calendar notes. © 2008 Nokia. All rights reserved. -
Page 149: Recycle
More detailed information is available from the product retailer, local waste authorities, national producer responsibility organizations, or your local Nokia representative. Check how to recycle your Nokia products at www.nokia.com/werecycle, or if browsing on a mobile device, www.nokia.mobi/werecycle. -
Page 150: Medical Devices
● Read and follow the directions from the manufacturer of their implanted medical device. If you have any questions about using your wireless device with an implanted medical device, consult your health care provider. © 2008 Nokia. All rights reserved. -
Page 151: Hearing Aids
Observe restrictions on the use of radio equipment in fuel depots, storage, and distribution areas; chemical plants; or where blasting operations are in progress. Areas with a © 2008 Nokia. All rights reserved. -
Page 152: Emergency Calls
2. Press the end key as many times as needed to clear the display and ready the device for calls. 3. Open the dialer by selecting the dialer icon ( 4. Enter the official emergency number for your present location. Emergency numbers vary by location. 5. Press the call key. © 2008 Nokia. All rights reserved. -
Page 153: Certification Information (Sar)
Canada. These requirements set a SAR limit of 1.6 W/kg averaged over one gram of tissue. The highest SAR value reported under this standard during product certification for use at the ear is 1.29 W/kgand when properly worn on the body is 0.92 W/kg. © 2008 Nokia. All rights reserved. -
Page 154: Index
39 battery answering 41 saving power 27 conference 41 blogs 119 duration of 49 Bluetooth connectivity missed 49 blocking devices 108 options during 40 device address 107 received 49 device visibility 105 redialing 140 © 2008 Nokia. All rights reserved. - Page 155 56 e-mail messages 62 ringing tones 57 end all calls option 42 saving 56 sending 56 synchronizing 104 voice tags 56 factory settings copyright protection 139 restoring 139 feeds, news 119 © 2008 Nokia. All rights reserved.
- Page 156 Nokia Map Loader 94 internet connection 117 routes 92 browser See also saved items 93 saving locations 92 sending locations 92 J2ME Java application support 127 updating 94 Java applications 127 media music player 69 © 2008 Nokia. All rights reserved.
- Page 157 85 PUK codes 26 network settings 95 news feeds 119 Nokia Care 23 radio Nokia Map Loader 94 listening 74 Nokia Music Store 72 stations 75 notes 132 RealPlayer 130 notification light 140 © 2008 Nokia. All rights reserved.
- Page 158 SIM card security 136 settings 79, 132, 134 SIP 110 access point name control 110 SMS (short message service) 60 access points 99, 100 software applications 127 applications 135 software update 25 Bluetooth connectivity 105 songs 69 © 2008 Nokia. All rights reserved.
- Page 159 24 wireless LAN settings 98 WPA 103 wrist strap 38 video calls 43, 45 options during 44 Video Center 113 zooming 81, 83 video center my videos 115 transferring videos 115 video feeds 114 © 2008 Nokia. All rights reserved.
- Page 160 Manual del Usuario para Nokia 5800 XpressMusic Edición 1...
- Page 161 Nokia, Nokia Connecting People, los logos de Nokia Original Enhancements y Nokia Care son marcas comerciales o marcas registradas de Nokia Corporation. Nokia tune es una marca de sonido de Nokia Corporation. Otros nombres de productos y compañías aquí mencionados pueden ser marcas comerciales o nombres comerciales de sus respectivos propietarios.
- Page 162 Nokia no es propietaria de los derechos de copyright ni de los derechos de propiedad intelectual de las aplicaciones de terceros. Por lo tanto, Nokia no asume ningún tipo de responsabilidad en relación con la asistencia al usuario final, la funcionalidad de tales aplicaciones y la información incluida en las aplicaciones o los materiales.
- Page 163 II) este dispositivo debe aceptar cualquier interferencia recibida, incluso una interferencia que pueda causar un funcionamiento no deseado. Cualquier cambio o modificación que no haya sido expresamente aprobado por Nokia puede anular la legitimación del usuario de utilizar este equipo. Número de modelo: 5800d-1b...
- Page 164 Colocar una correa de mano....40 Acciones de la pantalla táctil....22 Bloqueo remoto........40 Tecla multimedia.........24 Cambiar el tono de timbre....24 4. Realizar llamadas....41 Asistencia técnica de Nokia....24 Sensor de proximidad......41 2. Buscar ayuda......25 Llamadas de voz ........41 Durante una llamada......42 Ayuda del dispositivo......25 Buzón de voz ........42...
- Page 165 Responder o rechazar una llamada de Administrar nombres y video............48 números..........60 Video compartido........48 Números y direcciones Requisitos para video predeterminados.........60 compartido........48 Tonos de timbre, imágenes y texto de Configuraciones.........49 llamada para los contactos....60 Compartir video en vivo o Copiar contactos........61 videoclips...........50 Servicios SIM.........61 Aceptar una invitación......51...
- Page 166 Grabar videos........90 Listas de reproducción.....76 Controles e indicadores en pantalla Podcasts..........77 para grabar video......90 Transferir música desde una Después de grabar un computadora........77 videoclip..........91 Nokia Music Store.........77 Nokia Podcasting.........78 12. Posicionamiento Configuraciones de (GPS)........91 podcasting.........78 Descargas...........79 Acerca del GPS........91 Radio.............80 GPS asistido (A-GPS)......92...
- Page 167 Sugerencias de seguridad....114 Ver los elementos guardados...100 Enviar datos utilizando Navegar hacia un destino....101 conectividad Bluetooth....114 Actualizar mapas.......101 Vincular dispositivos.......115 Nokia Map Loader......102 Recibir datos utilizando conectividad Bluetooth....116 14. Conectividad....102 Bloquear dispositivos.....116 Conexiones de datos y puntos de Modo remoto de SIM.......117 acceso..........102...
- Page 168 16. Nokia Video Centre..122 Reloj mundial........135 Agenda..........135 Ver y descargar videoclips....122 Vistas de la agenda......135 Vínculos de video.......124 Barra de herramientas de la Mis videos...........124 agenda..........136 Transferir videos desde su PC...125 Administrador de archivos....136 Configuraciones del centro de Acerca del administrador de video...........125...
- Page 169 Configuraciones de llamadas..151 (SAR)............165 Desvío de llamadas......152 Índice........167 Restricción de llamadas....153 22. Solución de problemas......153 Accesorios......157 Batería........157 Información sobre baterías y cargadores..........157 Normas de autenticación de baterías Nokia...........159 Autenticación del holograma..159 ¿Qué ocurre si la batería no es auténtica?........159 Cuidado y mantenimiento....160...
- Page 170 Sólo personal calificado puede instalar o reparar este producto. ACCESORIOS Y BATERÍAS Utilice sólo baterías y accesorios aprobados. No conecte productos incompatibles. RESISTENCIA AL AGUA Su dispositivo no es resistente al agua. Manténgalo seco. © 2008 Nokia. Todos los derechos reservados.
-
Page 171: Acerca De Su Dispositivo
Usted también podrá acceder a otros sitios de terceros mediante su dispositivo. Los sitios de terceros no están afiliados a Nokia, y Nokia no los patrocina ni asume responsabilidad alguna por ellos. Si opta por acceder a dichos sitios, deberá... -
Page 172: Servicios De Red
Este dispositivo admite protocolos WAP 2.0 (HTTP y SSL) que se ejecutan en protocolos TCP/IP. Algunas funciones de este dispositivo, como tales como MMS, exploración y e-mail, requieren soporte de la red para estas tecnologías. © 2008 Nokia. Todos los derechos reservados. -
Page 173: Teclas Y Partes
1. Inicio Teclas y partes 1 — Conector micro USB para conectar a una PC compatible 2 — Conector Nokia AV (3,5 mm) para auriculares compatibles, audífonos y conectores de salida de TV 3 — Conector del cargador 4 — Tecla Encender/Apagar 5 —... - Page 174 En la mayoría de los casos, esto es normal. Si sospecha que el dispositivo no funciona en forma adecuada, llévelo a su centro de servicio autorizado más cercano. © 2008 Nokia. Todos los derechos reservados.
-
Page 175: Insertar La Tarjeta Sim
Si la tarjeta SIM no está correctamente insertada, sólo podrá utilizar el dispositivo en el perfil Desconectado. Insertar la batería Apague siempre el dispositivo y desconecte el cargador antes de retirar la batería. © 2008 Nokia. Todos los derechos reservados. - Page 176 1. Conecte un cargador compatible a un tomacorriente de pared. 2. Conecte el cable de alimentación al dispositivo. Si la batería está completamente descargada, es posible que pasen varios minutos antes de que el indicador de carga comience a oscilar. © 2008 Nokia. Todos los derechos reservados.
- Page 177 Desconecte el cargador del dispositivo y luego del tomacorriente de pared. Sugerencia: Desconecte el cargador del tomacorriente de pared cuando el cargador no esté en uso. Un cargador conectado al tomacorriente de pared consume energía incluso cuando no está conectado al dispositivo. © 2008 Nokia. Todos los derechos reservados.
-
Page 178: Encender El Dispositivo
El stylus tipo bolígrafo se encuentra en la cubierta posterior del dispositivo. Importante: Utilice solamente un lápiz óptico aprobado por Nokia con este dispositivo. El uso de otro lápiz óptico puede no sólo invalidar cualquier garantía aplicable al dispositivo, sino dañar la pantalla táctil. -
Page 179: Pantalla De Inicio
> Bloq. tecl. auto > Período autobloq. teclado. Pantalla de inicio La Pantalla de inicio es el punto de inicio donde puede reunir todos los contactos importantes o los accesos directos de las aplicaciones. © 2008 Nokia. Todos los derechos reservados. -
Page 180: Acceder Al Men
Menú > Configurac. y Personal > Pantalla inicio. Acceder al menú Para acceder al menú, pulse la tecla Menú. Para abrir una aplicación o carpeta en el menú, tóquela. © 2008 Nokia. Todos los derechos reservados. - Page 181 Para arrastrar, coloque el dedo o el stylus sobre la pantalla, y deslícelo por la pantalla. Ejemplo: Para desplazarse hacia arriba o abajo en una página Web, arrastre la página con el dedo o el stylus. © 2008 Nokia. Todos los derechos reservados.
- Page 182 Si la pantalla táctil y las teclas están bloqueadas, al tocar la pantalla no se enciende la luz. Para desbloquear la pantalla y las teclas, deslice el interruptor de bloqueo. © 2008 Nokia. Todos los derechos reservados.
-
Page 183: Tecla Multimedia
Para obtener los manuales más recientes, información adicional, descargas y servicios relacionados con su producto Nokia, consulte en www.nokia- latinoamerica.com/soporte o su sitio Web local de Nokia. Puede obtener información detallada adicional en los Servicios Nokia Care y en el folleto Condiciones de garantía. Servicio de ajustes de configuración Para descargar ajustes de configuración como MMS, GPRS, e-mail y otros servicios... -
Page 184: Buscar Ayuda
Servicios de Nokia Care Si necesita comunicarse con los servicios de Nokia Care, verifique la lista de centros de contacto locales de Nokia Care en www.nokia- latinoamerica.com/contactenos. Mantenimiento Para obtener información acerca de los servicios de mantenimiento, busque el punto de servicio Nokia Care más cercano en www.nokia-latinoamerica.com/ centrosdeservicio. -
Page 185: Soluciones De Accesibilidad
Manual del usuario ampliado En las páginas de soporte del producto del sitio Web de Nokia hay disponible una versión ampliada de este manual del usuario. Algunas aplicaciones o funciones sólo se explican en el manual del usuario ampliado. - Page 186 ● Código de bloqueo (denominado también código de seguridad) — El código de bloqueo (cinco dígitos) le ayuda a proteger el dispositivo contra el uso no autorizado. El código predeterminado es 12345. Puede crear y cambiar el código, © 2008 Nokia. Todos los derechos reservados.
- Page 187 ● Las funciones que usan LAN inalámbrica (WLAN) o que permiten la ejecución de dichas funciones en segundo plano mientras utiliza otras funciones, aumentan la demanda de energía de la batería. La WLAN en el dispositivo Nokia se desactiva cuando no está intentando conectarse, no está conectado a un punto de acceso ni está...
-
Page 188: Memoria Disponible
Puede eliminar: ● Mensajes de las carpetas en Mensajería y mensajes de e-mail recuperados del buzón de correo. ● Páginas Web guardadas. ● Información de contacto. ● Notas de Agenda. © 2008 Nokia. Todos los derechos reservados. -
Page 189: Transferir Contenido
● Archivos de instalación (.sis o .sisx) de aplicaciones que instaló. Transfiera los archivos de instalación a una computadora compatible. ● Imágenes y videoclips que están en la Galería. Utilice Nokia PC Suite para hacer copias de seguridad en una computadora compatible. -
Page 190: Transferir Contenido Por Primera Vez
(1 a 16 dígitos) y seleccione Aceptar. Ingrese el mismo código en el otro dispositivo y seleccione Aceptar. Los dispositivos ahora están vinculados. Puede que algunos dispositivos anteriores de Nokia no tengan la aplicación Transferir. En este caso, la aplicación Alternar se envía al otro dispositivo como un mensaje. - Page 191 Se admite el Acceso a paquetes de datos de alta velocidad (HSDPA) y está activo (servicio de red). indica que la conexión está retenida y indica que hay una conexión disponible. © 2008 Nokia. Todos los derechos reservados.
-
Page 192: Tarjeta De Memoria
La sincronización está en curso. Tarjeta de memoria Utilice sólo Tarjetas microSD y microSDHC aprobadas por Nokia con este dispositivo. Nokia utiliza estándares industriales aprobados para las tarjetas de memoria, pero algunas marcas podrían no ser totalmente compatibles con este dispositivo. Las tarjetas incompatibles pueden dañar la tarjeta y el dispositivo, además de los datos... -
Page 193: Retirar La Tarjeta De Memoria
1. Si el dispositivo está encendido, antes de sacar la tarjeta, pulse la tecla Encender/ Apagar y seleccione Retirar tarjeta memoria. © 2008 Nokia. Todos los derechos reservados. -
Page 194: Control De Volumen Y Altavoz
útil. Para iniciar una conexión Web (servicio de red), en el teclado, toque y mantenga pulsada la tecla 0. © 2008 Nokia. Todos los derechos reservados. -
Page 195: Ubicaciones De La Antena
útil de la batería. Antena Bluetooth y WLAN Antena GPS Antena celular © 2008 Nokia. Todos los derechos reservados. -
Page 196: Barra De Contactos
Buzón de salida para su envío en otro momento. Cuando el perfil Desconectado está activo, puede usar el dispositivo sin una tarjeta SIM. Si la tarjeta SIM no está correctamente insertada, el dispositivo se inicia en el perfil Desconectado. © 2008 Nokia. Todos los derechos reservados. - Page 197 Es posible que algunas aplicaciones y funciones no permitan que el contenido de la pantalla gire. Auricular Puede conectar un auricular o audífonos compatibles al dispositivo. Es posible que deba seleccionar el modo de cable. © 2008 Nokia. Todos los derechos reservados.
-
Page 198: Retirar La Tarjeta Sim
Para usar los audífonos con la unidad de control remoto, conecte la unidad al Conector Nokia AV en el dispositivo y luego conecte los audífonos a la unidad. -
Page 199: Colocar Una Correa De Mano
Para activar el bloqueo remoto y definir el contenido del mensaje de texto que se utilizará, seleccione Menú > Configurac.y Teléfono > Admin. teléfono > Seguridad > Teléfono y tarjeta SIM > Bloqueo remoto teléfono > © 2008 Nokia. Todos los derechos reservados. -
Page 200: Realizar Llamadas
Para llamar al contacto, pulse la tecla Llamar. Si guardó varios números para un contacto, seleccione el número que desea de la lista y pulse la tecla Llamar. © 2008 Nokia. Todos los derechos reservados. - Page 201 Muchas de las opciones que puede usar durante una llamada de voz son servicios de red. Buzón de voz Para llamar al buzón de voz (servicio de red), en la pantalla de inicio, seleccione para abrir el teclado y toque y mantenga pulsada la tecla 1. © 2008 Nokia. Todos los derechos reservados.
-
Page 202: Contestar O Rechazar Una Llamada
3. Cuando le contesten la nueva llamada, para incorporar al primer participante en la llamada de multiconferencia, seleccione Para agregar a una nueva persona a la llamada, realice una llamada a otro participante y agregue la nueva llamada a la llamada de multiconferencia. © 2008 Nokia. Todos los derechos reservados. -
Page 203: Llamada En Espera
Llamada en espera Puede contestar una llamada cuando tiene otra en curso. Para activar la función de llamada en espera (servicio de red), seleccione Menú > Configurac. y Llamada > Llamada > Llamada en espera. © 2008 Nokia. Todos los derechos reservados. - Page 204 1. Para iniciar la marcación por voz, en la pantalla de inicio, mantenga pulsada la tecla Llamar. Si está usando un auricular compatible con tecla de auricular, mantenga pulsada esta tecla para iniciar la marcación por voz. © 2008 Nokia. Todos los derechos reservados.
-
Page 205: Realizar Una Llamada De Video
Consulte los precios con el proveedor de servicios. 1. En la pantalla de inicio, seleccione para abrir el teclado e ingrese el número de teléfono. 2. Seleccione Opciones > Llamar > Llamada de video. © 2008 Nokia. Todos los derechos reservados. -
Page 206: Durante Una Llamada De Video
La instantánea no se guarda. Para acercar o alejar su imagen, seleccione Opciones > Zoom. Para cambiar la calidad del video, seleccione Opciones > Preferencia de video > Calidad normal, Detalle más claro o Movimiento más suave. © 2008 Nokia. Todos los derechos reservados. -
Page 207: Responder O Rechazar Una Llamada De Video
● Tiene una conexión UMTS activa y está dentro de una cobertura de red UMTS. Si sale de la red UMTS durante la sesión de video compartido, la sesión se detiene mientras la llamada de voz continúa. © 2008 Nokia. Todos los derechos reservados. -
Page 208: Configuraciones
Configuraciones de la conexión UMTS Para configurar la conexión UMTS: ● Comuníquese con el proveedor de servicios para establecer un acuerdo para el uso de la red UMTS. © 2008 Nokia. Todos los derechos reservados. -
Page 209: Compartir Video En Vivo O Videoclips
(disponible sólo para el destinatario). 3. Para finalizar la sesión de video compartido, seleccione Detener. Para finalizar la llamada de voz, pulse la tecla Finalizar. Cuando finaliza la llamada, también termina la sesión de video compartido. © 2008 Nokia. Todos los derechos reservados. -
Page 210: Aceptar Una Invitación
El dispositivo registra las llamadas perdidas y recibidas sólo si la red admite estas funciones, el dispositivo está encendido y si está dentro del área de cobertura de la red. Para abrir la aplicación Registro, seleccione Menú > Registro. © 2008 Nokia. Todos los derechos reservados. -
Page 211: Llamadas Recientes
Se le podría cobrar por las conexiones de paquete de datos según la cantidad de datos enviados y recibidos. Para verificar la cantidad de datos enviados o recibidos durante las conexiones de paquete de datos, seleccione Paquete datos. © 2008 Nokia. Todos los derechos reservados. -
Page 212: Controlar Todos Los Eventos De Comunicación
El reconocimiento de escritura a mano le permite escribir directamente en la pantalla usando el stylus como bolígrafo. Toque cualquier campo de ingreso de texto para ingresar letras, números y caracteres especiales. © 2008 Nokia. Todos los derechos reservados. -
Page 213: Teclado En Pantalla
Para activar el bloqueo de mayúsculas, toque dos veces la tecla. La tecla tendrá una línea debajo. 5 — Números y símbolos: alterna entre números, caracteres especiales más utilizados y caracteres alfabéticos en el teclado en pantalla. © 2008 Nokia. Todos los derechos reservados. -
Page 214: Escritura A Mano
Para borrar caracteres o mover el cursor hacia atrás, muévase de la derecha a la izquierda (consulte Figura 1). Para insertar un espacio, muévase de la izquierda a la derecha (consulte Figura 2). © 2008 Nokia. Todos los derechos reservados. -
Page 215: Teclado Alfanumérico
3 — Indicador de ingreso de texto: abre una ventana emergente, en la que puede activar o desactivar los modos de ingreso de texto predictivo, cambiar mayúsculas y minúsculas, y alternar entre el modo alfabético y el numérico. © 2008 Nokia. Todos los derechos reservados. -
Page 216: Ingreso De Texto Tradicional
Activar texto predictivo. 2. Para escribir la palabra que desea, toque las teclas de 2 a 9. Toque cada tecla sólo una vez por cada letra. Por ejemplo, para escribir "Nokia" cuando el © 2008 Nokia. Todos los derechos reservados. -
Page 217: Alternar Entre Los Modos De Texto
● Idioma de escritura — Defina qué caracteres específicos del idioma de la escritura a mano se reconocen y cómo es el diseño del teclado en pantalla. ● Velocidad de escritura — Ajuste la velocidad con la que se reconoce la escritura a mano. © 2008 Nokia. Todos los derechos reservados. -
Page 218: Contactos (Directorio)
En la barra de herramientas de la lista de contactos, seleccione alguna de las siguientes opciones: Llamar — Llamar al contacto deseado. ● Crear mensaje — Enviar un mensaje al contacto deseado. ● Nuevo contacto — Crear un nuevo contacto. ● © 2008 Nokia. Todos los derechos reservados. -
Page 219: Administrar Nombres Y Números
Puede definir un tono de timbre para un contacto o grupo y una imagen y un texto de llamada para un contacto. Cuando el contacto lo llama, el dispositivo reproduce el tono de timbre seleccionado y muestra el texto de llamada o la imagen (si el © 2008 Nokia. Todos los derechos reservados. -
Page 220: Copiar Contactos
Para obtener información acerca de la disponibilidad y uso de los servicios de la tarjeta SIM, comuníquese con el proveedor de la tarjeta SIM. Este puede ser el proveedor de servicios u otro proveedor. © 2008 Nokia. Todos los derechos reservados. -
Page 221: Contactos Sim
Para hacerlo, el número del centro de mensajes y el número de teléfono del destinatario deben estar incluidos en la lista de marcación fija. © 2008 Nokia. Todos los derechos reservados. -
Page 222: Mensajería
Inform. entrega — Puede solicitar a la red que le envíe un informe de ● entrega de los mensajes de texto y mensajes multimedia que ha enviado (servicio de red). © 2008 Nokia. Todos los derechos reservados. -
Page 223: Escribir Y Enviar Mensajes
4. Para escribir el mensaje, toque el campo de mensaje. 5. Para agregar un objeto a un mensaje, seleccione y el tipo de contenido que corresponda. El tipo de mensaje puede cambiar a mensaje multimedia según el contenido insertado. © 2008 Nokia. Todos los derechos reservados. -
Page 224: Buzón De Entrada De Mensajes
Buzón de entrada, seleccione el mensaje. Para responder un mensaje recibido, seleccione Opciones > Responder. Mensajes multimedia Importante: Tenga precaución al abrir los mensajes. Los mensajes pueden contener software malicioso o dañar de alguna manera el dispositivo o la PC. © 2008 Nokia. Todos los derechos reservados. -
Page 225: Datos, Configuraciones Y Mensajes De Servicios Web
Deberá tener una cuenta de e-mail por separado. Siga las instrucciones proporcionadas por el buzón de correo remoto y del proveedor de servicios de Internet (ISP). © 2008 Nokia. Todos los derechos reservados. -
Page 226: Abrir El Buzón De Correo
Recuperar e-mail > Nuevos para recuperar todos los mensajes nuevos, Seleccionados para recuperar sólo los mensajes seleccionados o Todos para recuperar todos los mensajes del buzón. Para detener la recuperación de mensajes, seleccione Cancelar. © 2008 Nokia. Todos los derechos reservados. -
Page 227: Eliminar Mensajes De E-Mail
Opciones > Eliminar > Teléfono y servidor. Para cancelar la eliminación de un e-mail que está marcado para ser eliminado del dispositivo y del servidor durante la próxima conexión ( ), seleccione Opciones > Deshacer eliminar. © 2008 Nokia. Todos los derechos reservados. -
Page 228: Desconectarse Del Buzón De Correo
Con los comandos de servicio (servicio de red) puede ingresar y enviar solicitudes de servicio (también conocidas como comandos USSD) al proveedor de servicios, tales como comandos de activación para los servicios de red. © 2008 Nokia. Todos los derechos reservados. -
Page 229: Configuraciones De Mensajes
● Conexión preferida — Seleccionar la conexión que desea utilizar. ● Resp. mismo centro — Seleccionar si desea responder este mensaje para que se envíe con el mismo número del centro de mensajes de texto (servicio de red). © 2008 Nokia. Todos los derechos reservados. -
Page 230: Configuraciones De Mensajes Multimedia
(servicio de red). Si el mensaje no se puede enviar dentro de este período de tiempo, el mensaje se elimina del centro de mensajes. © 2008 Nokia. Todos los derechos reservados. -
Page 231: Configuraciones De E-Mail
Las configuraciones pueden estar predefinidas en el dispositivo, o usted puede recibir las configuraciones como un mensaje de configuración del proveedor de servicios que ofrece el servicio MI. También puede ingresarlas manualmente. © 2008 Nokia. Todos los derechos reservados. -
Page 232: Personalizar El Dispositivo
El nombre del perfil seleccionado se muestra en la parte superior de la pantalla de inicio. Si el perfil General está en uso, sólo aparece la fecha. © 2008 Nokia. Todos los derechos reservados. -
Page 233: Carpeta Música
RSS o Atom para su reproducción en dispositivos móviles y computadoras. Puede transferir música al dispositivo desde otros dispositivos compatibles. Reproducir una canción o un podcast Para abrir el Reproductor de música, seleccione Menú > Música > Repr. mús.. © 2008 Nokia. Todos los derechos reservados. - Page 234 Para modificar el balance y la imagen estéreo o para mejorar el bajo, seleccione Opciones > Configuraciones. Para regresar a la pantalla de inicio y dejar el reproductor de música ejecutándose en segundo plano, pulse la tecla Finalizar. Para cerrar el reproductor, seleccione Opciones > Salir. © 2008 Nokia. Todos los derechos reservados.
-
Page 235: Listas De Reproducción
Opciones > Reordenar lista repr.. Para cambiar la ubicación de una canción, seleccione la canción en la ubicación que desea y Excluir. Para terminar de reordenar la lista de reproducción, seleccione Hecho. © 2008 Nokia. Todos los derechos reservados. -
Page 236: Podcasts
Para adquirir música, primero debe registrarse en el servicio. Para acceder a Nokia Music Store, debe tener un punto de acceso de Internet válido en el dispositivo. Para abrir Nokia Music Store, seleccione Menú > Música > Tienda mús.. -
Page 237: Nokia Podcasting
Configuraciones de podcasting Para abrir Nokia Podcasting, seleccione Menú > Música > Podcasting. Antes de utilizar Nokia Podcasting, defina la conexión y las configuraciones de descarga. El método de conexión recomendado es WLAN. Verifique con el proveedor de servicios los términos y las tarifas del servicio de datos antes de usar otros métodos... -
Page 238: Descargas
Las actualizaciones automáticas sólo se producen si se selecciona un punto de acceso predeterminado específico y se ejecuta Nokia Podcasting. Si no se está ejecutando Nokia Podcasting, no se activarán las actualizaciones automáticas. ● Límite de descarga (%) — Defina el porcentaje de memoria que se reserva para descargas de podcasts. -
Page 239: Radio
Seleccione Menú > Música > Radio. Para escuchar estaciones guardadas, seleccione Opciones > Estaciones y seleccione una estación de la lista. Para eliminar o renombrar una estación, seleccione Opciones > Estaciones > Opciones > Eliminar o Renombrar. © 2008 Nokia. Todos los derechos reservados. -
Page 240: 10. Galería
Para copiar o mover archivos a la tarjeta de memoria (si hay una insertada) o a la memoria del dispositivo, seleccione un archivo, Opciones > Organizar > Copiar o Mover, y seleccione alguna de las opciones disponibles. © 2008 Nokia. Todos los derechos reservados. -
Page 241: Ver Imágenes Y Videos
Editar — Edite la imagen o el videoclip que seleccionó. ● Eliminar — Elimine la imagen o el videoclip que seleccionó. ● Organizar imágenes y videos Seleccione Menú > Galería y Imág. y videos > Opciones y algunas de las siguientes opciones: © 2008 Nokia. Todos los derechos reservados. -
Page 242: Modo Salida De Tv
En el modo de salida a TV, no puede utilizar el televisor como visor de la cámara. Para ver imágenes y videoclips en la TV, siga estas indicaciones: 1. Conecte un cable de salida de video Nokia a la entrada de video de un TV compatible. -
Page 243: 11. Cámara
Todo el audio, incluyendo las llamadas activas, el sonido estéreo del videoclip, el tono de las teclas y el tono de timbre se envían a la TV cuando se conecta el cable de salida de video Nokia al dispositivo. Puede utilizar el micrófono del dispositivo normalmente. -
Page 244: Capturar Imágenes
La vista de configuraciones de captura le ofrece accesos directos a varios elementos y configuraciones antes de capturar una imagen o grabar un videoclip. Después de cerrar la cámara, las configuraciones de captura vuelven a sus valores predeterminados. © 2008 Nokia. Todos los derechos reservados. - Page 245 La visualización de la pantalla cambia para coincidir con las configuraciones que define. Las configuraciones de captura son específicas del modo de disparo. Cuando alterna entre los modos no restaura las configuraciones definidas. © 2008 Nokia. Todos los derechos reservados.
-
Page 246: Capturar Imágenes
Para acercar o alejar una imagen cuando la captura, utilice la tecla de zoom del dispositivo. Para dejar la cámara abierta en segundo plano y usar otras aplicaciones, pulse la tecla Menú. Para volver a la cámara, mantenga pulsada la tecla Capturar. © 2008 Nokia. Todos los derechos reservados. -
Page 247: Después De Capturar Una Imagen
Automático, Red. ojos rojos, Activar y Desactivado. Evite tocar los LED del flash cuando la cubierta posterior no esté puesta. Después de un uso prolongado, los LED pueden calentarse. © 2008 Nokia. Todos los derechos reservados. -
Page 248: Escenas
La cámara captura la imagen después de que finaliza el tiempo de espera seleccionado. Para desactivar el temporizador, seleccione > > Sugerencia: Seleccione 2 segundos para mantener la mano firme al capturar una imagen. © 2008 Nokia. Todos los derechos reservados. -
Page 249: Grabación De Video
3 — Icono de captura. Tóquelo para grabar video. 4 — Luz de video encendida/apagada. 5 — Configuraciones de grabación. Toque para cambiar las configuraciones. 6 — Indicador de nivel de carga de la batería. © 2008 Nokia. Todos los derechos reservados. -
Page 250: Después De Grabar Un Videoclip
Las coordenadas del GPS se expresan en formato de grados y grados decimales, mediante el sistema internacional de coordenadas WGS-84. El Gobierno de los Estados Unidos es el operador del Sistema de Posicionamiento Global (GPS-Global Positioning System), y el único responsable de su precisión y © 2008 Nokia. Todos los derechos reservados. -
Page 251: Gps Asistido (A-Gps)
Debe tener definido en el dispositivo un punto de acceso a Internet para recuperar datos de asistencia del servicio Nokia A-GPS en una conexión de paquete de datos. Para definir un punto de acceso para A-GPS, seleccione Menú > Aplicaciones >... -
Page 252: Sostener El Dispositivo De Manera Correcta
Para ver las posiciones de los satélites encontrados, seleccione Camb. vista. Inicialmente, el dispositivo debe recibir señales de al menos cuatro satélites para poder hacer el cálculo de su ubicación. Cuando se ha realizado el cálculo inicial, © 2008 Nokia. Todos los derechos reservados. -
Page 253: Solicitudes De Posición
GPS. Las coordenadas del GPS se expresan en formato de grados y grados decimales, mediante el sistema internacional de coordenadas WGS-84. Seleccione Opciones y algunas de las siguientes opciones: © 2008 Nokia. Todos los derechos reservados. -
Page 254: Datos Gps
● Basada en la red — Utilice información de la red celular (servicio de red). Servidor de posicionamiento Para definir un punto de acceso y un servidor de posicionamiento para A-GPS, seleccione Servidor posicionam.. Es posible que su proveedor de servicios haya © 2008 Nokia. Todos los derechos reservados. -
Page 255: 13. Mapas
área se descargará automáticamente a través de Internet. Es posible que algunos mapas estén disponibles en el dispositivo o en la tarjeta de memoria. También puede usar el software para PC Nokia Map Loader para descargar mapas. Para instalar Nokia Map Loader en una PC compatible, visite http:// maps.nokia.com (en inglés). -
Page 256: Posicionamiento De Red
El indicador GPS muestra la disponibilidad y la potencia de la señal satelital. Una barra corresponde a un satélite. Cuando el dispositivo intenta encontrar un satélite, la barra cambia a amarillo. Cuando el dispositivo recibe © 2008 Nokia. Todos los derechos reservados. -
Page 257: Buscar Ubicaciones
Opciones > Buscar > Direcciones > Opciones > Selec. de Contactos. Si busca ubicaciones sin conexión a Internet, los resultados de búsqueda se limitan a un radio de 50 km (31 millas). © 2008 Nokia. Todos los derechos reservados. -
Page 258: Planificar Una Ruta
Para navegar al destino en auto o a pie, si compró una licencia para estos servicios adicionales, seleccione Opciones > Comenzar a conducir o Comenzar a caminar. Para guardar la ruta, seleccione Opciones > Guardar ruta. © 2008 Nokia. Todos los derechos reservados. -
Page 259: Guardar Y Enviar Ubicaciones
Colecciones > Opciones > Nueva colección. Para agregar ubicaciones a la colección, abra Mis lugares, toque la ubicación y seleccione Agregar > Agregar a colección. Para ver la ubicación seleccionada en el mapa, seleccione Mostrar en mapa. © 2008 Nokia. Todos los derechos reservados. -
Page 260: Navegar Hacia Un Destino
Para detener la navegación, seleccione Opciones > Detener navegación. Actualizar mapas Para actualizar los mapas del dispositivo, seleccione Opciones > Herramientas > Configuraciones > Mapa > Opciones > Buscar actualiz. mapa o utilice Nokia Map Loader. Para actualizar la aplicación Mapas, visite http://maps.nokia.com (en inglés). -
Page 261: Nokia Map Loader
Internet a la memoria del dispositivo o a una tarjeta de memoria compatible. Debe usar la aplicación Mapas y explorar mapas al menos una vez antes de usar Nokia Map Loader, ya que Nokia Map Loader usa la información de Mapas para comprobar la versión de los mapas que debe descargar. -
Page 262: Configuraciones De Red
● Mostrar info. célula — Configure el dispositivo para que indique cuando esté en una red celular basada en la tecnología de red microcelular (MCN, Micro Celular Network) y para activar la recepción de información celular. © 2008 Nokia. Todos los derechos reservados. -
Page 263: Conexión Wi-Fi/Wlan
Se establece una conexión a una WLAN cuando crea una conexión de datos utilizando un punto de acceso a Internet para WLAN. La conexión WLAN activa se cierra cuando finaliza la conexión de datos. © 2008 Nokia. Todos los derechos reservados. -
Page 264: Asistente Wlan
Seleccione alguna de las siguientes opciones: ● Filtrar redes WLAN — Filtrar redes LAN inalámbricas (WLAN) en la lista de redes encontradas. Las redes seleccionadas no se muestran la próxima vez que la aplicación busca redes WLAN. © 2008 Nokia. Todos los derechos reservados. -
Page 265: Modos De Funcionamiento
Si selecciona Ejecutar automátic. o permite que el dispositivo ejecute la prueba cuando lo solicite, y la prueba de conectividad se realiza exitosamente, el punto de acceso se guarda en los destinos de Internet. © 2008 Nokia. Todos los derechos reservados. -
Page 266: Puntos De Acceso
● Portador de datos — Seleccione el tipo de conexión de datos. Según la conexión de datos que seleccione, estarán disponibles sólo determinados campos de configuración. Complete todos los campos marcados con Debe © 2008 Nokia. Todos los derechos reservados. -
Page 267: Crear Grupos De Puntos De Acceso
Opciones > Organizar > Cambiar prioridad. Puntos de acceso de paquete de datos Seleccione Menú > Configurac. y Conectividad > Destinos > Punto de acceso y siga las instrucciones que aparecen en pantalla. © 2008 Nokia. Todos los derechos reservados. - Page 268 Internet. ● Dirección servidor proxy — Ingrese la dirección del servidor proxy. ● Número de puerto proxy — Ingrese el número de puerto del servidor proxy. © 2008 Nokia. Todos los derechos reservados.
-
Page 269: Puntos De Acceso A Internet Wlan
WLAN. ● Tipo de autenticación — Seleccione Abierto o Compartido para el tipo de autenticación entre el dispositivo y el dispositivo del punto de acceso WLAN. © 2008 Nokia. Todos los derechos reservados. -
Page 270: Conexiones De Datos Activas
● Número de puerto proxy — Ingresar el número de puerto proxy. Conexiones de datos activas Seleccione Menú > Configurac. y Conectividad > Admin. conexión. En la vista de conexiones de datos activas, puede ver las conexiones de datos abiertas: © 2008 Nokia. Todos los derechos reservados. -
Page 271: Sincronización
Para administrar perfiles de sincronización, seleccione Opciones y la opción deseada. Para sincronizar datos, seleccione Opciones > Sincronizar. Para cancelar la sincronización antes de que termine, seleccione Cancelar. © 2008 Nokia. Todos los derechos reservados. -
Page 272: Conectividad Bluetooth
SIM.. Para asegurar el funcionamiento con otros dispositivos que admiten tecnología Bluetooth, utilice los accesorios aprobados por Nokia para este modelo. Consulte a los fabricantes de otros dispositivos para determinar la compatibilidad entre esos dispositivos y el suyo. -
Page 273: Sugerencias De Seguridad
2. Toque un elemento y seleccione Opciones > Enviar > Vía Bluetooth. Aparecen los dispositivos con tecnología inalámbrica Bluetooth que están dentro del área de alcance. Los iconos del dispositivo son los siguientes: computadora © 2008 Nokia. Todos los derechos reservados. -
Page 274: Vincular Dispositivos
3. Algunos accesorios de audio se conectan automáticamente al dispositivo después de la vinculación. En caso contrario, para conectarse a un accesorio, seleccione Opciones > Conectar a dispos. audio. Los dispositivos vinculados se indican con en la búsqueda de dispositivos. © 2008 Nokia. Todos los derechos reservados. -
Page 275: Recibir Datos Utilizando Conectividad Bluetooth
Para desbloquear todos los dispositivos bloqueados, seleccione Opciones > Eliminar todos. Si rechaza una solicitud de vinculación de otro dispositivo, se le preguntará si desea bloquear todas las solicitudes de conexión futuras provenientes de ese dispositivo. © 2008 Nokia. Todos los derechos reservados. -
Page 276: Modo Remoto De Sim
Si el dispositivo está bloqueado, ingrese el código de bloqueo para desbloquearlo. Para salir del modo remoto de SIM, pulse la tecla Encender/Apagar y seleccione Salir modo remoto SIM. Seleccione Menú > Configurac. y Conectividad > USB. © 2008 Nokia. Todos los derechos reservados. -
Page 277: Conexiones De Pc
Conexiones de PC Puede usar su dispositivo móvil con una variedad de aplicaciones compatibles de conectividad a PC y de aplicaciones para la comunicación de datos. Con Nokia Ovi Suite puede, por ejemplo, transferir archivos e imágenes entre el dispositivo y una computadora compatible. -
Page 278: Configuraciones Sip
Iniciar una conexión activa de paquete de datos (por ejemplo, para enviar y recibir e-mail) es más rápido que el dispositivo establezca una conexión de paquete de datos cuando la necesite. Si no hay cobertura para paquete de © 2008 Nokia. Todos los derechos reservados. -
Page 279: 15. Compartir En Línea
Para suscribirse a un servicio para compartir en línea, visite el sitio Web del proveedor de servicios y compruebe que el dispositivo Nokia sea compatible con el servicio. Cree una cuenta como lo indica el sitio Web. Recibe el nombre de usuario y la contraseña necesarias para configurar el dispositivo con la cuenta. -
Page 280: Administrar Las Cuentas
Para agregar etiquetas a la publicación, seleccione Etiquetas:. Para seleccionar si desea activar la publicación de la información de ubicación contenida en el archivo, seleccione Ubicación:. © 2008 Nokia. Todos los derechos reservados. -
Page 281: Publicar Archivos Desde Galería
4. Seleccione Opciones > Registrar en Web. 16. Nokia Video Centre Con Nokia Video Centre (servicio de red), puede descargar y reproducir videoclips por aire a partir de servicios de video en Internet compatibles mediante una conexión de paquete de datos o WLAN. También puede transferir videoclips desde una PC compatible al dispositivo y verlos en el Centro de video. - Page 282 Opciones > Programar descargas. El Centro de video descarga de manera automática nuevos videoclips diariamente a la hora que especifique. Para cancelar descargas programadas para una categoría, seleccione Descarga manual como el método de descarga. © 2008 Nokia. Todos los derechos reservados.
-
Page 283: Vínculos De Video
● Cancelar descarga — Cancelar una descarga. ● Detalles de video — Ver detalles del archivo. ● Camb. relación aspecto — Seleccionar la relación de aspecto del videoclip. Seleccione Natural, Expandir o Zoom. © 2008 Nokia. Todos los derechos reservados. -
Page 284: Transferir Videos Desde Su Pc
Conexión de red. Para seleccionar la conexión manualmente cada vez que el Centro de video abra una conexión de red, seleccione Preguntar siempre. Para activar o desactivar la conexión GPRS, seleccione Confirmar uso de GPRS. © 2008 Nokia. Todos los derechos reservados. -
Page 285: 17. Explorador Web
Importante: Instale y utilice sólo las aplicaciones y el software de fuentes confiables que ofrezcan seguridad, como las aplicaciones Symbian Signed o las aprobadas por Java Verified™. © 2008 Nokia. Todos los derechos reservados. -
Page 286: Barra De Herramientas Del Explorador
Barra de herramientas del explorador La barra de herramientas del explorador le ayuda a seleccionar las funciones del explorador que utiliza con frecuencia. En la barra de herramientas, seleccione entre las siguientes opciones: © 2008 Nokia. Todos los derechos reservados. -
Page 287: Navegar Por Las Páginas
Los vínculos son archivos XML en páginas Web que se utilizan para compartir, por ejemplo, los titulares más recientes o blogs. Los Blogs o weblogs son diarios en la Web. Es común encontrar vínculos Web en páginas Web, Blog y Wiki. © 2008 Nokia. Todos los derechos reservados. -
Page 288: Widgets
Para buscar texto, números de teléfono o direcciones de e-mail dentro de la página Web actual, seleccione Opciones > Buscar palabra clave y la opción que corresponda. Para ir a la coincidencia anterior, seleccione Opciones > Buscar anterior. © 2008 Nokia. Todos los derechos reservados. -
Page 289: Descargar Y Comprar Elementos
Para modificar la lista, seleccione Opciones > Descargas. En la lista, seleccione un elemento y Opciones para cancelar descargas en curso o abrir, guardar o eliminar descargas finalizadas. © 2008 Nokia. Todos los derechos reservados. -
Page 290: Favoritos
Si ha intentado acceder o ha accedido a información confidencial que exige contraseñas, vacíe la memoria caché después de cada uso. Para vaciar la memoria caché, seleccione Opciones > Borrar datos privacidad > Caché. © 2008 Nokia. Todos los derechos reservados. -
Page 291: Seguridad De Conexión
Antes de cambiar cualquier configuración del certificado, asegúrese de poder confiar totalmente en el propietario del certificado y de que éste realmente pertenezca al propietario indicado. 18. Buscar Buscar Seleccione Menú > Internet > Búsqueda. © 2008 Nokia. Todos los derechos reservados. -
Page 292: Iniciar Una Búsqueda
Acerca de ¡Descargue! Seleccione Menú > Descargue. Con Descargue, puede descubrir, ver previamente, comprar, descargar y actualizar contenido, servicios y aplicaciones. Puede acceder fácilmente a juegos, tonos de © 2008 Nokia. Todos los derechos reservados. -
Page 293: Comprar Y Descargar Elementos
20. Otras aplicaciones Reloj Seleccione Menú > Aplicaciones > Reloj. Alarma Para ver las alarmas activas e inactivas, seleccione Alarmas. Cuando la alarma está activa, aparece . Cuando la alarma se repite, aparece © 2008 Nokia. Todos los derechos reservados. -
Page 294: Reloj Mundial
Para abrir la agenda, seleccione Menú > Agenda. Vistas de la agenda Para alternar entre las vistas mensual, semanal, diaria y de notas de tareas, seleccione Opciones > Cambiar vista > Vista del mes, Semana, Día o Tareas. © 2008 Nokia. Todos los derechos reservados. -
Page 295: Barra De Herramientas De La Agenda
Para mover y copiar archivos y carpetas, o para crear nuevas carpetas en la memoria, seleccione Opciones > Organizar y la opción que desea. Para ordenar los archivos, seleccione Opciones > Ordenar por y la categoría que desea. © 2008 Nokia. Todos los derechos reservados. -
Page 296: Editar La Tarjeta De Memoria
.sisx Sólo instale software que es compatible con el dispositivo. Instalar aplicaciones Puede transferir archivos de instalación a su dispositivo desde una computadora compatible, descargarlos durante la exploración o recibirlos en un mensaje © 2008 Nokia. Todos los derechos reservados. - Page 297 Bluetooth. Puede usar Nokia Application Installer en Nokia Ovi Suite para instalar una aplicación en el dispositivo. Los iconos del Administrador de aplicaciones indican lo siguiente: Aplicación SIS o SISX...
-
Page 298: Eliminar Aplicaciones
Si el archivo .sis es el adjunto de un mensaje, elimine el mensaje del buzón de entrada de Mensajes. Eliminar aplicaciones Seleccione Menú > Configurac. y Admin. aplicac.. © 2008 Nokia. Todos los derechos reservados. -
Page 299: Configuraciones Del Administrador De Aplicaciones
Con RealPlayer, puede reproducir videoclips o transmitir archivos multimedia por aire sin guardarlos antes en el dispositivo. RealPlayer no necesariamente admite todos los formatos de archivo ni todas las variaciones de formatos de archivo. Seleccione Menú > Aplicaciones > RealPlayer. © 2008 Nokia. Todos los derechos reservados. -
Page 300: Barra De Herramientas De Realplayer
Web. Antes de iniciar la reproducción de contenido en vivo, su dispositivo se conecta al sitio y empieza a cargar el contenido. El contenido no se guarda en el dispositivo. © 2008 Nokia. Todos los derechos reservados. -
Page 301: Grabadora
La calculadora tiene una precisión limitada y está diseñada para cálculos sencillos. Para realizar un cálculo, ingrese el primer número del cálculo. Para eliminar un número, seleccione C. Seleccione una función, como sumar o restar. Ingrese el segundo número del cálculo y seleccione =. © 2008 Nokia. Todos los derechos reservados. -
Page 302: Convertidor
● Actualización auto. hora — Para actualizar la hora, fecha y zona horaria, seleccione Activar. Puede que este servicio de red no esté disponible en todas las redes. © 2008 Nokia. Todos los derechos reservados. -
Page 303: Configuraciones De Idioma
Seleccione Menú > Configurac. y Teléfono > Comandos voz. Para editar los comandos de voz, seleccione Opciones > Cambiar comando. Para escuchar la etiqueta de voz sintetizada, seleccione Opciones > Reproducir. © 2008 Nokia. Todos los derechos reservados. -
Page 304: Configuraciones De Accesorios
Las configuraciones disponibles dependen del tipo de accesorio. Configuraciones de salida de TV Para cambiar las configuraciones para una conexión de salida de TV, seleccione Salida de TV y alguna de las siguientes opciones: © 2008 Nokia. Todos los derechos reservados. -
Page 305: Configuraciones De La Aplicación
● Perfil predeterminado — Configure el perfil que desea que se active cada vez que conecte un cable de conectividad de video de Nokia al dispositivo. ● Tamaño de pantalla TV — Seleccione la relación de aspecto de la TV: Normal o Pantalla ancha para TV de pantalla ancha. -
Page 306: Configuraciones De Seguridad
Si olvida el código PIN o PIN2, comuníquese con el proveedor de servicios. Si olvida el código de bloqueo, comuníquese con un punto de servicio Nokia Care o con el proveedor de servicios. -
Page 307: Gestión De Certificados
La existencia de un certificado no proporciona ninguna protección por sí sola; el administrador de certificados debe contar con certificados correctos, auténticos y confiables como medida de seguridad adicional. © 2008 Nokia. Todos los derechos reservados. - Page 308 ● Internet: Sí — el certificado puede certificar servidores. ● Instalación aplicación: Sí — el certificado puede certificar el origen de una nueva aplicación Java™. Para cambiar el valor, seleccione Opciones > Cambiar config. segurid.. © 2008 Nokia. Todos los derechos reservados.
-
Page 309: Módulo De Seguridad
DRM que ya está en su dispositivo. La revocación de ese software DRM no afecta el uso del contenido protegido con otros tipos de DRM ni el uso de contenidos no protegidos con DRM. © 2008 Nokia. Todos los derechos reservados. -
Page 310: Luz De Notificación
● Rechazar llam. con mens. — Active el rechazo de una llamada con un mensaje de texto para informarle a la persona que llama de por qué no pudo contestar la llamada. © 2008 Nokia. Todos los derechos reservados. -
Page 311: Desvío De Llamadas
El desvío de llamadas le permite desviar las llamadas entrantes al buzón de voz o a otro número de teléfono. Para obtener detalles, comuníquese con el proveedor de servicios. Para activar el desvío de llamadas, seleccione Activar. Para verificar si la opción está activa, seleccione Verificar estado. © 2008 Nokia. Todos los derechos reservados. -
Page 312: Restricción De Llamadas
Para obtener informaciones sobre contraseñas, comuníquese con su proveedor de punto de acceso, por ejemplo, un proveedor de servicios comerciales de Internet (ISP) o un proveedor de servicios de red. © 2008 Nokia. Todos los derechos reservados. - Page 313 Esto es normal, no es un defecto. P: ¿Por qué mi dispositivo Nokia no puede establecer una conexión GPS? R: Establecer una conexión GPS puede demorar desde un par de segundos hasta varios minutos.
- Page 314 P: ¿Cómo desconecto la LAN inalámbrica (WLAN) en mi dispositivo Nokia? R: La WLAN en el dispositivo Nokia se desconecta cuando no está conectado o intentando conectarse a otro punto de acceso, o no está buscando redes disponibles. Para reducir el consumo de batería, puede especificar que el dispositivo Nokia no busque redes disponibles o que las busque en segundo plano con menos frecuencia.
- Page 315 > Si es necesario. Si esto no ayuda, apague y vuelva a encender el dispositivo. P: ¿Puedo usar mi dispositivo Nokia como módem de fax con una PC compatible? R: No puede usar el dispositivo como módem de fax. Sin embargo, con el desvío de llamadas (servicio de red), puede desviar las llamadas de fax entrantes a un número...
-
Page 316: Accesorios
Información sobre baterías y cargadores Su dispositivo recibe alimentación eléctrica a través de una batería recargable. La batería indicada para este dispositivo es BL-5J. Es posible que Nokia disponga de modelos adicionales de batería para este dispositivo. Este dispositivo está diseñado para su uso con los siguientes cargadores: AC-8, AC-5. - Page 317 Utilice la batería solamente para el propósito para el que fue diseñada. No utilice nunca el cargador o la batería si están dañados. Mantenga la batería fuera del alcance de los niños. © 2008 Nokia. Todos los derechos reservados.
-
Page 318: Normas De Autenticación De Baterías Nokia
¿Qué ocurre si la batería no es auténtica? Si no puede confirmar que su batería Nokia con el holograma en la etiqueta es una batería auténtica de Nokia, no la use. Llévela al centro de servicio autorizado Nokia o al distribuidor más cercano para solicitar asistencia. El uso de una batería no aprobada por Nokia podría ser peligroso y podría resultar en un rendimiento... -
Page 319: Cuidado Y Mantenimiento
● No deje caer, no golpee ni sacuda bruscamente el dispositivo. Los manejos bruscos pueden dañar las tarjetas de circuitos internos y los mecanismos delicados. ● No utilice productos químicos abrasivos, solventes de limpieza ni detergentes fuertes para limpiarlo. © 2008 Nokia. Todos los derechos reservados. -
Page 320: Reciclar
Nokia local cuentan con información más detallada. Verifique cómo reciclar sus productos Nokia en www.nokia.com/werecycle (en inglés), o si está navegando desde un dispositivo móvil, www.nokia.mobi/werecycle (en inglés). -
Page 321: Entorno Operativo
15,3 cm (6 pulgadas) entre un dispositivo móvil y el dispositivo médico implantado, por ejemplo, marcapaso o desfibrilador cardioversor implantado, a fin de evitar interferencias potenciales con el dispositivo médico. Quienes tengan dichos dispositivos deben: © 2008 Nokia. Todos los derechos reservados. -
Page 322: Auxiliares Auditivos
No almacene ni transporte líquidos inflamables, gases o materiales explosivos en el mismo compartimiento destinado al dispositivo, sus piezas o accesorios. Para los automóviles equipados con bolsas de aire, recuerde © 2008 Nokia. Todos los derechos reservados. -
Page 323: Zonas Potencialmente Explosivas
Internet (llamadas por Internet), active las llamadas por Internet y el teléfono celular. El dispositivo intentará hacer llamadas de emergencia tanto a través de la red celular como de su proveedor de servicio de © 2008 Nokia. Todos los derechos reservados. -
Page 324: Información De Certificación (Sar)
Su dispositivo móvil es radiotransmisor y receptor. Está diseñado para no exceder los límites de exposición a ondas de radio recomendados por las normas internacionales. La organización científica independiente ICNIRP ha desarrollado estas normas e incluido márgenes de seguridad diseñados para asegurar la © 2008 Nokia. Todos los derechos reservados. - Page 325 W/kg en un gramo de tejido corporal. El valor SAR más elevado informado según este estándar durante la certificación del producto para uso cerca del oído es de 1,29 W/kg y cuando se lleva cerca del cuerpo es de 0,92 W/kg. © 2008 Nokia. Todos los derechos reservados.
-
Page 326: Índice
66, 68 escenas 89 arrastrar 22 flash 88 audífono 38 grabar 91 indicadores 85 modo de imagen 87 barra de herramientas activa 88 modo de video 90 barra multimedia 24 © 2008 Nokia. Todos los derechos reservados. - Page 327 115 acceso 119 visibilidad del dispositivo 114 desvío de llamadas 152 conectividad Bluetooth fecha y hora 143 activación y desactivación 114 idioma 144 bloqueo de dispositivos 116 llamadas 151 configuraciones 113 pantalla 144 © 2008 Nokia. Todos los derechos reservados.
- Page 328 103 explorador configuraciones de semana barra de herramientas 127 alarma de la agenda 135 búsqueda de contenido 129 contactos descargas 130 copia 61 explorar páginas 126, 128 edición 59 favoritos 131 eliminar 60 © 2008 Nokia. Todos los derechos reservados.
- Page 329 IAP (puntos de acceso a mapas 96 Internet) 105 actualización 101 imagen de fondo 73 búsqueda de ubicaciones 98 indicadores e iconos 31 elementos guardados 100 información de enviar ubicaciones 100 posicionamiento 91 exploración 97 © 2008 Nokia. Todos los derechos reservados.
- Page 330 66 mensajes difusión celular 69 protección de copyright 150 mensajes multimedia 64, 65 puntos de acceso 105, 107 menú 21 grupos 108 mini mapa 128 MMS (servicio de mensajes multimedia) 64, 65 © 2008 Nokia. Todos los derechos reservados.
- Page 331 128 silenciar sonido 43 sincronización de datos 112 SIP 119 WEP 110 SMS (servicio de mensajes widgets 129 cortos) 64 WPA 111 solución de problemas 153 Soporte de la aplicación Java J2ME 137 © 2008 Nokia. Todos los derechos reservados.
- Page 332 87, 90 © 2008 Nokia. Todos los derechos reservados.
Need help?
Do you have a question about the 5800 XpressMusic and is the answer not in the manual?
Questions and answers