
Related Manuals for Philips EP4051


Summary of Contents for Philips EP4051
- Page 1 Super automatic espresso machine 4000 series EP4051, EP4050 EN USER MANUAL 4219.460.3761.1 PHILIPS4000 OTC_FRONT-BACK_A5_WE.indd 1 22-11-16 10:46...
- Page 2 EP4050 ESPRESSO CLASSIC COFFEE MEMO MEMO CAPPUCCINO AROMA STRENGTH MEMO LATTE MACCHIATO MENU MEMO EP4051 CLASSIC COFFEE ESPRESSO MEMO MEMO CAPPUCCINO CAFÉ AU LAIT MEMO MEMO MENU AROMA STRENGTH...
-
Page 3: Table Of Contents
English Contents Machine overview_________________________________________________________________ Introduction ______________________________________________________________________ First installation___________________________________________________________________ AquaClean filter __________________________________________________________________ Activating the AquaClean filter_______________________________________________________ Replacing the AquaClean filter_______________________________________________________ Replacing the AquaClean filter after 8 filters were used__________________________________ Measuring the water hardness_______________________________________________________ Control panel and display___________________________________________________________ One-touch beverage buttons________________________________________________________ Navigation buttons________________________________________________________________ MENU button ____________________________________________________________________ AROMA STRENGTH button _________________________________________________________ CoffeeSwitch_____________________________________________________________________... -
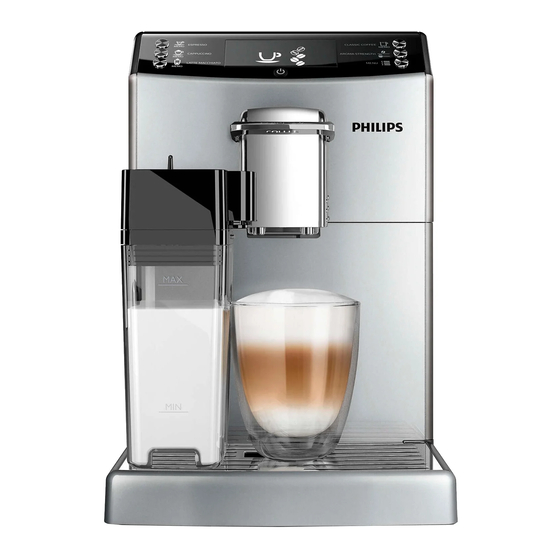
Page 4: Machine Overview
Drip tray Introduction Congratulations on your purchase of a Philips full-automatic coffee machine! To fully benefit from the support that Philips offers, please register your product at www.philips.com/coffee-care. Read the separate safety booklet carefully before you use the machine for... -
Page 5: First Installation
English To help you get the best out of your coffee machine, Philips offers full support in 4 different ways: - The separate quick start guide for first installation and first use. - This user manual for more detailed information on how to use the machine, how to keep it clean, how to descale it and how to solve problems. -
Page 6: Replacing The Aquaclean Filter
English 1 For instructions on how to place the AquaClean filter in the water tank, see the separate quick start guide. Note: Shake the AquaClean filter for about 5 seconds, immerse it upside down in a jug with cold water and wait until no more air bubbles come out. -
Page 7: Replacing The Aquaclean Filter After 8 Filters Were Used
English The display asks if you want to activate a new filter. 3 Press the OK button to confirm. AQUA CLEAN FILTER NEW? The display automatically updates the number of filters used. 4 Dispense 2 cups of hot water (0.5 l) to complete the activation. Discard AQUA CLEAN this water. -
Page 8: Control Panel And Display
Use the one-touch beverage buttons to quickly prepare one of the preset beverages: ESPRESSO, CAPPUCCINO, CLASSIC COFFEE, LATTE MACCHIATO (EP4050 only) and CAFÉ AU LAIT (EP4051 only). Navigation buttons Some of the one-touch beverage buttons have a double function; use these buttons to navigate through the menu. -
Page 9: Aroma Strength Button
English - To start descaling - To restore to the factory settings AROMA STRENGTH button Use the AROMA STRENGTH button to adjust the coffee strength or to brew pre-ground coffee. CoffeeSwitch Thanks to the innovative CoffeeSwitch technology, the machine allows you to brew two types of coffee by changing the brewing pressure at the flip of a lever. -
Page 10: Brewing Coffee With Pre-Ground Coffee
English To brew two cups of espresso, press the ESPRESSO button twice. The machine automatically carries out two grinding cycles in sequence. Note: Using the cover of the bean hopper helps to keep the beans fresh. Brewing coffee with pre-ground coffee When you brew coffee with pre-ground coffee, use the measuring scoop supplied to put the correct dose in the pre-ground coffee compartment. -
Page 11: Brewing Milk-Based Coffee Beverages And Milk Froth
2 Choose your milk-based beverage. Press the one-touch CAPPUCCINO button, LATTE MACCHIATO button (EP4050 only) or CAFÉ AU LAIT button (EP4051 only) to brew one of these milk-based beverages right away. Press the MENU button, choose DRINKS and scroll down through the drinks to select MILK FROTH, LATTE MACCHIATO (EP4050 only) or CAFÉ... -
Page 12: Adjusting Coffee Strength
English 2 Press the OK button when the cup contains the desired amount of espresso. The tick on the display shows that the button is programmed: every time it is pressed, the machine brews the set espresso volume. Note: To set the volume of espresso lungo, cappuccino, café au lait and latte macchiato, follow the same procedure: press and hold the button of the beverage and press the OK button when the cup contains the desired amount of coffee or milk. -
Page 13: Cleaning And Maintenance
Note: Consult the table below for when and how to clean all detachable parts of the machine. For more detailed information on how to clean the brew group and how to descale the machine, read the corresponding chapters below and visit the dedicated website www.philips.com/coffee- care. Cleaning table... -
Page 14: Cleaning The Brew Group
Cleaning the brew group Note: Scan the QR code or visit www.philips.com/coffee-care for support videos on how to remove and clean the brew group. Caution: Do not clean the brew group in the dishwasher and do not use washing-up liquid or a cleaning agent to clean it. -
Page 15: Reinserting The Brew Group
English 3 Put a coffee oil remover tablet in the pre-ground coffee compartment. 4 Press the CLASSIC COFFEE button. The machine dispenses water from the coffee dispensing spout. 5 When the progress bar has reached the middle, set the main switch on the back of the machine to OFF. -
Page 16: Lubrication
4 Close the service door. Lubrication For optimal performance of the machine, you have to lubricate the brew group. See table below for the lubrication frequency. For support videos visit our website: www.philips.com/coffee-care. Usage frequency Nr of beverages brewed daily Lubrication frequency... -
Page 17: Thorough Cleaning Of The Milk Carafe
English 2 Remove the cup with the beverage and place an empty cup under the milk dispensing spout. Note: Make sure the milk dispensing spout is pulled out. 3 Press the OK button to start dispensing hot water. Thorough cleaning of the milk carafe To clean the milk carafe thoroughly, you have to do the following regularly: 1 Remove the lid of the milk dispensing unit. -
Page 18: Reassembling The Milk Carafe
Monthly cleaning of the milk carafe Only use Philips/Saeco milk circuit cleaner for this cleaning cycle. 1 Pour the contents of the milk circuit cleaner sachet in the milk carafe. Then fill the milk carafe with water up to the MAX level indication. -
Page 19: Descaling Procedure
In that case, repairs are not covered by the warranty. Only use Philips/Saeco descaling solution to descale the machine. The use of other products may damage the machine and leave residues in the water. - Page 20 English 4 Pour the descaling solution into the water tank. Fill the water tank with fresh water up to the CALC CLEAN level indication. Place the water tank back into the machine. Press the OK button to confirm. The first phase of the descaling procedure starts. The machine starts dispensing the descaling solution at intervals.
-
Page 21: What To Do If The Descaling Procedure Is Interrupted
English 15 Clean the brew group by performing the 'Weekly brew group cleaning' cycle. 16 Install a new AquaClean filter in the water tank. Tip: Using the AquaClean filter reduces the need for descaling! What to do if the descaling procedure is interrupted If the machine gets stuck during descaling, you can exit the descaling procedure by pressing the standby button. -
Page 22: Meaning Of The Error Codes
Below you find a list of the error codes showing problems that you can solve yourself. Support videos are available on www.philips.com/coffee-support. If another error code appears, please contact the Philips Consumer Care Center in your country. For contact details, see the warranty leaflet. -
Page 23: Troubleshooting
This chapter summarizes the most common problems you could encounter with the machine. Support videos and a complete list of frequently asked questions are available on www.philips.com/coffee-care. If you are unable to solve the problem, contact the Consumer Care Center in your country. For contact details, see the warranty leaflet. - Page 24 English Problem Cause Solution You have not removed the Remove the coffee grounds container coffee grounds container. before you remove the brew group. I cannot insert the brew The brew group is not in the Reset the machine in the following way: group.
- Page 25 English Problem Cause Solution The machine grinds the The coffee exit duct is blocked. Clean the coffee exit duct with the coffee beans, but coffee handle of the measuring spoon or a does not come out or spoon handle. Switch the appliance off coffee comes out slowly.
- Page 26 English Problem Cause Solution The filter has not been replaced Descale your machine first and then in time after the AquaClean install the AquaClean filter. filter icon flashed and the capacity dropped to 0%. You did not install the First descale the machine and then AquaClean filter during first install a new AquaClean filter.
- Page 27 Milk circuit cleaner START DESCALING? 23 MIN...
- Page 28 >75% recycled paper...
Need help?
Do you have a question about the EP4051 and is the answer not in the manual?
Questions and answers
I have a warning icon, a water drop with 2 semi circular arrows around it. What is this indicating?
The water drop icon with two semi-circular arrows on the Philips EP4051 indicates that the machine requires descaling.
This answer is automatically generated