
Subscribe to Our Youtube Channel
Related Manuals for Vacmaster vp320


Summary of Contents for Vacmaster vp320
- Page 1 Models: User’s Manual VP320 (110V) VP320EU (220-240V) www.VacMasterFresh.com Register your product and get support at...
-
Page 2: Save These Instructions
This vacuum sealer, powered by a strong, durable 1.5 HP pump, will meet the demand of medium to high volume commercial and food service operations. With the VP320 you can extend food life, maintain food quality, reduce freezer burn and reduce food waste and costs. -
Page 3: Table Of Contents
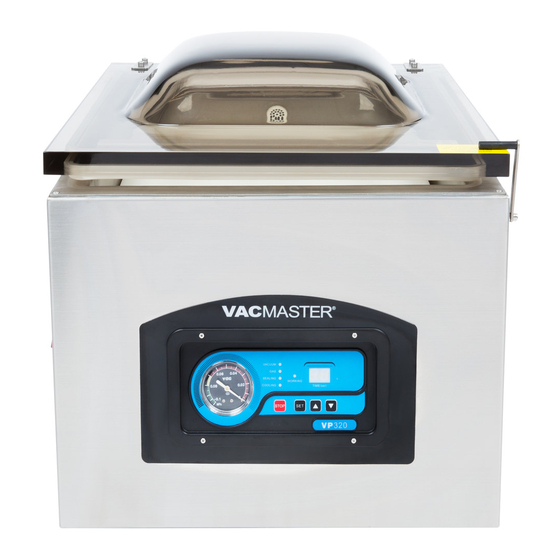
Table of Contents VP320 Features & Maintenance Kit Important Safeguards Set Up - Adding Oil How to Start & Use Your VP320 Control Panel Adjusting the Timing Controls 11-12 Maintainance - Maintaining the Vacuum Pump - Changing/Replacing Oil - Cleaning and Care... - Page 4 VP320 Features Seal Pad Lid Gasket Vacuum Chamber Filler Plates - (not shown) Used to occupy space in the chamber. The plates allow for faster vacuum. When more space is occupied, there is less air to be removed from the chamber.
- Page 5 VP320 Maintenance Kit Included with your machine purchase is a VP320 Maintenance Kit that will help you with setting up and maintaining the machine. Exhaust Filter (extra) - See page 12 for Maintenance Instructions Seal Wire - Extra wire for the seal bars...
-
Page 6: Important Safeguards
• Read all instructions in this User’s Manual before use. • Do not use the VP320 near a heat source or on a wet or hot surface. • To protect against electrical shock, do not immerse any part of the vacuum sealer plug or power cord in water or any other liquid. -
Page 7: Set Up - Adding Oil
Set Up - Adding Oil IMPORTANT: Oil must be added to machine prior to use. Make sure the VP320 is turned OFF and unplugged before adding oil. Required Supplies: • VacMaster vacuum pump oil (included) ® • Empty oil bottle with spout (included) •... -
Page 8: How To Start & Use Your Vp320
Allow 2” of extra headspace at the top of the pouch to ensure a quality, air-tight seal. The VP320 accepts vacuum chamber pouches up to 16”W x 20”L in size. - Page 9 Keep pouches that contain liquids or wet product below the height of the seal bar. Lay the pouch flat inside the chamber, with the opening of the pouch across the seal bar. Make sure that the pouch lies flat across the seal bar and is free of wrinkles.
- Page 10 Control Panel Features Vacuum Gauge - Indicates the vacuum level inside the chamber Function Lights - Vacuum - Illuminates to adjust vacuum time and during the vacuum process. During set-up, adjust the vacuum time using the UP/DOWN Buttons. Gas - This model does not offer the gas flush option. Sealing - Illuminates to adjust sealing time and during the sealing process.
-
Page 11: Control Panel
Cooling Time - To increase or decrease the cooling time, press the SET button until COOLING is illuminated and then use the UP/DOWN buttons to adjust the cooling time accordingly. NOTE: The VP320 settings will always default to the most recently used settings on the machine. www.VacMasterFresh.com | 800-821-7849... -
Page 12: Maintaining The Vacuum Pump
® NOTE: The VP320 vacuum pump requires periodic oil changes. Follow this oil change schedule to ensure proper maintenance of your VP320. • First oil change: After 25 hours of initial use. • Future oil changes: Every 60 hours, 3 months or if oil becomes discolored. -
Page 13: Cleaning And Care
If needed, use a clean, damp cloth with mild soap. a. Wipe the vacuum chamber clean. b. Wipe the gasket clean. c. Wipe the seal area clean. Do not store the VP320 outside. • DO NOT use any acetone-based or abrasive cleaners on the lid or other plastic •... -
Page 14: Vacuum Packaging Tips
Follow all food safety regulations as outlined by the FDA at www.FDA.gov. • Vacuum packaging cannot reverse the deterioration of foods • Use only VacMaster Vacuum Chamber Pouches and accessories ® • Some fruits and vegetables may release gases, known as outgassing. -
Page 15: Parts
Parts Description Part Number Lid Screws Upper Plate for Lid 979301 Lower Plate for Lid Hinge (Set) 979352 Lid Gasket 979426 Holder for Seal Pad 979305 Seal Pad 979306 www.VacMasterFresh.com | 800-821-7849... - Page 16 Parts www.VacMasterFresh.com | 800-821-7849...
- Page 17 979126 VacMaster Panel Decal 979130 Control Mounting Panel 979125 Control Panel Decal 979122 Settings Decal 979122 Decal Model VP320 979122 Circuit Board 979129 Foot Rubber 979159 Lid Latch 979170 *For EU model, refer to Fuse Socket Plug www.VacMasterFresh.com | 800-821-7849...
- Page 18 Parts - Chamber Description Part Number Complete Seal Bar 979300 Seal Tape (Tape Only) 979420 Chamber Tee for Piston Hose Hose for Piston Piston for Seal Bar (Complete) 979380 Gas Shock 979356 Split Washer Left Bottom Anchor Bolt 979357 Anchor Rod Gas Shock Bracket Proximity Switch 979355...
-
Page 19: Troubleshooting
Turn the machine back on and it should return to working order. VP320 does not pull a complete vacuum with pouch - The vacuum time may not be set high enough. Set the vacuum time higher and vacuum again. -
Page 20: Warranty
ARY Inc. ARY, Inc. P.O. Box 412888 Kansas City, MO 64141 All Rights Reserved. VACMASTER and VacStrip are trademarks or registered trademarks ® ® of ARY, Inc. in the United States and other countries.
Need help?
Do you have a question about the vp320 and is the answer not in the manual?
Questions and answers