
Related Manuals for ATN binox-thd


Summary of Contents for ATN binox-thd
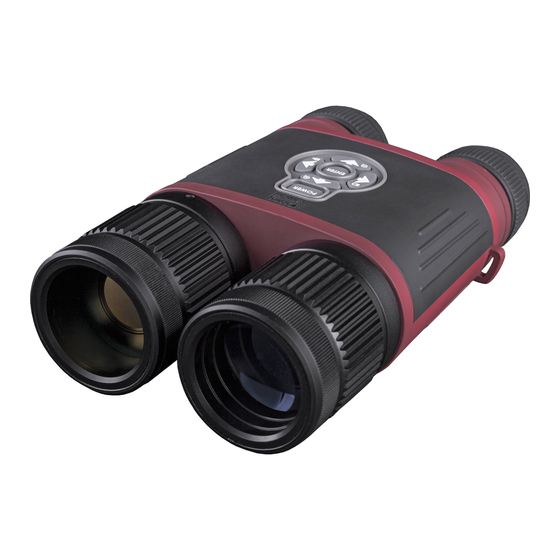
- Page 1 BinoX-THD THERMAL SMART HD BINOCULARS M A N U A L ATN BinoX-THD USER’S GUIDE (REV. 2, JUNE, 2016) AMERICAN TECHNOLOGIES NETWORK CORP .
- Page 2 The information in this manual is furnished for informational use only, is subject to change without notice, is not to be construed as a commitment by ATN Corp. ATN Corp. assumes no responsibility or liability for any errors or inaccuracies that may appear in this book. ©2016 ATN Corp. All rights reserved.
-
Page 3: Table Of Contents
TA B L E O F C O N T E N T S Features .........4 Application . -
Page 4: Features
960 @ 30 fps Microphone WiFi (Streaming, Gallery, & Controls) iOS & Android GPS (Geotagging, Elevation, etc.) Battery life (Li-ion) 6–8 hr Battery type (3) CR 123 * ATN reserves the right to change the above specifications at any time without notice... -
Page 5: Preparing The Device
The following steps must be accomplished prior to each mission where the device is used: 1. Open packaging box, remove Thermal BinoX-THD and check the contents 2. Make sure that nothing is missing 3. Inspect the device for damage to optical surfaces, body, eyecups, operation buttons, etc. -
Page 6: Firmware Update
In the event of a power failure during an update the device may crash corrupt ing its system files and will need to be sent back to the ATN factory for service. It is important not to use additional sources of power during firmware update! Update the new firmware as follows: 1. -
Page 7: On/Off
ON/OFF To TURN ON the device press and hold the POWER button until you see the ATN splash screen. To TURN OFF the device press and hold the POWER button, until the dialog box “Shut down the device?” appears. Choose “Yes” to turn off. -
Page 8: Compass Calibration
MOUNTING ON A TRIPOD The BinoX THD is tripod mountable and can be mounted on tripods with a 1/4” thread mount. COMPASS CALIBRATION When the compass needs to be calibrated the word “CAL” appears instead of the Compass Scale. To calibrate you should rotate the device on three axis as illus- trated. -
Page 9: Interface
I N T E R FAC E HOMESCREEN First screen you’ll see after switching on the device is Homescreen. It consists of Scales, Status Bar icons and different Informational Widgets. SCALES E-Compass Scale shows yaw angle based on e-Magnetometer data. Roll Scale shows binocular cant based on internal 3D Gyroscope. -
Page 10: Main Operations
Display widgets can be dis- abled from the System Menu. To get to the System Menu you should click on the CENTER button from Homescreen and access the Shortcut Carou- sel. Then select the wrench icon with RIGHT or LEFT buttons and push CENTER button enter the menu. -
Page 11: Shortcut Carousel
SHORTCUT CAROUSEL The Carousel is your access to a number of Shortcuts that allows you quick access to additional features. Just click on the CENTER button from Home- screen to access the Carousel. Buttons highlighted in Red are the only ones that activate a par- ticular shortcut. -
Page 12: Using System Menu
SYSTEM MENU Allows for access to various system options and adjustments. USING SYSTEM MENU To enter the System Menu you should open Shortcut Car- ousel with CENTER button and select the wrench icon with RIGHT or LEFT buttons Then push CENTER button to enter the menu. - Page 13 To change a particular value you should follow the next few steps. Select the subcategory you need with the UP or DOWN buttons Press the Center button select a particular value (once selected it will turn red). Change the value with the UP and DOWN buttons To select a new value press CENTER button...
-
Page 14: Functions
F U N C T I O N S PHOTO AND VIDEO MODES Press the LEFT button while staying in Homescreen to TAKE A PHOTO. You must have a microSD card inserted in the device for these features to work. All files will be stored on the microSD card. - Page 15 To make changes choose the Photo/Video Tab in System Menu, then use UP or DOWN buttons to select Time Lapse Settings. Press the Center button enter the mode settings. While you are in this mode, the Time Lapse widget appears. BURST Burst mode captures a series of photos.
-
Page 16: Rangefinder
Then push CENTER button to enter the menu. You must have a microSD card inserted in the device for these features to work. All files will be stored on the microSD card. Recorded videos can be found in the Gallery of the device. -
Page 17: How To Perform A Nuc
NOTE During the measurement process, you can zoom in and out using standard buttons (UP and DOWN). If the Target Height is incorrect you can change it: • Press the RIGHT button to enter the Menu; • Choose one of the presets or input the height manually;... - Page 18 PIXEL CORRECTION PROCEDURE Pixel Correction Procedure is intended to correct “neutral” pixels that are visible in the FOV, but are not responding to the changing environment or scenery. They may be white or black and remain static and or nonresponsive. 1.
-
Page 19: System Menu
SYS T E M M E N U THERMAL INVERSE HOT — swap the appearance of coldest and hot- test color. PALETTES — the range of colors used in displaying. CONTRAST — the difference in luminance and color that makes an object more distin- guishable. -
Page 20: Settings
SLEEP MODE Sleep mode is activated when your device is not in use for a set period of time (example: 1 – 60min). During sleep mode the display and some of the sensors will be inactive. To get out of Sleep mode and get back to normal operations just physi- cally move the device or press any of the buttons. -
Page 21: Servicing
M O B I L E A P P L I CAT I O N S By utilizing the ATN Obsidian app., you can control your device and view live streaming. Connect a phone or tablet and view everything simul taneously. - Page 22 For customer service and technical support, please contact American Technologies Network Corp. 1341 San Mateo Avenue, South San Francisco, CA 94080 phone: 800-910-2862, 650-989-5100 e-mail: service@atncorp.com www.atncorp.com ©2016 ATN Corporation...
Need help?
Do you have a question about the binox-thd and is the answer not in the manual?
Questions and answers