Advertisement
Table of Contents
- 1 User Manual
- 2 Product Safety & Precautions
- 3 Camera Layout & Overview
- 4 Installation
- 5 Menu Options & Defaults
- 6 Description of Button Functions
- 7 Basic Operation Description
- 8 Camera & Accessories
- 9 Hints and Tips
- 10 Profile Settings
- 11 Frequently Asked Questions
- 12 Firmware Update Instructions
- 13 Technical Specifications
- 14 Further Information
- Download this manual
Advertisement
Table of Contents

Related Manuals for Street Guardian Sg9665GC


Summary of Contents for Street Guardian Sg9665GC
-
Page 1: User Manual
Digital video recorder Sg9665GC User manual... -
Page 2: Product Safety & Precautions
Product safety & precautions Thank you for purchasing the Street Guardian SG9665GC Digital Video Recorder (DVR), please read and follow this guide before installation and use. The camera is designed to operate at temperatures of between -10°c to +60°c, operating outside of these temperatures may produce unpredictable results. - Page 3 Introduction The Street Guardian SG9665GC Digital Video Recorder is engineered to require minimal user intervention, it is pre-configured with logical default settings and is supplied ready to use once installed with a minimum of adjustment needed to personalise to your needs.
-
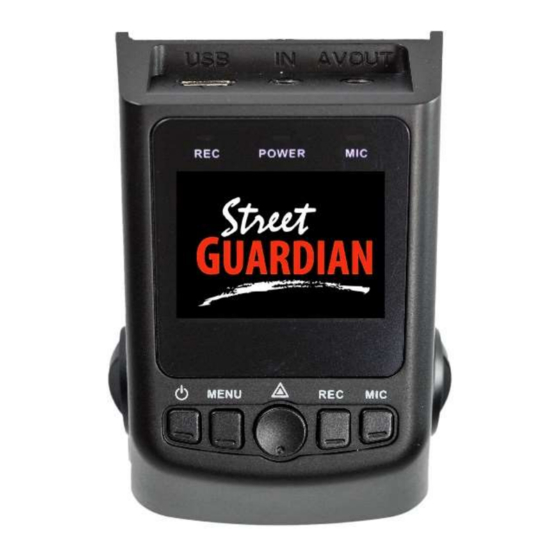
Page 4: Camera Layout & Overview
Camera layout & Overview... -
Page 5: Installation
Installation The DVR should preferably be mounted behind, or to either side of the rear view mirror and within the sweep area of the windscreen wipers. Before mounting the DVR ensure that there is enough room to access and remove the memory card, there is sufficient room for the cables, and adequate clearance for the mirror to be adjusted. - Page 6 1. Once a suitable mounting location is decided secure the DVR mount bracket to the windshield using the provided 3M adhesive tape, ensuring the window is clean prior to application, remove the backing tape and press and hold the bracket firmly against the glass for 2 minutes, then wait 20 minutes before attaching the camera.
- Page 7 3. Insert the USB connector of the vehicle charger into the USB interface of the DVR. 4. Your camera may be supplied with an on glass GPS antenna or a dashtop GPS antenna. The GPS should be mounted correctly according to which type of GPS antenna you have. [Note] the on glass type GPS antenna should not be mounted within 15cm of the camera for best performance, the type of GPS can be identified by the length of the cable, the on glass type GPS antenna...
- Page 8 Settings The DVR is pre-set with logical default settings and is ready to operate with minimal adjustment required, when powered on the internal capacitors will charge, the DVR will then power up and recording will commence. [Note] The DVR does not contain a battery and will need to be connected to a power source to configure settings, connecting to a computer USB port is not supported.
-
Page 9: Menu Options & Defaults
Menu options & defaults To access the menus any active recording must be stopped by pressing the key, pressing the key once will enter the menu first level menu, pressing the key twice will enter the second menu level menu, pressing the key again will exit the menu. - Page 10 Menu page 1 Resolution – 1080FHD – The resolution of the recorded files. Loop Recording – 3 MINS – The size of each recording segment. WDR – – Wide Dynamic Range, Increases night time, high contrast and low light performance. EV –...
- Page 11 Menu page 2 DATE/TIME – DD/MM/YYYY enter the date and time and choose the display format, press the key to advance to the next option. menu Time Zone – – set as appropriate to your region if using GPS. Boot delay – 5 SEC –...
-
Page 12: Description Of Button Functions
Description of Button Functions [Note] The buttons have different functions depending on the current state, recording, standby or playback. 1.<POWER> Button Function 1: Power on/off When powered off, press the <POWER> button to power on the DVR. The DVR begins to work automatically. When powered on, press and hold the <POWER>... - Page 13 button to navigate the menu options, press the <OK> button to confirm the selected option. After completing the setting press the <MENU> button to exit the menu setting function. Function 2: Playback edit Whilst in the playback menu press the < MENU> button to enter the edit mode to delete or protect files or adjust and enter the slide show mode.
- Page 14 During the menu setting process, press the <OK> button to confirm the settings. Function 3: Play In playback mode, press the <OK> button to play video data and press the <OK> button again to suspend the playing of video data. 4.
- Page 15 In the menu setting and playback modes, you can press the <MIC> button to page down. Function 2: Fast Forward In playback state, press the <MIC> button to enter the fast forward mode. Function 3: Mode switching In standby state, press the <MIC> button to enter the playback mode.
-
Page 16: Basic Operation Description
Basic operation description 1. Automatic Recording When you start your vehicle the DVR is automatically started and the recording commences, the REC indicator on the screen will blink and the REC, POWER, MIC LED’s will indicate their status. At power off the DVR will automatically save the current recording and will power down. - Page 17 If the CMOS sensor detects movement the DVR will commence recording. If no movement is detected the recording will pause, if further movement is detected recording will recommence. The amount of time recorded will vary according to the Motion Timeout menu settings.
-
Page 18: Camera & Accessories
14. String for bracket 15. Spare 3M tape for GPS removal 16. GPS antenna 17. AV out extension cable 18. Trim pry tool 19. Street Guardian sticker 20. Windscreen cleaning 21. Audio recording warning wipe stickers 22. Android/PC/MAC USB 23. Micro SD memory card... - Page 19 Camera – SG9665GC Full HD digital video camera. Mount bracket thin – used for most vehicle installations. Mount bracket thick – used for near vertical mounting such as truck or rear window applications. Spare 3M tape for mount – die cut replacement 3M tape to suit mount brackets.
- Page 20 GPS antenna – may be dashtop or window mount type, check the cable length to determine which type you have and only mount accordingly, dashtop 140cm cable, window mount 70cm cable. AV out extension cable – more compact connector than regular AV cables, may also be used as GPS extension cable if required.
- Page 21 cpl filter The included CPL filter (optional for V1 and V2 cameras) will help to reduce dashboard reflections which can otherwise inhibit details in some scenes. Below is an example of the reduction in glare and reflection when using the CPL filter. [Note] The CPL filter is installed with the larger opening facing up.
-
Page 22: Hints And Tips
hints & tips It is essential to make sure the camera has a clear view for best results, automotive glass cleaners should be used to prevent window fogging, using a glass cleaning additive in the washer fluid is also recommended, keeping wiper blades in good working order and replacing them when they start to wear is best practice. - Page 23 Playback and file handling Registrator Viewer is a free program for viewing and managing files from in car digital video recorders, the program works with many popular DVR models and offers many configuration options. The program will run without installing by double clicking the exe file, for Windows versions 7 and higher no additional codecs are required, for earlier versions of Windows it may be necessary to update the playback codecs in your computer, the K-Lite codec pack...
-
Page 24: Profile Settings
Profile settings There are some configuration option settings specific to the SG9665GC Select View/Profile to show the profile options, here you can choose My dash cam has GPS as appropriate or choose My dash cam can record only video if you are not using the included GPS, although the DVR has a G-Sensor this data is not logged and is only for automatic file locking purposes. - Page 25 Video overlap The SG9665GC records a one second overlap between file chapter or recycle points to ensure that no video is missed, this overlap can be automatically trimmed to allow seamless playback. To trim the overlap go to View/Timeline/Set video files overlap time, click to open the overlap value settings option.
- Page 26 Saving a segment of a recording The following demonstrates how to export a file segment, exporting is done without re-encoding or changing any quality or characteristics of the files and may be useful for editing purposes, it is also possible to remove the audio or GPS information selectively and a subtitle track can be created to overlay GPS data if available onto the exported video.
- Page 27 Select the finish point Forward through to the desired end point and then select View/Timeline/Set selection end (B) in current position the selected segment will now be highlighted in blue on the timeline, you may also loop just the selected A-B segment to confirm your selection. save selected fragment...
- Page 28 Choose File/Save selected fragment this will open the cut options where you can select how you would like to export the video segment, remove the audio track, remove the video and only export the audio track etc, click Start to export the desired segment.
-
Page 29: Frequently Asked Questions
Frequently asked questions Q. When the camera turns on the screen shows briefly then goes black and I can’t access the menus, what’s wrong? A. If the AV out is connected to an external monitor the regular display is disabled, also ensure you don’t have the GPS plugged into the AV out port. - Page 30 Q. I use a Mac, anything I need to know? A. Mac can leave hidden system files on the memory card that can prevent the camera from recycling correctly and cause recordings to fail, memory cards should always be reformatted in the camera before use.
-
Page 31: Firmware Update Instructions
Firmware update instructions Any updated firmware will be made available on the support section of our website https://streetguardian.info/support To update the firmware the process is as follows • Extract the zipped firmware file downloaded from our website • Delete any files from the memory card •... -
Page 32: Technical Specifications
Technical Specifications Processor Novatek 96655 Image Sensor Sony Exmor IMX322 Lens f/2.0 Metal Body, 7 Element Glass Angle of View 112° Horizontal, 135° Diagonal Resolution Full HD 1920×1080 @15mbit/sec Frame Rate 30FPS Video Format H.264 MOV AV Output NTSC/PAL LCD display 1.5-inch Storage Temp -20°C to 70°C... -
Page 33: Further Information
[Note] The information contained in this user manual is based on the features and functions found in the December 2016 firmware release. www.streetguardian.info © Street Guardian 2016...
Need help?
Do you have a question about the Sg9665GC and is the answer not in the manual?
Questions and answers