Table of Contents
Advertisement
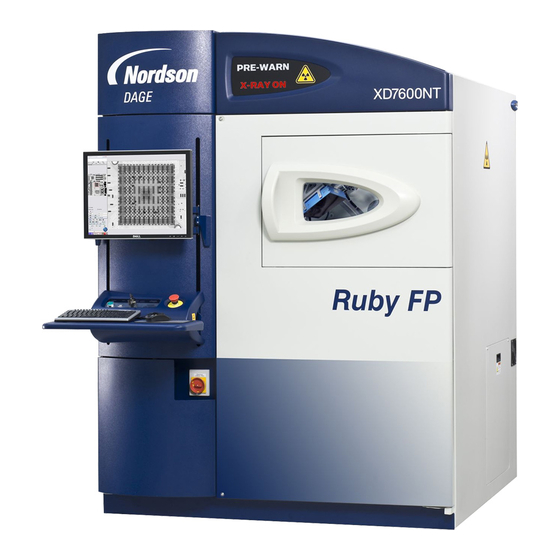
DAGE XD7600NT OPERATING INSTRUCTIONS
This equipment generates and uses X-Rays that are harmful to human body. The effects are cumulative
and irreversible. In order to use this tool users are required to take the Basic X-Ray SAFETY course
offered by the Office of Radiological Safety
followed by a test) and complete Form B that will authorize the user to use the equipment.
Symbol Meaning
Indicates that x-rays are emitted when the x-ray tube is energized.
Indicates the presence of high voltages (can cause death or serious injury) within the equipment.
Indicates the presence of poisonous material within the machine.
Shielding methods
The machine is lined with lead or lead glass in all areas where X-rays could otherwise escape through the
cabinet. The thickness of the lead lining varies according to the power of the expected radiation at that
point. A Geiger Muller counter is placed near the glass door, in order to track the amount of radiation
emitted from the tool. The tool is inspected for radiation (leakage) on a regular basis.
Key switch Positions
In the Power Off position, all functions of the machine are disabled.
SWITCH AT THIS POSITION
In the Power Enable position, the vacuum pumps and control computer are enabled, but all
motion and X-ray systems are disabled.
In the X-ray Enable position, all functions of the machine become operational.
Front access door
The front door is locked by a latch that is electrically released unless the door release button is clicked.
The interlocks are double-redundant, self-monitoring systems designed for safety.
X-ray warnings
The illuminated x-ray generation warnings on the front of the machine indicate when X-rays have been
requested (yellow), and when they are actually on (red). Red lamps above the rear access panel and at
the top rear corners of each side of the cabinet also indicate when X-rays are on.
BASIC SAFETY INFORMATION
http://www.ors.gatech.edu
. (A two hour training program
NEVER LEAVE THE KEY
Advertisement
Table of Contents

Related Manuals for Nordson DAGE XD7600NT


Summary of Contents for Nordson DAGE XD7600NT
- Page 1 DAGE XD7600NT OPERATING INSTRUCTIONS BASIC SAFETY INFORMATION This equipment generates and uses X-Rays that are harmful to human body. The effects are cumulative and irreversible. In order to use this tool users are required to take the Basic X-Ray SAFETY course offered by the Office of Radiological Safety http://www.ors.gatech.edu...
- Page 2 OPERATING STEPS INVOLVED First log in User Name (First Initial, Last Name), time and other details in the excel log sheet on the desktop. The green “POWER ON” button must be pressed in. (Starts the x-ray tube vacuum pumps and powers up the machine electronics, including the control computer and the monitor) NEVER TURN IT OFF...
- Page 3 If the door is not opened within 20 seconds, it is automatically re-locked. Place the sample on the sample holder, 20mm from the front left-hand corner. Close the front door. WARNING: THE MAXIMUM HEIGHT OF THE SAMPLE MUST NOT EXCEED 50mm. Severe damage my result if the limit is exceeded.
- Page 4 To Set a Navigation Map A unique feature of the Dage XD series is the ability to create a navigation "map". The navigation map is produced using the selected voltage and power settings. It is first necessary to set these to values so the sample is clearly visible.
- Page 5 ADJUSTING THE SETTINGS FOR BEST IMAGE There are several machine adjustments that contribute to the final image. Note : Anytime you want to refresh the image just left click on it.. a) Tube voltage Start at the lowest voltage and look for the x-ray penetration through the darkest (thickest) part of the sample.
- Page 6 Initially an automatic adjustment is made which makes the darkest part of the picture black, and the lightest white. Anytime you want to revert back to the unprocessed image, press the <Stretch Contrast> button again. e) Image processing Select the “Image enhancement” tab to set up the choice of enhancement Then click on the Image Enhance button Each filter can also be applied at different strengths by the use of the strength slider.
- Page 7 You can also set a viewing angle by going to the <Inspect> <Measure> tab from the top menu (ruler like icon) and selecting a view angle (0 to 67), and an orbit angle (0 to 360 degrees). Setting the height The magnification of a part depends on how close it is to the x-ray tube.
- Page 8 Will save as an image file with the callouts, the dartboard showing the angle and magnification used, also shows the navigation map as a reference with the current settings of voltage, power and frame averaging. Topics- Not completed! Measurements Tab Video Savings Taking sample out, switching of the tool properly and completing the user log, copying the saved files (no flash drives only email).
Need help?
Do you have a question about the DAGE XD7600NT and is the answer not in the manual?
Questions and answers