
Related Manuals for Arista CloudVision Appliance


Summary of Contents for Arista CloudVision Appliance
-
Page 1: Quick Start Guide
Quick Start Guide CloudVision Appliance Arista Networks www.arista.com DOC-01796-02... - Page 2 © Copyright 2017 Arista Networks, Inc. The information contained herein is subject to change without notice. Arista Networks and the Arista logo are trademarks of Arista Networks, Inc in the United States and other countries. Other product or service names may be trademarks or service marks of others.
-
Page 3: Table Of Contents
Electrostatic Discharge (ESD) Precautions .................... 3 CloudVision Physical Appliance Setup ....................4 2.3.1 Front Bezel..........................4 2.3.2 Locate the MAC Addresses for the CloudVision Appliance ............5 2.3.3 Back Panel Ethernet Connections ..................... 5 DNS Entries ............................6 CloudVision Appliance IP Configuration ....................7 2.5.1... - Page 4 Appendix E Tools to Manage and Update Images............25 Redeploy CVP VM Tool ........................25 Upgrade the Host Image........................26 Appendix F Host Console Access via iDRAC..............27 Appendix G SNMP Monitoring Support ................29 Appendix H CloudVision Worksheet................31 Quick Start Guide: CloudVision Appliance...
-
Page 5: Chapter 1 Overview
Step 2 Configuring the CloudVision appliance (Chapter Important! Ultimate disposal of this product should be in accordance with all applicable laws and regulations. Safety Information Refer to the Arista Networks document Safety Information and Translated Safety Warnings available at: http://www.arista.com/support/docs/eos. Quick Start Guide: CloudVision Appliance... -
Page 6: Obtaining Technical Assistance
Obtaining Technical Assistance Chapter 1: Overview Obtaining Technical Assistance Any customer, partner, reseller or distributor holding a valid Arista Service Contract can obtain technical support in any of the following ways: • Email: support@arista.com. This is the easiest way to create a new service request. -
Page 7: Chapter 2 Preparation
Minimize handling of assemblies and components. • Keep replacement parts in their original static-free packaging. • Remove all plastic, foam, vinyl, paper, and other static-generating materials from the work area. • Use tools that do not create ESD. Quick Start Guide: CloudVision Appliance... -
Page 8: Cloudvision Physical Appliance Setup
Step 3 Rotate the left end of the bezel away from the front panel.4. Step 4 Unhook the right end of the bezel and pull the bezel away from the system. Figure 2-1: Removing and installing the front bezel Legend release latch key-lock front bezel Quick Start Guide: CloudVision Appliance... -
Page 9: Locate The Mac Addresses For The Cloudvision Appliance
MAC address for your reference. Record the MAC addresses in the CloudVision Worksheet (see Appendix Figure 2-2: MAC address location 2.3.3 Back Panel Ethernet Connections On the back panel of the CloudVision appliance, locate the Ethernet Integrated 10/100/1000 Mbps NIC connectors. Figure 2-3: Back Panel iDRAC LACP... -
Page 10: Dns Entries
In order to manage your CloudVision cluster, it is often easier to connect to them by hostname as opposed to IP address. Fully qualified domain names (FQDNs) should be allocated to: • Each of the CloudVision Appliance host machines • Each of the CloudVision Appliance iDRAC interfaces •... -
Page 11: Cloudvision Appliance Ip Configuration
Chapter 2: Preparation CloudVision Appliance IP Configuration CloudVision Appliance IP Configuration The CloudVision Appliance Host and iDRAC IP addresses can be allocated in either of two ways: Option 1: Using an available DHCP server • DHCP Based IP Address Setup (page 7) •... - Page 12 USERCTL=yes NM_CONTROLLED=no Step 2 Configure DNS settings by editing the /etc/resolv.conf file nameserver <dnsServerIP-1> nameserver <dnsServerIP-2> search <domain1> <domain2> … Step 3 Restart the networking service for the changes to take effect. service network restart Quick Start Guide: CloudVision Appliance...
-
Page 13: Chapter 3 Accessing Cloudvision Appliance
For example: https://192.168.0.120. The Login page appears (Figure 3-1 on page 10). Login using the default username and password, which are: • username: root • password: arista Note Both the username and password are case sensitive. Quick Start Guide: CloudVision Appliance... -
Page 14: Updating The Host Password
Chapter 3: Accessing CloudVision Appliance Figure 3-1: Login page 3.1.2 Updating the Host Password You can directly update or change a password using the following method. Step 1 Enter your login credentials. Default Username: root Default Password: arista Step 2 Running passwd with no options will change the password of the account running the command. -
Page 15: Changing The Idrac Password
Chapter 3: Accessing CloudVision Appliance iDRAC 3.1.3 Changing the iDRAC Password Two options are available to change the iDRAC password: • Changing the Password through the iDRAC Web Interface • Changing the Password through the CLI 3.1.3.1 Changing the Password through the iDRAC Web Interface Step 1 Under "iDRAC Settings", go to User Authentication. - Page 16 Chapter 3: Accessing CloudVision Appliance Figure 3-4: Apply the password change Step 7 Logout, and then login through the iDRAC GUI to verify the change. 3.1.3.2 Changing the Password through the CLI Resetting the iDRAC password can be done using the command line tool, racadm.
-
Page 17: Web Access Into Host Via Kimchi
Chapter 3: Accessing CloudVision Appliance Web Access into Host via Kimchi Web Access into Host via Kimchi On the management station, open your Web browser and connect to URL: https://<host>:8001. Login through the Kimchi Login Page (Figure 3-6). iDRAC is supported on the following browsers: •... -
Page 18: Using The Cli To Access The Appliance
Web Access into CVX and CVP Consoles via Kimchi Chapter 3: Accessing CloudVision Appliance To access the console ports for your CVP and/or CVX applications: Step 1 Open your browser to https://<host>:8001 Step 2 Enter in your login credentials Default Username: root Default Password: arista Step 3 Select the "Guests"... -
Page 19: Chapter 4 Setting Up Cv Applications
Step 1 Access the primary, secondary and tertiary CVP VMs on the respective appliance via Kimchi (see “Web Access into CVX and CVP Consoles via Kimchi” on page 13). Step 2 Refer to the CloudVision Configuration Guide for Shell-Based Configuration of Multi-Node. Quick Start Guide: CloudVision Appliance... -
Page 20: Log Into The Cvp Web Interface
For Multi-node clusters, setting the password only has to be done on one node, and will be synced to other nodes so subsequently any node can be accessed via its web interface. Refer to the CloudVision Configuration Guide for instructions on using CVP. Figure 4-1: CloudVision Portal login page Quick Start Guide: CloudVision Appliance... -
Page 21: Appendix A Status Indicators
The LCD back-light remains OFF if LCD messaging is turned off through the iDRAC utility, the LCD panel, or other tools. Figure A-1: LCD panel features Table A-1 LCD panel features Item Button Description Left Moves the cursor back in one-step increments. Select Selects the menu item highlighted by the cursor. Quick Start Guide: CloudVision Appliance... -
Page 22: Power Supply Status Indicators
Replace the power supply with a power supply that matches the capacity of the other power supply. Flashing amber Indicates a problem with the power supply. Quick Start Guide: CloudVision Appliance... -
Page 23: Appendix B Parts List
The following sections list the installation parts provided by the accessory kit. Two-Post Rack Mount Parts Two-Post Rack mount kit includes: • Two sliding rail assemblies • Two hook and loop straps Figure B-1: Two-Post Rack Mount Parts Quick Start Guide: CloudVision Appliance... - Page 24 Two-Post Rack Mount Parts Appendix B: Parts List Quick Start Guide: CloudVision Appliance...
-
Page 25: Appendix C Front Panel Features And Indicators
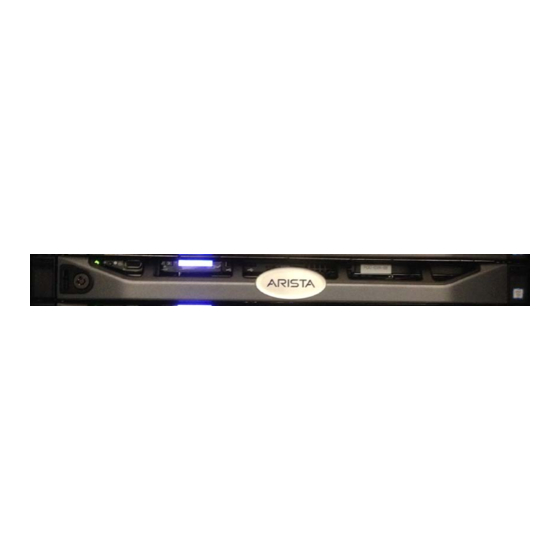
Appendix C Front Panel Features and Indicators This appendix displays the front panel of the CloudVision appliance. Figure C-1: CloudVision appliance (front view) Table C-1 Front-panel features and indicators Indicator, Button, or Connector Description Power-on indicator, power button The power-on indicator lights when the system power is on. The power button controls the power supply output to the system. - Page 26 A slide-out label panel which contains system information such as Service Tag, NIC, MAC address, and so on for your reference. Hard drives Up to four 3.5 inch hot-swappable hard drives/SSDs. Optical drive (optional) One optional slim SATA DVD-ROM drive or DVD+/-RW drive. Quick Start Guide: CloudVision Appliance...
-
Page 27: Appendix D Back Panel Features And Indicators
Appendix D Back Panel Features and Indicators This appendix displays the back panel of the CloudVision appliance. Figure D-1: CloudVision appliance (back view) Table D-1 Back-panel features and indicators Indicator, Button, or Connector Description Serial connector Allows you to connect a serial device to the system. - Page 28 Ethernet connector 3 Integrated 10/100/1000 Mbps NIC connector. Ethernet connector 4 Integrated 10/100/1000 Mbps NIC connector Power supply (PSU1 and PSU2) Up to two 550 W redundant AC power supplies. Quick Start Guide: CloudVision Appliance...
-
Page 29: Appendix E Tools To Manage And Update Images
CVP data using CVP tool before using this method. Step 1 Locate the disks and tool package (cvp-<version>-kvm.tgz) in the CloudVision Portal folder for your version. (You can download the package from arista.com.) Step 2 SSH into the CV appliance Host OS. -
Page 30: Upgrade The Host Image
Upgrade the Host Image Appendix E: Tools to Manage and Update Images Upgrade the Host Image Arista provides an ISO with all updated packages and a tool to mount the images ISO and upgrade the system. Note This process will reboot the entire system. -
Page 31: Appendix F Host Console Access Via Idrac
Step 1 From the iDRAC SSH interface run the command below to access the serial console: console com2 Step 2 To return to the DRAC interface and disconnect from the console the default escape sequence is ^\ (CTRL+\) or simply close the SSH window. Quick Start Guide: CloudVision Appliance... - Page 32 Appendix F: Host Console Access via iDRAC Quick Start Guide: CloudVision Appliance...
-
Page 33: Appendix G Snmp Monitoring Support
Appendix G SNMP Monitoring Support To locate the SNMP support page, go to iDRAC Settings>Network>Services. Figure G-1: SNMP page Quick Start Guide: CloudVision Appliance... - Page 34 Appendix G: SNMP Monitoring Support Quick Start Guide: CloudVision Appliance...
-
Page 35: Appendix H Cloudvision Worksheet
Appendix H CloudVision Worksheet Print and complete the CloudVision worksheet with the following information. Step 1 Locate the MAC addresses for the CloudVision appliance, see Locate the MAC Addresses for the CloudVision Appliance (page The information tag is a slide-out label panel which contains system information such as Service Tag, NIC, MAC address for your reference. - Page 36 Appendix H: CloudVision Worksheet Table H-1 CloudVision Worksheet Quick Start Guide: CloudVision Appliance...
- Page 37 Appendix H: CloudVision Worksheet Figure H-1: CVP Appliance mapping Quick Start Guide: CloudVision Appliance...
- Page 38 Appendix H: CloudVision Worksheet Quick Start Guide: CloudVision Appliance...
Need help?
Do you have a question about the CloudVision Appliance and is the answer not in the manual?
Questions and answers