Table of Contents
Advertisement
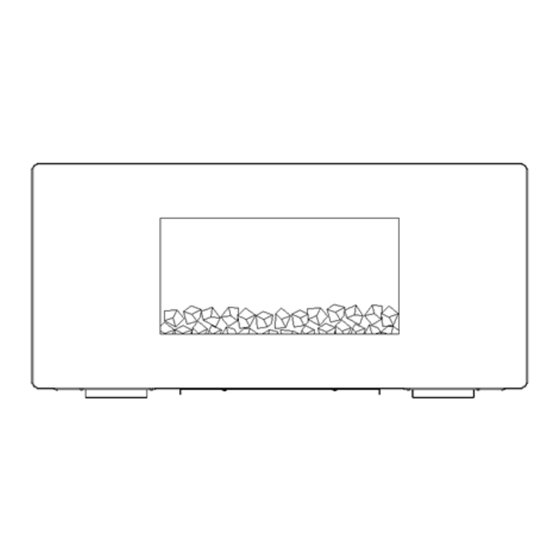
FLAT PANEL FIREPLACE HEATER
Model Numbers: Galena (EF27H)
OWNER'S MANUAL
Wall-Hanging Mode
Free-Standing Mode
Read and understand this entire owner's manual, including all safety
information, before plugging in or using this product. Failure to do so could
WARNING
result in fire, electric shock, or serious personal injury.
Keep this owner's manual for future reference. If you sell or give this product
CAUTION
away, make sure this manual accompanies this product.
NO VENTING REQUIRED
120V AC; 60 Hz; 1350 Watts
Advertisement
Table of Contents

Related Manuals for PuraFlame Galena


Summary of Contents for PuraFlame Galena
- Page 1 FLAT PANEL FIREPLACE HEATER Model Numbers: Galena (EF27H) OWNER’S MANUAL Wall-Hanging Mode Free-Standing Mode Read and understand this entire owner’s manual, including all safety information, before plugging in or using this product. Failure to do so could WARNING result in fire, electric shock, or serious personal injury.
-
Page 2: Table Of Contents
CONTENTS CSA / Power Cord Labels ………………………………………………………………………….. 2 Important Safety Information & Warnings ……………………………………………………… 3 Preparation …………………………………………………………………………………………… 5 Parts & Hardware …………………………………………………………………………………… 5 Assembly - Free-Standing Mode ………………………………………………………………… 7 Assembly - Wall Hanging Mode ………………………………………………………………….. 10 Battery Information ……………………………………………………………………………….. 15 Operation …………………………………………………………………………………………….. -
Page 3: Important Safety Information & Warnings
IMPORTANT SAFETY INFORMATION! WARNING Read all instructions before using this heater! This heater is hot when in use. To avoid burns, DO NOT let bare skin touch hot surfaces. If provided, use handles when moving this heater. Keep combustible materials, such as furniture, pillows, bedding, papers, clothes, and curtains at least 3 feet (0.9m) from the front of the heater, and keep them away from the sides and rear. -
Page 4: Save These Instructions
WARNING WARNING: DO NOT DEPEND ON THE ON/OFF SWITCH THE SOLE MEANS OF DISCONNECTING POWER WHEN SERVICING OR MOVING THE HEATER. ALWAYS UNPLUG THE POWER CORD. WARNING: REDUCE THE RISK OF FIRE OR ELECTRIC SHOCK---DO NOT USE THIS HEATER WITH ANY SOLID STATE SPEED CONTROL DEVICES. For residential use only! NOT for commercial use! Any commercial or public use of this heater voids all warranties, and could cause injury. -
Page 5: Preparation
PREPARATION This carton includes GLASS! ALWAYS use extreme caution when handling glass. Failure to do so could result in personal injury or property damage. Remove all parts and hardware from the carton and place them on a clean, soft, dry surface. Parts and assembly steps are grouped for free-standing or wall-hanging use. - Page 6 PARTS & HARDWARE - GENERAL Box 1 – Remote Control & Machine Screws Box 2 – Decorative Glass 2 - M4x8 Machine Screws ( 2 ) RC - Remote Control ( 1 ) AAA Battery ( 2 ) D - Decorative Glass ( 1 set ) PARTS &...
-
Page 7: Assembly: Free-Standing Mode
7 – External Sensor(1) NOTE: The External Sensor (7) is optional (not for free), and not included in the parts list. Please e-mail us to customerservice@puraflame.com if you have requirements. ASSEMBLY: FREE-STANDING MODE ALWAYS unplug this fireplace heater before assembly or cleaning, or before relocating. - Page 8 STEP 3. Lay the firebox on its back so the pedestal leg (E) hangs over the edge of a table. Or, have an adult helper lift the bottom edge of the firebox. Slide the pedestal leg cover and base (F/G) over the pedestal leg (E).
- Page 9 Hook Post Slot STEP 5. 1. Carefully set both hooks of the front glass panel (B) into the slots at the top front edge of the firebox (A). 2. Press the two posts of the glass panel into the locking slots near the lower corners of the front firebox panel.
-
Page 10: Assembly: Wall-Hanging Mode
ASSEMBLY: WALL-HANGING MODE Minimum 2 inches Wall or other from edge of glass objects at side Wall or other objects at side Minimum 2 inches from edge of glass Minimum 4-3/8 inches Floor or other surface STEP 1. Find a safe location. Minimum clearance on each side must be at least 2 inches (50mm); minimum clearance from the floor must be at least 4-3/8 inches (11.1 cm);... - Page 11 STEP 2. Locate the wall studs using an electronic stud-finder. Studs are spaced 16” apart as measured from the center of each stud. The holes in the mounting bracket (C) will align with the wall studs. The end of each arm has a set of three holes. Select one set of holes (left, center, or right) when attaching the mounting bracket to the wall.
- Page 12 STEP 5. If only one wall stud is available, the wall mount bracket must be secured to the wall with two M5x40 wood screws (3) though the two center post holes AND four M4x30 drywall screws (4) through one other set of bracket holes. DO NOT attach the wall mount bracket to the wall studs with one of the outer sets of holes as the bracket will not be stable.
- Page 13 STEP 8. Thread the two M5x40 wood screws (3) through the center post holes, into the pilot holes, and into the wall stud. Partially tighten. Make sure the bracket is level. Thread the four M4x30 drywall anchor screws (4) through the wall mount bracket and into drywall anchors. DO NOT OVER-TIGHTEN! This may loosen the anchors or damage the drywall.
- Page 14 STEP 10. Carefully arrange the decorative glass (D) along the inset window ledge at the front of the firebox. Use care when relocating the fireplace to prevent the decorative glass from falling out. The next step requires installation of a GLASS panel! The manufacturer recommends that two adults install the glass panel.
-
Page 15: Battery Information
BATTERY INFORMATION Remote Control Battery This remote control uses two AAA batteries (included). Instructions for battery installation are inside the Remote Control battery compartment. Always replace the battery in the remote control with the same type of battery. NEVER dispose of batteries in fire. Failure to observe this precaution may result in an explosion. -
Page 16: Control Panel
Indication Blue Light Indication Light Flame Remote Effect Receiver Control Panel Backlights Heater Vents Control Panel BUTTON FUNCTION ACTION & INDICATION ON: Turns on the standby mode. Enables 1. Press to turn the power on. All functions, all of the functions and remote control. and the remote control, are enabled. -
Page 17: Remote Control
Remote Control (Control panel ON/OFF switch must be ON to use remote control.) Aim the remote control at the remote receiver. Make sure you hear a beep once NOTICE you turn on the fireplace! If not, the fireplace will not respond to the signal. BUTTON FUNCTION ACTION &... - Page 18 Placing the sensor too close to the heater area of the appliance will cause unwanted cycling of the heater. NOTE: The external Sensor (7) is optional (not for free), and not included in the parts list. Please e-mail us to customerservice@puraflame.com if you have requirements.
-
Page 19: Care And Maintenance
CARE AND MAINTENANCE ALWAYS turn the heater OFF and unplug the power cord from the outlet before cleaning, performing maintenance, or moving this fireplace. Failure to do so could result in electric shock, fire, or personal injury. Cleaning NEVER immerse in water or spray with water. Doing so could result in electric shock, fire, or personal injury. -
Page 20: Schematic Diagram
SCHEMATIC DIAGRAM Indicating PCB Controlling PCB Sensor Sensor (Optional) Main Power PCB Fuel Bed LED Yellow Black Back Back Blue White Light Light Blue Heating Blue Black Element AC120V 60Hz Black Motor Motor Switch Sychronous Brown Motor Brown Thermal Cutout... -
Page 21: Faq - Frequently Asked Questions
FAQ - FREQUENTLY ASKED QUESTIONS Why does the fan blow before the heat comes on, and after the heater is turned off? Heat and cool gradually. The fan blows when the heater is first turned on, and the heat is still heating up. -
Page 22: Troubleshooting Guide
If it is OFF, the functions will not work. 2. If the ON/OFF switch is ON, and the functions do not work, please e-mail us at customerservice@puraflame.com The FLAME button doesn’t 1. Make sure the ON/OFF switch on the control panel is ON. -
Page 23: Limited Warranty
This product is not intended to be used as a primary heat source. It is for supplemental heating purposes only. Thank you for purchasing this product! If you have questions about assembly or operation of this product, are missing parts, or if the product is damaged, please e-mail us at: customerservice@puraflame.com... - Page 24 3.EF.27.05.512 A/1...
Need help?
Do you have a question about the Galena and is the answer not in the manual?
Questions and answers