
Related Manuals for IOGear GCS1782G


Summary of Contents for IOGear GCS1782G
- Page 1 Installation Guide 2-Port Dual-Link DVI KVMP Pro with 7.1 Audio GCS1782G PART NO. M1171-b www.iogear.com...
- Page 2 Computer, Inc. All other brand and product names are trademarks or registered trademarks of their respective holders. IOGEAR makes no warranty of any kind with regards to the information presented in this document. All information furnished here is for informational purposes only and is subject to change without notice. IOGEAR, Inc.
-
Page 3: Table Of Contents
Table of Contents Conventions Troubleshooting Package Contents Specifications System Requirements Operating Systems SJ/T 11364-2006 Overview Compliance Information Hardware Setup Limited Warrranty Basic Operation Contact Advanced Configuration Summary of Hotkey Settings The Firmware Upgrade Utility... -
Page 4: Conventions
Conventions This manual uses the following conventions: Monospaced Indicates text that you should key in. [ ] Indicates keys you should press. For example, [Enter] means to press the Enter key. If keys need to be chorded, they appear together in the same bracket with a plus sign between them: [Ctrl+Alt]. -
Page 5: Package Contents
Package Contents 1 x 2-Port Dual-Link DVI KVMP Pro with 7.1 Audio 2 x Dual Link DVI-D KVM Cables 2 x 7.1 Audio Cables 1 x Power Adapter 1 x Installation Guide 1 x Waranty Card System Requirements Console Computers 1 DVI display 1 DVI port 1 set of USB keyboard and mouse... -
Page 6: Operating Systems
Operating Systems Flavor Version Windows 2000 and higher Linux RedHat 9.0 and higher SuSE 10.0 / 11.1 and higher Ubutu 7.04 / 7.10 Unix 4.3 and higher FreeBSD 5.5 and higher Solaris 9 and higher Novell Netware 6.0 and higher OS 9.0 and higher Note: Supports Linux Kernel 2.6 and higher. -
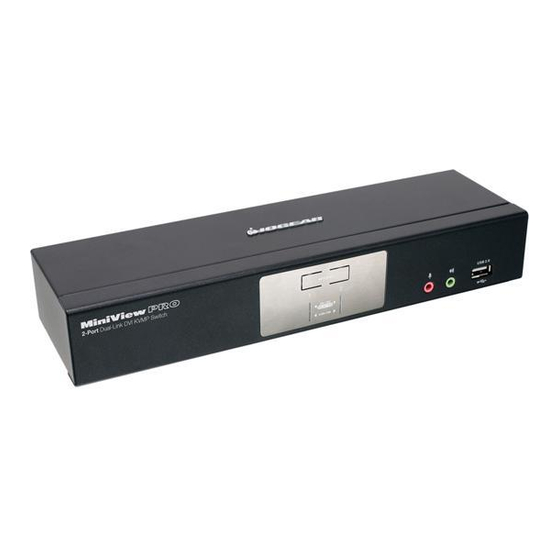
Page 7: Overview
Overview Front View 2-Port Dual-Link DVI KVMP Switch... - Page 8 Component Description Port Selection Press a button for longer than two seconds to bring the KVM, USB, and Pushbuttons audio focus to the computer attached to its corresponding port. Port LEDs The Port LEDs are located below the Port Selection Pushbuttons. The upper one (Orange) are the KVM Port LEDs;...
- Page 9 Rear View...
- Page 10 Component Description USB Console Ports USB Keyboard and mouse connections* Console Port Section Connections for your monitor, mic, and speakers CPU Port Section Connections for the cables that link the switch to your computers. Each CPU port is comprised of a microphone jack, speaker jack, USB type B socket and a DVI connector Power Jack Power adapter connection...
-
Page 11: Hardware Setup
2. Connect your microphone, speakers, and monitor into the Console ports located on the unit’s rear panel Note: The IOGEAR KVM cable set provided 2.1 channel surround sound only. You must use the included audio cable for 7.1 audio 3. Using the KVM cable set, connect the DVI connector into any available DVI socket in the CPU Port setion of the switch, then connect the accompanying USB, microphone and speaker connectors into their corresponding USB, microphone, and speaker sockets. - Page 12 4. At the other end of the cable, connect the 2-Port Dual-Link DVI KVMP Switch USB, video, microphone, and speaker cables into their respective ports. 5. Connect your USB peripherals into the type A sockets (one is located on the front, the second is located on the rear).
-
Page 13: Basic Operation
Basic Operation There are three convenient methods to access the computers: Manual – which involves pressing the port selection buttons located on the unit’s front panel; Mouse – which involves double clicking the scroll wheel of the mouse; and Hotkey – which involves entering key combinations from the keyboard. - Page 14 Mouse Port Switching The KVM supports the very latest in mouse port-switching – simply double-click the scroll wheel of your USB mouse to cycle through the ports. Note: 1. This featured is only supported by USB 3-key scroll wheel mice. 2.
- Page 15 Cycling though the ports Hotkey Action [Scroll Lock] [Scroll Lock] [Enter] Increments the KVM, USB, and Audio focus to the next higher port ( port 4 wraps to 1) [Scroll Lock] [Scroll Lock] [K] [Enter] Increments only KVM focus to the next port [Scroll Lock] [Scroll Lock] [U] [Enter] Increments only the USB hub to the next port [Scroll Lock] [Scroll Lock] [S] [Enter]...
- Page 16 Port ID Numbering Each CPU port on the switch is assigned a port number. The port numbers are marked on the rear panel of the switch and each switch LED has a corresponding number for easy identification. The Port ID of a computer is derived from the CPU port number it is connected to. For example, a computer connected to CPU port 2 has a Port ID of 2.
- Page 17 Hotkey Result [Scroll Lock[ScrollLock][n][Enter] Brings the KVM, USB hub, and audio focus to the computer attached to the specified port. [Scroll Lock] [Scroll Lock][n] [K] Enter] Brings only the KVM focus to the computer attached to the specified port. [Scroll Lock] [Scroll Lock] [n] [U] [Enter] Brings only the USB hub focus to the computer attached to the specified port.
- Page 18 Note: 1. The n stands for the number of seconds that the GCS1782G should dwell on a port before moving on to the next. Replace the n with a number between 1 and 99 when entering this hotkey combination.
- Page 19 Hotkey Result [Scroll Lock] [Scroll Lock] [A] Enter] Invokes Auto Scan. The KVM focus cycles from port to port at 5 second intervals (default interval) [Scroll Lock] [Scroll Lock] [A] [n] Enter] The KVM focus cycles from port to port at n second intervals.
-
Page 20: Advanced Configuration
Advanced Configuration Advanced Configuration Hotkey Setting Mode In some instances the default hotkey settings conflict with programs running on your computer, and in some instances the default hotkeys either do not exist on your keyboard (MAC keyboards for instance do not have a Scroll Lock key), or are inconvenient to use, so The Hotkey Setting Mode allows you to select alternate configurations for the KVM’s hotkeys. - Page 21 Invoking Hotkey Setting Mode (Default) 1. Press and hold down [Num Lock] (the Clear key on MACs). 2. Press and release [-]. 3. Release [Num Lock] (the Clear key on MACs). To Toggle to or from the alternate Hotkey Setting Mode (HSM): 1.
-
Page 22: Summary Of Hotkey Settings
Summary of Hotkey Settings Note: The term “invoke HSM” in the following table refers to the default or alternate method chosen above Action Key sequence Result Port Switching Invoke HSM Press Changes the [Scroll Lock] key to [Ctrl] and release [T] USB reset 1. - Page 23 Other OS Mode 1. Invoke HSM Reset keyboards and mice under some 2. Press [F1] special OS’s that do not support USB 2.0 Mouse Emulation 1. Invoke HSM Allows the special programming of multifunction mice to 2. Press [M] Control operate through the KVM List Hotkey 1.
- Page 24 Mouse 1. Invoke HSM The Mouse Port-switching function can be enabled or Port-switching 2. Press [W] disabled. The default setting is disabled. Note: This feature only supports the USB 3-key scroll wheel mice. The default setting is OFF. This feature is only sup- ported when mouse emulation is also enabled.
- Page 25 Comparison of Default and Alternate Manual Port Selection Settings Action Default Alternate Press and release a port Switches only the KVM focus to KVM, Audio and USB focus selection pushbutton the selected port switch to the selected port Press a port selection pushbutton Audio focus switches to the Audio focus switches to the twice...
- Page 26 Keyboard Operating Platform The KVM’s default port configuration is for a PC compatible keyboard operating platform. If your console uses a PC compatible keyboard and you have a Mac or Sun attached to a port, for example, you can change the port’s keyboard operating platform configuration so that the PC compatible keyboard emulates the Mac or Sun keyboard.
- Page 27 The PC compatible (101/104 key) keyboard can emulate the functions of Mac and Sun keyboards when the Control key [Ctrl] is used in conjunction with other keys. The emulation mappings are listed in the table on the next page.
- Page 28 PC Keyboard Mac Keyboard PC Keyboard Sun Keyboard [Shift] Shift [Ctrl] [T] Stop [Ctrl] Ctrl [Ctrl] [F2] Again [Ctrl] [F3] Props [Ctrl] [1] [Ctrl] [F4] Undo [Ctrl] [2] [Ctrl] [F5] Front [Ctrl] [3] [Ctrl] [F6] Copy [Ctrl] [4] [Ctrl] [F7] Open [Alt] [Ctrl] [F8]...
- Page 29 PC Keyboard Mac Keyboard PC Keyboard Sun Keyboard [Ctrl] [1] [Enter] Return [Ctrl] [2] [Backspace] Delete [Ctrl] [3] [Insert] Help [Ctrl] [4] [Ctrl] [H] Help [Ctrl] Compose ♦ Note: Press and release the first key [Ctrl], then press and release the activation key.
-
Page 30: The Firmware Upgrade Utility
KVM switch’s firmware. The Utility comes as part of a Firmware Upgrade Package that is specific for each device. Check the web site regularly to find the latest packages and information relating to them: http://www.iogear.com Before you Begin 1. - Page 31 5. Invoke Firmware Upgrade Mode (see Firmware Upgrade Mode, page 24). The front panel orange LEDs flash to indicate that Firmware Upgrade Mode is in effect.
- Page 32 Starting the Upgrade 1. Run the downloaded Firmware Upgrade Package file – either by double clicking the file icon, or using a command line to enter the full path. The Firmware Upgrade Utility Welcome screen appears: 2. Read the License Agreement (click the I Agree button). 3.
- Page 33 Upgrade Succeeded After the upgrade has completed, a screen appears to inform you that the procedure was successful: Click Finish to close the Firmware Upgrade Utility. After a successful completion, the KVM exits Firmware Upgrade Mode, and resets itself. Upgrade Failed If the Upgrade Succeeded screen doesn’t appear, it means that the upgrade failed to complete successfully, in which case you should do the following: 1.
-
Page 34: Troubleshooting
Troubleshooting Symptom Possible Cause Action Mouse / Keyboard not Improper mouse and/ Unplug the cable(s) from the console responding. or keyboard reset. port(s),then plug it/them back in. USB devices not KVM switch needs to Power off all devices on the installation. responding. -
Page 35: Specifications
Specifications Function GCS1782G Computer Connections CPU Port Selection Front Panel Pushbuttons; Hotkey, Mouse Console Connectors Keyboard 1 x USB Type A F (black, rear panel) Mouse 1 x USB Type A F (black, rear panel) Video 1 x DVI-I F (white) - Page 36 Function GCS1782G KB / Mouse 2 x USB 1.1 Type B (white) Video 2 x DVI-I F (white) Audio Line Out Port 2 x Mini Stereo Jack F (green) Line In Port 2 x Mini Stereo Jack F (blue) Microphone Port...
- Page 37 Switches Selected 2 x Pushbutton LEDs On Line 2 x (Orange) USB Link 2 x (Green)
-
Page 38: Faq
A VGA Female to DVI-A Male Adapter for each of your VGA computer is required*** *DVI-I Male to Male Cable (G2LDI006) is available and sold separately at www.iogar.com **VGA Male to Male Cable (G2LVGA006) is available and sold separately at www.iogear.com. ***VGA Female to DVI-A Male Adapter (GDVIMVGAF) is available and sold separately at www.iogear.com. - Page 39 For the DVI computers: Simply follow the instruction of the Installation Section. For the VGA computers: 3. Connect each of your VGA video output with a VGA Male to Male cable. 4. Connect the other side of the VGA cable to the VGA connection on the DVI-A Male to VGA . Female Adapter.
-
Page 40: Sj/T 11364-2006
SJ/T 11364-2006 The following contains information that relates to China. 有毒有害物质或元素 部件名称 多溴联苯 多溴二苯醚 铅 (Pb) 汞 (Hg) 镉(Cd) 六价 (Cr(VI)) (PBB) (PBDE) 电器部件 ● ○ ○ ○ ○ ○ 机构部件 ○ ○ ○ ○ ○ ○ ○:表示该有毒有害物质在该部件所有均质材料中的含量均在SJ/T 11363-2006规定的限量要求之下。 ●:表示符合欧盟的豁免条款,但该有毒有害物质至少在该部件的某一均质材料中的含量超出 SJ/T 11363-2006的限量要求。... -
Page 41: Compliance Information
Compliance Information FCC Statement This equipment has been tested and found to comply with the limits for a Class B digital device, pursuant to Part 15 of the FCC Rules. These limits are designed to provide reasonable protection against harmful interference in a residential setting. This product generates, uses, and can radiate radio frequency energy and, if not installed and used as directed, it may cause harmful interference to radio communications. -
Page 42: Limited Warrranty
Limited Warrranty Warranty Information This product carries a 3 Year Limited Warranty. For the terms and conditions of this warranty, please go to http://www.iogear.com/support/warranty Register online at https://www.iogear.com/registration Important Product Information Product Model Serial Number... -
Page 43: Contact
Contact WE’RE HERE TO HELP YOU! NEED ASSISTANCE SETTING UP THIS PRODUCT? Make sure you: 1. Visit www.iogear.com for more product information 2. Visit www.iogear.com/support for live help and product support IOGEAR www.iogear.com iogear.custhelp.com support@iogear.com... - Page 44 ©2016 IOGEAR ®...
Need help?
Do you have a question about the GCS1782G and is the answer not in the manual?
Questions and answers