Table of Contents
Advertisement
Quick Links
Advertisement
Table of Contents

Related Manuals for OPCOM GrowWall


Summary of Contents for OPCOM GrowWall
- Page 1 User Manual Version 2.0...
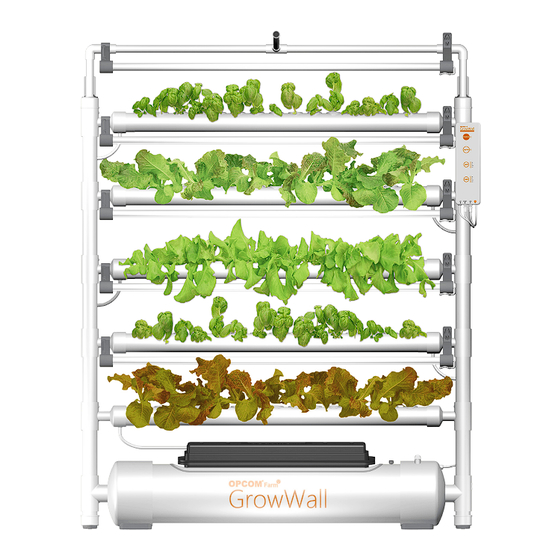
- Page 2 Your GrowWall will do much of the work and save your time in the process of growing a crop of up to 75 plants. It is a tool to grow plants from seeds to harvest, simply and in a clean environment.
-
Page 3: Table Of Contents
C1. Regrowing..................23 C2. Growing Sprouts................24 C3. Synchronization Control Function..........26 D: Maintenance....................27 D1. Change Water...................27 D2. Check EC & pH.................28 D3. EC / pH Meter Use and Calibration..........29 D4. Change LED Tube................30 E: ........................31 E1. Troubleshooting................31 E2. GrowWall Q&A................32 Register with OPCOM...................33... -
Page 4: A: Assembly
User Manual GrowWall A: Assembly Please check all accessories listed here before starting setup. 1-1 Main Body - pre-assembled parts GrowWall Control Box x 1 (OAEE05A) LED Lighting Power Cable (OAAS08A) Water Pipe Filter x 5 (OAMS08A) 30W LED Growth Tube... -
Page 5: Grow Kit
• Use dry hands when taking out seed capsules. • Opcom cannot guarantee for results of other sources’ seeds. Use Opcom grow kit supplies for best results. • A germination rate of seeds of 70% ± 10% is normal (depending on varietal of plant ). -
Page 6: Description
User Manual GrowWall 2. Description Connecting Pipe (UP) x 1 Adjustable Light Arm x 5 Water Inlet x 1 Control Box Water Pipe Filter LED Tube x 5 Bubble Level Pump Sprout Box Grow Tube Water Tank... -
Page 7: Caution
User Manual GrowWall 3. Caution °C Under °F 1000 30%-85%RH Keep indoors Please use 5 LED Lamps at room temperature total under 1000W. 41-90 °F (15-32°C). Unplug unit if not in use. To avoid electric shock, Mind children's use of unit,... -
Page 8: Set Up Process
Electric Drill 7.13 gallons (27L) Rubber Mallet Phillips screwdriver Water Step 1. GrowWall consists of four numbered modules that fit together on top of each other. Step 2. Put the four modules flate on the ground. Step 2. Step 1. - Page 9 User Manual GrowWall Step 3. Starting with R1, L1 on the bottom, insert the two vertical tubes of R2, L2 into the corresponding tubes on R1, L1. Align the holes on the two parts, and secure each of the two junctions by inserting a plastic rivet, using a rubber mallet.
- Page 10 GrowWall User Manual Step 5. Place the wall bracket on top of R3,L3. Place the hollow plastic peg into the round hole in the bracket as shown. Put the screw into this tube, and with a screw driver, affix the tube and the bracket to the unit.
- Page 11 User Manual GrowWall Place the unit stand against the wall. Step 7. Step 7.
- Page 12 User Manual GrowWall Step 8. Install The Control Box 1. Attach the control box by aligning the holes on the back with the screws on the right side vertical pipe, and then pushing down to lock in place. 2. Ensure the pump and LED lamps' power cables were plugged into the slot on the control box.
- Page 13 User Manual GrowWall Step 9. Tidy up the Tube and Cable 1. Ensure that the tube is connected to the pump, and secured with a tightened ring fixture. Turn clockwise to tighten. 2. Attach the other end of the tube to the water inlet. Turn clockwise to tighten.
- Page 14 GrowWall User Manual Step 10. Ensure the tube are connected The grey PU tube from the grow tube were pre-connected to vertical pipe. Ensure the depth of insertion is more than 0.4 inch (10mm). Note Ensure that the tube is connected firmly before turning the unit on, failure...
- Page 15 (bottom right of the unit), keeping the air bubble between the 2 lines. 2. Attach to the wall with the included anchors and screws. Note Adjust the distance to the wall, if the height is not enough for GrowWall (65 inch).
- Page 16 GrowWall User Manual 3. To secure the bracket to the wall, first make a mark on the wall using 3M tape to stick to the wall (Recommend) or using the bracket as a guide. Drill a hole (using a 0.25 inch (5mm) bit) on the mark and insert the anchor. Expose the adhesive strip on the back of the bracket, align the anchor and the bracket hole insert the screwdriver with the Phillips head.
-
Page 17: Preparing
GrowWall User Manual 5. Preparing Step 1. Add Water Add water until the water level exceeds the red line, approximately 80% full of water tank or 7.13 gallons (27L). Do not overfill and always maitain the water above the red line. - Page 18 * 10 mins/cycle Note Please power and turn on GrowWall at 6-9 AM to meet daytime / night cycle time. Most plants can be grown using the AUTO mode. For specific varietals or if you want to experiment on your own, you can manually control the timing of the LED growth lamps...
-
Page 19: B: Planting
User Manual GrowWall B: Planting B1. Sowing stage Stage Time afer planting Pump Note ・Remove the top half of the seed capsules. Sowing Day 0~ Day 7 ・Check the sprout every day and make Stage (Starting to sprout) sure the sponges are always wet. - Page 20 Step 3. Seed Sowing If using OPCOM Farm seed capsules: 1. With completely dry hands, take out seed capsules from capsule bottle. 2. Soak the sponge completely, then insert seed capsules vertically halfway into the middle of each cross-opening in the seedling sponge.
- Page 21 GrowWall User Manual Step 4. After 30 minutes of seed sowing, remove the top half of the seed capsules with tweezers. The bottom half will have dissolved into the sponge, depositing the seeds in the perfect location for growing. NOTE: If you don't remove the seed capsule tops, they may inhibit sprouting rate.
-
Page 22: B2. Seedling Stage
GrowWall User Manual B2. Seedling stage Stage Time afer planting Pump Note ・Ensure seeds germination rate>70%. Seeding Day 7~ Day 14 ・In each sponge, keep strong plants and Stage (Germination rate>70%) cut the other weak plants (refer to the drawing below). - Page 23 GrowWall User Manual Step 3. Add Nutrition and Test the Water 1. After adding water, put the Pump in AUTO mode. • During the operation of the pump, the tank water level begins to decrease, after every layer of planting tube has filled with water. Pump stops after 10 minutes in AUTO mode.
- Page 24 Both sides of the LED tube are in a rotating holder to allow you to optimize the direction of the light. This is part of OPCOM's patented design to make the GrowWall flexible to accommodate different plants and their growth.
-
Page 25: B3. Growing Stage
GrowWall User Manual B3. Growing Stage Stage Time afer planting Pump Note ・When young plants grow to 3-4 inches Growing After Day 14 Auto Auto Stage height, change control box to AUTO mode. ・Maintain EC & pH value. Once a week, check the water level and refill as needed. Also test the water's pH and EC levels and adjust as necessary. -
Page 26: B4. Grow To Harvest
GrowWall User Manual The light tubes can be adjusted to accommodate their growth stages. Up to135° High 13 inch (33 cm) B4. Grow to Harvest When plants have reached full growth, you can enjoy your harvest. If plants start getting crowded and interfere with each other, harvest the large ones, to give the others more space to grow to full size. -
Page 27: C2. Growing Sprouts
GrowWall User Manual C2. Growing Sprouts Place sprout box on water tank. Moisten a sprouting sponge and spread the seeds on top of it. Connect the water tube to water inlet and follow instructions below. It will take around 7 days to harvest. Details for growing sprouts and length of time to harvest should be described on sprout seed packages. - Page 28 GrowWall User Manual 4. Lay down seedling cover to cover all seeds. Place the sprout box on top of the water tank. Seedling Cover Water Tube Water inlet Sprout Box Water outlet 5. After 1 days, check the status of your sprouts.
-
Page 29: C3. Synchronization Control Function
GrowWall User Manual C3. Synchronization Control Function GrowWall GrowWall GrowWall Control Control Control Note The synchronization cable allows you to synchronize the control of up to 10 GrowWalls. You can use any of the GrowWalls' control boxes to change all the units at one time. -
Page 30: D: Maintenance
User Manual GrowWall D: Maintenance D1.Change Water After a cycle of planting, you may want to change water, or clean the unit. Turn off power Unplug the tube from the interlet. Wait for 15 minutes, let the water drain back to the tank. -
Page 31: D2. Check Ec & Ph
User Manual GrowWall D2. Check EC & pH In order to keep good growing conditions, check and adjust EC/pH weekly. Please maintain EC between 1000-2000μS/cm (=1.0-2.0 ms/cm) 0.4-0.6 0.6-0.8 0.8-1.0 1.0-2.0 Status over (add 3pcs) (add 2pcs) (add standard add water... -
Page 32: D3. Ec / Ph Meter Use And Calibration
User Manual GrowWall D3. EC / pH Meter Use and Calibration The pH and EC meters come with a convenient, protective bag that you can hang by your GrowWall. pH meter EC meter pH meter Usage : Remove the protective cap. Turn the meter on by sliding the black button to the left. -
Page 33: D4.Change Led Tube
User Manual GrowWall D4.Change LED Tube The lamps are pre-assembled, you can replace the LED tube if necessary. How to replace the LED tube: Step 1. Unplug the lamp power cable. Step 2. Pull out the cable from the cable holder on the LED arm. -
Page 34: E1. Troubleshooting
If on AUTO, HI or LOW there will be periods of time during a 24-hour cycle when lamps are off. See page 15 for cycle descriptions. ☑ If a lamp has burned out or does not work, replace with a new OPCOM LED tube (OAEE07A). ☑... -
Page 35: E2. Growwall Q&A
Q2 : What type of lamps can be used in the GrowWall? A2 : The lamps provided with your GrowWall is standard OPCOM 30W (L30T) LED Growth Tube. This is suitable for most plants’ growth. You may also use OPCOM Professional LED Growth Tube 65W (L65T) to accommodate special growth needs. -
Page 36: Register With Opcom
Please register with www.opcomfarm.com to receive tips and ideas on how to grow a variety of vegetables, sprouts, herbs and fruits using your OPCOM Farm appliance. We are continu- ously adding more usage ideas to our website, as part of OPCOM Farm’s mission to provide you with tools to source healthy, clean, living foods.
Need help?
Do you have a question about the GrowWall and is the answer not in the manual?
Questions and answers