
Related Manuals for Yamaha YAS-706 Series


Summary of Contents for Yamaha YAS-706 Series
- Page 1 Front Surround System Owner’s Manual Read the supplied booklet “Quick Start Guide” before using the unit. English...
-
Page 2: Table Of Contents
Contents PREPARATION NETWORKS Supplied items ...............3 Networks................26 Features ..................4 Network functions and the MusicCast CONTROLLER app ....26 Frequently asked questions..........5 Connecting to a network ................26 Part names and functions .............6 Playing back music stored on media servers (PCs/NAS)...... 39 Installation ................9 Listening to Internet radio................ -
Page 3: Preparation
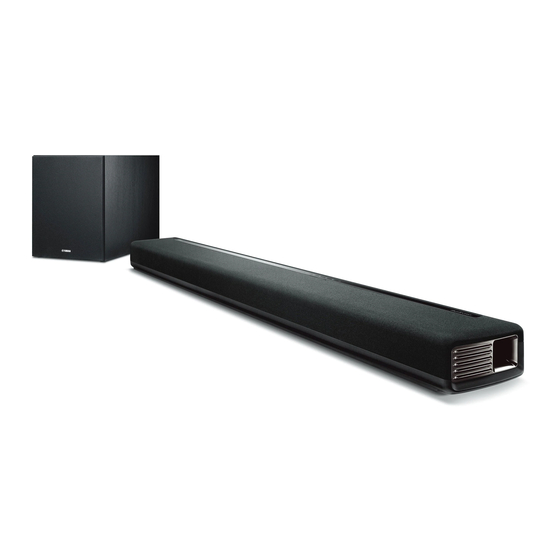
PREPARATION Supplied items Preparing the remote control Peel off the protection sheet before use. Make sure you have received all of the following items. The YAS-706 Center unit (YAS-CU706) Wireless subwoofer (NS-WSW121) Supplied accessories Operating range of the remote control Operate the remote control within the range as shown below. -
Page 4: Features
Enjoy 7.1 channel surround sound, which creates a wide and deep soundstage, as if speakers are positioned not only in front of, but also to the left, right, and behind the listener. • Bass extension Enjoy powerful bass with Yamaha’s exclusive bass boosting technology, Advanced Bass Extension Processing (p. 19). • Unrestricted playback of music over a network using MusicCast CONTROLLER The free app for mobile devices*, MusicCast CONTROLLER, allows you to listen to music stored on mobile devices such smartphones, or on servers, or to listen to Internet radio stations and many kinds of major streaming services (p. -
Page 5: Frequently Asked Questions
(the source device) and to link other rooms (devices to which audio is distributed) with the master room. Refer to the supplied MusicCast Setup Guide, or visit Yamaha’s website for details. -
Page 6: Part Names And Functions
Part names and functions Center unit (front panel/top panel) Keys are located in the rear part of the center unit. STATUS HDMI1 COAXIAL ANALOG BLUETOOTH SURROUND CONNECT HDMI2 Indicators (input) key Remote control sensors The indicators on the top panel flash or glow, to show Select an input source to be played back (p. -
Page 7: Power Cable
Center unit (rear panel) HDMI SYSTEM COAXIAL SUBWOOFER OUT (ARC) IN 1 IN 2 ANALOG CONNECTOR UPDATE ONLY NETWORK Power cable TV input jack SUBWOOFER OUT jack For connecting to an AC wall outlet (p. 14). For connecting to a TV with an optical digital audio For connecting to the supplied subwoofer using a cable (p. -
Page 8: For Connecting To The Center Unit Using A Wired
Subwoofer (rear panel) SUBWOOFER STATUS SYSTEM INPUT PAIRING CONNECTOR SUBWOOFER STATUS SYSTEM INPUT PAIRING CONNECTOR Power cable STATUS indicator INPUT jack For connecting to an AC wall outlet (p. 14). Shows subwoofer’s connection status (p. 15). For connecting to the center unit using a wired Glows green: Power on connection (p. -
Page 9: Installation
Installation Position the center unit and subwoofer as shown below with installation. Cautions • Be sure to install the center unit on a large, stable stand where it does not fall subject to vibrations, such as from an earthquake, and where it is out of the reach of children. •... -
Page 10: Installing The Center Unit On A Tv Stand, Etc
• Do not lean on the center unit or apply excessive force to the top of the unit. Doing so may cause the center unit to fall. • Check that the center unit is fixed securely after the installation. Yamaha will bear no responsibility for any accidents caused by improper installations. - Page 11 How to mount the center unit on the wall Using the supplied cover (for the TV remote repeater) When the center unit is mounted on a wall, the TV remote repeater may appear white. If 1 Attach the mounting template on a wall and mark for the screw holes. this presents a distraction while watching TV, attach the supplied cover to the TV remote repeater.
-
Page 12: Connecting The Unit
Connecting the unit TVs that do not support Audio Return Channel (ARC) Connect the TV to the unit with an HDMI cable (not supplied) and an optical digital audio cable. Connecting the unit to a TV HDMI OUT (ARC) jack HDMI input Connect a TV to the unit so that video input to the unit can be output to the TV. -
Page 13: Connecting Playback Devices
Coaxial connection Connecting playback devices Connect a video device to this unit via a coaxial digital cable. Next, connect the video Connect video devices such as BD/DVD players, cable or satellite set-top boxes (STBs), device’s video output to the TV’s video input. and game consoles to the unit. -
Page 14: Analog Connection
Analog connection Connecting the power cable Connect a video device to this unit via a stereo cable (not supplied). Next, connect the After all the connections are complete, plug in the power cable of the center unit and the video device’s video output to the TV’s video input. subwoofer. -
Page 15: Turning On The Unit
Turning on the unit This section explains initial setup of the unit, performed when it is Wired connection turned on for the first time after purchase. If there is no sound coming from the subwoofer, or if sound is intermittent, due to the influence of radio waves from other Press the z key to turn on the unit. -
Page 16: Displaying The Menu Screen On The Tv
Displaying the menu screen on the TV Visual operation of this unit is The menu display TV remote control (example) possible by displaying its menu The menu is displayed on the TV screen when the SETUP key is screen on the TV. pressed. -
Page 17: Screen Displayed On A Tv When The Unit Is Turned On
Screen displayed on a TV when the unit is turned on When the unit is turned on for the first time after purchase, the Selecting a language for menu display screen shown below will be displayed on the TV and the indicator will be flashing. -
Page 18: Playback Operations
PLAYBACK Operations (power) key Input keys Remote control signal transmitter Select an input source to be played back. Turns on or off the unit. Transmits infrared signals. TV ......TV audio or sound from a device connected to the unit’s TV input Turned on jack HDMI 1, HDMI 2 ..Sound from a device connected... - Page 19 Enable/disable the bass extension function. When this function is enabled, you can enjoy a powerful bass sound with the Yamaha original bass boost technology “Advanced Bass Extension Enabled: Flashes three times and goes out Disabled: Flashes once and goes out Processing.”...
- Page 20 SUBWOOFER (+/–) keys NET RADIO (1–3) keys Adjust the volume of the subwoofer. Assign audio input via a network (Internet radio stations, music files stored on media servers, etc.) to the NET RADIO key. Volume down (–) Volume up (+) Assign a station 1 Play the desired Internet radio station (p.
- Page 21 INFO key While the INFO key is held down, status, including the type of audio signal being input and whether the clear voice function is enabled or disabled, can be confirmed by the glowing of indicators. Type of audio signal being input Unit functions and positioning The bass extension function is enabled TV audio input signal with the ARC function activated...
-
Page 22: Operating The Unit By Tv's Remote Control (Hdmi Control)
Operating the unit by TV’s remote control (HDMI control) The HDMI control function (link function) coordinates operation of a TV and the unit so that the unit can be operated using the TV’s remote control. When a TV is connected to the unit with an HDMI cable (p. 12), the TV’s remote control can be used to perform the following operations. Coordinated functions via the TV remote control HINT •... -
Page 23: Wireless Playback Of Audio Via Bluetooth Connection
Wireless playback of audio via NOTE • Audio cannot be received by the unit from mobile devices and the like, and transmitted to speakers or headphones at the same time. Bluetooth connection HINT • “Bluetooth” in the setup menu must be set to “On” (default; p. 46) to use Bluetooth functions. •... -
Page 24: Listening To The Sound From A Bluetooth Device (Receiving)
Play back a song on the Bluetooth Listening to the sound from a Bluetooth device device. (Receiving) Audio from a Bluetooth device, such as a mobile device or a digital music player, can be played over a wireless connection. NOTE •... -
Page 25: Using Wireless Headphones To Listen To Audio (Transmitting)
Use the keys to select a Bluetooth device, and Using wireless headphones to listen to then press the ENTER key. audio (Transmitting) Bluetooth wireless headphones can be used to listen to audio played via the unit. NOTE Input keys • Use a Bluetooth device that supports the A2DP profile. •... -
Page 26: Networks
NETWORKS Networks Network functions and the MusicCast CONTROLLER Connecting to a network Choose a wired or wireless network connection based on your network environment. A network connection allows you to listen to Internet radio stations or music streaming Wired network connections services, and to use AirPlay to play music files, or to play music files stored on your computer (media server) via this unit. - Page 27 Wireless network connections Connecting with the MusicCast CONTROLLER app (registering the unit as a MusicCast-enabled device) Connect the unit to a wireless router (access point) to use a network. Refer to the following for instructions on connecting to a wireless router (access point). Install the MusicCast CONTROLLER app on your mobile device to connect the unit to a network and register it as a MusicCast-enabled device.
- Page 28 Turn on the unit, and then tap “Next”. Follow the on-screen instructions to configure network settings. HINT • When a screen like that below is displayed, follow the on-screen instructions to configure network settings. 1. Use the Home button on your mobile device to return to the Home screen.
- Page 29 To register the unit as a MusicCast-enabled device, configure the HINT following items. • If a different MusicCast-enabled device is already registered with the MusicCast CONTROLLER app, tap (Setup) in the room selection screen, and then select “Add New Device” to add the unit to the app. •...
- Page 30 Using connection methods other than the Use the keys to select “Wireless (Wi-Fi)”, and press the ENTER key. MusicCast CONTROLLER app (wireless network) Use the setup menu on the unit to connect to a wireless network without using the MusicCast CONTROLLER app. •...
- Page 31 When the following screen is displayed, press the Using the WPS push button configuration ENTER key. A wireless connection can be established by pressing WPS button on the wireless router (access point). Press the key to turn on this unit. Turn on the TV and switch the TV input to display video from the unit (HDMI OUT jack;...
- Page 32 Push the WPS button on the wireless router (access Searching for a wireless router (access point) point). Find and connect to a nearby wireless router (access point). When a connection has been established, “Completed” will be displayed on the TV screen. Press the key to turn on this unit.
- Page 33 Use the keys to select the desired access point Use the keys to select “Connect” and press and press the ENTER key. the ENTER key to start the connection process. The wireless connection setting screen appears on the TV. When a connection has been established, “Completed” will be displayed on the TV screen.
- Page 34 Setting up the wireless connection manually Use the keys to select “SSID”. Setup the SSID (network name), encryption method and security key for your network manually. Press the key to turn on this unit. Turn on the TV and switch the TV input to display video from the unit (HDMI OUT jack;...
- Page 35 Use the keys to select “Security” and the Use the keys to select “Connect” and press keys to select the encryption method. the ENTER key to start the connection process. Settings When a connection has been established, “Completed” will be None, WEP, WPA2-PSK (AES), Mixed Mode displayed on the TV screen.
- Page 36 Using the WPS PIN code Use the keys to select the desired access point and press the ENTER key. Register the unit’s PIN code with your wireless router (access point) The PIN code of the unit appears on the TV screen. to establish a connection.
- Page 37 Connecting a mobile device to the unit Use the keys to select “Wireless Direct”, and then press the ENTER key. directly (Wireless Direct) Connect a mobile device directly to the unit without using a wireless router (access point). Wireless Direct supports the following. −...
- Page 38 Use the / / / and ENTER keys to enter the Use the keys to select “Save” and press the security key. ENTER key to save the setting. Enter either 8 to 63 character string, or 64 hexadecimal (base This completes the settings and “Set the mobile device.” will be 16) keys.
-
Page 39: Playing Back Music Stored On Media Servers (Pcs/Nas)
Start Windows Media Player 12 on your PC. Playing back music stored on media servers (PCs/ Select “Stream”, then “Turn on media streaming”. NAS) Click “Turn on media streaming”. You can play back music files stored on your PC or DLNA-compatible NAS via the unit. Select “Allowed”... -
Page 40: Listening To Internet Radio
Using the MusicCast CONTROLLER app to bookmark a station Listening to Internet radio Select the desired Internet radio station. You can listen to Internet radio stations from all over the world. in the playback screen, and then tap “Add Bookmark”. NOTE •... -
Page 41: Playing Back Music With Airplay
HINT Playing back music with AirPlay • When the unit is turned on for the first time after purchase, the indicator flashes slowly and the “Share Wi-Fi Settings” screen is displayed on the TV. While the indicator is flashing and the screen is displayed, network settings from your iOS device (an iPhone, etc.) can be applied to the unit to connect the The AirPlay function allows you to play back iTunes or iPod music on the unit via unit to a wireless network. -
Page 42: Playing Back Music Stored On Mobile Devices
Playback of iTunes/iPod music contents Playing back music stored on mobile devices Follow the procedure below to play back iTunes/iPod music contents on the unit. Use this function to play music stored on your mobile device over a network. Turn on the unit, and start iTunes on the PC or display the playback screen on the iPod. -
Page 43: Settings
SETTINGS Settings Setup menu A variety of settings for this unit can be specified and adjusted from Press the key to select a menu and then press the setup menu. Among the options available are the sound beam the ENTER key or key. - Page 44 Setup menu list Menu Settings Function Page Dynamic Range Specify dynamic range. Audio Delay Specify audio output timing. Specify audio output timing when distributing sound from the unit to other Audio Delay (LINK) Audio Sync, Lip Sync Sound MusicCast-enabled devices. Specify whether the subwoofer will be connected via a wired or wireless Bass Out connection.
-
Page 45: Dynamic Range
Sound Audio Delay (LINK) ➜ ➜ Setup Menu Sound Audio Delay (LINK) Dynamic Range Specify whether or not the unit’s sound output timing is synchronized with other ➜ ➜ Setup Menu Sound Dynamic Range MusicCast-enabled devices when sound is distributed from this unit to other MusicCast- enabled devices. -
Page 46: Turn Hdmi Control On Or Off
HDMI Bluetooth Use to configure the settings related to HDMI signals and the HDMI control function. Configures the Bluetooth settings. HDMI Control Bluetooth ➜ ➜ ➜ ➜ Setup Menu HDMI HDMI Control Setup Menu Bluetooth Bluetooth Turn HDMI control function (p. 22) on or off. Enables/disables the Bluetooth function. -
Page 47: Display The Unit's Network Information
Network Network Connection ➜ ➜ Configures the network settings. Setup Menu Network Network Connection Select the network connection method. Information Settings ➜ ➜ Setup Menu Network Information Select this option when connecting the unit to a network with a Wired network cable (not supplied). -
Page 48: Configure The Network Parameters (Such As Ip Address)
IP Address MAC Address Filter ➜ ➜ ➜ ➜ Setup Menu Network IP Address Setup Menu Network MAC Address Filter Configure the network parameters (such as IP address). The MAC address filter limits network devices that can be used to operate the unit. When operating the unit via an app on a mobile device, specify the MAC address of the •... -
Page 49: Enable/Disable The Function That Turns On The Unit From Other Network Devices
Network Standby Function ➜ ➜ Setup Menu Network Network Standby Dimmer Turn the function that controls the unit’s power (Network Standby) when a mobile device ➜ ➜ Setup Menu Function Dimmer or Bluetooth device is operated on or off. Settings Adjust the brightness of the indicators. -
Page 50: Enable/Disable The Function That Turns Off The Unit Automatically
Auto Power Standby Information ➜ ➜ Display information for the audio and video signal input to this unit. Setup Menu Function Auto Power Standby Enabling the auto power standby function prevents the unit from remaining on when not Audio in use. ➜... -
Page 51: Configuring 4K Video Mode
Configuring 4K video mode When playing 4K video, select Mode 1 or Mode 2 according to the video signal format. 4K (60 Hz/50 Hz) signals are input and output in 4:4:4, 4:2:2, or 4:2:0 format. Mode 1* Depending upon the device connected or the HDMI cable used, video may not be displayed correctly. -
Page 52: Updating The Unit's Firmware
Should this occur, try again at a later time. If the update is completed successfully, all indicators on the • For details on update, visit the Yamaha website. unit will flash. Using “Network Update” in the setup... -
Page 53: Initializing The Unit
Initializing the unit drive Follow the procedure below to initialize the unit. Download the latest firmware version from the Yamaha website to a USB flash drive, which can then be used to update the unit’s firmware. Turn off the unit. -
Page 54: Appendix Troubleshooting
Refer to the table below when the unit does not function properly. If the problem you are experiencing is not listed below or if the instructions below do not help, turn off the unit, disconnect the power cable, and contact the nearest authorized Yamaha dealer or service center. - Page 55 Audio Problem Cause Remedy No sound. Another input source is selected. Select an appropriate input source (p. 18). The mute function is activated. Cancel the mute function (p. 20). The volume is too low. Turn up the volume (p. 20). The power cable of the unit is not connected properly.
- Page 56 Increase the volume of the subwoofer with the SUBWOOFER + key on the remote control (p. 20). Wired/Wireless The subwoofer’s built-in protective circuit was activated. Disconnect the power cable, and contact your nearest Yamaha dealer or (The STATUS indicator on the subwoofer glows orange.) service center to request repair. Wired “Bass Out”...
-
Page 57: Remote Control
Audio/Video Problem Cause Remedy The image is not displayed on TV screen. The HDMI cable is not securely connected. Connect the HDMI cable properly (p. 12, 13). Menu screen of this unit is not displayed. 4K mode is not properly configured. Select Mode 1 or Mode 2 in accordance with the 4K signal format (p. - Page 58 Bluetooth Receiving Problem Cause Remedy Unable to connect the unit to a Bluetooth “Bluetooth” is set to “Off”. Set it to “On” (p. 46). device. Bluetooth is not selected as the input source. Select Bluetooth as the input source (p. 24). Another Bluetooth device is connected.
- Page 59 Transmitting Problem Cause Remedy Cannot make the unit connected to the “Bluetooth” is set to “Off”. Set it to “On” (p. 46). Bluetooth device. “Transmission” is set to “Off”. Set it to “On” (p. 46). Another Bluetooth device is connected. Terminate the current Bluetooth connection, and connect to the device to which audio should be transmitted (p.
- Page 60 Network Problem Cause Remedy The network feature does not function. The network parameters (IP address) have not been obtained properly. Enable the DHCP server function on your router and set “DHCP” in the setup menu to “On” on the unit (p. 48). If you want to configure the network parameters manually, check that you are using an IP address which is not used by other network devices in your network.
- Page 61 Problem Cause Remedy The Internet radio cannot be played. The selected Internet radio station is currently not available. There may be a network problem at the radio station, or the service may have been stopped. Try the station later or select another station. The selected Internet radio station is currently broadcasting silence.
-
Page 62: Pairing The Center Unit And Subwoofer
Use an object with a fine point, such as a pin, to Pairing the center unit and subwoofer hold down the SUBWOOFER PAIRING button on the subwoofer for more than 3 seconds. NOTE • Be sure that “Bass Out” of “Subwoofer” in the setup menu is set to “Wireless” (p. 45). -
Page 63: Specifications
Specifications YAS-CU706 Item Specifications Item Specifications Ethernet standard: 100BASE-T/10BASE-T Front L/R 50 W x 2 ch Amplifier Maximum Output WAV (PCM format only) /AIFF/FLAC: Tweeter 5 W x 2 ch Section Power up to 192 kHz Supported codecs Subwoofer 100 W ALAC: up to 96 kHz Network MP3/WMA/MPEG-4 AAC: up to 48 kHz... - Page 64 NS-WSW121 Item Specifications U.S.A. and Canada models: AC 120 V, 60Hz Item Specifications Taiwan model: AC 110 - 120 V, 50/60Hz Power Supply China model: AC 220V, 50Hz Output power 75 W (100 Hz, 6 Ω, 10% T.H.D) Amplifier Other models: AC 220 - 240 V, 50/60Hz section Dynamic power 130 W...
- Page 65 • When CPPM copy-protected DVD-Audio is played back, video and publishing date. audio signals may not be output depending on the type of the DVD To obtain the latest manual, access the Yamaha website then player. download the manual file.
- Page 66 Copyright 1999-2014 OpenSynergy GmbH owned by Bluetooth SIG, Inc. and any use of such marks by Yamaha 7.1 channel surround sound using the sound bar. All rights reserved. All unpublished rights reserved.
- Page 67 Yamaha Global Site http://www.yamaha.com/ Yamaha Downloads http://download.yamaha.com/ Manual Development Group © 2016 Yamaha Corporation Published 06/2016 KS-C0 YH958A0/EN...
Need help?
Do you have a question about the YAS-706 Series and is the answer not in the manual?
Questions and answers