Table of Contents
Advertisement
Quick Links
APRILIA WOULD LIKE TO THANK YOU
for choosing one of its products. We have drawn up this booklet to provide a comprehensive overview of your vehicle's quality features. Please read it
carefully before riding the vehicle for the first time. It contains information, tips and precautions for using your vehicle It also describes features, details
and devices to assure you that you have made the right choice. We believe that if you follow our suggestions, you will soon get to know your new vehicle
well and will use it for a long time at full satisfaction. This booklet is an integral part of the vehicle, and should the vehicle be sold, it must be transferred
to the new owner.
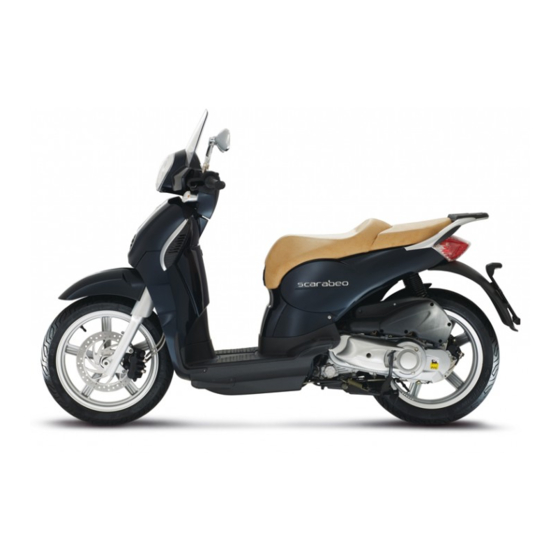
SCARABEO 125 i.e - 200 i.e.
Ed. 05 2010
Advertisement
Table of Contents

Related Manuals for APRILIA SCARABEO


Summary of Contents for APRILIA SCARABEO
- Page 1 This booklet is an integral part of the vehicle, and should the vehicle be sold, it must be transferred to the new owner. SCARABEO 125 i.e - 200 i.e. Ed. 05 2010...
- Page 2 The instructions given in this manual are intended to provide a clear, simple guide to using your vehicle; it also describes routine maintenance procedures and regular checks that should be carried out on the vehicle at an Aprilia Dealer or Authorised Workshop. The booklet also contains instructions for simple repairs.
- Page 3 Personal safety Failure to completely observe these instructions will result in serious risk of personal injury. Safeguarding the environment Sections marked with this symbol indicate the correct use of the vehicle to prevent dam- aging the environment. Vehicle intactness The incomplete or non-observance of these regulations leads to the risk of serious damage to the vehicle and sometimes even the invalidity of the guarantee The symbols illustrated above are very important.
-
Page 5: Table Of Contents
INDEX GENERAL RULES............... MAINTENANCE................53 Information to recycle the scooter..........Engine oil level................54 VEHICLE..................11 Engine oil level check............55 Arrangement of the main components........14 Engine oil top-up..............57 Dashboard................15 Warning light (insufficient oil pressure)......... 57 Analogue instrument panel............16 Engine oil change.............. - Page 6 Sidestand.................. 112 Luggage rack................112 Windscreen................113...
-
Page 7: General Rules
SCARABEO 125 i.e - 200 i.e. Chap. 01 General rules... -
Page 8: Information To Recycle The Scooter
Information to recycle the scooter (01_01, 01_02) VEHICLE SCRAPPING If the vehicle must be scrapped, contact your nearest "Vehicles Disposal Centre". • Vehicles Disposal Centres These centres are specifically used to correctly treat the vehicles scrapping, they are registered by the Japan Mini Vehicles Association as centres for the specific treatment of scrapping material on a large scale. - Page 9 Japan Automobile Recycling Promotion Centre call centre for vehicles recy- cling Telephone: 03-3598-8075 Time: From 9:30 am to 5:00 pm (Except holidays, weekends and the first and last day of the year.)
-
Page 11: Vehicle
SCARABEO 125 i.e - 200 i.e. Chap. 02 Vehicle... - Page 12 02_01...
- Page 13 02_02...
-
Page 14: Arrangement Of The Main Components
Arrangement of the main components (02_02) KEY: 1. Expansion tank 2. Coolant expansion tank cap 3. Rear brake fluid reservoir 4. Left rear-view mirror 5. Bag hook 6. Air filter 7. Centre stand 8. Left passenger footrest 9. Battery 10. Main and secondary fuse boxes 11. -
Page 15: Dashboard
22. Battery compartment cover 23. Spark plug 24. Engine oil refill cap 25. Right passenger footrest Dashboard (02_03) 02_03... -
Page 16: Analogue Instrument Panel
1. Electrical controls on the left-hand side of the handlebar 2. Rear brake lever 3. Front brake lever 4. Throttle grip 5. Electrical controls on the right-hand side of the handlebar 6. Ignition switch / steering lock (ON - OFF - LOCK) / saddle opening 7. - Page 17 02_04 1. Blue high beam warning light 2. Green turn indicator warning light 3. Fuel gauge 4. Orange low fuel warning light 5. Speedometer 6. Coolant temperature warning light 7. Coolant temperature gauge 8. Red oil pressure warning light...
- Page 18 9. Multifunction indicator: total odometer (ODO) / two trip odometers (ODO I - ODO II) / battery voltage / external temperature with ice indication (ice icon illuminates at temperatures below 4°C (39.2°F)) 10. Service indicator 11. Digital clock 12. Electronic fuel injection check warning light (red) INSTRUMENT AND GAUGE DESCRIPTION NOTE WITH THE KEY SET TO «ON», ALL THE PRE-INSTALLED WARNING LIGHTS,...
- Page 19 Low fuel warning light «4» Turns on when there is a 2-litre fuel reserve in the tank. If this occurs, refill the tank as soon as possible. Speedometer «5» Shows riding speed. Coolant high temperature warning light «6» Turns on when the coolant temperature indicator reaches very high values. Stop the engine at once and check the coolant level.
- Page 20 Displayed to indicate low engine oil pressure. If this occurs, stop the engine at once and contact an Official Aprilia Dealer. With engine off, the warning light is always on. If it turns off, there is a failure in the sensor or the connections.
-
Page 21: Digital Lcd Display
IF THE WARNING LIGHT TURNS ON WHILE THE ENGINE IS WORKING PROP- ERLY, THIS MEANS THAT THERE IS A FAILURE IN THE ELECTRONIC FUEL INJECTION SYSTEM. IF THIS OCCURS, STOP THE ENGINE AT ONCE AND CON- TACT AN Aprilia Official Dealer. Digital lcd display (02_05, 02_06) Clock adjustment... -
Page 22: Mode" Button
“MODE” button (02_07) Press the MODE button «2» to shift the instrument panel display. NOTE ELECTRICAL COMPONENTS FUNCTION ONLY WHEN THE IGNITION KEY IS SET TO "ON" 02_07 Key switch (02_08, 02_09) The ignition switch «1» is located on the right-hand side, near the headstock. NOTE KEY «2»... -
Page 23: Locking The Steering Wheel
SWITCH POSITIONS ON «A»: The engine and lights can be set to work. The key cannot be extracted. OFF «B»: The engine and lights cannot be set to work. The key may be removed. OPEN «C»: The engine and lights cannot be set to work. The helmet compartment can be opened. -
Page 24: Switch Direction Indicators
• Press and turn the key «2» anticlockwise (to the left), move the handlebar slowly until the key «2» is set to «LOCK». • Extract the key. 02_10 Switch direction indicators (02_11) Move the switch «3» to the left, to indicate a left turn; move the switch «3» to the right, to indicate a right turn. -
Page 25: Horn Button
Horn button (02_12) To action the horn, press button «2». NOTE ELECTRICAL COMPONENTS FUNCTION ONLY WHEN THE IGNITION KEY IS SET TO "ON" 02_12 Light switch (02_13) If the light switch «4» is set to «A», the high beam light is activated; if it is set to «B», the low beam light is activated. -
Page 26: Start-Up Button
Start-up button (02_14) Press the button and the starter motor spins the engine. NOTE ELECTRICAL COMPONENTS FUNCTION ONLY WHEN THE IGNITION KEY IS SET TO "ON" 02_14 Mapping selection (02_15) The control unit may have two different "mappings": - ECO is for a low engine performance mapping to obtain low fuel consumption. - SPORT is for a maximum engine performance mapping to the detriment of fuel con- sumption. -
Page 27: Power Supply Socket
Power supply socket (02_16) • There is a 12V socket «4» inside the helmet compartment. • The socket can be used to feed appliances with power below 180 W (mobile phones, hand lamp, etc.). CAUTION USING THIS SOCKET FOR A LONG PERIOD CAN RESULT IN A FULLY DIS- 02_16 CHARGED BATTERY. -
Page 28: Identification
02_18 Identification (02_19, 02_20) Write down the chassis and engine numbers in the specific space in this manual. The chassis number can be used to order spare parts. NOTE ALTERING IDENTIFICATION NUMBERS CAN BE SERIOUSLY PUNISHED BY LAW, PARTICULARLY MODIFYING THE CHASSIS NUMBER WILL IMMEDIATE- LY INVALIDATE THE WARRANTY. -
Page 29: Rear Top Box Opening
Chassis number The chassis number is stamped on the chassis central bar. Remove the cover indi- cated to read it. Chassis No.: ..........02_19 Engine number The engine number is stamped near the rear shock absorber lower support. Engine No.: ..........02_20 Rear top box opening (02_21) Located below the handlebar, in the internal shield;... -
Page 30: Bag Clip
Bag clip (02_22) The bag hook «1» is under the saddle in the front part. CAUTION DO NOT HANG BULKY BAGS OR PACKAGES ON THE HOOK TO AVOID OB- STRUCTING VEHICLE HANDLING AND FEET MOVEMENT. 02_22 Characteristic Maximum weight allowed: 1.5 kg. -
Page 31: Use
SCARABEO 125 i.e - 200 i.e. Chap. 03... -
Page 32: Checks
CLE FOR CORRECT AND SAFE OPERATION AS SHOWN IN THE TABLE. FAIL- URE TO DO SO MAY LEAD TO SEVERE INJURY OR VEHICLE DAMAGE. DO NOT HESITATE TO CONTACT AN OFFICIAL APRILIA DEALER IF YOU DO NOT UNDERSTAND HOW SOME CONTROLS WORK OR IF MALFUNCTION IS DETECTED OR SUSPECTED. - Page 33 and check for tyre wear and damage. Steering Check that the rotation is uniform, smooth and there are no signs of clearance or slackness. Centre stand Check that it works smoothly and it goes back to its normal position when the springs are released. Lubricate couplings and joints if necessary.
-
Page 34: Refuelling
Refuelling (03_01) CAUTION FUEL USED TO DRIVE EXPLOSION ENGINES IS HIGHLY INFLAMMABLE AND CAN BECOME EXPLOSIVE UNDER SPECIFIC CONDITIONS. CARRY OUT REFILLING AND MAINTENANCE PROCEDURES IN A WELL-VEN- TILATED PLACE AND WITH THE ENGINE OFF. DO NOT SMOKE WHILE REFUELLING OR WHEN CLOSE TO FUEL VAPOURS, AVOID CONTACT WITH NAKED FLAMES, SPARKS OR ANY OTHER SOURCE THAT MAY CAUSE FUEL TO CATCH FIRE OR EXPLODE. - Page 35 CAUTION KEEP OUT OF THE REACH OF CHILDREN. Use premium unleaded petrol, minimum octane rating 95 (NORM) and 85 (NOMM) To refuel: • Lift the saddle. • Unscrew and remove fuel tank cap «1». • Refuel. • Refit the cap «1». DO NOT ADD ADDITIVES OR ANY OTHER SUBSTANCES TO THE FUEL.
-
Page 36: Shock Absorber Adjustment
Check oil and oil seal of front suspension following the instructions on the scheduled maintenance table. CAUTION TO HAVE THE FRONT SUSPENSION OIL CHANGED TAKE YOUR MOTORCY- CLE TO AN Official Aprilia Dealer WHO WILL PROVIDE A PRECISE AND PROMPT SERVICE. • Turn the adjustment ring nut «1» (shock absorber spring preloading adjust- ment). -
Page 37: Running In
Running in Engine run-in is essential to ensure engine long life and correct operation. If possible, ride on roads with lots of bends and/or slopes to test that the engine, suspensions and brakes perform efficiently. Follow these indications: • Do not twist the throttle grip fully at low rpm whether during or after run-in. •... -
Page 38: Starting Up The Engine
CAUTION AFTER THE FIRST 1000 KM (625 MILES) IN OPERATION, PERFORM THE CHECKS INDICATED IN THE SCHEDULED MAINTENANCE CHART TO AVOID INJURIES TO YOURSELF, OTHERS AND/OR DAMAGING THE VEHICLE. NOTE ONLY AFTER THE FIRST RUN-IN 1000 KM (625 MILES) IT IS POSSIBLE TO AT- TAIN THE BEST SPEED AND ACCELERATION PERFORMANCE OF YOUR MO- TORCYCLE. - Page 39 LIGHTS HAVE TURNED OFF. IF THIS WARNING LIGHT DOES NOT TURN ON OR IF AFTER THREE SECONDS THE WARNING LIGHTS DO NOT TURN OFF, CONTACT AN Official Aprilia Deal- • Block at least one wheel, by operating one brake lever "6". If this does not occur, it means there is no current in the ignition relay and the engine does not start.
- Page 40 ON WHILE THE ENGINE IS WORKING PROPERLY THIS MEANS THAT THE OIL PRESSURE IN THE CIRCUIT IS NOT ENOUGH. SHOULD THIS OCCUR, STOP THE ENGINE AT ONCE AND CONTACT AN aprilia Official Dealer. NEVER USE THE VEHICLE WITH LOW ENGINE OIL SO AS TO AVOID DAMAGING ENGINE...
-
Page 41: Precautions
• Engage at least one brake lever and do not accelerate until you set off. CAUTION DO NOT SET OFF SUDDENLY WHEN THE ENGINE IS COLD. TO MINIMISE THE EMISSION OF AIR POLLUTING SUBSTANCES AND FUEL CONSUMPTION, WARM UP THE ENGINE BY RIDING THE FIRST KILOMETRES AT A LIMITED SPEED. - Page 42 CAUTION WITH THE VEHICLE AT A STANDSTILL, PRACTICE USING THE REAR-VIEW MIRRORS. THE MIRRORS ARE CONVEX, SO OBJECTS MAY SEEM FARTHER AWAY THAN THEY REALLY ARE. THESE MIRRORS OFFER A WIDE-ANGLE VIEW AND ONLY EXPERIENCE HELPS YOU JUDGE THE DISTANCE SEPARAT- ING YOU AND THE VEHICLE BEHIND.
- Page 43 OF STOP IN ASCENT, FULLY DECELERATE AND ONLY USE THE BRAKES TO KEEP THE VEHICLE STOPPED. USING THE ENGINE TO KEEP THE VEHICLE STOPPED MAY CAUSE THE VARIATOR TO OVERHEAT. CAUTION BEFORE GETTING INTO A BEND, REDUCE SPEED OR BRAKE; WHILE BEND- ING, RIDE AT THE SAME MODERATE AND CONSTANT SPEED OR SLIGHTLY ACCELERATE;...
-
Page 44: Difficult Start Up
Difficult start up (03_10) Press the starter button «7» and make the starter motor turn for about five seconds, without accelerating. If due to particularly low temperatures the engine fails to start at the first attempt, slightly accelerate, press the starter button and release it as soon as the engine starts. Keep engine accelerated for a couple of seconds and afterwards release the handle grip. - Page 45 • Release the handle grip (Pos. A) and gradually operate the brakes to stop the vehicle. • While at a temporary halt, keep at least one brake operated.. 03_11 PARKING CAUTION PARK ON SAFE AND LEVEL GROUND TO PREVENT THE MOTORCYCLE FROM FALLING.
-
Page 46: Catalytic Silencer
CAUTION WITH ENGINE OFF AND THE IGNITION SWITCH SET TO «ON» THE BATTERY MAY GET DISCHARGED. • Turn key «2» and set ignition switch «1» to «OFF» . • Rest the vehicle on its stand. CAUTION DO NOT LEAVE THE KEY INSERTED IN THE IGNITION SWITCH. 03_12 •... -
Page 47: Stand
NEVER leave the ignition key in the lock and always use the steering lock. Park the motorcycle in a safe place such as a garage or a place with guards. Whenever possible, use the aprilia "Bodyguard" armoured cable or an additional an- titheft device. -
Page 48: Safe Driving
Write down your personal details and telephone number on this page to help identi- fying the owner in case of vehicle retrieval after a theft. LAST NAME: ....NAME: ......ADDRESS: ....TELEPHONE NO.: .... IMPORTANT: In many cases, stolen vehicles can be identified through data indicated in the use and maintenance booklet. - Page 49 Avoid any abrupt and dangerous swerves for your own as well as others' safety (for example: rearing up on the back wheel, riding over the speed limit, etc.). Besides, always assess and bear in mind the road surface conditions, visibility, etc. Do not knock obstacles that can damage the motorcycle or cause loss of control.
- Page 50 If necessary, take the motorcycle to an Official Aprilia Dealer to check especially the frame, handlebar, suspensions, safety components and any device the user cannot assess without the aid of a specialist. Report any malfunction to the engineers and/or mechanics in order to facilitate their work.
- Page 51 Do not add or modify electrical equipment that exceed the vehicle capacity as this may result in a sudden stop or a dangerous lack of power required to keep the sound and light alarm devices operative. aprilia advises using original accessories (aprilia genuine accessories).
- Page 52 LOADING Do not overload your scooter. Keep packages as close as possible to the motorcycle centre of gravity and distribute load evenly on both sides to minimise imbalance. Check also that the load is firm and secured to the scooter, mainly for long trips. Do not hang anything from your vehicle's handlebars, mudguards or forks, such as protruding, bulky, heavy and/or dangerous objects: this will slow the vehicle perform- ance when turning and will upset the handling of your vehicle.
-
Page 53: Maintenance
SCARABEO 125 i.e - 200 i.e. Chap. 04 Maintenance... -
Page 54: Engine Oil Level
BE CAREFUL NOT TO DIRTY COMPONENTS, THE WORKING OR SURROUND- ING AREA. THOROUGHLY WASH OUT ANY OIL TRACE. IN THE EVENT OF OIL LEAKS OR MALFUNCTIONING, TAKE YOUR VEHICLE TO AN Official aprilia Dealer. NOTE USE OIL WITH THE SPECIFICATIONS DETAILED IN THE RECOMMENDED PRODUCTS TABLE. -
Page 55: Engine Oil Level Check
NOTE DO NOT EXCEED THE "MAX" MARK WHEN TOPPING-UP ENGINE OIL. Take your vehicle to an Official aprilia Dealer to carry out the replacement. Engine oil level check (04_01, 04_02) • Park the vehicle on its centre stand. CAUTION PARK THE MOTORCYCLE ON SAFE AND LEVEL GROUND. - Page 56 • Unscrew and take out the measuring cap-dipstick «1». • Clean the area in contact with oil with a clean cloth. • Place without screwing the cap-dipstick «1» into its tube «2». • Remove the cap-dipstick «1» again and read the level the oil reaches on the dipstick.
-
Page 57: Engine Oil Top-Up
Engine oil top-up (04_03) • Pour a small quantity of oil in the tube «2» and wait approximately five mi- nutes so that the oil flows evenly into the crankshaft. • Check the oil level and top up, if required. •... -
Page 58: Engine Oil Change
Check following the instructions in the scheduled maintenance table and according to the engine capacity. Take your vehicle to an Official aprilia Dealer to have the oil checked and changed. CAUTION HANDLING OIL FOR PROLONGED PERIODS AND ON A REGULAR BASIS CAN CAUSE SERIOUS SKIN DAMAGE. -
Page 59: Tyres
THOROUGHLY WASH OUT ANY OIL TRACE. IN THE EVENT OF OIL LEAKS OR MALFUNCTIONING, TAKE YOUR VEHICLE TO AN Official aprilia Dealer. Tyres (04_05, 04_06) This vehicle is fitted with tyres without inner tubes (Tubeless). CAUTION CHECK TYRE PRESSURE FREQUENTLY, WITH TYRES AT AMBIENT TEMPER- ATURE. -
Page 60: Spark Plug Dismantlement
ARE HIGHLY IMPORTANT AND SO THEY SHOULD BE CARRIED OUT USING THE SPECIFIC TOOLS AND WITH THE ADEQUATE KNOWLEDGE. HAVE YOUR TYRES AND WHEELS SERVICED AT AN Official Aprilia Dealer, OR A SPECIAL- ISED TYRE WORKSHOP. NEW TYRES CAN BE COVERED BY A SLIPPERY COAT: RIDE WITH CAUTION DURING THE FIRST KILOMETRES. - Page 61 • Lift the saddle. • Unscrew and remove the two screws «3» (one at each side). • Unscrew and remove the two screws «4» (one at each side). 04_07 CAUTION PROCEED WITH CAUTION. DO NOT DAMAGE THE TABS AND/OR THEIR CORRESPONDING SLOTS. HANDLE PLASTIC AND PAINTED COMPONENTS WITH CARE, DO NOT SCRATCH OR SPOIL THEM.
- Page 62 CAUTION BEFORE CARRYING OUT THE FOLLOWING OPERATIONS AND IN ORDER TO AVOID BURNS, LEAVE ENGINE AND SILENCER TO COOL OFF TO AMBIENT TEMPERATURE. • Remove the tube «1» of the spark plug «2». • Clean off any trace of dirt from the spark plug base. Then unscrew it using the spanner supplied in the toolkit and remove it from its fitting, being careful not to let dust or any other substance come into the cylinder.
-
Page 63: Removing The Air Filter
Spark plug NGK PMR9B Locking torques (N*m) Spark plug tightening torque 10 Nm (1.02 kg) • Refit the spark plug tube «1» securely, so that it will not get detached when exposed to engine vibrations. • Refit the central inspection cover «5». Removing the air filter (04_10, 04_11) Clean the air filter and check it is in good conditions following the instructions in the scheduled maintenance table and according to the engine capacity. -
Page 64: Air Filter Cleaning
04_11 Air filter cleaning (04_12, 04_13) CAUTION TO AVOID RISK OF FIRE OR EXPLOSION DO NOT USE PETROL OR INFLAM- MABLE SOLVENTS TO CLEAN THE FILTERING ELEMENT. • Wash the filtering element «3» with clean, non-inflammable or high-volatility solvents and leave it to dry properly. •... -
Page 65: Cooling Fluid Level
• Remove the cover «5». • Drain the content in a container; then, send it to a recycling bank. 04_13 Cooling fluid level (04_14, 04_15, 04_16, 04_17) CAUTION DO NOT USE YOUR MOTORCYCLE IF THE COOLANT LEVEL IS BELOW THE MINIMUM LEVEL MARKED "MIN". - Page 66 NENTS; IT MAY CATCH FIRE PRODUCING INVISIBLE FLAMES. WHEN CARRY- ING OUT MAINTENANCE OPERATIONS, IT IS ADVISABLE TO WEAR LATEX GLOVES. CONTACT AN Official aprilia Dealer FOR REPLACEMENT. Coolant solution is 50% water and 50% antifreeze fluid. This is the ideal mixture for most operating temperatures and provides good corrosion protection.
- Page 67 CHECK CAUTION WAIT FOR THE ENGINE TO COOL DOWN BEFORE CHECKING OR TOPPING- UP THE COOLANT LEVEL. • Shut off the engine and wait until it cools off. CAUTION PARK THE MOTORCYCLE ON SAFE AND LEVEL GROUND. • Open the glove-box. •...
- Page 68 TOP-UP • Remove the front case «3» by undoing the two screws «4» located at the back and the four screws «5» located in the shield back plate. • Remove the filler cap «1». CAUTION PROCEED WITH CAUTION. 04_15 DO NOT DAMAGE THE TABS AND/OR THEIR CORRESPONDING SLOTS. HANDLE PLASTIC AND PAINTED COMPONENTS WITH CARE, DO NOT SCRATCH OR SPOIL THEM.
-
Page 69: Checking The Brake Oil Level
THIS VEHICLE IS FITTED WITH AN INTEGRAL BRAKING SYSTEM. 04_18 CAUTION UNEXPECTED CLEARANCE VARIATIONS OR ELASTIC RESISTANCE IN THE BRAKE LEVER ARE DUE TO FAILURE IN THE HYDRAULIC CIRCUIT. CONTACT AN Official Aprilia Dealer IN CASE OF DOUBTS ON THE CORRECT OPERATION... - Page 70 OF THE BRAKING SYSTEM OR WHEN UNABLE TO CARRY OUT ROUTINE CHECK PROCEDURES. CAUTION PAY SPECIAL ATTENTION TO THE BRAKE DISC AND THE FRICTION GASKETS AND CHECK THAT THEY ARE NOT OILY OR GREASY, SPECIALLY AFTER MAINTENANCE OPERATIONS OR CHECKS. CHECK THAT THE BRAKE PIPE IS NOT TWISTED OR WORN.
- Page 71 Check the brake pads and discs for wear If pads and/or the disc need not to be replaced: • Take your vehicle to an Official Aprilia Dealer to carry out the replacement. CAUTION CHECK BRAKING EFFICIENCY. IN THE EVENT OF EXCESSIVE TRAVEL OF THE...
-
Page 72: Battery
Battery (04_20, 04_21, 04_22, 04_23) Check that the leads are tightened following the instructions on the scheduled main- tenance table and according to the engine capacity. CAUTION FIRE HAZARD. FUEL OR ANY OTHER FLAMMABLE SUBSTANCES MUST NOT BE CLOSE TO ELECTRICAL COMPONENTS. THE BATTERY ELECTROLYTE IS TOXIC, CORROSIVE AND AS IT CONTAINS SULPHURIC ACID, IT CAN CAUSE BURNS WHEN IN CONTACT WITH THE SKIN. - Page 73 ITIVE LEAD (+) FIRST AND THEN THE NEGATIVE ONE (-). DISCONNECT IN THE REVERSE ORDER. BATTERY FLUID IS CORROSIVE. DO NOT POUR OR SPREAD IT ESPECIALLY ON PLASTIC PARTS. WHEN RECHARGING A "MAINTENANCE FREE" BATTERY INSTALLED USE A SPECIFIC BATTERY CHARGER (VOLTAGE/CONSTANT AMPERAGE OR CON- STANT VOLTAGE TYPE).
- Page 74 04_21 • Remove the battery compartment cover. NOTE UPON REFITTING, INSERT THE FITTING TABS CORRECTLY IN THEIR SLOTS. • Disconnect the negative lead (-) first and then the positive one (+). • Remove the battery «3» from its housing and put it away on a flat surface in a cool and dry place.
- Page 75 Checking and cleaning terminals and leads • Check that the terminals «4» of the cables and the battery leads «5» are: - in good conditions (not corroded or covered by deposits); - covered by neutral grease or petroleum jelly. If necessary: •...
-
Page 76: Use Of A New Battery
Use of a new battery (04_24, 04_25, 04_26) • Park the vehicle on its centre stand. • Remove the mats «1». • Undo and remove the two screws «2». CAUTION PROCEED WITH CAUTION. 04_24 DO NOT DAMAGE THE TABS AND/OR THEIR CORRESPONDING SLOTS. HANDLE PLASTIC AND PAINTED COMPONENTS WITH CARE, DO NOT SCRATCH OR SPOIL THEM. -
Page 77: Long Periods Of Inactivity
• Place the battery «3» in its housing. • Connect the positive lead (+) first and then the negative one (-). • Cover the leads and terminals with neutral grease or petroleum jelly. • Refit the battery compartment cover and tighten the two screws «2». •... - Page 78 NOTE A FUSE THAT BLOWS FREQUENTLY MAY INDICATE A SHORT CIRCUIT OR OVERLOAD. IF THIS OCCURS, CONTACT AN Official aprilia Dealer. Checking the fuses is necessary whenever an electrical component fails to operate or is not working properly or when the engine does not start.
- Page 79 • Remove the battery compartment cover. NOTE UPON REFITTING, INSERT THE FITTING TABS CORRECTLY IN THEIR SLOTS. 04_28 • Extract one fuse at a time and check if filament «3 » is broken. • Before replacing the fuse, find and solve, if possible, the reason that caused the problem.
-
Page 80: Lamps
MAIN FUSES DISTRIBUTION 20A Fuse «6» Direct positive (voltage regulator, instrument panel, ignition switch and plug socket fuse) 15A Fuse «9» Plug socket power supply 20 A Fuse «7» Spare Parts AUXILIARY FUSES DISTRIBUTION 15 A Fuse «4» From ignition switch to all light loads, license plate light, intermittence and horn. - Page 81 CAUTION BEFORE REPLACING A BULB, TURN THE IGNITION SWITCH TO «KEY OFF» AND WAIT A FEW MINUTES FOR THE BULB TO COOL OFF. WEAR CLEAN GLOVES OR USE A CLEAN DRY CLOTH TO REPLACE THE BULB. DO NOT LEAVE PRINTS ON THE BULB AS THIS MAY CAUSE IT TO OVERHEAT OR EVEN BLOW OUT.
-
Page 82: Front Light Group
High beam warning light (*) Low fuel warning light (*) Engine oil pressure warning light Electronic fuel injection check warning light (*) Front light group (04_31, 04_32, 04_33, 04_34, 04_35, 04_36, 04_37, 04_38) In the headlamp there are: • One low/high beam light bulb «1»; •... - Page 83 04_33 04_34 04_35...
- Page 84 LOW-/HIGH BEAM LIGHT BULB • Hold the electric connector «8» and unhook it from the bulb holder; CAUTION DO NOT PULL THE ELECTRICAL CABLES WHEN TAKING OUT THE BULB ELECTRICAL CONNECTOR. 04_36 • Remove the plastic gasket «9»; • Release the clip «10»; •...
-
Page 85: Headlight Adjustment
• Take out the tail light bulb «13» and replace it with another one of the same type; Headlight adjustment (04_39, 04_40) For a quick check of the correct direction of the front light beams, place the vehicle ten metres from a vertical wall and make sure the ground is level. Turn on the low beam light, sit on the vehicle and check that the light beam projected to the wall is a little below the headlight horizontal straight line (about 9/10 of the total height). - Page 86 NOTE THE FOLLOWING INFORMATION REFERS TO ONLY ONE INDICATOR BUT IT APPLIES TO BOTH. • Unscrew and remove the screw «1» in order to take out the turn indicator from its fitting. CAUTION PROCEED WITH CAUTION. DO NOT DAMAGE THE TABS AND/OR THEIR CORRESPONDING SLOTS. 04_41 •...
- Page 87 04_43 • Take out the bulb from its fitting. NOTE INSERT THE BULB IN THE BULB HOLDER SO THAT THE TWO GUIDING PINS COINCIDE WITH THEIR GUIDES ON THE BULB HOLDER. • Install a bulb of the same type adequately. When refitting the bulb: NOTE POSITION THE PROTECTIVE GLASS «2»...
-
Page 88: Rear Optical Unit
Rear optical unit (04_44, 04_45) In the rear light there are: - one tail light/stop light bulb «1»; - two rear turn indicator bulbs «2». To replace the bulbs: • Remove the tail light glass «3» by undoing the four screws «4». TAIL LIGHT / STOP LIGHT BULB 04_44 •... -
Page 89: Number Plate Light
- the right bulb ANTICLOCKWISE. NOTE UPON REFITTING, PLACE THE FAIRING OF THE REAR LIGHT «3» CORRECTLY INTO PLACE. CAUTION TIGHTEN THE SCREWS «4» CAREFULLY AND SLIGHTLY TO AVOID DAMAG- ING THE TAIL LIGHT GLASS «3». Number plate light (04_46) To remove the bulb: •... -
Page 90: Rear-View Mirrors
Rear-view mirrors (04_47) To remove the mirrors: • Unscrew the lock nut «1»; • Slide off the rear-view mirror «2». To adjust the mirror, hold it and turn until it is adjusted to the adequate angle. 04_47 Front and rear disc brake (04_48, 04_49, 04_50, 04_51) NOTE THIS MOTORCYCLE IS FITTED WITH FRONT AND REAR DISC BRAKES WITH INDEPENDENT HYDRAULIC CIRCUITS. - Page 91 Pad wear check Check brake pad wear following the instructions on the scheduled maintenance table and according to the engine capacity. Disc brake pad wear depend on the use, the riding style and the roads. CAUTION CHECK BRAKE PADS FOR WEAR MAINLY BEFORE EACH RIDE. To carry out a quick pad check: •...
-
Page 92: Inactivity Of The Vehicle
CIENCY AND DISC SAFETY AND INTEGRITY ARE AT RISK. CAUTION 04_51 TO CHANGE THE BRAKE PADS, PLEASE CONTACT AN Official Aprilia Dealer. IF YOU ARE ADEQUATELY TRAINED AND EXPERIENCED, REFER TO THE IN- STRUCTIONS IN THE WORKSHOP BOOKLET AVAILABLE ALSO AT ANY Offi- cial Aprilia Dealer. - Page 93 NOTE PLACE A CLEAN CLOTH ON THE CYLINDER NEXT TO THE SPARK PLUG SEAT TO PROTECT IT FROM POTENTIAL OIL SPLASHES. • Press the starter button for some seconds to distribute the oil evenly on the cylinder surfaces. • Remove the protection cloth. •...
-
Page 94: Cleaning The Vehicle
Cleaning the vehicle Clean the motorcycle frequently if exposed to adverse conditions, such as: • Air pollution (cities and industrial areas) • Salinity and humidity in the atmosphere (seashore areas, hot and wet weath- er). • Special environmental/seasonal conditions (use of salt, anti-icing chemical products on the roads in winter). - Page 95 CAUTION TO CLEAN THE HEADLIGHTS USE A SPONGE SOAKED IN WATER AND MILD DETERGENT, RUBBING THE SURFACE GENTLY AND RINSING FREQUENTLY WITH PLENTY OF WATER. REMEMBER TO CLEAN THE VEHICLE CAREFULLY BEFORE ANY POLISHING WITH SILICON WAX. DO NOT USE ABRASIVE PASTES TO POLISH MATT FINISH PAINTWORK. THE VEHICLE SHOULD NEVER BE WASHED IN DIRECT SUNLIGHT, ESPECIAL- LY DURING SUMMER, WITH THE BODYWORK STILL HOT, AS THE SHAMPOO CAN DAMAGE THE PAINTWORK IF IT DRIES BEFORE BEING RINSED OFF.
-
Page 96: Transport
Transport CAUTION BEFORE TRANSPORTING THE VEHICLE, EMPTY THE FUEL TANK WELL AND MAKE SURE IT IS PERFECTLY DRY. DURING TRANSPORT, THE VEHICLE SHOULD BE AT ALL TIMES UPRIGHT AND WELL ANCHORED SO AS TO AVOID FUEL, OIL OR COOLANT LEAKS. IN CASE OF FAILURE, DO NOT HAVE THE MOTORCYCLE TOWED. - Page 97 CAUTION AFTER EMPTYING THE TANK, REFIT THE FUEL TANK CAP.
-
Page 99: Technical Data
SCARABEO 125 i.e - 200 i.e. Chap. 05 Technical data... - Page 100 VEHICLE TECHNICAL DATA Max. length 2040 mm Max. width 720 mm Max. height (to windshield) 1372 mm Saddle height 810 mm Wheelbase 1391 mm Minimum ground clearance 145 mm Weight in running order (kerb 154 kg weight) Engine oil (Engine oil change and 1000 cm³...
- Page 101 Steering rake 26.5° Front suspension Hydraulic action telescopic fork Front suspension travel 104 mm Rear suspension hydraulic action double-acting shock absorber, adjustable preloading Rear suspension travel 80 mm Front disc Ø 260 mm disc brake with hydraulic transmission Rear drum Ø...
- Page 102 Battery 12V - 10 Ah FUSES 20 - 15 - 15 - 15 A Alternator (permanent magnet 12 V - 330W at 8000 rpm type) ENGINE TECHNICAL DATA Engine model BB01 (125) CB01 (200) Engine type Single-cylinder, 4-stroke, 4 valves, wet sump forced lubrication system, double overhead camshaft.
- Page 103 Clutch Automatic centrifugal dry clutch Gearbox Automatic Cooling forced-circulation air cooling driven by a centrifugal pump Fuel system Electronic injection. Throttle body diffuser Ø 32 mm Fuel Premium unleaded petrol, minimum octane rating of 95 (NORM) and 85 (NOMM) Ignition type Electronic Spark plug NGK PMR9B...
-
Page 104: Kit Equipment
Turn indicator warning light (*) High beam warning light (*) Low fuel warning light (*) Engine oil pressure warning light Electronic fuel injection check warning light (*) Kit equipment (05_01) The tool kit «3» is located in the specific housing, in the glove-box. Open the glove-box. -
Page 105: Programmed Maintenance
SCARABEO 125 i.e - 200 i.e. Chap. 06 Programmed maintenance... -
Page 106: Scheduled Maintenance Table
Scheduled maintenance table CAUTION FIRE HAZARD. FUEL OR ANY OTHER INFLAMMABLE SUBSTANCES MUST NOT BE CLOSE TO ELECTRICAL COMPONENTS. BEFORE ANY MAINTENANCE OPERATION OR INSPECTION ON THE MOTOR- CYCLE, SHUT OFF THE ENGINE AND REMOVE THE KEY. WAIT UNTIL THE ENGINE AND THE EXHAUST SYSTEM ARE COLD, IF POSSIBLE LIFT THE SCOOTER WITH A SPECIFIC TOOL ON A FIRM AND LEVEL GROUND. - Page 107 For servicing or technical advice, consult an Official aprilia Dealer for prompt and accurate service. Ask your Official aprilia Dealer to test the vehicle on the road after a repair but none- theless, personally carry out the Pre-ride Checks after a maintenance operation.
- Page 108 Km x 1,000 Air filter Transmission cover air deflector filter Engine oil filter Valve clearance Braking systems Electrical system and battery Brake fluid ** Coolant level** Hub oil Engine oil* Headlight direction adjustment Sliding shoes / CVT rollers Vehicle road test Variator front movable half-pulley Radiator Wheels/ tyres...
- Page 109 C: CLEAN, R: REPLACE, A: ADJUST, L: LUBRICATE * Check level every 3,000 km ** Replace every 2 years *** Replace every 4 years RECOMMENDED PRODUCTS TABLE Product Description Specifications AGIP TEC 4T, SAE 10W-40 Engine oil 10W-40 AGIP GEAR SYNTH SAE 75W-90 Gearbox oil API GL4, GL5 AGIP FORK 7.5W...
-
Page 111: Special Fittings
SCARABEO 125 i.e - 200 i.e. Chap. 07 Special fittings... - Page 112 Sidestand (07_01, 07_02) The side stand is optional. To access the fitting point: • Undo the screw «1» of the cap 2» of the spoiler on the left of the vehicle; • Remove the cap «2». 07_01 07_02 Luggage rack The case plate and three different case models are optional: - New Concept;...
- Page 113 Windscreen (07_03) The windshield is supplied as optional. • If replacing the glass of the optional high windshield is required, first fit the high instrument panel frame supplied with the vehicle in the place of the in- strument panel upper frame. 07_03...
- Page 115 TABLE OF CONTENTS Mirrors: 90 Air filter: 63, 64 Headlight: 85 Horn: 25 Hub oil: 58 rear-view mirrors: 90 Battery: 72, 76 Brake: 69, 90 Identification: 28 Saddle: 27 Instrument panel: 16 Scheduled maintenance: Disc brake: 90 Shock absorber: 36 Display: 21 Spark plug: 60 Key switch: 22...
- Page 116 Only by requesting Aprilia Original Spare Parts can you be sure of purchasing products that were developed and tested during the actual vehicle design stage. All Aprilia Original Spare Parts undergo quality control procedures to guarantee reliability and durability.
Need help?
Do you have a question about the SCARABEO and is the answer not in the manual?
Questions and answers