Table of Contents
Advertisement
Advertisement
Table of Contents

Subscribe to Our Youtube Channel
Summary of Contents for Hafele EB SERIES
- Page 1 1020*Tip* (EN) INSTRUCTION MANUAL IO-CBI-0161 / 8064847 (01.2016 / v1)
- Page 2 DEAR CUSTOMER, The oven is exceptionally easy to use and extremely efficient. After reading the instruction manual, operating the oven will be easy. Before being packaged and leaving the manufacturer, the oven was thoroughly checked with regard to safety and functionality. Before using the appliance, please read the instruction manual carefully.
-
Page 3: Table Of Contents
TABLE OF CONTENTS Safety instructions ......................4 Description of the appliance ..................... 8 Installation ......................... 10 Operation ........................... 13 Baking in the oven – practical hints ................48 Cleaning and maintenance ....................50 Troubleshooting........................55 Technical data ........................56... -
Page 4: Safety Instructions
SAFETY INSTRUCTIONS Warning: The appliance and its accessible parts become hot during use. Care should be taken to avoid touching heating elements. Children less than 8 years of age shall be kept away unless continuously supervised. This appliance can be used by children aged from 8 years and above and persons with reduced physical, sensory or mental capabilities or lack of experience and knowledge if they have been given supervision or instruction concerning... - Page 5 SAFETY INSTRUCTIONS Danger of burns! Hot steam may escape when you open the oven door. Be careful when you open the oven door during or after cooking. Do NOT lean over the door when you open it. Please note that depending on the temperature the steam can be invisible.
- Page 6 HOW TO SAVE ENERGY Using energy in a respon- sible way not only saves money but also helps the environment. So let’s save energy! And this is how you can do it: Do not uncover the pan too often (a watched pot never boils!).
- Page 7 DISPOSAL OF THE APPLIANCE UNPACKING Old appliances should not sim- During transportation, protec- ply be disposed of with normal tive packaging was used to household waste, but should protect the appliance against be delivered to a collection and any damage. After unpack- recycling centre for electric and ing, please dispose of all electronic equipment. A symbol...
-
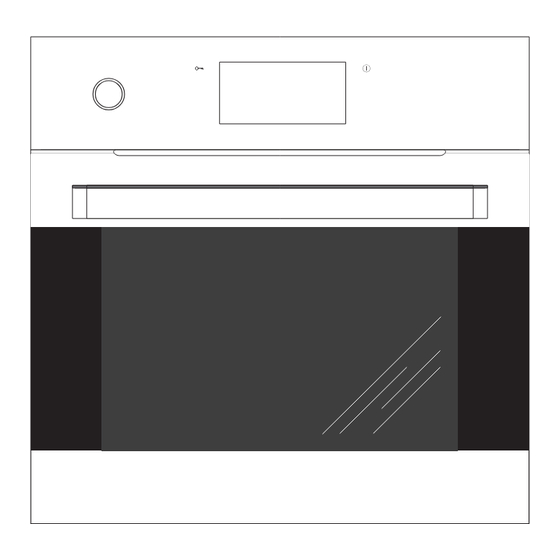
Page 8: Description Of The Appliance
DESCRIPTION OF THE APPLIANCE Touch screen con- trol panel Water container On/Off switch drawer Child Lock Built-in LAN port Built-in USB con- nector Oven door handle... - Page 9 SPECIFICATIONS OF THE APPLIANCE Cooker fittings: Grill grate Baking tray* (drying rack) Roasting tray* Perforated bowl Solid bowl Meat probe Wire shelf supports Steam generator *optional...
-
Page 10: Installation
INSTALLATION Installing the oven The kitchen area should be dry and aired and equipped with efficient ventillation. When installing the oven, easy access to all control elements should be ensured. This is a Y–type design built–in oven, which means that its back wall and one side wall can be placed next to a high piece of furniture or a wall. -
Page 11: Electrical Connection
INSTALLATION Electrical connection Adjust the position of the oven door Adjustment mechanism allows you to change The oven is manufactured to work with the height of right side of the oven door a one-phase alternating current (230V as limited by its design. Oven door height 1N~50 Hz) and is equipped with a 3 adjustment on one side allows you to level x 1,5 mm... - Page 12 INSTALLATION Connect the oven to the Internet To take advantage of the advanced oven If wireless Internet access is available, features, connect it to the Internet. use the supplied wireless router. You need to first connect the router to your This can be done in two ways: PC and connect it to an available wireless network (you will need the name of the...
-
Page 13: Operation
OPERATION Before using the appliance for There is a special application for PCs, tablets and smartphones that will help you the first time use the appliance and update its firmware. Use the application to upload, modify and Remove packaging, clean the interior of manage recipes, photo albums, weather the oven, settings, remote control settings and... - Page 14 OPERATION Using the control panel The bottom widgets bar 1 BACK - touch to go back to the previous page/menu or up one level 2 COOKBOOK - touch to open the cook book, 3 TIMER - touch to set the timer, 4 SHORTCUTS - touch to display the default and user programmable shortcuts, as shown below,...
- Page 15 OPERATION Drop-down widget menu When you select the Grill Heating Function for a shortcut, touch the symbol to save it. Touch the symbol on the screen to expand the menu. Once your choice is saved, the new shortcut populates the selected placeholder in the menu.
- Page 16 OPERATION Firmware Update Widget. The List of Appliances widget When an Internet connection is detected, the Touch the widget pictogram to view the list of appliance will attempt once a day to contact home appliance on the network. The status of the update server and download the latest a washing machine, dishwasher, cooker and firmware version (if available). If an Internet...
- Page 17 OPERATION Select Language Set current time After connecting the appliance to the mains, Once your preferred language is set you the user is prompted to select the menu now need to confirm the current time by language. touching OK or set the time using the slider or the +/- soft keys. Touch OK to confirm the Select your preferred language from the rotat- current time.
- Page 18 OPERATION Main Menu Set the current date Stop the carousel and touch a menu item to Touch in standby to display current time. enter the submenu. Another way to select the Touch the screen anywhere to activate the Settings menu item is to touch OK when the appliance and display the main menu.
- Page 19 OPERATION Main Menu \ Settings The following language menu items are Stop the carousel and touch the Settings available: menu item to enter the submenu. Another - Deutsch, way to select the Settings menu item is to - English, touch OK when the carousel has stopped. - Polski, - Пo pyccки, The following Settings menu items are avail-...
- Page 20 OPERATION Setting Duration (for a heating function) - clock type, - time format. When you select any heating function the display will look as shown below (before Swipe your finger across the screen to rotate setting the Duration or End time) - the screen the menu items. Stop the carousel and touch is dimmed.
- Page 21 OPERATION bar. The appliance will show time countdown Set Duration and End Time (for a heating function) and the animated red progress bar below End Time. A) Set the Duration. For more details on how to Set the Duration, please refer to the Set the Duration (for the heating function) section.
- Page 22 OPERATION Main Menu \ Settings \ Time \ Timer C) Appliance operation in selected mode When the current time reaches the start time, Stop the carousel and touch the Timer menu the appliance will start the selected heating item to enter the submenu. Another way to function.
- Page 23 OPERATION Touch OK to acknowledge and mute the Menu \ Setup \ Time \ Clock type acoustic signal. Afterwards the appliance will display the Duration screen. If you do not Stop the carousel and touch the Clock Type set the Duration or does not restart the Timer menu item to enter the submenu.
- Page 24 OPERATION Menu \ Setup \ Lighting Main Menu \ Setup \ Time \ Time Format Stop the carousel and touch the Lighting Stop the carousel and touch the Time Format menu item to enter the submenu. Another menu item to enter the submenu. Another way to select the Lighting menu item is to way to select the Clock Type menu item is to touch OK when the carousel has stopped.
- Page 25 OPERATION Main Menu \ Settings \ Sound Access handle backlight menu to select re- sidual heat mode or decorative mode Stop the carousel and touch the Sound menu item to enter the submenu. Another way to Decorative mode select the Sounds menu item is to touch OK Activate the decorative mode to use the back- when the carousel has stopped.
- Page 26 OPERATION Main Menu \ Settings \ Sound \ Menu Sound Main Menu \ Settings \ Sounds \ Oven Pre- heat End Sound Stop the carousel and touch the Sounds menu item to enter the submenu. Another Select the sound in the same way as de- way to select a menu item is to touch OK scribed in the previous section.
- Page 27 OPERATION Main Menu \ Settings \ Brightness Main Menu \ Settings \ Themes Main Menu \ Settings \ Brightness Stop the carousel and touch the Themes Stop the carousel and touch the Brightness menu item to enter the submenu. Another menu item to enter the submenu.
- Page 28 OPERATION Main Menu \ Settings \ Weather Main Menu \ Settings \ Firmware update Stop the carousel and touch the Weather Stop the carousel and touch the Firmware menu item to enter the submenu. Another update menu item to enter the submenu. way to select a menu item is to touch OK Another way to select the Firmware update when the carousel has stopped.
- Page 29 OPERATION Main Menu \ Settings \ Service Stop the carousel and touch the Service menu item to enter the submenu. Another way to select a menu item is to touch OK when the carousel has stopped. Possible error messages: - No errors - E0 - temperature sensor error - E1 - meat probe sensor error - E2 - steam generator sensor error...
- Page 30 OPERATION Main Menu \ Settings \ Special Settings Touch the Remote Control menu item to en- able or disable remote control. The selected Stop the carousel and touch the Special symbol is highlighted in red. Touch OK to Settings menu item to enter the submenu. confirm your selection.
- Page 31 OPERATION Main Menu \ Heating Functions Stop the carousel and touch the Heating Functions menu item to enter the submenu. Another way to select a menu item is to touch OK when the carousel has stopped. The following heating functions menu items are available: Overview of heating functions, possible tem- perature and default settings.
- Page 32 OPERATION Main Menu \ Heating Functions \ Fan Touch at any time to end programme and cooking exit to an upper menu level showing the avail- (Operation of any function using the ex- able heating functions. ample of fan cooking) Stop the carousel and touch the fan cooking menu item to enter the submenu.
- Page 33 OPERATION Using the meat probe acoustic signal. If you do not start the programme again within 60 seconds, the Plug in the meat probe into the socket and appliance will display the current time. select a desired heating function. Opening the door during a programme dis- Default meat probe temperature of 80°C is connects the heating elements and convec- shown in temperature box on the display.
- Page 34 OPERATION Main Menu \ Preset Programmes Stop the carousel and touch the Preset Pro- grammes menu item to enter the submenu. Another way to select a menu item is to touch OK when the carousel has stopped. The following Preset Programmes are avail- able: meat, poultry, pizza, frozen products, pastry, steam cooking, low temperature bak- ing, extra programmes.
- Page 35 OPERATION pastries crumble cake fruitcake cheesecake Swiss roll sponge cake muffins cookies bread Steam programmes sliced vegetables Function 1 frozen vegetables Function 2 broccoli, cauliflower Function 3 Asparagus Function 4 jacket potatoes Function 4 Vegetable casserole Function 5 Fish Function 6 Sea food Function 7 meat Function 8...
- Page 36 OPERATION low temperature rare fillet of beef baking medium rare fillet of beef beef roulade pork neck roast pork roast beef rare roast beef turkey breast pork loin veal additional pro- dough proving grammes drying 2, 3, 4 keep food warm heating plates pasteurization...
- Page 37 OPERATION Touch the BACK icon to exit the Weight Example: using a preset program with no setting screen. oven preheating Touch +/- soft keys or use the slider bar to set the required Weight with 0.1 kg steps. Touch Stop the carousel and touch the Poultry menu OK to confirm the desired Weight setting. The item to enter the submenu containing the Weight setting screen will close.
- Page 38 OPERATION set for the oven chamber and END TIME, The oven is equipped with special stainless display backlight is flashing. steel bowls: Touch OK or anywhere on the screen to ac- - perforated for vegetables and fish knowledge and mute the acoustic signal. After - solid for meat. this, the appliance switches to standby mode. Place bowls on the appropriate level in ac- cordance with the displayed message.
- Page 39 OPERATION Menu / User Programmes The display shows the set oven temperature, END TIME and symbol and display back- Stop the carousel on the User Programmes light is flashing. menu item and touch it to view a submenu of 20 user programmes that can be customized Touch OK to acknowledge and mute the to your needs.
- Page 40 OPERATION Editing user programme settings When in the User Programmes submenu, stop the carousel on the "EDIT" menu item (item 21 — first item to the left of Programme 1) and touch it to enter a submenu of 20 edit- able programmes. This will be indicated by the "edit mode" title at the top of the screen. "Edit mode"...
- Page 41 OPERATION Cookbook — QR code. Main menu / Cookbook When you view a recipe, the cookbook widget Stop the carousel and touch the Cookbook icon changes to a QR code. Touch the QR menu item to view a submenu with the fol- code symbol to maximise the QR on the lowing items: Pastries, Meat, Poultry, Italian screen.
- Page 42 OPERATION Main Menu / Cleaning acoustic signal. After this, the appliance switches to standby mode. Stop the carousel and touch the Cleaning menu item to enter the submenu. Another way to select the menu item is to touch OK when the carousel has stopped. The Cleaning Settings are as follows: the heating function —...
- Page 43 OPERATION Main Menu / Slideshow / Select Photo Main menu / Slide show Album Stop the carousel and touch the Slideshow Stop the carousel and touch the Select Photo menu item to view a submenu with the follow- Album menu item to view a submenu with the ing items: Select Photo Album, Transitions, following items: Album 1...
- Page 44 OPERATION Main Menu / Slideshow / Slideshow speed Main Menu / Slideshow / Slideshow order Stop the carousel and touch the Slideshow Stop the carousel and touch the Slideshow or- speed menu item to view the slideshow der menu item to view the slideshow viewing speed submenu.
- Page 45 OPERATION Main Menu / Slideshow / Run Slideshow Main menu / Slideshow / Update Photos Stop the carousel and touch the Run Slide- Stop the carousel and touch the Update Pho- show menu item to view the submenu. Touch tos menu item to enter the submenu. the selected item.
- Page 46 OPERATION Cooling fan operation ECO feature Cooling fan is started whenever oven cham- Eco function allows the use of residual heat ber temperature exceeds 50°C regardless of in the oven chamber to heat food. any heating function operating or not. Eco function is available for the following heating functions: Once cooking is finished the display shows...
- Page 47 OPERATION Automatic power cut-off Special functions If the oven operates any heating function for Child Lock a long (excessive) period of time, heating elements are disconnected. How to activate? Example: If oven cavity temperature is 200°C Touch and hold for 3 seconds to activate heater are turned off after about 3 hours.
-
Page 48: Baking In The Oven - Practical Hints
BAKING IN THE OVEN – PRACTICAL HINTS Baking we recommend using the baking trays which were provided with your cooker; it is also possible to bake in cake tins and trays bought elsewhere which should be put on the drying rack; for baking it is better to use black trays which conduct heat better and shorten the baking time;... - Page 49 BAKING IN THE OVEN – PRACTICAL HINTS ECO Fan Heater ECO Fan Heater is an optimised heating function designed to save energy when preparing food. You cannot reduce the cooking time by setting a higher temperature; preheating the oven is not recommended. Do not change the temperature setting and do not open the oven door during ...
-
Page 50: Cleaning And Maintenance
CLEANING AND MAINTENANCE Proper routine maintenance and cleaning of Note. After each use wipe the steam genera- the oven can significantly extend its trouble- tor dry with a sponge to collect water. Any free operation. remnants of the scale are best removed with water and vinegar. Turn off the oven before cleaning. - Page 51 CLEANING AND MAINTENANCE Ovens marked with the letters Dc have Ovens marked with the letter D are stainless steel sliding telescopic runners equipped with easily removable wire shelf attached to the wire shelf supports. The supports. To remove them for cleaning telescopic runners should be removed use size 3 Allen key to undo the Z1 and Z2 and cleaned together with the wire shelf fixing screws from shelf support holders...
- Page 52 CLEANING AND MAINTENANCE Replacing the halogen bulb in the oven 1. Unplug the appliance 2. Remove shelves and trays from the oven. Before replacing the halogen bulb, make 3. If the oven has telescopic runners, re- sure the appliance is disconnected from move them also.
-
Page 53: Door Removal
CLEANING AND MAINTENANCE Removing the inner panel Door removal 1. Using a flat screwdriver unhook the up- per door slat, prying it gently on the sides In order to obtain easier access to the oven (fig. B). chamber for cleaning, it is possible to remove 2. Pull the upper door slat loose. (fig. B, C) the door. - Page 54 CLEANING AND MAINTENANCE 3. Pull the inner glass panel from its seat Regular inspections (in the lower section of the door). Re- move the inner panel (fig. D). Besides keeping the oven clean, you 4. Clean the panel with warm water with should: some cleaning agent added. ● carry out periodic inspections of the con- Carry out the same in reverse order to trol elements and cooking units of the...
-
Page 55: Troubleshooting
TROUBLESHOOTING In the event of any fault: turn off the appliance, disconnect the power supply, based on the instructions given in the table below, some minor issues can be corrected by the user. Please check the consecutive points in the table before you refer the repair to customer service. -
Page 56: Technical Data
TECHNICAL DATA Voltage rating 230V~50 Hz Power rating max. 3,1 kW Oven dimensions H/W/D 59,5 / 59,5 / 57,5 cm Complies with EU regulations EN 60335-1, EN 60335-2-6 standards Certificate of compliance CE The Manufacturer hereby declares that this product complies with the general requirements pursuant to the following European Directives: ...
Need help?
Do you have a question about the EB SERIES and is the answer not in the manual?
Questions and answers