Table of Contents
Advertisement
Quick Links
Advertisement
Table of Contents

Subscribe to Our Youtube Channel
Related Manuals for vita vacumat 4000 premium t


Summary of Contents for vita vacumat 4000 premium t
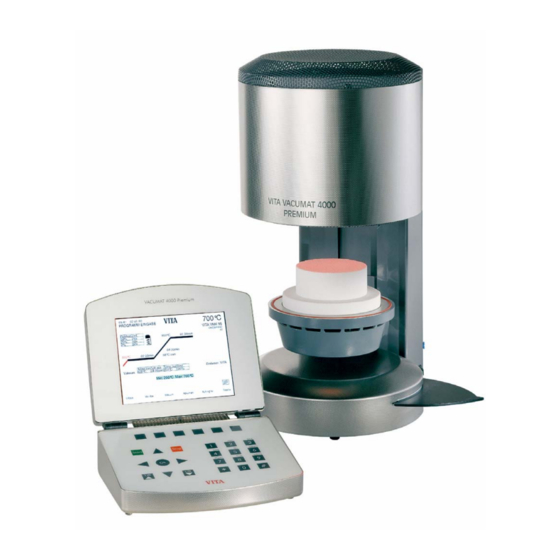
- Page 1 VITA VACUMAT 4000 ® PREMIUM T Operating manual Date of issue: 07- 07...
-
Page 2: Table Of Contents
® VITA Vacumat 4000 Premium T Table of contents 1 FOREWORD ...............................6 PICTOGRAMS............................6 COPYRIGHT ............................6 2 TECHNICAL INFORMATION ........................7 GENERAL DESCRIPTION .........................7 EXTERNAL CONTROL EQUIPPED WITH..................7 FIRING PROGRAMS..........................8 3 SERVICE PROGRAMS..........................8 4 SAVING OF FIRING DATA FOR QUALITY ASSURANCE................9 5 SAFETY FUNCTIONS ..........................9 6 DIMENSIONS/WEIGHTS ..........................10... - Page 3 ® VITA Vacumat 4000 Premium T 12.3 QUICKSTARTING A FIRING PROGRAM – QUICKSTART ............20 13 START MENU ............................21 14 STANDBY ..............................22 14.1 ADJUSTMENT OF STANDBY TEMPERATURE................22 14.2 START/STOP STANDBY MODE......................23 15 SELECTING A FIRING PROGRAM......................24 16 CHANGING PROGRAM VALUES......................26 16.1 CHANGING PROGRAM VALUES IN GRAPHICS MODE ..............26 16.2 CHANGING PROGRAM VALUES IN TABULAR MODE ..............28...
- Page 4 ® VITA Vacumat 4000 Premium T 23.15 DRY – PROGRAM (VITA IN-CERAM SPRINT) ................61 24 SOFTWARE UPDATE ..........................62 25 FACTORY SETTINGS ..........................62 26 FIRING TABELS ............................63 26.1 VITA VM 7 ............................63 26.2 VITA VM 9 ............................63 ® 26.3 VITAVM 9 FOR VITABLOCS ......................64...
-
Page 5: Foreword
Copyright These operating instructions must be treated confidentially. They should only be used by authorized persons. Disclosure to third parties is only permitted with the written approval of VITA Zahnfabrik H. Rauter GmbH&Co.KG. All documents are protected by copyright law. -
Page 6: Technical Information
® VITA Vacumat 4000 Premium T Technical information General description • Powerful in technology – highest level of temperature accuracy due to temperature control via 2 temperature sensors – time saving operating comfort – modest spatial requirements - optimal firing results •... -
Page 7: Firing Programs
® VITA Vacumat 4000 Premium T Firing programs • Memory capacity for approx. 500 firing programs. • Adjustment of standby temperature. • Arrangement of firing programs acc. to material groups. • Possibility of numerical/alpha-numerical input of firing groups/firing programs. • Creation, deletion, changing, copying/inserting, sorting of material groups. -
Page 8: Saving Of Firing Data For Quality Assurance
® VITA Vacumat 4000 Premium T Saving of firing data for quality assurance • Saving of nominal and actual firing data values (see section 23.5 ). • Saving of user name, equipment-no., date of firing incident, job-no., • Saving of material information via scanner* (manufacturer, article-no., batch-no.) •... -
Page 9: Dimensions/Weights
® VITA Vacumat 4000 Premium T Dimensions/weights Firing unit • Width: 240 mm • Depth: 340 mm • Height: 460 mm • Housing: Steel/stainless steel • Weight: 14,0 kg • Firing chamber capacity: Diameter: 90 mm Height: 55 mm • Firing chamber temperature: max. -
Page 10: Installation And Start-Up
® VITA Vacumat 4000 Premium T Installation and start-up Mounting location • Install the unit in a dry, heated room with a clearance of at least 25 cm to the near- est wall. • With temperatures below 15 °C (e.g. after... -
Page 11: Connecting The Unit To The Mains Supply
® VITA Vacumat 4000 Premium T Connecting the unit to the mains supply Before start-up, observe item 4 "Notes on safety"! • Plug the connecting cable into control unit (2/1) and firing unit. • Connect the vacuum pump (Abb. 1) •... -
Page 12: Shutting Down The Unit, Out Of Operation
® VITA Vacumat 4000 Premium T Shutting down the unit, out of operation If the unit is not used the lift should be retracted into the firing chamber and the unit switched off by the main switch (see Fig. 1, item 2). Closing the firing chamber protects the insulation and prevents the absorption of moisture. -
Page 13: Notes On Information Decals
® VITA Vacumat 4000 Premium T Notes on information decals This symbol warns of dangerous voltage. Before opening the unit it must be isolated from the power supply by pulling out the mains plug. After removing the back plate and... -
Page 14: Cleaning The Firing Unit
® VITA Vacumat 4000 Premium T Cleaning the firing unit Pull out the mains plug before starting to clean! Cleaning of the firing chamber from inside is not necessary, regular cleaning of the housing with a damp cloth enhances the operational reliability. -
Page 15: Fan
Warranty and liability The warranty and liability depends on the conditions agreed upon by contract. Changes to the software without the knowledge of and approval by VITA Zahnfabrik H. Reuter GmbH & Co KG cause the exemption from liability and warranty. -
Page 16: Temperature Rise
® VITA Vacumat 4000 Premium T Temperature rise The program shows the temperature rise in °C/Min. and in Min / sec. The input value can be selected in the range from °C/Min (20 °C – 120 °C) or Min/sec. (2:00 – 40:00). The second value is automati- cally calculated and displayed. -
Page 17: User Assigned Programs
Stick the system changes over to this user after plugging in. The display shows the name of the user. If no Memory Stick is plugged in, VITA will be displayed as user. 11.1 Changing the user/creating a user Unit switched on, main menu is displayed. -
Page 18: General Operation Of Unit
® VITA Vacumat 4000 Premium T General operation of unit The control unit is solely to be operated with the pin supplied for this purpose. The use of other means for opera- tion will cause damage to the touch- screen and possible malfunctions. -
Page 19: Alphanumerical/Numerical Input
® VITA Vacumat 4000 Premium T 12.2 Alphanumerical/numerical input When actuating for alphanumerical inputs the keypad is displayed. Click on a field: The field is highlighted in colour. The input of a value deletes the existing value. Touch the field with the pin behind the last digit: The cursor is displayed. -
Page 20: Start Menu
® VITA Vacumat 4000 Premium T Start menu The control unit is solely to be operated with the pin supplied for this purpose. The use of other means for operation will cause damage to the touchscreen and pos- sible malfunctions. -
Page 21: Standby
® VITA Vacumat 4000 Premium T Standby 14.1 Adjustment of standby temperature Press button "Standby" in the start menu. • Enter a value via the numerical key- pad (1). • Press button "OK" (2) to confirm or "Can- cel" (3) without changing the tempera-... -
Page 22: Start/Stop Standby Mode
® VITA Vacumat 4000 Premium T 14.2 Start/stop standby mode • Press button "Start" (1) in the start menu, the lift moves to top position, the heating is active. • Press button "Open" (2), switch on the heating, the lift moves down to bottom position. -
Page 23: Selecting A Firing Program
® VITA Vacumat 4000 Premium T Selecting a firing program • Select one of the displayed program groups (1) from the start menu. • Choose the desired program in the firing table (2). • Press button "Select program" (3) to se- lect the program. - Page 24 ® VITA Vacumat 4000 Premium T The Info bar (10) shows the active program section. The chronological sequence is displayed green in the firing curve (9). • Press button "Stop" (11) to terminate the program. Press button "OK" after the end of the pro-...
-
Page 25: Changing Program Values
® VITA Vacumat 4000 Premium T Changing program values Time and temperature values as well as vacuum activation and deactivation values can be changed in graphics and tabular mode. Values for lift positions pre-drying, cooling, vacuum value and pre-vacuum are changed in graphics mode. - Page 26 ® VITA Vacumat 4000 Premium T Do not save value • Press button "Start" (5). • Press button No The program runs with changed values. After the sequence return to the originally saved value. Save value • Press button "Save" (6).
-
Page 27: Changing Program Values In Tabular Mode
® VITA Vacumat 4000 Premium T 16.2 Changing program values in tabular mode • Select the program group in the start menu. The process for changing program values is explained on the example for changing the pre-drying time. • Select the program (1). - Page 28 ® VITA Vacumat 4000 Premium T • Enter a value via the numerical key- pad (5). • Press button "OK" (6). • Change other values as required. • Press button "Back" (7). Values changed in tabular mode are saved. • Press button "Select program" (8).
-
Page 29: Lift Positions And Position Times For Pre-Drying
® VITA Vacumat 4000 Premium T Lift positions and position times for pre-drying For the pre-drying phase 3 lift positions are available. • Pos. 1 – bottom position – the possible input value is 0 – 30 %, the time value 0 – 2:00 Min. -
Page 30: Direct Input Of Changes For Lift Position And Position Time
® VITA Vacumat 4000 Premium T 17.1 Direct input of changes for lift position and position time. • Select the program group in the start menu. • Select the program. Example: Change of lift position 1: • Actuate the field "Lift position 1" (1). - Page 31 ® VITA Vacumat 4000 Premium T • Press button "OK" (5). • Press button "Start" (6). The program runs with the specified values. This sequence applies for all changes to all program values in graphics mode.
-
Page 32: Input Of Changes To Lift Position And Position Time In The Pre-Drying Menu
® VITA Vacumat 4000 Premium T 17.2 Input of changes to lift position and posi- tion time in the pre-drying menu . • Select the program group in the start menu. • Select a program. e.g. change of lift position 1. -
Page 33: Lift Positions For Cooling
® VITA Vacumat 4000 Premium T Lift positions for cooling • Select the program group in the start menu. • Select the program. • If cooling is not activated press button "Cooling On/Off" (1), basic values are displayed. 18.1 Direct input of changes to the lift position cooling •... -
Page 34: Entering Changes To The Lift Position In The Cool Down Menu
® VITA Vacumat 4000 Premium T • Actuate the field for "Lift position" (5), the keypad (6) is displayed. • Enter the value. • Press button "OK" (7). • Press button "Start" (8). After expiration the original value is re- stored. - Page 35 ® VITA Vacumat 4000 Premium T Press input field "%" (2) or button "Lift" (3). • Enter the value (6). • Press button "Lift up" or "Lift down" (4). • Press button "OK" (5). • Press symbol "Cooling" (7). Start the program with changed value.
-
Page 36: Vacuum Settings
® VITA Vacumat 4000 Premium T Vacuum settings • Select the program group in the start menu. • Select the program. • Press button "Main vacuum On/Off" (1) Activate/deactivate vacuum. • Press button "Save" (2). When choosing "On" the basic values will be accepted. - Page 37 ® VITA Vacumat 4000 Premium T In case of program changes, for pre-drying temperature/start temperature, end temperature and rise time the times for switching on and off are automatically adapted. The pump running time is identical with the rise time.
-
Page 38: Pre-Vacuum Adjustment
® VITA Vacumat 4000 Premium T Pre-vacuum adjustment • Select the program group in the start menu. • Select the program. • Actuate the field "Pre-vacuum" (1) – activate/deactivate pre-vacuum. • Actuate the field "Duration" or "Value", the keypad is displayed. - Page 39 ® VITA Vacumat 4000 Premium T • Press button "New" (2). • Enter the program name, e.g. Test (see also section 12.2). • Press button "OK" (3). • Press button "Up" (4) or "Down" (5). • Press button "OK" or "Main menu".
-
Page 40: Deleting Program Groups
® VITA Vacumat 4000 Premium T 21.1 Deleting program groups. Deleting a program group also de- letes the associated firing program. • Press button "Edit" (1) • Press button "Delete" (2). • Select the program group (3). • Press button "OK" (4). -
Page 41: Changing A Program Group
® VITA Vacumat 4000 Premium T • Press button "Main menu" (5). 21.2 Changing a program group • Press button "Edit" (1) • Press button "Change" (2). - Page 42 ® VITA Vacumat 4000 Premium T • Select the program group (3). • Press button "OK" (4). • Enter the program name (see also section 12.2). • Press button "OK" (5). • Press button "Main menu" (6).
-
Page 43: Copying/Inserting A Program Group
® VITA Vacumat 4000 Premium T 21.3 Copying/inserting a program group • Press button "Edit" (1) in the start menu. • Press button "Copy/Insert" (2). • Select the program group (3). • Press button "OK" (4). -
Page 44: Sorting Program Groups
® VITA Vacumat 4000 Premium T • Press button "Stick" (6) or "VITA" (5). • Sort with buttons "Up" (7) or "Down" (8). • Press button "OK" (9). • Press button "Main menu" (10). When inserting a program group with the same name a number will be added. - Page 45 ® VITA Vacumat 4000 Premium T • Press button "Sort" (2). • Select the program group (3). • Move the group with buttons "Up" (4) or "Down" (5). • Press button "OK" (6). • Press button "Main menu" (7).
-
Page 46: Creating New Firing Programs
® VITA Vacumat 4000 Premium T Creating new firing programs If a new program group is to be created first, refer to section 21. • Select the program group in the start menu (1). When creating program groups on the Memory Stick you should change to the main menu before pulling out/plugging in. - Page 47 ® VITA Vacumat 4000 Premium T Enter a program name via the keypad (4). • Press button "OK" (5) to confirm. The program offers basic values by default. For changing refer to section 22.2. • Press button "Back" (6). The programs offer basic values by default.
-
Page 48: Deleting Firing Programs
® VITA Vacumat 4000 Premium T 22.1 Deleting firing programs • Select the program group in the start menu (1). • Press button "Edit table" (2). • Press button "Delete" (3). - Page 49 ® VITA Vacumat 4000 Premium T • Select the program to be deleted (4). • Press button "OK" (5). • Select further programs to be deleted. • Press button "Back" (6).
-
Page 50: Changing Firing Programs
® VITA Vacumat 4000 Premium T 22.2 Changing firing programs • Select the program group in the start menu (1). • Press button "Edit table" (2). • Press button "Change" (3). - Page 51 ® VITA Vacumat 4000 Premium T • Select the program to be changed (4). • Press button "OK" (5) to confirm. Example: Changing the pre-drying time: • Press button "Pre-drying time" (6). • Enter a value via the keypad (7).
-
Page 52: Copying/Inserting Firing Programs
® VITA Vacumat 4000 Premium T 22.3 Copying/inserting firing programs • Select the program group in the start menu (1). • Press button "Edit table" (2). • Press button "Copy/Insert" (3). - Page 53 • Press button "Yes" (6) to add the pro- gram to the user "Vita". • Press button "No" (7) to add the program to the user "Stick". • Select the program group (8), e.g. "Vita VM 7". • Press button "OK" (9).
- Page 54 ® VITA Vacumat 4000 Premium T Sort with buttons "Up" (10) or "Down" (11). • Press button "Back" (12). • Press button "Back" (12). • Press button “Back” 13 • Press button “Main menu”...
-
Page 55: Service Programs
® VITA Vacumat 4000 Premium T Service programs • Press button "Service" in the start menu. The individual sections are activated by touching with the pin. Possible changes are saved by actuating the button "Accept". 23.1 Information about the unit/Software... -
Page 56: Export Failure Report
® VITA Vacumat 4000 Premium T 23.4 Screen settings Calibrating the touch panel This calibration must be carried out when actuation of a field on the screen does not trigger any action of the desired function. • Press button "Calibrate Touch–Panel". -
Page 57: Date/Time
® VITA Vacumat 4000 Premium T 23.7 Date/Time • Actuate "Date/Time". • Press field "Date" or "Time". Input date = DD: MM: YY Input time = HH: MM see also section "Display formats". • Press button "Accept". 23.8 Display formats Adjustment for temperature display: Temperature display in °C... -
Page 58: Lift Speed Settings
® VITA Vacumat 4000 Premium T 23.9 Lift speed settings Adjust the lift speed with the slide control. • Operate the slide control. • Press button "Accept". 23.10 Operating data Operating hours: Total time of unit Firing hours of heating:... -
Page 59: Temperature Calibration By Means Of Silver Test
23.11 Temperature calibration by means of silver test With this program and the VITA – Silver Text Set (VITA – Order-No. B 230) the temperature in the fir- ing chamber can be checked and readjusted within the range of plus/minus 20 °C. When adjusting make sure that the instructions for the performance (instructions in the silver test set) of the test with the silver sample are strictly applied. -
Page 60: Programs Cancel
• Press button "Accept". 23.14 Melody for end of program • Select desired length. • Press Accept button. 23.15 Dry – Program (Vita In-Ceram sprint) Temperature area 130°C – 700 °C Holding time for end tem perature 0- 60:00Min... -
Page 61: Software Update
Factory settings With "Factory Settings" the following func- tions are reset to factory settings: Firing programs acc. to VITA firing table, see section 26. Brightness / contrast, see section 23.4 Language German, see section 23.2 Time format to DD:MM:YY, see section 23.7 Stop single push button contact, see section 23.13... -
Page 62: Firing Tabels
* For non-shaded VITA In-Ceram YZ please carry out an EFFECT BONDER firing. ATTENTION: Do not carry out this firing in the case of shaded VITA In-Ceram YZ ! ** For shaded VITA In-Ceram YZ please carry out a BASE DENTINE Wash firing. -
Page 63: Vitavm ® 9 For Vitablocs
1.00 7.27 2. firing 6.00 7.16 1.00 7.16 Glaze firing VITA SHADING 4.00 5.00 1.00 0.00 PASTE “glaze” Glaze firing VITA Akzent finishing 4.00 5.00 1.00 0.00 agent Corrective firing CORRECTIVE 4.00 4.20 1.00 4.20 26.4 VITA VM 13 Pre- Temp. -
Page 64: Vita Vmk 95
2. dentine friring 6.00 7.48 1.00 7.48 Glaze firing 0.00 4.52 1.00 Glaze firing VITA Akzent 4.00 4.52 1.00 Glaze firing VITA Glaze LT 4.00 4.45 1.00 Correction firing with CORRECTIVE 4.00 7.00 1.00 7.00 26.6 VITA VMK 95 Pre- Temp. drying approx. -
Page 65: Vita Omega 900
6.00 1.00 6.00 Correction porcelain firing with 4.00 6.00 1.00 6.00 Glaze firing 4.00 2.00 ® Glaze firing with VITA Akzent 4.00 4.00 2.00 Fluid Glaze firing with Glaze Akz25 4.00 4.00 1.00 26.8 VITA TITANIUM PORCELAIN Pre- Temp. drying approx. -
Page 66: Vitadur Alpha
6.00 6.00 1.00 6.00 Dentine firing 6.00 6.00 1.00 6.00 Glaze firing 4.00 1.00 Glaze firing with VITA Akzent 4.00 3.00 1.00 Fluid Glaze firing without glaze 4.00 3.00 1.00 ® 26.10 Soldering in VITA VACUMAT 4000 Premium T Method 1 Preheat the objects in the muffle preheating oven with solder flux and soldering balls for 15-20 min- utes at 400 °C. -
Page 67: Error Messages
® VITA Vacumat 4000 Premium T Error messages Message in display Detection Test/remedy • Check/clean/replace the lift plate seal • Clean the sealing edge on the firing chamber floor. Cleaning work see sec- If a value of at tion 8.3 least 30 % is not •... - Page 68 ® VITA Vacumat 4000 Premium T Message in display Detection Test/remedy • Check connection of thermo element X 20 on the printed circuit board. • Check the connection of the thermo element on the firing chamber. Program is aborted • Check the connection of the thermo element in the firing chamber.
- Page 69 ® VITA Vacumat 4000 Premium T Message in display Detection Test/remedy Fuse defective, see section Replace defective fuse Permanent sound of approx. 6 seconds Permanent sound Check heater connection on circuit board Replace CPU – circuit board...
- Page 70 ® VITA Vacumat 4000 Premium T Adjustment of standby temperature · 22 General description · 7 Alphanumerical input · 20 Automatic temperature adjustment · 17 Information about the unit · 56 Information decals · 14 CE – Sign · 15 Initial start-up of unit ·...
- Page 71 Vacuum settings · 37 Scope of delivery · 10 Vacuum value · 38 Screen settings · 57 Vita In-Ceram sprint · 61 Selecting a firing program · 24 VITA OMEGA 900 · 66 Service programs · 8, 56 VITA TITANIUM PORCELAIN · 66 Shutting down the unit ·...
- Page 72 With the unique VITA SYSTEM 3D-MASTER ® all natural tooth shades are systematically determined and completely reproduced. Please note: Our products should be used according to the working instructions. We cannot be held liable for damages resulting from incorrect handling or usage.
Need help?
Do you have a question about the vacumat 4000 premium t and is the answer not in the manual?
Questions and answers