
Related Manuals for vita V60 i-Line PLUS


Summary of Contents for vita V60 i-Line PLUS
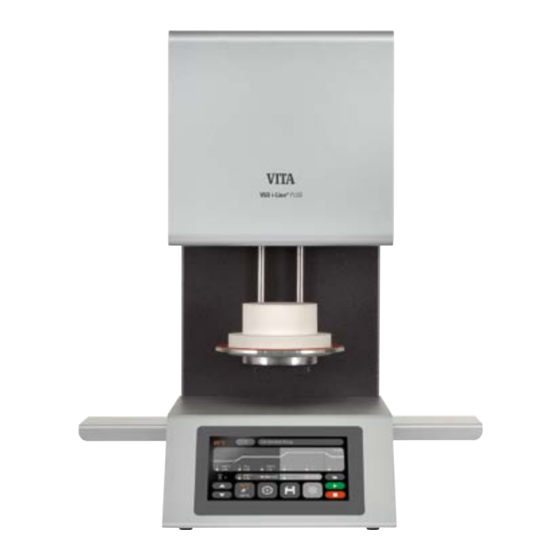
- Page 1 VITA V60 i-Line® PLUS Instructions for use VITA Farbkommunikation VITA Farbkommunikation VITA shade determination VITA shade communication VITA shade reproduction VITA shade control VITA – perfect match.
-
Page 2: Table Of Contents
VITA V60 i-Line® PLUS Table of Contents 1 Scope of delivery . . . . . . . . . . . . . . . . . . . . . . . . . . . . . . . . . . . . . . . . . . . . . . . . . . . . . . . . . . . . . . . . . . . . . . . . . . . . . . . . . . . . . . . . 5 1 .1 Contents of the package . - Page 3 VITA V60 i-Line® PLUS 14 Switching the device on . . . . . . . . . . . . . . . . . . . . . . . . . . . . . . . . . . . . . . . . . . . . . . . . . . . . . . . . . . . . . . . . . . . . . . . . . . . . . . . . . . 13 14 .1 Start/change to standby .
- Page 4 As a quality manufacturer of dental ceramic materials and devices, VITA Zahnfabrik ensures that only high-quality materials were used in the development and manufacture of the VITA V60 i-Line PLUS. Our experience based on over 30 years of ceramic furnace development is reflected in this product.
-
Page 5: Scope Of Delivery
VITA V60 i-Line® PLUS 1 Scope of delivery 1.1 Contents of the package Complete with • 1 VITA V60 i-Line furnace • 1 Firing platform • 1 Cable for mains power connection • 1 Operating Manual • 1 Connection cable for the vacuum pump •... -
Page 6: Electrical Data
Power consumption: max. 1500 watt 5 Intended use 5.1 Intended purpose and basics of device construction The VITA V60 i-Line PLUS is a fully automatic and microprocessor-controlled firing unit for all dental ceramic firing processes. 5.2 Unauthorized modes of operation The operation of the device with power sources, products, etc., which are... -
Page 7: Safety Information
VITA V60 i-Line® PLUS 6 Safety information 6.1 Pictograms The manufacturer is not liable for accidents to the user occurring when the device is open! Never operate the device without the firing base installed. In continuous operation (max. final temperature, max. firing time), some parts of the firing chamber may reach high temperatures (above 70°C). -
Page 8: Setup And Connections
VITA V60 i-Line® PLUS 7 Setup and connections 7.1 Installation location • Install the device in a dry, heated room. The distance to the closest wall should be at least 25 cm (see also Section 6.2, Ambient conditions). • When the temperature is below 15°C (e.g., after transport), leave the device to stand for approx. -
Page 9: Startup
VITA V60 i-Line® PLUS 8 First commissioning Before the first use, please read the Safety Information in Section 6! For information about the device connections, refer to Section 7.2 • Connect vacuum pump with electrical connection and tubing connection to the device. -
Page 10: Cleaning The Furnace
VITA V60 i-Line® PLUS 9 Cleaning the furnace Important! Before each cleaning operation, remove the power supply plug! It is not necessary to clean the inside of the firing chamber. Cleaning the casing of the firing chamber at regular intervals with a damp cloth contributes to its operating safety. -
Page 11: Ce Mark
VITA V60 i-Line® PLUS 10 CE mark With the CE mark, a legally binding declaration is made that the device meets the essential requirements of Directive 2006/42/EC (on machines), Directive 2011/65/EU (RoHS) as well as Directive 2014/30/EU (EMC). 11 Mains power supply failure The instrument is equipped with power supply failure protection. -
Page 12: Warranty And Liability
The warranty and liability are based on the terms and conditions stipulated in the contract. In the event of software modifications without the knowledge and approval of VITA Zahnfabrik H. Rauter GmbH & Co. KG, all liability and warranty claims are invalidated. -
Page 13: Switching The Device On
The first time standby is started after switching on the firing device, the firing chamber remains slightly open for five minutes in order to remove moisture from the firing chamber (VITA AntiCon). The Standby button has two temperature values. You can choose between Normal Mode (adjustable standby temperature, e.g. -
Page 14: Operation And Functions
VITA V60 i-Line® PLUS 15 Operation and functions Program overview Program areas Figure 5 – Overview of operation and functions Designation Note Function Program backup Lock open, program open - lock closed, program backed up 18.7 Program number Entry field for program number 1 – 200... -
Page 15: Keyboard Functions
VITA V60 i-Line® PLUS 16 Keyboard functions When you touch a program area in the program overview, the associated editing window with keyboard appears. The values of the program area can be changed in the editing window. Figure 6 – Example of editing field for vacuum... -
Page 16: Select/Start Firing Programs
17 Select/start firing programs Firing programs for VITA ceramic materials are already preprogrammed in the VITA V60 i-Line PLUS. These correspond to the recommended VITA settings. A firing program is selected by entering the number. The preset assignment of the program numbers can be viewed via the program name (see Section 18.8 Changing the program name). -
Page 17: Changing Program Values
VITA V60 i-Line® PLUS 18 Changing program values To change the program values, touch the specific program area in which the values are to be changed. The associated editing window opens and program changes can be made. Pre-drying (see Section 18.1) First temperature rise/holding time (see Section 18.2) -
Page 18: Pre-Drying
VITA V60 i-Line® PLUS 18.1 Pre-drying Times for the individual pre-drying positions The possible holding times of the individual lift positions depend on the preselected pre-drying time. Therefore set the pre-drying time first and then enter the time at the middle and lower lift position. -
Page 19: Temperature Rise And Temperature Holding Time
VITA V60 i-Line® PLUS 18.2 Temperature rise and temperature holding time The device has two program areas for temperature rise and temperature holding time. The second temperature rise and the second temperature holding time can each be activated and deactivated. Both areas are operated in the same manner. -
Page 20: Cooling
VITA V60 i-Line® PLUS 18.3 Cooling The maximum value is dependent on the final holding temperature. The cooling temperature must be lower than the final holding temperature. Only those values can be set which are displayed via the entry field. -
Page 21: Vacuum Setting
VITA V60 i-Line® PLUS 18.4 Vacuum setting The time and temperature values for switching the vacuum pump on and off are dependent on the abovementioned program values. If the pre-drying temperature or the final temperature is changed, the switch-on temperature of the vacuum pump is set as equal to the pre-drying temperature, and the vacuum time (running time of the vacuum pump) as equal to the rise time. -
Page 22: Saving Program Values
VITA V60 i-Line® PLUS 18.5 Saving program values Altered program values are displayed in orange on the display, and the Save button is active. Pressing the Save button will turn it white. If the program is backed up, the PIN must be entered after pressing the Save button (see Section 19.8). -
Page 23: Program Backup
VITA V60 i-Line® PLUS 18.7 Program backup Two statuses are displayed on the program backup button: • Lock open – Program parameters can be freely altered and can be saved • Lock closed – Program parameters can be freely altered;... - Page 24 VITA V60 i-Line® PLUS To create a new program, press the Program Settings button. Then press Create new firing program. Material name Change program name Create new firing program Delete firing program Programs Export firing program to USB stick Import firing program from USB stick Back to Program Overview Figure 22 –...
-
Page 25: Device Settings
VITA V60 i-Line® PLUS 19 Device settings Applying device settings: Device settings Figure 24 – Device settings Table 20 – Device setting Display shows the following setting buttons: Figure 25 – Setting buttons for device settings Designation Note Function Device information Information on the device 19.1... -
Page 26: Device Information
19.2 Factory settings By pressing the button, the program memory is reset to the factory settings for the default VITA firing programs. Attention: Programs entered by the user will be deleted. By pressing the button, the program memory is reset to the factory settings for the default VITA firing programs. -
Page 27: Temperature Setting And Cleaning Firing
19.3 Temperature setting and cleaning firing Temperature calibration using the silver probe With this program and the VITA Silver Probe set (VITA Order No. B 230), the temperature in the combustion chamber can be checked and readjusted within the range of +/- 40°C. Care must be taken during calibration that the instructions on performing the silver probe test are strictly observed (see instructions in the Silver Probe set). -
Page 28: Temperature Display °C Or °F
VITA V60 i-Line® PLUS 19.4 Temperature display in °C or °F Select desired display unit. Setting is automatically saved. Change temperature unit Stop without saving Save values, back to settings Figure 29 – Temperature display Table 25 – Temperature display 19.5 Language... -
Page 29: Entering Pin For Firing Programs
VITA V60 i-Line® PLUS 19.7 Entering a PIN for firing programs Firing programs can be protected from changes by entering a PIN. The PIN entered here is then used to back up individual firing programs. Protected programs can be used by every user. One-time changes can be made. -
Page 30: Loudspeaker Tone Duration
VITA V60 i-Line® PLUS The program is now locked until a program change is made. To permanently save the program backup, press the Save button and enter the PIN again. Backed up programs can be used by every user. One-time changes can also be made anyway. -
Page 31: Setting The Standby Temperature
Save values, back to settings Figure 38 – Entering standby temperature Table 34 – Entering standby temperature 20 Software update You can find the current software on the VITA home page, https://www.vita-zahnfabrik.com/, under Documents & Media/Download Center/Product information/ Software Updates After selecting the type of device, the current software can be selected and copied to a USB stick. -
Page 32: Error Messages
VITA V60 i-Line® PLUS 21 Error messages Any errors that occur are shown in the display. Subsequent error messages may occur and can be reset with the confirmation button. However, a permanent reset of the error message is only possible if the error has been eliminated. -
Page 33: Alphabetical Table Of Contents
VITA V60 i-Line® PLUS 22 Alphabetical table of contents Administration of the firing programs Pre-drying Ambient conditions Program backup Program overview CE mark Changing program values Rapid cooling Cleaning the touchscreen Cleaning firing for the firing chamber Cooling Safety functions... -
Page 34: List Of Figures
VITA V60 i-Line® PLUS 23 List of figures Figure 1 – Device connections . . . . . . . . . . . . . . . . . . . . . . . . . . . . . . . . . . . . . . . . . . . . . . . . . . . . . . . . . . . . . . . . . . . . . . . . . . . . . . . . . 8 Figure 2 –... -
Page 35: List Of Tables
VITA V60 i-Line® PLUS 24 List of tables Table 1 – Explanation of notes and information . . . . . . . . . . . . . . . . . . . . . . . . . . . . . . . . . . . . . . . . . . . . . . . . . . . . . . . . . . . . . . . . . . . 4 Table 2 –... - Page 36 The VITA Modulbox is not necessarily a component of the product. Date of issue of this information for use: 2023-06 After the publication of these instructions for use, any previous versions become obsolete.
Need help?
Do you have a question about the V60 i-Line PLUS and is the answer not in the manual?
Questions and answers