Table of Contents
Advertisement
Advertisement
Table of Contents

Related Manuals for Innotech MAXIM I


Summary of Contents for Innotech MAXIM I
- Page 1 MAXIM Series Controllers INSTALLATION INSTRUCTIONS...
- Page 2 Mass Electronics Pty Ltd. Trademark The term ‘Innotech’ used in this manual is a trademark of Mass Electronics Pty Ltd trading as Innotech Control Systems Australia. 'Microsoft' and 'Windows' are registered trademarks of the Microsoft Corporation in the United States and other countries.
- Page 3 Document Title: Maxim Installation Instructions Revision History Version Date Summary of Changes Number First release of Installation Instructions for Innotech MAXIM Series June 2011 Controllers. November 2013 Contact Details Update, Style Update. Edition 2.0 dated 20/11/2013 Page 3 © Mass Electronics Pty Ltd 2011...
- Page 4 This page has been left intentionally blank. Edition 2.0 dated 20/11/2013 Page 4 © Mass Electronics Pty Ltd 2011...
-
Page 5: Table Of Contents
2-1 Overview ........................16 2-2 Physical Description and Dimension Diagrams ............. 17 2-2.1 Overview ........................17 2-2.2 MAXIM I, II, III, and 1010 Controllers ................17 2-2.3 MiniMAX, MicroMAX, VAVMax, and IG01 ..............18 2-3 General Installation Information ................20 2-3.1 Overview ........................20 2-3.2 General Installation Guidelines ................20... - Page 6 A-3 Logging onto the Controller ..................57 A-4 VAVMax Settings ....................... 58 A-5 Commissioning ......................58 A-5.2 Configuring the K-Factor ..................59 A-5.1 Calibration of sensors .....................59 Customer Assistance ...................... 60 Innotech Support ......................60 Edition 2.0 dated 20/11/2013 Page 6 © Mass Electronics Pty Ltd 2011...
- Page 7 List of Illustrations Figure 2-1: Typical Enclosure Installation ................16 Figure 2-2: MAXIM I and MAXIM II Controller Dimensions ............17 Figure 2-3: MAXIM III and MAXIM 1010 Controller Dimensions ..........18 Figure 2-4: MiniMAX, MicroMAX, VAVMax and IG01 Controller Dimensions......19 Figure 2-5: ...
- Page 8 Features of MAXIM Series Controllers ..............12 Table 3-1: MAXIM I, II, III and 1010 Power Source Specifications ...........28 Table 3-2: MAXIM I, II, III and 1010 Controller Power Input Terminals ........28 Table 3-3: Input/Output Range for Universal Inputs ..............29 Table 3-4: ...
-
Page 9: Chapter 1 - Preliminary Information
MAXIM Series Controllers INSTALLATION INSTRUCTIONS Chapter 1 - Preliminary Information... -
Page 10: Scope
With the exception of the MAXIM 1 controller, all MAXIM Series controllers can either be used in standalone applications to control external equipment, or in an Innotech network consisting of multiple controllers and devices supporting Global and Net Comms traffic. This manual covers the following Maxim Series Controllers: •... -
Page 11: 1-1.2 Terminology Used In This Manual
Human Machine Interface (HMI) provides direct access for complete control and operation of various Innotech controllers. The HMI basically consists of the Liquid Crystal Display (LCD) and the keypad for direct interaction with the controllers. -
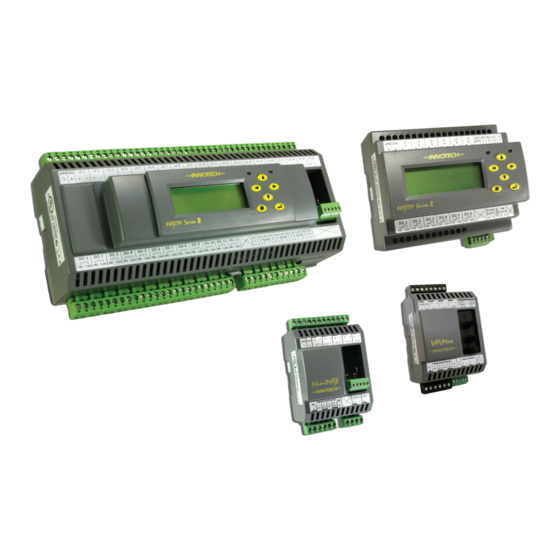
Page 12: Overview Of Maxim Series Controllers
The controllers that can be installed on the primary network provide communication channels with Net and Global comms functionality. These controllers can interface with other Innotech network resources. The MAXIM Series controllers that can be installed on the Innotech primary network are: • MAXIM II •... -
Page 13: 1-2.2 Sub System Network Controllers
These controllers can operate in standalone applications, using the respective universal inputs, universal outputs, analogue outputs, and digital outputs to transmit and receive information and control external equipment, or as part of a network of Innotech devices that support Net and Global comms communication. -
Page 14: Special Considerations
MAXIM Installation Instructions 1-2.4 MAXIM I Controller The MAXIM I Controller is unique in that it only operates in standalone applications, using the built in universal inputs, analogue outputs, and digital outputs to transmit and receive information and control external equipment. The MAXIM I controller cannot be installed on a network. -
Page 15: Chapter 2 - Mechanical Installation
MAXIM Series Controllers INSTALLATION INSTRUCTIONS Chapter 2 - Mechanical Installation... -
Page 16: Overview
MAXIM Series controllers on industry standard DIN rail. Innotech recognises that the installation examples described in this manual may not suit the requirements of all customers. However this document should serve as a guide for all installations, regardless of whether your particular installation is similar to that of provided examples. -
Page 17: Physical Description And Dimension Diagrams
The MAXIM Series I, II, III, and 1010 controllers are housed in DIN cases and are suitable to be mounted on DIN rail. The exact dimensions of the MAXIM I and MAXIM II controllers are shown in Figure 2-2 below. Figure 2-3 on the next page shows the dimensions of the MAXIM III and MAXIM 1010 controllers. -
Page 18: 2-2.3 Minimax, Micromax, Vavmax, And Ig01
MAXIM Installation Instructions Figure 2-3: MAXIM III and MAXIM 1010 Controller Dimensions 2-2.3 MiniMAX, MicroMAX, VAVMax, and IG01 These controllers are housed in a compact DIN case and are suitable to be mounted on DIN rail. And since these controllers are housed in a common case, the dimensions therefore for each controller are the same, as illustrated in Figure 2-4 on the next page. -
Page 19: Figure 2-4: Minimax, Micromax, Vavmax And Ig01 Controller Dimensions
MAXIM Installation Instructions Figure 2-4: MiniMAX, MicroMAX, VAVMax and IG01 Controller Dimensions 2-2.3.1 VAVMax Differential Pressure Input The Differential Pressure Input is only available on the VAVMax (VM01) controllers. It is used to measure and respond to changes in air velocity pressure, which is determined by how the VAVMax controller has been configured. -
Page 20: General Installation Information
The following installation guidelines are provided to ensure continued and reliable operation of the MAXIM Series controllers: • The MAXIM I, II, III, and 1010 controllers should be installed in a position that provides easy access to the optional HMI, and sufficient room for power and input/output cabling. Placement of the these controllers should account for the optimum viewing angle of the LCD, which is approximately 80 °... -
Page 21: 2-3.3 Installing On Din Rail
MAXIM Installation Instructions 2-3.3 Installing on DIN Rail As mentioned earlier the MAXIM Series controllers are designed to be mounted on DIN rail. The DIN rail is a set of different standardized rails widely used for mounting industrial control equipment inside equipment racks. - Page 22 MAXIM Installation Instructions This page has been left intentionally blank. Edition 2.0 dated 20/11/2013 Page 22 © Mass Electronics Pty Ltd 2011...
-
Page 23: Chapter 3 - Electrical Installation
MAXIM Series Controllers INSTALLATION INSTRUCTIONS Chapter 3 - Electrical Installation... -
Page 24: Overview
Commissioning. NOTE Customers are encouraged to contact Innotech Control Systems Australia or your nearest authorised distributor for any clarification or further information regarding the installation process. Cabling plays an important role in the installation of MAXIM Series controllers. Therefore shielded cable for wiring must be used in all cases. -
Page 25: Figure 3-1: Maxim Series Iii Connection Details Generated With Maxcon Software
MAXIM Installation Instructions Innotech MAXIM Series III Controller (v6.20) Figure 3-1: MAXIM Series III Connection Details Generated with MAXCon Software Chapter 3 – Electrical Installation Page 25 © Mass Electronics Pty Ltd 2011... -
Page 26: 3-3.1 Maxim I, Ii, Iii, And 1010 Controllers
MAXIM Installation Instructions 3-3.1 MAXIM I, II, III, and 1010 Controllers This section of the manual provides wiring information for MAXIM Series I, II, III, and 1010 controllers. Information is provided on wiring a power source, and all associated inputs and outputs. -
Page 27: Figure 3-4: Maxim Iii Controller Terminal Connection Layout
MAXIM Installation Instructions POWER UNIVERSAL INPUTS DIGITAL RELAY ANALOGUE OPTIONAL NET & GLOBAL OUTPUTS OUTPUTS ETHERNET COMMS PORT (RS485) Figure 3-4: MAXIM III controller terminal connection layout Power Universal Inputs Universal Outputs Global & Optional Net Comms Ethernet RS485 Port Figure 3-5: ... - Page 28 MAXIM Installation Instructions 3-3.1.1 Power Input The MAXIM I, II, III, and 1010 controllers may by powered by either an AC or a DC power source. The operating voltage must meet the requirements of Safety Extra Low Voltage (SELV) to EN60730. The transformer used must be a safety transformer in compliance with EN60742 and be designed for 100% duty.
- Page 29 MAXIM Installation Instructions 3-3.1.2 Universal Inputs The MAXIM I, II, III, and 1010 controllers are equipped with Universal Inputs that can be configured to suit a wide range of applications as described in Table 3-3 below. Each Universal Input has a signal terminal (+) and a reference terminal (–).
-
Page 30: Figure 3-6: Analogue Output Driving Multiple Solid State Relays
If up to 6 SSRs are to be wired in series, you can use the Analogue Output as 0 to 10 V DC modulating in conjunction with the Innotech Heat Valve (IHV) module. Please refer to the following datasheets for more information on IHVs: •... -
Page 31: Table 3-4: Maxim 1010 Universal Outputs
MAXIM Installation Instructions 3-3.1.4 Digital Relay Outputs The digital relay outputs have two terminals assigned to each channel representing the Normally Open (NO) and Common (COM) contacts of the associated relay. It is good practice to use pilot relays for the actual switching functions, particularly when it applies to inductive loads such as coils, solenoids, and motors. -
Page 32: 3-3.2 Minimax Controllers (Mm01 / Mm02)
MAXIM Installation Instructions 3-3.2 MiniMAX Controllers (MM01 / MM02) This section of the manual provides wiring information for the MiniMAX MM01 and MM02 controllers. Information is provided on wiring a power source and all associated inputs and outputs. The general layout of the input and output terminals for each of these controllers is illustrated in Figure 3-7 below. - Page 33 0 to 100% Duty Cycle at 13Hz When a UIO on a MiniMAX controller is configured as a Thermistor input type, it is designed to be used with Innotech SEN Series Detectors. The sensing range and accuracy for the SEN Series Detectors is as follows: •...
-
Page 34: 3-3.3 Vavmax And Micromax Controllers
MAXIM Installation Instructions 3-3.2.3 TRIAC Outputs The MiniMAX controllers are equipped with four TRIAC outputs used for switching the 24 V AC power supply through to the outputs of the controller. There are four 24 V terminals for each TRIAC output, and two 0 V terminals that are shared by the four TRIAC outputs. -
Page 35: Table 3-9: Vavmax And Micromax Power Source Specifications
MAXIM Installation Instructions 3-3.3.1 Power Input The VAVMax and MicroMAX controllers are powered by a 24 V AC power source. The operating voltage must meet the requirements of Safety Extra Low Voltage (SELV) to EN60730. The transformer used must be a Class 2 safety transformer in compliance with EN60742 and be designed for 100% duty. It must also be sized and fused in compliance with local safety regulations. - Page 36 When a UIO on a VAVMax or a MicroMAX controller is configured as a Thermistor input type, it is designed to be used with Innotech SEN Series Detectors. The sensing range and accuracy for the SEN Series Detectors is as follows: •...
- Page 37 The VAVMax and MicroMAX controllers are equipped with a fixed thermistor input labelled TEMP. The fixed thermistor input has a signal terminal (+) and a reference terminal (–). This input is designed for use with the Innotech SEN Series Detectors. The sensing range and accuracy for the SEN Series Detectors is as follows: •...
-
Page 38: 3-3.4 Ig01 Sub System Gateway
MAXIM Installation Instructions 3-3.4 IG01 Sub System Gateway This section of the manual provides wiring information for the IG01 Sub System Gateway. Information is provided on wiring a power source and all associated inputs and outputs. The general layout of the input and output terminals for each of these controllers is illustrated in Figure 3-9 below. -
Page 39: Table 3-14: Ig01 Sub System Gateway Power Terminals
MAXIM Installation Instructions A single transformer may be used to supply voltage to more than one controller, but you must ensure that the planned load is well within the rating of the transformer. The transformer output terminal designated as AC Neutral must be solidly earthed to the main earth link of the enclosure panel. The dedicated power input terminals are Terminals 1 and 2 and are detailed in Table 3-14 below. - Page 40 MAXIM Installation Instructions This page has been left intentionally blank. Edition 2.0 dated 20/11/2013 Page 40 © Mass Electronics Pty Ltd 2011...
-
Page 41: Chapter 4 - Network Installation
MAXIM Series Controllers INSTALLATION INSTRUCTIONS Chapter 4 - Network Installation... -
Page 42: Overview
Network Cabling for complete details and information on performing a network installation with MAXIM Series controllers. A general network diagram of Innotech hardware is illustrated in Figure 4-1 below. Figure 4-1: Innotech Network Diagram Edition 2.0 dated 20/11/2013 Page 42... -
Page 43: Chapter 5 - Commissioning
MAXIM Series Controllers INSTALLATION INSTRUCTIONS Chapter 5 - Commissioning... -
Page 44: Overview
MAXIM Series controllers. NOTE Customers are encouraged to contact Innotech Control Systems Australia or your nearest authorised distributor for any clarification or further information regarding the installation process. 5-2.1 Mechanical Inspection Please check the following items to complete the mechanical inspection of the installation process: •... - Page 45 • Verify that all cables and wiring are free from physical damage. NOTE Please ensure that the electrical installation process is completed in accordance with DS99.04 Innotech Cabling Manual. Refer to the Cabling Manual for more detailed information. Chapter 5 – Commissioning Page 45 ©...
-
Page 46: Figure 5-1: Checking Power Input Voltage
MAXIM Installation Instructions 5-2.2.1 Checking Power Inputs The power inputs must be inspected to ensure that the supplied voltage is within the specifications of the particular controller, as illustrated in Figure 5-1 below. In cases where a DC power source is utilised, correct polarity must be verified, and the 0 V terminal must be connected to ground. -
Page 47: Figure 5-2: Checking Universal Inputs For 0V
MAXIM Installation Instructions 5-2.2.2 Checking Universal Inputs Before any Universal Inputs are connected to a MAXIM Series controller, you MUST follow the steps listed below to verify that 0 V A C is measured across these inputs. Please note that the voltage will be measured directly at the Universal Input wiring, and NOT at the controller, as illustrated in Figure 5-2 below. -
Page 48: Figure 5-3: Checking Digital Relay Output Wiring
MAXIM Installation Instructions 5-2.2.3 Checking Digital Relay Outputs The Digital Relay Outputs on MAXIM Series controllers are interfaced through relays, each with Single Pole Single Throw (SPST) contacts. Before checking the Digital Relay Outputs, it is important to verify that there are no short circuits in the external wiring, which can cause the contact current to exceed the maximum rating. - Page 49 MAXIM Installation Instructions The steps below provide further details to check and verify proper operation of the Digital Relay Outputs on MAXIM Series controllers, as illustrated in Figure 5-3 on the previous page. 1. Verify that the MAXIM controller on which the Digital Relay Outputs will be checked is powered OFF.
-
Page 50: Figure 5-4: Checking Analogue Output Voltage
MAXIM Installation Instructions 5-2.2.4 Checking Analogue Outputs The Analogue Output wiring on MAXIM Series controllers should be checked to verify that the output terminals are free of any external voltage, to verify continuity through the external analogue circuit, and to verify that the resistance of the external analogue voltage is sufficient to avoid overloading the analogue output circuit. -
Page 51: Figure 5-5: Checking Analogue Output Resistance
MAXIM Installation Instructions CHECKING ANALOGUE OUTPUT RESISTANCE Connected to equipment or device 2000 Figure 5-5: Checking Analogue Output Resistance 5-2.2.5 TRIAC Outputs The following items should be checked and verified for proper operation of the TRIAC Outputs on applicable controllers: •... -
Page 52: Figure 5-6: End Of Cable Jumper Locations On Sub Network Devices
All controllers along the RS485 Comms on a sub system network should be carefully checked to verify that the EOL jumpers are installed only on the last controller in the network. NOTE Refer to DS 99.04 Innotech Cabling Manual for EOLs and comms wiring when using repeaters, or more complex wiring configurations. Jumper Setting... -
Page 53: Appendix A - Using The Ct01 Commissioning Tool
MAXIM Series Controllers INSTALLATION INSTRUCTIONS Appendix A - Using the CT01 Commissioning Tool... -
Page 54: Overview
MAXIM Installation Instructions A-1 Overview The Commissioning Tool – Subsystem Network (CT01) is a Human Machine Interface (HMI) that allows you to configure controllers on a Subsystem network. It provides full access and navigation through the menu structure of the Subsystem controllers. You can use the CT01 to commission the controllers as an alternative to the software method. -
Page 55: A-2.2 Connecting To Sub System Gateway (Ig01)
MAXIM Installation Instructions A-2.2 Connecting to Sub System Gateway (IG01) When you connect the CT01 to the Innotech Sub System Gateway (IG01) using the provided adaptor cable, the CT01 can communicate with all subsystem controllers on that network that are connected to the IG01, as illustrated in Figure A-2 below. -
Page 56: A-2.3 Connecting To Sub System Network
MAXIM Installation Instructions A-2.3 Connecting to sub system network When you connect the CT01 to the subsystem network at any point using the provided adaptor cable, the CT01 can communicate with all controllers on the sub system network that are connected to the IG01, EXCEPT for the controller that is directly connected to the CT01. -
Page 57: A-2.4 Ct01 Menus And Navigation
MAXIM Installation Instructions A-2.4 CT01 Menus and Navigation The interface of the CT01 is relatively easy to navigate. To access the Menu page press the Exit button. To select how the CT01 is connected to the controller, select Setup and press the Enter button. -
Page 58: Vavmax Settings
MAXIM Installation Instructions A-4 VAVMax Settings Configuring a VAVMax controller requires a number of parameters that have to be calibrated. You can use the CT01 to calibrate the following parameters on a VAVMax controller to suit your requirements: • Zone temperature set point. •... -
Page 59: A-5.2 Configuring The K-Factor
The K-Factor may need to be rechecked and calibrated when the airflow is set to VMax. A-5.1 Calibration of sensors The calibration of sensors is normally completed by the Innotech commissioning technicians. However the CT01 can be used to calibrate the sensor if the need arises. Follow the steps below to calibrate sensors: 1. -
Page 60: Customer Assistance
Innotech Support Innotech provides technical information on the Web to assist you with using its products. At www.innotech.com.au, you can find technical manuals, user instructions, and data sheets for all our products. For direct product support or product information, contact your local distributor, or an Innotech representative.
Need help?
Do you have a question about the MAXIM I and is the answer not in the manual?
Questions and answers