Table of Contents
Advertisement
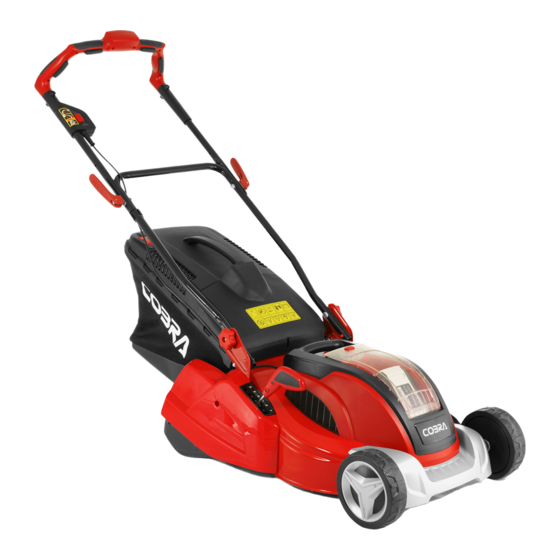
MODEL: RM4140V (DYM101701)
COBRA LAWN MOWER
OWNER'S MANUAL
WARNING!
When using the machine the safety rules must be followed. For your own safety and bystanders please read these
instructions before operating the machine. Please keep the instructions safe for later use.
Cobra Garden Machinery
Henton and Chattell Ltd., London Road, Nottingham NG2 3HW UK
www.cobragarden.co.uk
1
Advertisement
Table of Contents

Related Manuals for Cobra RM4140V


Summary of Contents for Cobra RM4140V
- Page 1 MODEL: RM4140V (DYM101701) COBRA LAWN MOWER OWNER’S MANUAL WARNING! When using the machine the safety rules must be followed. For your own safety and bystanders please read these instructions before operating the machine. Please keep the instructions safe for later use.
-
Page 2: Table Of Contents
CONTENT SECTION 1 SYMBOLS MARKED ON THE PRODUCT ……………..………….……….3 SECTION 2 GENERAL SAFETY RULES……………… ……………..………….……….4-7 SECTION 3 GENERAL IDENTIFICATION ..…………………………………………7 SECTION 4 TECHNICAL DATA ......………………………………………..7-8 SECTION 5 ASSEMBLY ........………………………………………..8-12 …………………………………..12 SECTION 6 ADJUSTMENT OF CUTTING HEIGHT SECTION 7 SAFETY PRECAUTIONS ....………………………………………..13 SECTION 8 STARTING…………………………………………………….…………………13-15 SECTION 9 BLADE…………………………………………………………………………….15 SECTION 10 MAINTENANCE AND CARE…………………………………………………..16... -
Page 3: Section 1 Symbols Marked On The Product
KNOW YOUR LAWN MOWER Read this manual carefully, observing the recommended safety instructions before, during and after using your lawn mower. Following these simple instructions will also maintain your lawn mower in good working order. Familiarize yourself with the controls on your mower before attempting to operate it, but above all, be sure you know how to stop your mower in an emergency. -
Page 4: Section 2 General Safety Rules
CE Marking The product meets demands and regulations set by the European Community. WEEE Marking CAUTION! Unusable power tools do not belong with domestic waste. They must be taken to a communal collecting point for environmentally friendly disposal in accordance with local regulations. - Page 5 IMPORTANT READ CAREFULLY BEFORE USE. KEEP FOR FUTURE REFERENCE. 1) Read the instructions carefully. Be familiar with the controls and the proper use of the equipment. 2) Never allow children or people unfamiliar with these instructions to use the lawnmower. Local regulations can restrict the age of the operator 3) Never mow while people, especially children, or pets are nearby.
- Page 6 27) Check the grass catcher frequently for wear or deterioration. 28) Replace worn or damaged parts for safety. 29) Children are not allowed to use the machine. 30) This appliance is not intended for use by persons with reduced physical, sensory or mental capabilities, or lack of experience and knowledge, unless they have been given supervision or instruction concerning use of the appliance by a person responsible for their safety.
-
Page 7: Section 3 General Identification
7. Height adj. lever 8. Wheel cover 9. Battery door 10. Rear cover 11. Lower handle 12.Upper handle 13.LED display 4. TECHNICAL DATA Model: RM4140V / DYM101701 Rated Voltage: 40V d.c. Rated Power: 550W No Load Speed: 3100min Grass catcher capacity Cutting Width:... -
Page 8: Section 5 Assembly
Battery Lithium-ion Model number DYMA72E Rated voltage 40Vdc Capacity 144Wh Number of battery cells 20pcs Battery charger Model number A72E Input 220-240VAC,50Hz,1A Output 40Vdc,2A Charging temp. range 0 - 40℃ 5. ASSEMBLY 5.1 ASSEMBLY THE FOLDING HANDLE A) Fix the lower handlebars into the unit body with locking knobs, bolts and washers as Fig. 2A,/Fig.2B/Fig.2C shown. B) Release the upper handlebars for folding. - Page 9 IMPORTANT: If the position of indicator opening is very dirty, the indicator will not inflate-in this case, clean the position of indicator opening immediately. Fig.3A Fig.3B Fig.3C Fig.3D Fig.3E Fig.3F...
- Page 10 Fig.3G Fig.3H 5.3 INSTALLING THE ISOLATOR KEY 1. Press the button (1) and lift the battery door.(2) (Fig.4A) 2. Insert the isolator key into the slot.(Fig. 4B) Fig.4A Fig.4B 5.4 INSTALLING THE BATTERY 1.Open the battery door. 2. Make sure the isolator key is switch off. Switch mark ”1” is ON”, “0” is “OFF”. (Fig. 5A) 3.
- Page 11 Fig.5A Fig. 5B Fig. 5C Fig. 5D 5.5 REMOVE THE BATTERY (Fig.6A/Fig.6B) 1. Lift and hold up the battery door 2. Press and hold the battery latch button (1) at the bottom of the battery pack. 3. Remove battery pack from the product. Fig.6A Fig.6B 5.6 ADJUSTING THE HANDLE HEIGHT...
-
Page 12: Section 6 Adjustment Of Cutting Height
The left side and right side of lower handle must adjust to the same height. WARNING: Fig.7A Fig.7B Fig.7C 6. ADJUSTMENT OF THE CUTTING HEIGHT Apply outward pressure to disengage lever from the rack. Move the lever forward or back to adjust the height. The height (the blade to the ground) can be adjusted from 17mm (position 1) to 75mm (position 6), 6 height positions. -
Page 13: Section 7 Safety Precautions
7. SAFETY PRECAUTIONS a) Always operate with the deflector or grass catcher in the correct position. b) Always stop the motor before removing the grass catcher or adjusting the height of cut position. c) Before mowing, remove all foreign objects from the lawn which may be thrown by the machine. While mowing, stay alert for any foreign objects which may have been missed. - Page 14 a) Press the safety push-button (1). b) And meanwhile, press any switch button (There are four buttons) (2), and keep it in grasp. Release button (1) Lift the front of the machine and switch off isolator key while crossing gravel or roads surface. If you release the switch button (A,B,C,D), the motor will stop.
-
Page 15: Section 9 Blade
When reassembling, make sure that the cutting edges face in the direction of the motor rotation. The blade screw (2) must be torque to 20N.m. WARNING: For service, replace the blade with Cobra blade: 263002917 or 263003498 Fig.12 WARNING: Disconnect the electric cord from the power supply. -
Page 16: Section 10 Maintenance And Care
10. MAINTENANCE AND CARE Warning: Before performing any Maintenance or cleaning work, Always remove the battery and switch off the isolator key! Do not spray the unit with water. Ingress of water may destroy the switch-plug combination unit and the electric motor. -
Page 17: Section 12 Environmentally Friendly Disposal
If your dealer did not collect registration information from you, please take a few minutes and register your purchase with Cobra. You can register by completing and mailing the registration card that should be in the box or by going online to: www.cobragarden.co.uk... -
Page 18: Section 14 Ec-Declaration Of Conformity
14. EC-DECLARATION OF CONFORMITY EC Declaration of Conformity We herewith declare, Cobra Garden Machinery Henton & Chattell Ltd, London Road, Nottingham NG2 3HW UK That the following machine complies with the appropriate basic safety and health requirements of the EC Directive based on its design and type, as brought into circulation by us.
Need help?
Do you have a question about the RM4140V and is the answer not in the manual?
Questions and answers