Xerox Workcentre 5330 User Manual
Hide thumbs
Also See for Workcentre 5330:
- Function manual (5 pages) ,
- User giude (222 pages) ,
- Evaluator manual (21 pages)
Advertisement
Advertisement
Table of Contents

Related Manuals for Xerox Workcentre 5330


Summary of Contents for Xerox Workcentre 5330
- Page 1 Xerox Workcentre 5330...
-
Page 2: Machine Overview
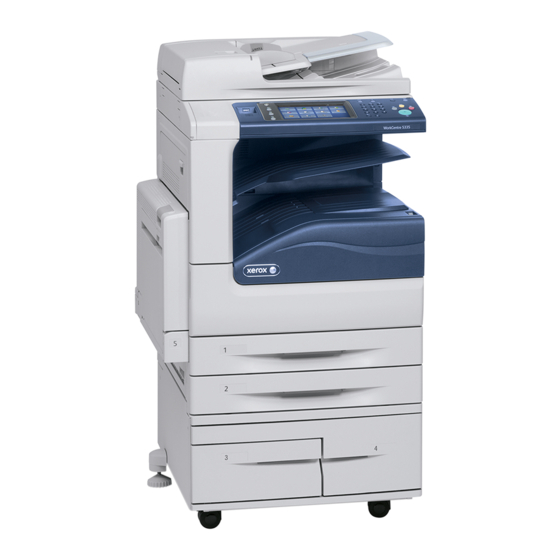
Machine Overview Document Feeder and Control Panel Glass On/Off Bypass Tray Switch Tray 2 Tray 1 Tray 4 Tray 3... -
Page 3: Loading Trays 1 And 2
Loading Trays 1 and 2 Open and place the paper in the tray. Make sure the green guide are is the correct position. Note: Paper must not be loaded above the max line. The paper settings for the tray are going to display on the touch screen. - Page 4 Loading Paper Trays 3 and 4 Trays 3 and 4 are dedicated for Letter 8.5 x 11 size paper. Make sure the Green Guide is right up again the paper . Note: Paper must not be loaded above the max line. The paper settings for the tray are going to display on the touch screen.
-
Page 5: Bypass Tray
Bypass Tray 2. Place the media onto the tray. Paper must not be loaded above the max line. The paper settings for the tray are going to display on 1. Make sure the tray is in the down position. the touch screen. Confirm or change the Type of paper, the Size, and the... - Page 6 Confirming Paper Changes Once you close a tray or put something into the bypass tray the confirm screen will appear and you will have the options to change the tray setting. Adjust the paper size, paper type, and the color of the paper as needed by selecting Change Settings button and confirm the changes.
-
Page 7: Loading Originals
Loading Originals Document Feeder: One or more pages go Face Up. Make sure the gray guides are right up against the original. Document Glass: Originals go Face Down on the glass in the Upper Left hand corner. -
Page 8: Control Panel
Control Panel Help Energy Saver All Services Job Status Clear All Stop Touch Screen Start Machine Status Keypad... -
Page 9: Standard Login
Standard Login Swipe you’re Connecticut College ID Card to login If user’s card number is not in the PaperCut Database the user will be prompted to enter their Connecticut College User Name and Password. - Page 10 The first time you use your ID card you will need to register. The machine will prompt you to enter both your Connecticut College User Name and Password. Hit done after each request. Your card will now be registered to all machines. You will now be able to swipe to login and out of the machines.
- Page 11 Hit done after each request. If completed you will see the screen below confirming your card registration. . Your card will now be registered to all machines. You will now be able to swipe to login and out of the machines.
- Page 12 Alternate Login If you do not have your Connecticut College ID you can login to the machine by pressing the Alternate Login button on the MFP Screen...
- Page 13 You will be prompted to enter your Connecticut College Username and Password. Hit Done after each prompt to login...
- Page 14 Fund-Org Selection There are 3 Options for selecting the Fund-Org Number You can search for a Fund-Org You can choose from the list of by typing in a partial number Fund-Org Numbers and hitting the save button in the right hand corner...
- Page 15 Once you’ve entered your Fund-Org info the machine will display a You can also manually enter an entire confirmation number including the Fund-org by typing in the number and department info. From here select hitting save the Use Copier button to access the machine functions...
-
Page 16: Releasing Print Jobs
Releasing Print Jobs Once logged in if you have print jobs waiting to be printed you will be presented with a list of jobs ready to be released... - Page 17 You can choose a single print job or If you choose to print one document, print all of the jobs waiting the screen will display the job details From here you can choose to print or delete your job.
- Page 18 Paper Supply: This is Copy Output: We select where you can choose an any of the finishing options Main Copy Screen individual tray. When it is on that are installed on the Auto Select the machine will copier including Stapling and determine which tray to pull Hole Punching.
-
Page 19: Scan To E-Mail
Scan To Email When you choose Scan to Email, PaperCut will populate your email address in the To: and From: addresses... - Page 20 You can Main Email Screen New Recipient: adjust the You can search the Subject line active directory for to each yourself or other users E-mail Option: You can adjust the File Format and File Name of the individual in the organization. attachment.
- Page 21 Main Fax Screen Enter the Fax Number here using the keypad to the right of the control panel… Select Add to send the If you have a 2 Sided original. Change 1-Sided same Fax to multiple Fax to 2-Sided. numbers.
-
Page 22: Logging Out
Logging Out Press the Upper Right hand corner of the screen and choose “Remote User” 1 the “Logout” 2... - Page 23 The Print Driver can be found by clicking on Printer Properties on your print screen.
- Page 24 Remote Printing using the Xerox Print Driver The print driver interface gives you quick access to common features of the device at your work station. Including: – Job Type – Paper Supply – 2-Sided Printing – Finishing – Image Options...
- Page 25 Logging Out There are Two ways to logout: 1. Select the Log In/Out button on the control panel. You will have to confirm this request 2. Press Clear All twice to go back to default settings, again you will have to confirm this request Note: After 1 minute with no activity on the machine, it will log you out automatically...
-
Page 26: Changing Toner
Changing Toner Note: When the toner is getting low, you will get a warning to order a new toner before it is empty. Change the toner once it is completely empty. - Page 27 Staple Cartridge in the Integrated Office Finisher...
-
Page 28: Clearing Paper Jams
Clearing Paper Jams All the jams would occur on the left side of the machine. It is labeled (A,B,C…) The user interface will direct you on how to properly clear a jam. Follow the instructions proper jam removal. There are 2 areas where Lift open the grey lever. - Page 29 www.cbs-gisx.com Press the help button on our website to access customer knowledge basic. Where you can find the full user guides and a keyword search for frequently asked questions .
Need help?
Do you have a question about the Workcentre 5330 and is the answer not in the manual?
Questions and answers