Table of Contents
Advertisement
Quick Links
Advertisement
Table of Contents

Related Manuals for WEIGHSOUTH WSI-602


Summary of Contents for WEIGHSOUTH WSI-602
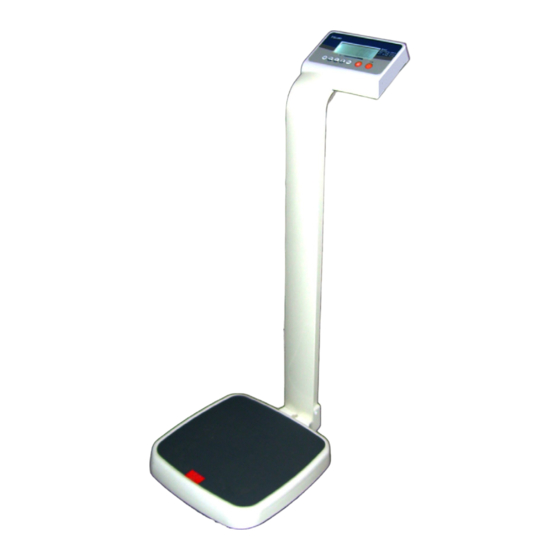
- Page 1 WeighSouth WSI-602...
-
Page 2: Table Of Contents
CONTENTS 1. PRECATIONS .................pg 1 2. INTRODUCTION ..............pg 2 3. SPECIFICATIONS ..............pg 3 3.1 Specifications ..............pg 3 4. INSTALLATION ..............pg 4 5. DESCRIPTION ..............pg 6 6. OPERATION ................pg 8 1. Power ON/OFF ..............pg 8 2. Zero ..................pg 8 3. Tare ..................pg 8 4. -
Page 3: Precations
1. PRECAUTIONS WARNING DISCONNECT ALL POWER TO THIS UNIT BEFORE INSTALLING, CLEANING, OR SERVICING. FAILURE TO DO SO COULD RESULT IN BODILY HARM OR DAMAGE THE UNIT. CAUTION • Permit only qualified persons to service the instrument • Before connecting or disconnecting any components, remove the power. -
Page 4: Introduction
2. INTRODUCTION • The WSI 602 series scales, amplifies signals from a load cell, converts it to digital data and displays it as a mass value. • It is accurate, fast and versatile series of general purpose balances with % weighing functions and accumulation • Mother and child weighing functions. -
Page 5: Specifications
3. SPECIFICATION 3.1 Specifications Model WSI-602 Maximum Capacity 250kg/600 lb Readability 100g/0.2lb Resolution 1/2,500 Tare Range Full Minimum Capacity 200g Linearity ± Common Specifications Interface RS-232 Output Optional Stabilisation Time 2 Seconds typical Operating Temperature 0°C - 40°C / 32°F - 104°F... -
Page 6: Installation
4. INSTALLATION Unpacking Carefully take the Unit out of its package, make sure its not damaged and all accessories are included. • Remove the weighing scale from the carton. • Remove the protective covering. Store the packaging if you need to transport the scale later. • Inspect the scale and terminal for damage. Make sure all com- ponents are included. Accessories, 1. Scale 2. Adaptor 3. Product manual Level Adjusting Place the scale on a firm surface. - Page 7 Installation USB Connecter (selectable) RS-232 Connecter (selectable) Adaptor Jack Calibration switch • Place the scale on a table. • Connect the adaptor pin in to the scale adaptor jack. Adaptor jack is located on therear side of the scale. • Adaptor connects into your AC power socket. • Turn on the On/Off key. If you want to turn off, press the key again. • Display will be show the version number and will be starting self checking. • After self checking, display will be come to normal weighing mode. • Warm-up time of 15 minutes stabilizes the measured values after switching on.
-
Page 8: Description
5. DESCRIPTION Key Board DESCRIPTION Turns the scale power On / Off Set to hold mode Set to BMI mode Set pre-tare Enter into the menu of parameter Change unit: kg / lb Sets display to Zero Subtracts weight of container... - Page 9 Display DISPLAY FUNCTION STABLE Indicator for Display stability ZERO Indicator for Zero display TARE Indicator for Tare display Indicator for weighing capacity graph Indicator for Net weight GROSS Indicator for Gross weight Lb/kg Indicator for weight units Indicator for Charging status of battery Voltage has dropped Low Voltage Fully Charged...
-
Page 10: Operation
6. OPERATION Initial Start-up Warm-up time of 15 minutes stabilizes the measured values after switching on. 6.1 Power ON/OFF Switch on the scale by pressing . The display is switched on and the self test is started. If you want to switch off press the key again. 6.2 Zero Environmental conditions can lead to the balance exactly zero in spite of the platform not taking any strain. However, you can set the display of your balance to zero any time by pressing... -
Page 11: Hold Function
6.5 Hold function Press before placing load on the platform, so HOLD is active "Hold " and "-----" appear on the display. After putting load on the platform no reading will be available until a stable non-zero weight is detected. During this period "----"... -
Page 12: Parameter
7. PARAMETERS Enter the Menu • Press during self checking(9--0), display will show F1 off Choose the Menu • Press , it can choose menu block or options one by one. Enter the Selected Menu • Press , it can confirm which will be displayed. Escape from the Menu • Press key, it can escape from the menu to weighing mode. Menu Sub Menu Description F1 off... -
Page 13: Calibration
8. CALIBRATION Calibration Settings in the Parameter; • Turn on the scale • Press key during self checking, display will F1 off show • Press key until it displays • Press key to confirm display will show P1 spd • Press keys, display will show P2 cal • Press key to show display • Press key to enter calibration, desc • Display will show • Press key until display show • Press... -
Page 14: Battery Operation
9. BATTERY OPERATION The Medical Scale can be operated from the battery if desired. The battery life is 12 hours (backlight) and 22 hours (without back- light). When the battery needs charging a symbol on the weight display will turn on. The battery should be charged when the symbol is on. The scale will still operate for about several minutes after which it will automatically switch off to protect the battery. -
Page 15: Maintenance
10. MAINTENENCE WARNING DISCONNECT ALL POWER TO THIS UNIT BEFORE INSTALLING, CLEANING, OR SERVICING. FAILURE TO DO SO COULD RESULT IN BODILY HARM OR DAMAGE THE UNIT. CAUTION • Permit only qualified persons to service the instrument • Before connecting or disconnecting any components, remove the power. -
Page 16: Error Codes
Cleaning • Disconnect the power before cleaning. • Use a cloth with mild suds and light cleaning agents. • Make sure that fluid is not able to get into the scale. • Use a clean and soft cloth for rub off. 10.2. Error Codes Error Code Description POSSIBLE CAUSES Err 4 Zero range exceeded. -
Page 17: Trouble Shooting
10.4 Trouble Shooting Problem Possible cause Common Solutions Main power is turned off. Check power is getting Power supply faulty or not inside the scale and on/ Display is blank. plugged. Internal battery is off switch is working. No self test not charged. - Page 18 Shipping screws are not Check the shipping removed. Parameters are screws under the plat- Can not use full set incorrectly. AD problem. form. Check Weighing capacity Load cell or mechanism unit and parameter damaged. settings. Check the load cell Shipping screws are not re- Check the shipping moved.
-
Page 19: Warranty
WARRANTY The Manufacturer warrants each product to be free from defects in materials and workmanship, and to conform to its published product specific cautions under normal use and service for the period of one year commencing from the date of purchase. The foregoing warranty is extended only to the first purchaser and applies only to product failures due to defective materials and/or workmanship. Without limiting the generality of the foregoing, the foregoing warranty will not apply if, upon inspection, it is found that...
Need help?
Do you have a question about the WSI-602 and is the answer not in the manual?
Questions and answers