
Subscribe to Our Youtube Channel
Related Manuals for AirLive Air3GII


Summary of Contents for AirLive Air3GII
- Page 1 Copyright and Disclaimer Air3GII Wireless 11n 150Mbps 3G Broadband Router User’s Manual AirLive GW-300NAS User’s Manual...
- Page 2 This equipment can generate, use and radiate radio frequency energy and, if not installed and used in accordance with the instructions in this manual, may cause harmful interference to radio communications. AirLive Air3GII User’s Manual...
- Page 3 CE Declaration of Conformity This equipment complies with the requirements relating to electromagnetic compatibility, EN 55022/A1 Class B. AirLive Air3GII User’s Manual...
-
Page 4: Table Of Contents
3.INSTALLATION/ UN-INSTALLATION .........................17 3.1 B ................................17 ASIC ETTING 3.2 F ..............................35 ORWARDING ULES 3.3 S ................................39 ECURITY ETTING 3.4 A ..............................47 DVANCED ETTING 3.5 T ..................................56 4.TROUBLESHOOTING ..............................60 APPENDIX A. SPEC SUMMARY TABLE.........................65 APPENDIX B. LICENSING INFORMATION........................66 AirLive Air3GII User’s Manual... -
Page 5: Introduction
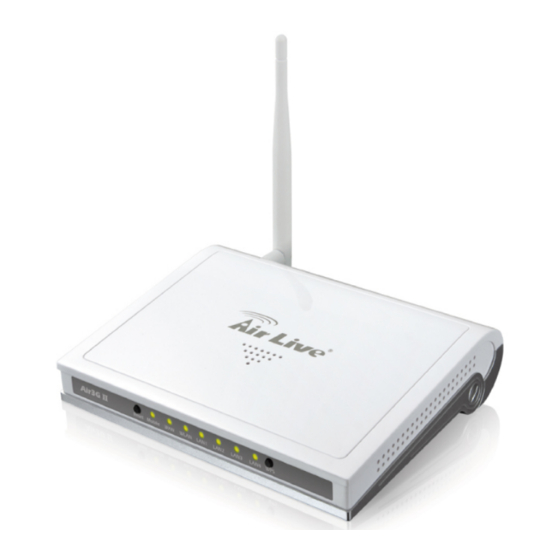
1. Introduction 1.Introduction The Air3GII is a high-performance tool that supports wireless networking at home, work, or in a public place. The Air3GII supports a USB 3G modem card, either WCDMA or EVDO and even HSDPA as well, and supports wireless data transfers up to 150M bps, and wired data transfers up to 100 Mbps. -
Page 6: Packing List
1. Introduction 1.1 Packing List Item Description Contents Quantity Air3GII Power adapter AirLive Air3GII User’s Manual... -
Page 7: Hardware Installation
1. Introduction 1.2 Hardware Installation A. Hardware configuratio AirLive Air3GII User’s Manual... -
Page 8: Step
1. Introduction AirLive Air3GII User’s Manual... - Page 9 Then plug the other end of into computer. Step 3. Plug the power jack into the receptor on the back panel of the router. Then plug the other end into a wall outlet or power strip. AirLive Air3GII User’s Manual...
-
Page 10: Specification
2.Specification Getting Started with Easy Setup Utility There are two approaches for you to set up the Air3GII quickly and easily. One is through executing the provided Windows Easy Setup Utility on your PC, and the other is through browsing the device web pages and configuration. -
Page 11: Airlive Air3Gii User's Manual
2.Specification Step 3: Then click the “Wizard” to continue. Step 4: Click “Next” to continue. AirLive Air3GII User’s Manual... - Page 12 2.Specification Step 5: Select Wireless Enable, and then click “Next” to continue. Step 6: Enter SSID, Channel and Security options, and then click “Next” to continue. AirLive Air3GII User’s Manual...
- Page 13 2.Specification Step 7: Click” Let me select WAN service by mys elf” to select WAN service manually. Step 8: Select 3G Service by clicking 3G icon to continue. AirLive Air3GII User’s Manual...
- Page 14 3G service settings automatically Click “Next” to continue Step 9-2: Or you can s elect “Manual” and manu ally fill in the required 3G service settings provid by your ISP. Click “Next” to continue. AirLive Air3GII User’s Manual...
- Page 15 2.Specification Step 10: Click “Nex t” to save your setting. Step 11: The Air3GII is rebooted to make your entire configuration take ef fect. AirLive Air3GII User’s Manual...
- Page 16 2.Specification Step 12: Click “Next” to test the Internet connection or you can ignore test. Step 13: Click “Next” to test WAN Networking service. Step 14: Setup is com pleted. AirLive Air3GII User’s Manual...
-
Page 17: Easy Setup By Configuring Web
Type in the default password “admin” in System Password and then click ‘login’ button. Select your language. Select “Wizard” for basic settings with simple way. Press “Next” to start the Setup Wizard. Configure with the Setup Wizard AirLive Air3GII User’s Manual... - Page 18 2.Specification tep 1: Change System Password. Set up your system password. (Default:a dmin) Step 2: Select Time Zone. Step 3: Select WAN Type. Choose Auto-Detecting or Manually to set WAN Type. AirLive Air3GII User’s Manual...
- Page 19 WAN interface as “Wireless WAN” and the WAN type as “3G”. Step 5: 3G Mode. Select Auto-Detect then click “Next” to continue. Step 6: Set up your Wireless Network. Set up your SSID. AirLive Air3GII User’s Manual...
- Page 20 2.Specification Step 7: Setup your Encryption Key here then click”Next” to continue. Step 8: Apply your Setting. Then clic k Apply Setting. Step 9: Click Fin ish to complete AirLive Air3GII User’s Manual...
-
Page 21: Installation/Un-Installation
Menu by opening the web-browser and typing in the IP Address of the device. The default IP Address is: 192.168.123.254 Enter the default password “admin” in the System Password and then click ‘login’ button. Then, you can browse the “Advanced” configuration pages for configuring this device. 3.1 Basic Setting AirLive Air3GII User’s Manual... - Page 22 WAN Interface: Sele ct Ethernet WAN or Wireless WAN to continue. WAN Type: WAN connection type of your ISP. You can click WAN Type combo button to choose a correct one from the following options: A. 3G AirLive Air3GII User’s Manual...
- Page 23 Connect-on-demand: The device will link up with ISP when the clients send outgoing packets. Auto Reconnect (Always-on): The device will link with ISP until the connection is established. Manually: The device will not make the link until someone clicks the connect-button in the Status-page. AirLive Air3GII User’s Manual...
- Page 24 LCP packets for keeping the connection alive. Ping Remote Host: Enter the Remote host IP and the time interval to send the ping packets for keeping the connection alive. B. Static IP Address: AirLive Air3GII User’s Manual...
- Page 25 WWAN broadband service. Meanwhile, if the device detected that the Ethernet WAN connection is recovered, your broadband connection will be switched to use the Ethernet WAN service AirLive Air3GII User’s Manual...
- Page 26 Auto Reconnect (Always-on): The device will link with ISP until the connection is established. Manually: The device will not m ake the link until someone clicks the connect-button in the Status-page. D. PPP over Ethernet AirLive Air3GII User’s Manual...
- Page 27 Set it to zero or enable “Auto-reconnect” to disable this feature. PPPoE Service Name: Optional. Input the service name if your ISP requires it. Otherwise, leave it blank. Maximum Transmission Unit (MTU): Most ISP offers MTU value to users. The default MTU value is 0 (auto). AirLive Air3GII User’s Manual...
- Page 28 IP Mode: Please check the IP mode your ISP assigned, and select “Static IP Address” or “Dynamic IP Address”. My IP Address and My Subnet Mask: The private IP address and subnet mask your ISP assigned to you. AirLive Air3GII User’s Manual...
- Page 29 Auto Reconnect (Always-on): The device will link with ISP until the connection is established. Manually: The device will not make the link until someone clicks the connect-button in the Status-page. Maximum Transmission Unit (MTU): Most ISP offers MTU value to users. The default MTU value is 0 (auto). AirLive Air3GII User’s Manual...
- Page 30 My IP Address and My Subnet Mask: The private IP address and subnet mask your ISP assigned to you. Gateway IP and Server IP Address/Name: The IP address of the L2TP server and designated Gateway provided by your ISP. AirLive Air3GII User’s Manual...
- Page 31 Manually: The device will not make the link until someone clicks the connect-button in the Status-page. Maximum Transmission Unit (MTU): Most ISP offers MTU value to users. The default MTU value is 0 (auto). .1.2. DHCP Server AirLive Air3GII User’s Manual...
- Page 32 Click on “Save” to store your settings or click “Undo” to give up the changes. Press “Clients List” and the list of DHCP clients will be shown consequently. Press “Fixed Mapping” and the DHCP Server will reserve the special IP for designated MAC address. AirLive Air3GII User’s Manual...
- Page 33 3.Installation/Un-installation AirLive Air3GII User’s Manual...
- Page 34 Regulatory Domain. The factory default setting is as follow: channel 1~11 for North America. (Channel 1~13 for European (ETSI); channel1~ 14 for Japan). 5. Wireless Mode: Choose “B/G mixed”, “B only”, “G only”, “N only”, “G/N mixed” or “B/G/N mixed”. The factory default setting is “B/G/N mixed”. AirLive Air3GII User’s Manual...
- Page 35 If you select HEX, you have to fill in 64 hexadecimal (0, 1, 2…8, 9, A, B…F) digits. If you select ASCII, the length of pre-share key is from 8 to 63. Fill in the key, Ex 12345678 AirLive Air3GII User’s Manual...
- Page 36 A-PSK. WPA/WPA2 Another encryption options for WPA-TKIP and WPA2-AES, the others are same the WPA. By pressing “WPS Setup”, you can configure and enable the easy setup feature WPS (Wi-Fi Protection Setup) for your wireless network. AirLive Air3GII User’s Manual...
- Page 37 Config Method here from “Pin Code” or “Push Button”. WPS status: Accordin g to your setting, the status will show “Start Process” or “No used” ess “Wireless Clients List” and the list of wireless clients will be shown consequently. AirLive Air3GII User’s Manual...
- Page 38 3.1.4. Change Password You can change the System Password here. We strongly recommend you to change the system password for security reason. Click on “Save” to store your settings or click “Undo” to give up the changes. AirLive Air3GII User’s Manual...
-
Page 39: Forwarding Rules
A virtual server is defined as a Service Port, and all requests to this port will be redirected to the computer specified by the Server IP. Virtual Server can work with Scheduling Rules, and give user more flexibility on Access control. For the details, please refer to Scheduling Rule. AirLive Air3GII User’s Manual... - Page 40 For example, if you have an FTP server (port 21) at 192.168.123.1, a Web server (port 80) at 192.168.123.2, and a VPN server at 192.168.123.6, then you need to specify the following virtual server mapping table: AirLive Air3GII User’s Manual...
- Page 41 NAT router. The Special Applications feature allows some of these applications to work with this product. If the mechanism of Special Applications fails to make an application work, try setting your computer as the DMZ host instead. AirLive Air3GII User’s Manual...
- Page 42 Windows XP, you can see the following icon when the client computer gets IP from the device. Click on “Save” to store your settings or click “Undo” to give up the changes. AirLive Air3GII User’s Manual...
-
Page 43: Security Setting
3.Installation/Un-installation 3.3 Security Setting AirLive Air3GII User’s Manual... - Page 44 Virtual Servers or DMZ host only. You can select one of the two filtering policies: Allow all to pass except those match the specified rules Deny all to pass except those match the specified rules AirLive Air3GII User’s Manual...
- Page 45 Packet Filter can work with Scheduling Rules, and give user more flexibility on Access control. For Detail, please refer to Scheduling Rule. Each rule can be enabled or disabled individually. Click on “Save” to store your settings or click “Undo” to give up the changes. AirLive Air3GII User’s Manual...
- Page 46 . Log DNS Query: Check if you want to log the action when someone accesses the specific URLs. . Privilege IP Address Range: Setting a group of hosts and privilege these hosts to access network without restriction. Domain Suffix: A suffix of URL can be restricted, for example, ".com", "xxx.com". AirLive Air3GII User’s Manual...
- Page 47 (like .com or .org, etc), while URL Blocking require user to input a keyword only. In other words, Domain filter can block specific website, while URL Blocking can block hundreds of websites by simply a keyword. AirLive Air3GII User’s Manual...
- Page 48 Click on “Save” to store your settings or click “Undo” to give up the changes. .4 MAC Control C Address Control allows you to assign differ ent access right for different users and to assign a specific IP address to a certain MAC address. AirLive Air3GII User’s Manual...
- Page 49 Choose "allow" or "deny" to allow or deny the clients, whose MAC addresses are not in the "Control table", to associate to the wireless LAN. Click on “Save” to store your settings or click “Undo” to give up the changes. 3.3.5 Miscellaneous AirLive Air3GII User’s Manual...
- Page 50 DoS attack comes from the Internet. Currently, the router can detect the following DoS attack: SYN Atta ck, WinNuke, Port Scan, Ping of Death, Land Attack etc. Click on “Save” to store your settings or click “Undo” to give up the changes. AirLive Air3GII User’s Manual...
-
Page 51: Advanced Setting
3.Installation/Un-installation .4 Advanced Setting AirLive Air3GII User’s Manual... - Page 52 1 recipient, using ';' or ',' to separate these email addresses. 5. E-mail Subject: The subject of email alert, this setting is optional. Click on “Save” to store your settings or click “Undo” to give up the changes. AirLive Air3GII User’s Manual...
- Page 53 Dynamic DNS Serve .Provider, Host Name, Username/E-mail, and Password/Key. You can get this information when you register an account on a Dynamic DNS server. Click on “Save” to store your settings or click “Undo” to give up the changes. AirLive Air3GII User’s Manual...
- Page 54 Check to enable the corresponding QOS rule. ser Rule#: The QoS rule can work with Scheduling Rule number#. Please refer to the ection 3.1.4.7 Schedule Rule. Click on “Save” to store your settings or click “Undo” to give up the changes. AirLive Air3GII User’s Manual...
- Page 55 P 3, IP 4: Enter the IP addresses of your SNMP Management PCs. User has to configure to where this device should send SNMP Trap message. 5. SNMP Version: Select proper SNMP Version that your SNMP Management software supports. AirLive Air3GII User’s Manual...
- Page 56 If you have more than one routers and subnets, you will need to enable routing table to allow packets to find proper routing path and allow different subnets to communicate with each other. The routing table allows you to determine which physical interface address to use for outgoing IP data grams. AirLive Air3GII User’s Manual...
- Page 57 4. Sync with my PC: Click on the button if you want to set Date and Time using PC’s Date and Time manually. Click on “Save” to store your settings or click “Undo” to give up the changes. AirLive Air3GII User’s Manual...
- Page 58 2. Add New Rule: To create a schedule rule, click the “Add New Rule” button. You can edit the Name of Rule, Policy, and set the schedule time (Week day, Start Time, and End Time). The following example configures “ftp time” as everyday 14:10 to 16:20. AirLive Air3GII User’s Manual...
- Page 59 3.Installation/Un-installation Click on “Save” to store your settings or click “Undo” to give up the changes. AirLive Air3GII User’s Manual...
-
Page 60: Tool Box
3.Installation/Un-installation 3.5 Tool Box AirLive Air3GII User’s Manual... - Page 61 3.Installation/Un-installation 3.5.1 System Info You can view the System Information and System log, and download/clear the System log, in this page. AirLive Air3GII User’s Manual...
- Page 62 You can backup your settings by clicking the “Backup Setting” function item and save it as a bin file. Once you want to restore these settings, please click Firmware Upgrade button and use the bin file you saved. AirLive Air3GII User’s Manual...
- Page 63 1. Domain Name or IP address for Ping Test: Allow you to configure an IP, and ping the device. You can ping a specific IP to test whether it is alive. Click on “Save” to store you r settings or click “Undo” to give up the changes. AirLive Air3GII User’s Manual...
-
Page 64: Troubleshooting
Press OK. Type ipconfig to get the IP of default gateway. Type “ping 192.168.123.254”. Assure that you ping the c orrect IP Address assigned to the Air3GII. It will show four replies if you ping correctly. AirLive Air3GII User’s Manual... - Page 65 Maybe the device can’t recognize your ISP automatically. Please select “Manual” mode, and filling in dial-up settings manually. .What can I do if my country and ISP are not in the list? Please choose “Others” item from the list, and filling in dial-up settings manually. AirLive Air3GII User’s Manual...
- Page 66 A. Can’t setup a wireless connection? Ensure that the SSID and the encryption settings are exactly the same to the Clients. Move the Air3GII and the wireless client into the same room, and then test the wireless connection. AirLive Air3GII User’s Manual...
- Page 67 4.Trobleshooting III. Disable all security settings such as WEP, and MAC Address Control. IV. Turn off the Air3GII and the client, then restart it and then turn on the clie nt again. Ensure that the LEDs are ind icating normally. If no, make sure that the AC power and Ethernet cables are firmly connected.
- Page 68 1. Ensure the Air3GII is powered on 2. Find the Reset button on the right side Press the Reset button for 8 seconds and then release. After the Air3GII reboots, it has back to the facto ry default settings. AirLive Air3GII User’s Manual...
-
Page 69: Appendix A. Spec Summary Table
PPTP, L2TP and IPSec Pass Through Web-Based IE, Navigator browser and SNMP Config.& Management IP assignment DHCP Server and Client Temperature: 0~40 Humidity 10%~90% Working non-condensing Environment OS supported Windows 95/98/ME/NT/2000/XP; Linux Full range(100-240V), Switching 5V 1.2A Power AirLive Air3GII User’s Manual... -
Page 70: Appendix B. Licensing Information
NTP client i mplementation RT61a pd for 802 .1X ap plication vsftpd- 2.0.3 quota-t ools 3.13 GNU Wget Availability of source code Please vis it our web site or contact us to obtain more information. AirLive Air3GII User’s Manual... - Page 71 If the software is modified by someone else and passed on, we want its recipients to know that what they have is not the original, so that any problems introduced by others will not reflect on the original authors' reputations. AirLive Air3GII User’s Manual...
- Page 72 You must cause any work that you distribute or publish, that in whole or in part contains or is derived from the Program or any part thereof, to be licensed as a whole at no charge to all third parties under the terms of this License. AirLive Air3GII User’s Manual...
- Page 73 (This alternative is allowed only for noncommercial distribution and only if you received the program in object code or executable form with such an offer, in accord with Subsection b above.) AirLive Air3GII User’s Manual...
- Page 74 Program by all those who receive copies directly or indirectly rough you, then the only way you could satisfy both it and this License would be to refrain ntirely from distribution of the Program. AirLive Air3GII User’s Manual...
- Page 75 N WRITING THE COPYRIGHT HOLDERS AND/OR THER PARTIES PROVIDE THE PROGRAM "AS IS" WITHOUT WARRANTY OF ANY KIND, ITHER EXPRESSED OR IMPLIED, INCLUDING, BUT NOT LIMITED TO, THE IMPLIED ARRANTIES OF MERCHANTABILITY AND FITNESS FOR A PARTICULAR PURPOSE. AirLive Air3GII User’s Manual...
- Page 76 U OR THIRD PARTIES OR A FAILURE OF THE PROGRAM TO PERATE WITH ANY OTHER PROGRAMS), EVEN IF SUCH HOLDER OR OTHER PARTY HAS BEEN ADVISED OF THE POSSIBILITY OF SUCH DAMAGES. END OF TERMS AND CONDITIONS AirLive Air3GII User’s Manual...
Need help?
Do you have a question about the Air3GII and is the answer not in the manual?
Questions and answers