Astralpool Viron Connect 10 Installation And Operating Instructions Manual
Pool and spa controller
Hide thumbs
Also See for Viron Connect 10:
- Installation and operating instructions manual (76 pages) ,
- Installation and operation manual (30 pages)
Table of Contents
Advertisement
Installation And OPERATING INSTRUCTIONS
WEB SITE
CONNECT 10 IOM INST 314
Melbourne: 03 8796 8600
North Sydney: 02 9853 2100
Brisbane: 07 3308 5400
INST314 CONNECT10 COLOUR TOUCH SCREEN V12-16
Viron Cartridge Filter
Pool and Spa Controller
OPERATING INSTRUCTIONS
Gold Coast: 07 5552 2600
South Sydney: 02 8778 9500
Adelaide: 08 8152 7600
I
INSTALLATION AND OPERATING INSTRUCTIONS
Bolero ND Cleaner
Perth: 08 9350 2600
Townsville: 07 4796 0100
www.astralpool.com.au
sales@astralpool.com.au
1
Advertisement
Table of Contents
Troubleshooting

Related Manuals for Astralpool Viron Connect 10


Summary of Contents for Astralpool Viron Connect 10
-
Page 1: Operating Instructions
INSTALLATION AND OPERATING INSTRUCTIONS INSTALLATION AND OPERATING INSTRUCTIONS WEB SITE Viron Connect 10 Viron Cartridge Filter Pool and Spa Controller Bolero ND Cleaner INSTALLATION AND OPERATING INSTRUCTIONS CONNECT 10 IOM INST 314 Melbourne: 03 8796 8600 Gold Coast: 07 5552 2600... -
Page 2: Viron Connect
Congratulations on the purchase of your AstralPool Viron Connect 10 controller. Correct installation and set up by a qualified and/or licensed technician will ensure you have many years of trouble free enjoyment from your swimming pool. • The Power Supply Module must be hard wired by a licensed electrician. To avoid a safety hazard, the supply cord if damaged, must only be replaced by AstralPool, its service agent or a suitably qualified person. -
Page 3: Table Of Contents
Table of Contents Section 1 Overview ................................ 5 Components ..................................5 Basic Operation ................................. 5 Section 2 Equipment Operation............................. 6 Pool & Spa ..................................6 Lighting ....................................6 Heating ....................................7 Solar ....................................7 Favourites ..................................8 Section 3 Setting the Clock ............................9 Clock setting .................................. - Page 4 Installing Internet Gateway hardware to the Connect 10…………………………………………………………………………….……………55 Configuring home Wi-Fi…………………………………………………………………………………..…………………………………………………….…58 Registering ‘Pool Owner’ and authorized ‘Users’……………………………………………………………………………………….………..…..59 Internet Serial Number and Password………………………………………………………………………………………………………………………61 Download connectmypool app to your SmartPhone or Tablet……………………………………………………………………….…………62 Internet Gateway and App trouble shooting……………………………………………………………………………………….……………………69 INST314 CONNECT10 COLOUR TOUCH SCREEN V12-16...
-
Page 5: Section 1 Overview
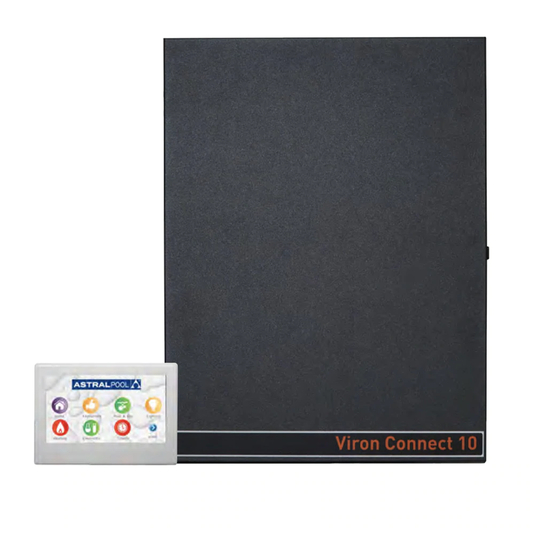
It is important that these instructions be read completely prior to installation or operation of the controller. These instructions are current for touchscreen version 1.7 onwards. 1.1 Components Viron Connect 10 Pool and Spa Controller equipment centre (supplied) b. Touchscreen Controller (supplied) RF handheld remote (optional) d. -
Page 6: Section 2 Equipment Operation
Section 2. Equipment Operation All appliances on your Viron Connect controller can be easily operated through the specific product screens. 2.1 Pool & Spa Option Select Pool & Spa Icon from the menu screen b. All equipment not allocated to a specific category (ie Lighting, Heating, etc) will be located in the Pool & Spa menu. - Page 7 2.4 Solar (if applicable) Select Solar from the menu screen b. Adjust set temperature to desired setting. Select Solar On / Off / Auto i. Off – turns solar manually off ii. On – turns solar manually on iii. Auto – turns solar to automatic operation. If sufficient heat difference between pool water and collector temperature solar will operate.
- Page 8 Section 3. Setting the Time 3.1 To set the current time on the Viron Connect touchscreen, select the Setup Icon from the main menu then select Set Time. 3.2 Using the up and down arrows, set the current hour , minutes and day (the clock default setting is using the 24 hour clock format, but 12 hour can be selected is desired) 3.3 Select done when completed.
- Page 9 Section 4. Timer Programming 4.1 Your Viron Connect controller has 8 programmable timers that can be set to operate at any time during the day. You can choose to run your timers on an ‘Everyday’, ‘Weekend’, or ‘Other’ setting. On selection of your chosen daily timers, When setting the corresponding starting letter of that selection will appear next to the timer (i.e ‘E’...
- Page 10 Any auxiliary valves which have been installed can be set to on or off. If valve is to be operating, select check box. Select next. Choose heater status (if installed). Select next. h. Choose to activate lighting zones (if installed). Select next. INST314 CONNECT10 COLOUR TOUCH SCREEN V12-16...
-
Page 11: Heating
Select the ‘Disabled’ option next to the timer you wish to set- This will then allow you to add a timer for this period. Using the arrows adjust the starting and finishing time for the timer period. Once setting the timer has begun, the ‘enabled’... - Page 12 NOTE : ONCE ALL TIMERS HAVE BEEN PROGRAMMED, ENSURE NO TIMER PERIODS OR DAYS ARE OVERLAPPING BEFORE CONTINUING. m. When finished with setting timers, select the ‘Menu’ button to return to the main screen. Next, select the ‘Home’ option which will display a screen giving you 3 options. i.
- Page 13 Section 5. Favorite Programming 5.1 The AstralPool Viron Connect 10 control system allows you to program ‘One Touch’ Favorite settings so you can operate numerous products at the same time for specific purposes. A total of 8 favorite settings can be programmed, allowing you to have things such as ‘Night Swim’, ‘Spa party’, ‘waterfall feature’...
-
Page 14: Installation And
d. Select ‘Favorite 1’ from the list. You will then be given 3 options on the next page. Select edit name. This is where you will be able to re-name the favorite, (first delete the name ‘Favorite’), then add your customized name, Next select ‘Edit Configuration’, this is where you choose what products you want to come on in that favorite. - Page 15 6.1 Control Box Installation The Viron Connect 10 electrical box has an IPX3 rating enabling it to be installed outside. Regulations within AS/NZS 3000:2007 require that the electrical box be installed outside of the pool zone. This pool zone extends 3.5m from the edge of the swimming pool.
-
Page 16: Solar
Appliance Installation / Connection - Power b. The Viron Connect controller comes with 8 x 10A GPOs and 2 x 15A GPOs. Two of the 10A outlets supply a constant 240V output for connection of appliances which require active power such as gas pool heaters. The other eight outlets are all switchable from the controller. - Page 17 Valve actuators, RJ12 cable connection ports and temperature sensor connections Section 7. Installation Setup 7.1 Touchscreen Controller Setup 1) From the main screen, select the ‘Setup’ Icon. Scroll to next page if not displayed on main page. 2) Scroll down through the screen to select the ‘Installation Setup’ icon. 3) Enter in the password of 1 2 3 4 INST314 CONNECT10 COLOUR TOUCH SCREEN V12-16...
- Page 18 4) A summary of the current equipment configuration will be shown on the screen - it will be a generic default factory setting. Select the ‘Change’ Icon to continue with the setup. 5) The next screen will then prompt you to use either the ‘SET UP WIZARD’ or the ‘JUMP TO ‘section. For the initial set-up, the ‘SET UP WIZARD’...
- Page 19 9) Select if a Genus heater is installed. ‘Genus’ heaters include all gas heaters manufactured by AstralPool Australia including the Viron eVo range, HiNRG range, HX range and JX range. i. If YES go forward to step 10; ii. If NO, you will be given the option of using the relay board within the controller to monitor the water temperature.
- Page 20 iv. If you select to use the relay board for temperature sensing, you can then choose if the display is in Celsius or Fahrenheit and if you want to use the touchscreen to regulate temperature. If you have an external heater (not manufactured by AstralPool) and you want to control your pool temperature from the Connect controller, select YES.
- Page 21 ii. Select ‘Connect Inbuilt’ if using connect 10 solar control, then press next iii. If NONE go forward to step 11 iv. Select if you require the collector to flush daily. AstralPool recommend activating this feature to ensure water does not stagnate within the collector. Also select if you are operating the solar from the filtration pump.
- Page 22 12) Next you must configure the appliances on each channel of the controller. Start with channel 1 where you will be given the options of Unused, Lighting (if configured), Pool Equipment, Controlled Heater Power (if configured) and Solar (if configured). Select which function applies to the equipment connected to the power outlet labeled channel 1.
- Page 23 13) Once you have selected the function of the channel, you need to advise if you would like to control this channel via a timer. When using a channel for filter pump utilizing an Astralpool chlorinator in AI mode configuration, you will now be asked if you want to activate this functionality for this timer. 14) Repeat step 12 for each additional channel you want to allocate a product to.
- Page 24 17) Depending on prior settings you may be asked if Cleaning Interlock and Heat Demand are required. Cleaning interlock prevents your Infloor cleaning system activating without the filtration pump operating and also prevents it operating when the system is in Spa mode. The Heat Demand will, if activated, sample the temperature of the water each hour during a programmed period.
- Page 25 8.3 Go to the ‘Setup’ option from the main menu then select ‘Configure Wireless’ 8.4 Use the password ‘1234’ to enter the wireless configuration menu. The current Network ID will be shown on the screen along with the option to ‘Install Transceivers’ and ‘Configure Handheld’. Select ‘Install Transceivers’ 8.5 Select ‘Install Fixed Transceivers’...
- Page 26 8.9 If you are connecting a handheld (RF) remote to the system also, use the ‘Configure Handheld’ option. 8.10 Your RF remote control has 8 outputs which can be programmed to operate any function of Viron Connect controller. Possible programming options are; 1) Favourite settings;...
- Page 27 Section 9. External Heater Control (non-Genus) 9.1 If a non AstralPool heater is installed or a non Genus compliant heater (such as AstralPool heat pumps), the Viron Connect system can be configured to operate and control the heater from the touchscreen. If you have an AstralPool compliant gas heater installed, do not proceed with the following steps.
- Page 28 Section 11. Touch Screen Installation Instructions Plasterboard Recessed Installation Figure 1 Section 11. Touch Screen Installation Instructions cont. To remove the touchscreen from the touchscreen backing panel, use a flat blade screwdriver in the slot as shown. Whilst holding the front of the screen, lift the tab with screwdriver and angle away until a gap is created and a small ‘click’...
- Page 29 Section 11. Touch Screen Installation Instructions cont. INST314 CONNECT10 COLOUR TOUCH SCREEN V12-16...
- Page 30 Section 11. Touch Screen Installation Instructions cont. INST314 CONNECT10 COLOUR TOUCH SCREEN V12-16...
- Page 31 Section 11. Touch Screen Installation Instructions cont. For a thick wall, turn the mounting arms around as shown: Continue to screw the mounting arms down until the clamp distance is slightly bigger than the wall thickness. Turn the screw anti clockwise so that the mounting arms fold into the Screen Back to enable it to fit into the wall cut-out. Section 11.
- Page 32 Feed the communications cable through the rear hole, fit the Screen Backing panel into the wall (Note that the TOP marking should be at the top), then tighten the screws Clip the screen back in to finish installation. Section 11. Touch Screen Installation Instructions cont. Surface Wall Mounting To mount on a solid wall where it is too difficult to recess the screen into the wall, use the Surface Mount base plate provided.
- Page 33 Section 11. Touch Screen Installation Instructions cont. Once this is mounted and all screws fastened, the Touchscreen can be clipped on in the same manner as the flush mount. The finished unit: Section 12. Custom Switching (from external source) 10.1 The Viron Connect controller has the ability to accept two external switching inputs that allow for the operation of a ‘Favorite’...
- Page 34 INST314 CONNECT10 COLOUR TOUCH SCREEN V12-16...
- Page 35 INST314 CONNECT10 COLOUR TOUCH SCREEN V12-16...
- Page 36 Section 13. Service Mode Operation 9.1 If control of the Connect system is required from outside the house, all equipment can be operated from the service panel inside the main electrical control box. This function would be used when wanting to manually operate any channel via a simple ON/OFF button press, for example performing a backwash or manually vacuuming the pool.
-
Page 37: Section 4 Timer Programming
’favorite’ menu settings, turn a valve or return system to ‘All Auto’. • Viron Connect 10 Temperature and solar sensor kit (520146) can be used when operating an AstralPool heat pump or another manufacturer’s heater. This is also needed when operating the solar heating option from the controller. -
Page 38: Section 8 Wireless Configuration
Check for timer periods/days crossing over Check isolation switch is on No power to touchscreen Check safety switch Check RJ12 cable connections Check “Service Mode” not enabled Check SYSTEM / LOCAL connection Touchscreen not activating channels ... -
Page 39: Control
Section 16. Equipment Outlet Names Record what equipment is plugged into the Equipment Centre. This will enable you to name each channel when you set up the touch screen control Example: Channel 1 Viron 3 speed Pump Channel 2 Arc underwater Light Channel 1 ________________________________________________________________ Channel 2 ________________________________________________________________... - Page 40 Part Two: Installing the Internet Gateway and Smart Phone/Tablet App The Internet Gateway is an optional purchase that allows the Connect 10 Pool and Spa Controller to connect to the internet, via a Wi-Fi or Ethernet connection , to a home Router. Downloading the free App ‘connectmypool’ and correctly setting up all equipment will allow the pool owner to control the pool and spa from their Smart Phone or Tablet.
- Page 41 Option 3 – FM wireless transceiver to ‘Internet Gateway’ to Home Modem Connect RJ12 cable from Connect controller to ‘Equipment side transceiver’. Connect ‘Touchscreen side transceiver’ via RJ12 cable to ‘Internet Gateway’ – This will establish a wireless link between transceivers and then communicate via Wi-Fi to the home router (when in range).
- Page 42 RJ12 RJ45 To Pool To Ethernet System Reset switch Wi-Fi Alive Connected After connecting the Internet Gateway to the Pool System the Home Wi-Fi can be configured. This is achieved using the Touch Screen 1. On the Touchscreen, go to ‘Setup’. INST314 CONNECT10 COLOUR TOUCH SCREEN V12-16...
-
Page 43: Section 15 Troubleshooting
2. Use the arrows to scroll pages, and then press on the ‘Internet Gateway’ button. 3. You are now shown the main Internet Gateway Diagnostics page. This page allows you to configure the Wi-Fi settings. On this page the Internet Serial Number is also displayed. If the serial number is shown as ‘???’, then the Touchscreen cannot communicate with the Internet Gateway. - Page 44 In order to activate the connectmypool App you must register the pool’s owner. The Pool Owner will have authority to access applicable functions in the Viron Connect 10 Pool and Spa controller and also delegate access to other users – which may be other members of the family or your pool service technician.
- Page 45 All fields in the User Registration need to be filled out. The email address supplied must be a valid email address as an email with a link in it will be sent to this address. The Password is used by the Pool Owner to access the App. In a latter process, other users can be allocated access to this pool.
- Page 46 The ‘Internet Gateway’s’ unique Serial Number and Passcode must now be entered. This is found on the registration sticker inside the box and must be kept by the pool owner. This information has been included as an adhesive label for convenience to consumer and also for security reasons. The Pool Name that is entered on this page will be displayed on the App.
- Page 47 To let additional people access your pool controller press ‘SETTINGS’, then ‘User List’, then ‘Add User’. After pressing ‘Add User’ you will be prompted to enter the new user’s name and email address along with their password. Once a User is added, their ability to access different features can be setup using the ‘Screen Configuration’ button.
- Page 48 1. Setup device to accept applications from an unknown source Select Settings. 2. Select Security. 2.1 Android Phone. Select More then select Security Select Unknown sources INST314 CONNECT10 COLOUR TOUCH SCREEN V12-16...
- Page 49 2.2 Android Tablet. Select Security and then Unknown sources. 3. Get application on to device. 3.1 Download from Web Site. The connectmypool application is available for download. 3.2 Install from Email Attachment. If the application has been emailed to the device, download it by selecting the download icon next to the connectmypool document.
- Page 50 4. Install application. 4.1 Android Phone. Select the connectmypool to start installation. Select Install. INST314 CONNECT10 COLOUR TOUCH SCREEN V12-16...
- Page 51 4.2 Android Tablet. Select the connectmypool to start installation. Use the package installer to install the application . Select Install. Select Open. INST314 CONNECT10 COLOUR TOUCH SCREEN V12-16...
- Page 52 5.0 Start Application and log in. If the connectmypool isn’t running, find the connectmypool icon on your desktop, and select it. The application will start. Log in using the username and password that was set up during registration. NOTE: You must log out for 10 minutes, then log in using your newly created user name/email and password before the system will configure itself.
- Page 53 Troubleshooting To confirm that the Internet Gateway is able to connect to the connectmypool servers, follow these steps. 7. On the Touchscreen, go to ‘Setup’. 8. Use the arrows to scroll pages, and then press on the ‘Internet Gateway’ button. 9.
- Page 54 The Internet Gateway can use either wired (Ethernet) or wireless (Wi-Fi) connection. The status of each is shown in the table. If the table is filled with ‘?’, then the Touchscreen cannot communicate with the Internet Gateway. Check that the Internet Gateway is plugged in to the pool system, using normal flat-cable RJ12 connection, and that the plugs of the RJ12 cable have the correct orientation.
- Page 55 Troubleshooting The Wireless Connection ‘Initialized’ shows ‘No’ The Internet Gateway was unable to initialize the Wireless connection. Cycle power to the Internet Gateway and wait 1 minute to allow for re-initialization. Check all connections and signal strength ok. If the problem persists, call AstralPool for support. ‘Linked’...
- Page 56 Code Text Meaning Idle The IG has not yet attempted to connect to the server. Wait for the IG to automatically connect, or press ‘Reconnect’ to force a connection attempt. 32768 Connection open The connection to the server is open, but no communication has yet been received.
- Page 57 Internet Gateway Status Lights The image below shows the bottom view of the Internet Gateway module. RJ12 RJ45 To Pool To Ethernet System Reset switch Wi-Fi Alive Connected The Internet Gateway has three main status lights. The ‘Alive’ status light flashes once every two seconds to indicate that the module is powered and operating correctly. The ‘Connected’...
- Page 58 Maintenance of your Controller Maintenance Schedule: Your new product incorporates moving parts and withstands high velocity water with chemicals in it. Some of these parts will wear in the normal course of use and require regular checks and maintenance. Performing these checks and maintenance will identify parts that have worn and require repair/replacement before further serious damage is sustained.
- Page 59 WARRANTY AstralPool Australia Pty Ltd (ABN 97 007 284 504) ("AstralPool") provides the following warranty in relation to its Viron Connect 10 Pool & Spa controller. ("Product"). Our goods come with guarantees that cannot be excluded under the Australian Consumer Law. You are entitled to a replacement or refund for a major failure and for compensation for any other reasonably foreseeable loss or damage.
- Page 60 The Product has not been installed, maintained and/or operated in complete compliance with the installation and operating instructions and any instructions by AstralPool; The Product has been subject to accident, negligence, alteration, abuse or misuse. The warranty does not extend to: a) normal wear and tear;...
Need help?
Do you have a question about the Viron Connect 10 and is the answer not in the manual?
Questions and answers