
Related Manuals for Superior MONIA


Summary of Contents for Superior MONIA
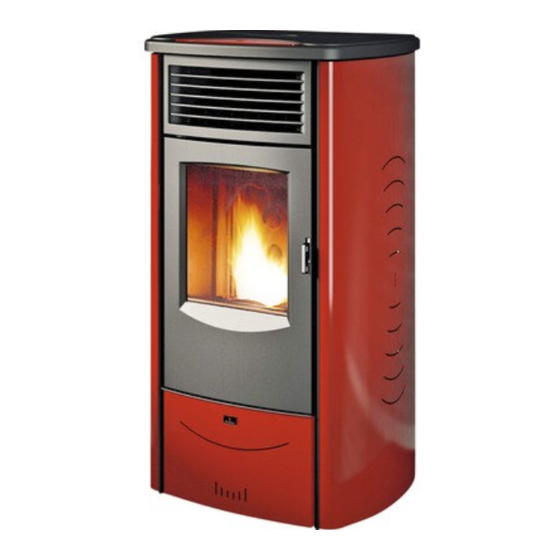
- Page 1 Pellet stove MONIA INSTRUCTION FOR INSTALLATION, USE AND MAINTENANCE H07023380 / DT2000477-03...
-
Page 2: Important Information
Dear Customer, Thank you for having chosen one of our products, which is the result of years of experience and continuous research aimed at making a superior product in terms of safety, reliability and performance. This booklet contains information and advice for safe and effi cient use of your product. -
Page 3: Table Of Contents
CONTENTS DT2010187-00 Section Heading Page GENERAL RULES Single chimney or flueway Soot inspection Chimney stack Fresh air intake Installation enviroment Load-bearing capacity of the fl oor Heating capacity Minimum safety distances Connection to the flueway 1.10 Connecting to a conventional chimney 1.11 Using an external flue 1.12... -
Page 4: General Rules
1.0 GENERAL RULES DT2010216-05 Ensure that the installation of your product conforms to all the indications given below. Fig. 1 CHIMNEY STACK FLUEWAY CONNECTION TO FLUE SOOT REMOVAL INSPECTION HOLE FRESH AIR INTAKE END ELBOW WITH INSPECTION WINDOW MINIMUM SAFETY DISTANCES CHECK OF FLOOR LOAD-BEARING CAPACITY DT2030321-00... -
Page 5: Single Chimney Or Flueway
DT2010024-02 1.1 SINGLE CHIMNEY OR FLUEWAY Every appliance must have a vertical fl ue pipe operating by natural draught to Fig. 2 discharge the combustion gases outdoors. The fl ue must: - comply with regulations in force in the place of installation of the appliance; - be tight to the products of combustion, waterproof, suitably insulated, made with materials resistant to corrosion by the gases and to stress;... -
Page 6: Chimney Stack
DT2010025-03 1.3 CHIMNEY STACK The chimney stack is a device fi tted on the top of the chimney that is designed Fig. 7 Fig. 8 to aid dispersion of the products of combustion in the atmosphere. The chimney stack must comply with the following requirements: it must have an internal section and shape the same as the fl... -
Page 7: Fresh Air Intake
DT2010539-03 1.4 FRESH AIR INTAKE To ensure trouble-free operation the stove/fi replace must have the necessary Fig. 12 Fig. 13 air available for combustion and this is provided through the fresh air intake. The fresh air intake must: - have a total free cross section at least equal to the size given in the paragraph “TECHNICAL DATA”;... -
Page 8: Installation Enviroment
DT2010033-01 1.5 INSTALLATION ENVIROMENT The appliance should be installed in a location which allows safe and convenient use as well as easy maintenance. If the product being installed requires an electrical socket, the room must also be provided with an earthed power supply in accordance with current regulations. The room where the appliance is to be installed must comply with the following requirements. -
Page 9: Minimum Safety Distances
Zona radiante dell'apertura beams or ceilings, etc) shown in the figures. del focolare * = Values referred to the use of original Superior flue pipes; if other pipes DT2032441-0 are used, the safety fire regulations or fire codes of reference are applicable. -
Page 10: Connecting To A Conventional Chimney
The use of this type of fi tting must allow for the collection of condensate mixed with soot, which builds up inside the pipe. It must also permit periodic cleaning of the fl ue without the need to disassemble the pipes. This type of fi tting can be bought at Superior retail outlets together with the pipes. An example is given below of a fl... -
Page 11: Using An External Flue
If the connector has to pass through partitions or walls of infl ammable or Fig. 22 CLOSING FLANGE heat-sensitive materials, or through load-bearing walls, create: an insulating barrier equal to or greater than 10cm around the connector using mineral-based insulating material (rock wool, ceramic fi bre) with a nominal density greater than 80kg/m - If the connector has to pass through non-fl... -
Page 12: Features And Technical Data
1 to 4 Ash drawer: removable Fuel: natural pure wood pellets (see “FUEL” section) Heating: forced ventilation DT2011648-00 2.2 ACCESSORIES AND EQUIPMENT MONIA Description Room sensor NTC 10K provided provided Cable L=200 Schuko IEC Pellet stove door handle tool provided provided Grate baffl... -
Page 13: Product Identification Data
DT2011541-00 2.4 PRODUCT IDENTIFICATION DATA Every product is identifi ed by a rating plate showing the model and the performance of the appliance as well as a plate giving the serial number. The rating plate is located on the rear panel of the stove, while the plate with the serial number is located on the underside of the hopper lid. A label bearing the serial number is also applied on the cover last page of the “Installation, operation and maintenance”... -
Page 14: Wiring Diagram
DT2032293-02 2.6 WIRING DIAGRAM SCAM FUMI POS. KEY TO PARTS POS. KEY TO PARTS NO. KEY TO COLOURS Control display Power supply with fuse (5X20 4AH250V) White Smoke sensor Yellow-green Room fan Room sensor Black Pellet-loading auger External thermostat Brown Flue gas fan Serial port DB9 Blue... -
Page 15: Preparing For Installation
Pursuant to current regulations on the safety of electrical equipment, you Fig. 27 must contact a Superior After-Sales Service Centre or a qualifi ed electrician for all and any work connected with installation, maintenance or servicing that involves access to electrical parts. -
Page 16: Installing The External Thermostat
DT2011598-00 4.2 INSTALLING THE EXTERNAL THERMOSTAT Fig. 30 The appliance is designed for connection to an external room thermostat. To connect the external thermostat use cable type 2x0.5mm clamped with a PG7 cable gland to be inserted in the appropriate hole in the rear panel (Fig. -
Page 17: Side Flue Gas Outlet (Optional)
- Remove the side panel after unscrewing the 2 front screws [E] (Fig. 35) and Fig. 35 loosen the rear screws [F] that secure it. (Fig. 36) - Follow the same procedure for the other side. - Refi t the cladding by repeating the above steps in the reverse order. DT2032309-0 Fig. - Page 18 - Replace the removed pipe [D] with the side fl ue gas outlet connection [E] to Fig. 39 be found in the kit, inserting it fully into its seat and taking care to seal it with a gasket and a silicone-based (not cement-based) sealant. (Fig. 39) DT2032326-0 - Secure the fl...
-
Page 19: Remote Control Kit (Optional)
DT2011677-01 4.5 REMOTE CONTROL KIT (OPTIONAL) Fig. 43 If the remote control kit is installed, it’s not possible to install at the same time the GPRS module and vice versa. - Referring to the paragraph “REMOVING THE CLADDING”, remove the lower front panel and the right side panel. -
Page 20: Fuel
> 1,0 kg/dm This “customisation” of stove settings must be carried out at Net heat value, approx. 5 kWh/kg a Superior Service Centre or by specially qualified personnel Moisture content, approx. < 8 % authorised by the factory. Residual ash, approx. -
Page 21: Use
6.0 USE DT2011649-00 • Do not use the stove as a cooking appliance. • Ensure that the room in which the stove is installed is suffi ciently well ventilated (fresh air intake). • Ensure that all joints in the fl ue are hermetically sealed using a silicone- (not cement-) based sealant which is resistant to temperatures of up to 250ºC and which shows no sign of deterioration. -
Page 22: Setting The Language
DT2011651-00 6.2 SETTING THE LANGUAGE This function allows one of the four languages available to be set on the display according to the country where the product is installed. Description of activity Display Press key 6 for a few seconds. The scrolling readout “SELECT LANGUAGE”... -
Page 23: Programming The Clock
DT2011643-00 6.4 PROGRAMMING THE CLOCK Correct time setting is necessary to be able to use all the functions where time is involved. Setting the clock entails programming the following values: day, hour and minutes. These values are displayed in sequence upon pressing the SET key. Display Description of activity Press key 6 for a few seconds. - Page 24 DAILY PROGRAM DT2011654-00 Description of activity Display Press key 6 for a few seconds. Use key 5 or 6 to scroll the menu that appears on the right display until the scrolling readout SET CHRONO appears. Confi rm by pressing the SET key. SET CHRONO The scrolling readout PROGRAM DAY appears on the right-hand display.
- Page 25 Description of activity Display Use key 1 or 2 to set the stop time of the fi rst operating cycle. Each time the key is pressed the time advances by 10 minutes. For automatic fast advance, hold the key pressed down for a few seconds. STOP SE PROGRAM 1 (scrolling readout) Confi...
-
Page 26: Menu Parameter
Description of activity Display Press key 1 or 2 to set the required power level during the fi rst operating cycle. Confi rm the power setting by pressing the SET key. SET EN PO 1 (scrolling readout) Press key 1 or 2 to set the required room temperature during the fi rst operating cycle. Confi... -
Page 27: Enable Beep
DT2011657-00 6.7 BUZZER ENABLE This function is used to enable or disable the warning signal emitted if a safety device is activated. Display Description of activity Press key 6 for a few seconds. Use key 5 or 6 to scroll the menu that appears on the right display until the scrolling readout ENABLE BEEP appears. -
Page 28: Lighting For The Fi Rst Time
DT2010082-04 6.9 LIGHTING FOR THE FIRST TIME - Before lighting the stove for the fi rst time, check that the grate is properly The time indicated for operation at maximum power does not necessarily placed and pushed towards the left. have to be continuous, but may be divided up into two periods separated - There will be odours when lighting the fi... - Page 29 The display automatically returns to its initial status. Automatic grate cleaning is activated during regular stove operation at programmed intervals that are set by Superior personnel. This procedure is necessary in order to eliminate accumulation of ash or encrustation that would prevent correct stove operation CLEANING BRA (scrolling readout) and must therefore be removed.
- Page 30 EXTERNAL THERMOSTAT DT2011663-00 Description of activity Display Stove operation can be regulated by any kind of external room thermostat connected to the electronic board. To connect the thermostat, see paragraph “INSTALLING THE EXTERNAL ROOM THERMOSTAT”. Operation of the external thermostat depends on the stove temperature setting. - If the set stove temperature is less than the room temperature, the external thermostat prevails.
-
Page 31: Remote Control
fl ame symbol will select one of the four power levels of the stove. - Temperature: when operating normally, pressing the + and - keys above the thermometer symbol will select the desired room temperature (7°C - 30ºC). SUPERIOR DT2030079-0 DT2010223-01 6.12 SAFETY DEVICES During operation some parts of the stove (door, handle, ceramic parts) can reach high temperatures. - Page 32 PELLET HOPPER TEMPERATURE DT2011667-00 Description of activity Display The automatic reset thermostat sensor is located on the pellet hopper and its function is to protect the hopper from excessive changes in temperature. If the pellet hopper temperature reaches critical levels, the thermostat cuts off the power supply to the fuel-loading auger, thereby stopping the supply of pellets to the grate and starting the stove shutdown process.
-
Page 33: Stove Status
STOVE ROOM TEMPERATURE SENSOR DT2011668-00 Description of activity Display The room sensor is connected to the rear of the stove (Fig. 29). It constantly monitors the temperature in the immediate vicinity of the stove to ensure that it can be operated in all safety. The alarm is activated when the sensor is momentarily or accidentally removed from its normal position. -
Page 34: Humidifier (Optional)
DT2011671-00 6.15 HUMIDIFIER (OPTIONAL) Fig. 48 The stove is provided with a niche for a humidifi er (optional) located under the ceramic insert of the top plate: once the ceramic cladding has been fi tted, the humidifi er can be fi lled with water. When refi... -
Page 35: Maintenance
DT2011672-00 Pursuant to current regulations on the safety of electrical equipment, you must contact a Superior After-Sales Service Centre or a qualifi ed electrician for all and any work connected with installation, maintenance or servicing that involves access to electrical parts. -
Page 36: Cleaning The Fi Rebox
DT2010428-03 7.3 CLEANING THE FIREBOX Once a week clean the fi rebox as follows. Fig. 52 - Remove the grate baffl e and draw out the grate. DEFLETTORE INTERNAL - Turn the eccentric clamps to free the internal baffl e. INTERNO BAFFLE - Lift the baffl... -
Page 37: Cleaning The Enamelled Metal Parts
The door of the stove is equipped with a ceramic glass window 4 mm thick, resistant to temperatures up to 750°C; the glass can only be broken by a strong blow or improper use. Do not slam the door or hit the glass. Should the glass break, only replace it with a spare part from the Superior factory. -
Page 38: Troubleshooting
It is therefore recommended that only Superior authorised Service Centres be contacted. Whenever authorised Service Centre personnel carry out work, they must show an identity card issued by the factory on which the following are printed: stamp and signature of the company and the period of validity of the actual document. - Page 39 PROBLEM CAUSE SOLUTION Stove combustion gas safety Replace the faulty control device (use Faulty pressure control device “ALF 2” stove status only originalo spares) Failed fi ll-in of Pellet-charging system Check the electric connections “NO ACC” stove status Empty hopper Fill the hopper Grate requires cleaning Clean the grate (see section 7.1)
- Page 40 Empty the pellet hopper; check and Pellet-charging system blocked clean the auger and chute This instruction booklet contains all the necessary information for installation, operation and maintenance. Only call the Superior service centre after having scrupulously followed all the instructions. H07023380 / DT2000477-03...
-
Page 41: Replacing The Fuses
DT2010557-02 8.1 REPLACING THE FUSES Electronic board fuse. Fig. 57 Motherboard Scheda madre Unscrew the cartridge fuse or safety plug from the electronic board and replace with a similar one. Motherboard fuse type: F4AL250V Cartridge fuse/safety plug Tappo porta fusibile DT2032439-0 Fig. - Page 42 H07023380 / DT2000477-03...
- Page 43 H07023380 / DT2000477-03...
- Page 44 Product serial number, to be quoted when requesting service from the After-Sales Service Centre. Via Montello, 22 31011 Casella d’Asolo (TV) - ITALY Tel. +39.04235271 - Fax +39.042355178 www.superiorstufe.com info@superiorstufe.com H07023380 / DT2000477-03...
Need help?
Do you have a question about the MONIA and is the answer not in the manual?
Questions and answers