Advertisement
Available languages
Available languages
Quick Links
FEATURES
For use with any LiftMaster 433MHz garage door opener.
Personalized Password:
Up to 10,000 possible combinations. Password can be easily changed if desired.
Temporary Password:
Can be added for visitors or service persons. This temporary password can be limit-
ed to a programmable number of hours or a programmable number of entries.
Rolling Code: While your password remains constant until you change it, the code
between the Keyless Entry and the receiver changes with each use, randomly
accessing over 100 billion new codes.
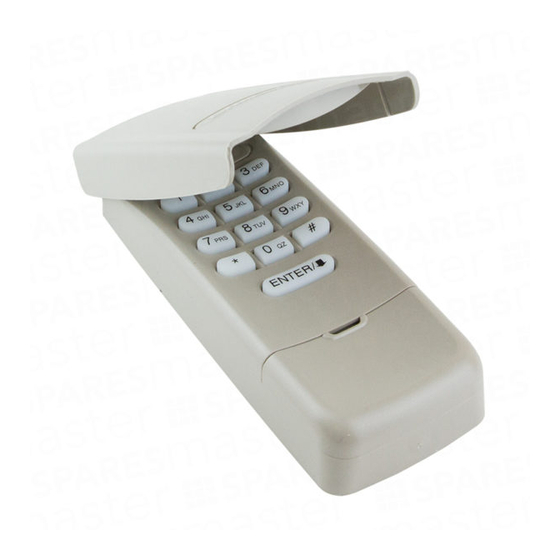
Operation: Opener activates when 4-digit password and ENTER button is pressed. If
wrong numbers are accidentally pressed, correction can be made immediately. The
ENTER button will transmit only the lastfour digits. The keypad will blink for 15 sec-
onds after the password is transmitted. During that time the ENTER button can be
used to stop or reverse the door travel.
One Button Close: Opener can be closed by pressing only the ENTER button if the one but-
ton close feature has been activated. This feature has been activated at the factory. To activate or
deactivate this feature press and hold buttons 1 and 9 for 10 seconds. The keypad will blink twice
when the one button close is active. The keypad will blink four times when one button close is
deactivated.
SETTING THE PERSONAL ENTRY PASSWORD
We recommend that you program your password now, before you install the Keyless
Entry. Then you can test the reception at the mounting location before you proceed
further.
USING THE MULTI- FUNCTION DOOR CONTROL
1. Enter a four digit personal identification
number (PIN) of your choice on the keypad.
Then press and hold ENTER.
2. While holding the ENTER button, press and
hold the LIGHT button on the Multi-Function
Door Control.
3. Continue holding the ENTER and LIGHT
buttons while you press the push bar on the
Multi-Function Door Control (all three buttons
are held).
4. Release buttons when the motor unit lights
blink. It has learned the code. If light bulbs
are not installed, two clicks will be heard.
To prevent possible SERIOUS INJURY or DEATH from a moving gate or
garage door:
• Install Keyless Entry Control within sight of the garage door, out of reach of
children at a minimum height of 1.5 m, and away from all moving parts of
door.
• ALWAYS keep remote controls out of reach of children. NEVER permit chil-
dren to operate, or play with remote control transmitters.
• Activate gate or door ONLY when it can be seen clearly, is properly adjust-
ed, and there are no obstructions to door travel.
• ALWAYS keep gate or garage door in sight until completely closed. NEVER
permit anyone to cross path of moving gate or door.
USING THE "LEARN" BUTTON
Wireless Keyless Entry with
rolling code Model 9747E
9
1
9
1
7
3
7
3
5
KG
5
KG
1. Press and release the learn button on motor unit. The
learn indicator light will glow steadily for 30 seconds.
2. Within 30 seconds, enter a four digit personal identifi
cation number (PIN) of your choice on the keypad.
Then press and hold the ENTER button.
3. Release the button when the motor unit lights blink. It
has learned the code. If light bulbs are not installed,
two clicks will be heard.
INSTALLATION
Choose a convenient location for installation.
Install out of the reach of children at a mini-
mum height of 1.5 m, away from all moving
parts of door.
For a one-piece door, choose the optional
location shown in the illustration to avoid
injury as the door swings up and out.
Test the reception of the Keyless Entry by
operating your opener from the selected loca-
tion. Change the location if necessary.
Remove the battery cover to access the bot-
tom mounting hole.
- Insert a small phillips screw driver into the
small hole at the
bottom of the cover and gently pull outward to loosen.
- Slide the cover down to remove. Remove battery.
Center the keypad at eye level against the selected location.
Mark 4-1/4" (10.8 cm) up the centerline from the bottom and drill
a 1/8" (3.2 mm) pilot hole. Install top mounting screw, allowing
1/8" (3.2 mm) to protrude above surface. Position keypad on
screw head and adjust for snug fit. With cover open so bottom
mounting hole is visible, use a punch to mark hole. Remove
keypad and drill 1/8" (3.2 mm) pilot hole. Replace keypad and
complete installation with bottom screw, using care to avoid cracking plastic housing.
Do not over tighten. To replace battery cover slide up and snap it into place.
The Keyless Entry Battery
To prevent possible SERIOUS INJURY or DEATH:
• NEVER allow small children near batteries.
• If battery is swallowed, immediately notify doctor.
The battery should produce power for at least one
year. Replace when the Keyless Entry illumination
becomes dim or it doesn't stay on after a keystroke.
Dispose of old battery properly.
TO CHANGE AN EXISTING, KNOWN PIN
If the existing PIN is known, it may be changed by one person without using a ladder.
1. Press the four buttons for the present PIN, then press and hold the # button.
The opener light will blink twice. Release the # button.
2. Press the new 4-digit PIN you have chosen, then press ENTER.
The motor unit lights will blink once when the PIN has been learned.
Test by pressing the new PIN, then press ENTER. The door should move.
TO SET A TEMPORARY PIN
You may authorize access by visitors or service people with a temporary 4-digit PIN.
After a programmed number of hours or number of accesses, this temporary PIN
expires and will no longer open the door. It can be used to close the door even
after it has expired. To set a temporary PIN:
1. Press the four buttons for your personal entry PIN (not the last temporary PIN),
then press and hold the * button. The opener light will blink three times. Release
the button.
2. Press the temporary 4-digit PIN you have chosen, then press ENTER.
The opener light will blink four times.
3. To set the number of hours this temporary PIN will work, press the number of
hours (up to 255), then press * .
3. To set the number of times this temporary PIN will work, press the number of
times (up to 255), then press #.
The opener light will blink once when the temporary PIN has been learned.
Test by pressing the four buttons for the temporary PIN, then press Enter. The door
should move. If the temporary PIN was set to a certain number of openings, remem-
ber that the test has used up one opening.To clear the temporary password,
repeat steps 1-3, setting the number of hours or times to 0 in step 3.
SPECIAL NOTE: The temporary password can ONLY be programmed to keypads
working on a LiftMaster Garage Door Opener. It WILL NOT work on keypads pro-
grammed to an external receiver. The temporary password will continue to CLOSE
the door even after the time has expired. To eliminate this, program a new
temporary password into the keypad.
i
en
Keyless
Typical
Entry
Installation
Exterior Front Wall
1-Piece or
Sectional Door
Door Jamb Edge
(Optional)
Door Jamb Face
(SECTIONAL DOOR ONLY)
KEYLESS ENTRY MUST BE
INSTALLED WITHIN
SIGHT OF THE DOOR
Bottom
mounting hole
Battery
Battery
Cover
Pb
Cd
Hg
OR
0845 602 4285
Advertisement

Subscribe to Our Youtube Channel
Related Manuals for Chamberlain 9747e


Summary of Contents for Chamberlain 9747e
- Page 1 1. Press and release the learn button on motor unit. The Wireless Keyless Entry with learn indicator light will glow steadily for 30 seconds. rolling code Model 9747E FEATURES 2. Within 30 seconds, enter a four digit personal identifi For use with any LiftMaster 433MHz garage door opener.
-
Page 2: Installation
Schlüsselloses Zugangssystem Rolling Code Modell 9747E INSTALLATION Typische Schlüsselloses Installation Wählen Sie einen geeigneten Platz für die Merkmale Zugangssystem Installation. Nehmen Sie den Einbau an einer Stelle Kann mit allen LiftMaster 433MHz Garagentorantrieben verwendet werden. Garagenvorderseite Persönliches Passwort: Bis zu 10.000 Kombinationen möglich.Passwort kann auf Wunsch ein- vor, außerhalb der Reichweite von Kindern mit... -
Page 3: Caractéristiques
Système d'accès sans clé à code tournant modèle 9747E Installation INSTALLATION typique CARACTÉRISTIQUES Système d'accès Choisir un emplacement Face avant de la porte Peut être utilisé avec tous les automatismes de porte de garage LiftMaster en 433,92 Mhz. sans clé... - Page 4 Sleutelloos toegangssysteem rolling code-model 9747E Typische INSTALLATIE Sleutelloos installatie Kenmerken toegangssysteem Kies een geschikte plaats voor de installatie. Voer de Kan worden gebruikt in combinatie met LiftMaster garagedeuraandrijvingen met 433MHz. inbouw uit op een plek buiten bereik van kinderen op Persoonlijk wachtwoord: tot wel 10.000 combinaties mogelijk.
-
Page 5: Installazione
Sistema di accesso senza chiavi Rolling Code modello 9747E INSTALLAZIONE Installazione Caratteristiche Scegliere un posto adatto per l’installazione. Sistema di accesso tipica Può essere utilizzato con i sistemi di automazione per porta garage LiftMaster con 433MHz. senza chiavi Effettuare l’installazione in un punto fuori dalla por- Password personale: fino a 10.000 combinazioni possibili. -
Page 6: Instalación
Sistema de acceso sin llave código dinámico modelo 9747E Instalación INSTALACIÓN Sistema de accesso típica CARACTERÍSTICAS Escoger una ubicación conveniente para la insta- sin llave Para usarse con calquier automatismo de garaje LiftMaster con 433MHz. Parte delantera del lación. Debe instalarseno menos de 5 pies (1.5 m) Contraseña personalizada: Hasta 10,000 combinaciones posibles. - Page 7 Sistema de acesso sem chave com código aleatório modelo 9747E Instalação INSTALAÇÃO típica Características Sistema de acesso Seleccione um local adequado para a instalação. sem chave Pode ser usado com os automatismos de portões de garagem LiftMaster com 433MHz. Frente da garagem Monte o sistema num local fora do alcance das no caso de um portão...
- Page 8 Inträde utan nyckel, modell 9747E med rullande kod Typisk INSTALLATION installation Inträde utan Särskilda kännetecken Välj en lämplig plats för installationen. Installera nyckel Kan användas i kombination med garageportöppnare av typ LiftMaster med 433MHz. utrustningen på en plats utom räckhåll för barn på...
- Page 9 Σύστημα πρόσβασης κυλιόμενου κωδικού άνευ κλειδιού, μοντέλο 9747E ΕΓΚΑΤΑΣΤΑΣΗ Σύστημα Τυπική πρόσβασης Χαρακτηριστικά Επιλέξτε κατάλληλη θέση για την εγκατάσταση. εγκατάσταση άνευ κλειδιού Μπορεί να χρησιμοποιηθεί με όλους τους μηχανισμούς κίνησης γκαραζόπορτας LiftMaster Πραγματοποιήστε την τοποθέτηση σε σημείο 433 MHz. μακριά από παιδιά με ελάχιστο ύψος 1,50 μέτρο...
- Page 10 Rolling Code -järjestelmällä toimiva kauko-ohjain, malli 9747E Tyypillinen ASENNUS asennus Ominaisuudet Kauko-ohjain Valitse sopiva paikka. Asenna kauko-ohjain Voidaan käyttää kaikkien 433 MHz Liftmaster autotallin oven avaajien kanssa. paikkaan, joka on lasten ulottumattomissa vähin- Autotallin etupuoli tään 1,5 metrin korkeudessa ja tarpeeksi kaukana Henkilökohtainen salasana:...
- Page 11 Nøgleløst adgangssystem Rolling Code model 9747 E INSTALLATION Egenskaber Vælg en egnet placering til installationen. Typisk Kan anvendes sammen med alle LiftMaster 433MHz garageportdrev. Foretag monteringen et sted, som er uden for installation Nøgleløst børns rækkevidde i en højde på mindst 1,50 adgangssystem Personlig kode: meter og som befinder sig i en sikker afstand...
- Page 12 Nøkkelløst tilgangssystem med rullekode modell 9747E INSTALLASJON Typisk installasjon Nøkkelløst Velg et egnet installasjonssted. Radiokodelåsen Egenskaper tilgangssystem skal installeres på et sted som er utilgjengelig for Kan brukes for alle garasjeportåpnere LiftMaster 433MHz. barn, i en høyde på minst 1,50 meter og i trygg...
Need help?
Do you have a question about the 9747e and is the answer not in the manual?
Questions and answers