Table of Contents
Advertisement
Quick Links
- 1 Setting up Your Mower
- 2 Using Your Wessex Mower / 4 Wheel Version
- 3 Belt Adjustment
- 4 Maintenance / Belt Adjustment / Lubrication / Flail Blades
- 5 Parts Illustration - Af & Afc120 Mainframe Assembly
- 6 Parts Illustration - Drive Shaft Assembly (Centre Mount)
- 7 Illustration -Af120 Belt Retainer Positioning
- Download this manual
Advertisement
Table of Contents

Subscribe to Our Youtube Channel
Related Manuals for Wessex AF120


Summary of Contents for Wessex AF120
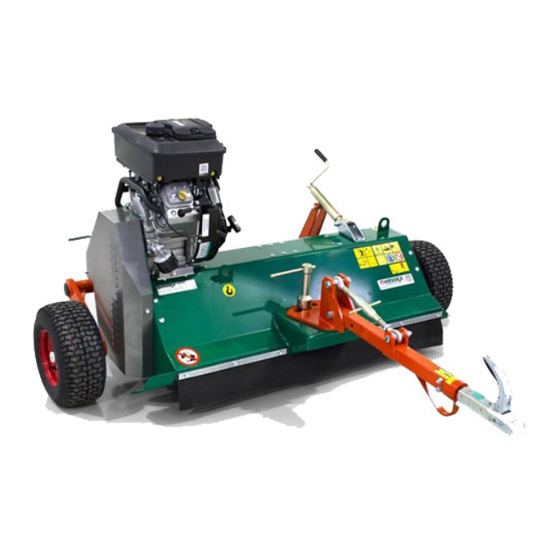
- Page 1 A Broadwood International Product Operation Manual and Parts Book Wessex AF120 & AFC120 Trailed Flail Mowers Product Code: L2002 Issue May 2011 Manufacturers and Distributors of Quality Equipment...
-
Page 2: Table Of Contents
Parts Illustration - AF120 Side Wheel Assembly ....... . .14... -
Page 3: Welcome To Your New Wessex Product
WELCOME TO YOUR NEW WESSEX PRODUCT Thank you for purchasing a Wessex product. As a Broadwood customer, you now number among the most important people of our business and we will endeavour to give you the best service available through our dealer network. -
Page 4: Safety Decals
SAFETY DECALS GB ATTENTION Description of pictograms. ATTENTION Description des pictogrames. VORSICH Beschreigung der piktogramme. GB Read Operating manual before use. Lisez Manual D’Opéreration avant l’utilisation. Vor der Benutzung, Betriebshandbuch lesen. GB Ear defenders must be worn. Défenseurs des oreilles doivent être portés. Gehörschutz getragen werden. - Page 5 SAFETY DECALS GB Lifting Point Point de levage Anschlagpunkt GB It is the operators responsibility to ensure that the machine is compatible with the load- ing capacity of the towing vehicle. Il est de la responsabilité des opérateurs afin de s’assurer que la machine est compati- ble avec la capacité...
-
Page 6: Important Safety Warnings
IMPORTANT SAFETY WARNINGS Wessex machines are guarded for your protection, but you must always observe certain elementary precautions. Machines are potentially dangerous and should be used with the greatest respect and ALL OPERATORS MUST read this manual and be are aware of all safety precautions. -
Page 7: Important Atv Safety Warnings
IMPORTANT ATV SAFETY WARNINGS READ THE FOLLOWING CAREFULLY IMPORTANT SAFETY INSTRUCTIONS ON COUPLING IMPLEMENTS AND ATTACHMENTS TO ATV’S TRAINING It is most essential that all operators of ATV’s are trained by a certified training organisation. It is strictly forbidden that any person under 16 years of age should ride an ATV. Any person 17 years of age must have had training before towing a trailer with an ATV. - Page 8 IMPORTANT ATV SAFETY WARNINGS TOWING Never tow loads larger or heavier than recommended for your ATV. (See ATV hand book). Never tow or turn across a slope. Never tow down a steep slope with a large or heavy load. When towing heavy loads there is a significant risk of jack-knifing or overturning. ROUGH TERRAIN Always take care when operating implements on rough terrain or uneven ground.
-
Page 9: Warranty
WARRANTY Your Broadwood product or equipment is warranted free from defect in workmanship or manufacture for one year from date of purchase. Any parts which appear to us to be defective, either in material or workmanship shall be replaced or repaired at no cost to the purchaser, subject to the following conditions: The registration card enclosed with this booklet must be returned to us within seven days of purchase. -
Page 10: Setting Up Your Mower
5. In order to obtain full cutting height adjustment, the adjustment handle(s) must be in the correct position on the adjusting screw mount see Plate 10 (page 30). USING YOUR WESSEX MOWER 1. Centrifugal Clutch version - The engine on your mower can be started with the throttle set at either the high or low revs setting, but always ensure that the revs are immediately adjusted so that the clutch is either completely engaged or disengaged. -
Page 11: Belt Adjustment
BELT ADJUSTMENT 1. Remove Belt Cover. 2. Loosen Jockey Pulley Bracket clamping bolt. 3. Tighten belts using adjusting screw and lock off. 4. Retighten clamp bolt. 5. Replace Belt Cover. NOTES 1. For Manual version, the clutch lever should be in the drive position for belt adjustment. 2. -
Page 12: Maintenance / Belt Adjustment / Lubrication / Flail Blades
MAINTENANCE IMPORTANT! Check that all fastening sets (bolts and nuts) are tight after the first hour of operation. LUBRICATION DAILY (8-10 working hours) Grease Main Rotor bearings (x2). Grease Roller bearings (x2). Grease Wheel bearings (x2). FLAIL BLADES The condition of the flail blades should be inspected daily. Damaged flail blades cause imbalance in the rotor and in turn, will cause serious damage to the mower, which is specifically excluded from our Warranty Conditions. -
Page 13: Troubleshooting / Winter Storage
TROUBLESHOOTING FAULT CAUSE REMEDY Leaving wheel track uncut 1. Forward speed too fast Reduce forward speed 2. Cutting height too high Lower cutting height Bad quality of cut 1. Forward speed too fast Reduce forward speed 2. Excessive blade wear Replace blades 3. -
Page 14: Parts Illustration - Af & Afc120 Mainframe Assembly
PARTS ILLUSTRATION - AF & AFC120 MAINFRAME ASSEMBLY PLATE 1... -
Page 15: Parts List - Af & Afc 120 - Mainframe Assembly
PARTS LIST AF & AFC120 MAINFRAME ASSEMBLY - PLATE 1 Item No. Part No. Description Qty. per Machine WX-2903 Fastening Set WX-9666 Shaft Spacer WX-1347 WX-7262 Taper Lock WX-8062 Engine Pulley WX-1520 Special Washer WX-7462 Centrifugal Clutch WX-10277 Fixed Guard WX-0103 Fastening Set WX-0760... -
Page 16: Parts Illustration - Af120 Side Wheel Assembly
PARTS ILLUSTRATION - AF120 SIDE WHEEL ASSEMBLY PLATE 2... -
Page 17: Parts List - Af120 Side Wheel Assembly
PARTS LIST - AF120 SIDE WHEEL ASSEMBLY - PLATE 2 Item No. Part No. Description Qty. per Machine WX-9053A Plastic Cap WX-11451 Right Hand Wheel Mounting Bracket WX-2203 Fastening Set WX-13380 Adjusting Screw Assembly WX-0603 Fastening Set WX-11251 Adjusting Screw Mount... -
Page 18: Parts Illustration - Af & Afc120 Rear Wheel Assembly
PARTS ILLUSTRATION - AF & AFC120 REAR WHEEL ASSEMBLY PLATE 3... -
Page 19: Parts List - Af & Afc 120 Rear Wheel Assembly
PARTS LIST - AF & AFC120 REAR WHEEL ASSEMBLY - PLATE 3 Item No. Part No. Description Qty. per Machine WX-3152 Wheel WX-2503 Fastening Set WX-13380 Adjusting Screw Assembly WX-0503 Fastening Set WX-11251 Adjusting Screw Mount WX-0403 Fastening Set WX-2029 Drawbar Adjuster WX-1129 Adjuster Bar... -
Page 20: Parts Illustration - Af & Afc120 Four Wheel Assembly
PARTS ILLUSTRATION - AF & AFC120 FOUR WHEEL ASSEMBLY PLATE 4... -
Page 21: Parts List - Af & Afc 120 Four Wheel Assembly
PARTS LIST - AF & AFC120 FOUR WHEEL ASSEMBLY - PLATE 4 Item No. Part No. Description Qty. per Machine WX-3152 Wheel WX-2503 Fastening Set WX-8753 Rear Wheel Mounting WX-13380 Adjusting Screw Assembly WX-0503 Fastening Set WX-11251 Adjusting Screw Mount WX-0403 Fastening Set WX-5228... -
Page 22: Parts Illustration - Afc120 Side Wheel Assembly
PARTS ILLUSTRATION - AFC120 SIDE WHEEL ASSEMBLY PLATE 5... -
Page 23: Parts List - Afc120 Side Wheel Assembly
WX-1538 Wheel Bearing Inner WX-1638 Wheel Bearing Outer WX-2652 Wheel, HTC WX-11651 Wheel Spacer WX-9153 Wheel Stud WX-9451 Wheel Hub WX-2552 Wheel, Flotation WX-11751 Wheel Spacer WX-9253 Wheel Stud *This assembly also used on AF120 for HTC and Flotation Wheels. -
Page 24: Parts Illustration - Drive Shaft Assembly (Centre Mount)
PARTS ILLUSTRATION - DRIVE SHAFT ASSEMBLY (CENTRE MOUNT) PLATE 6... -
Page 25: Parts List - Drive Shaft Assembly (Centre Mount)
PARTS LIST - DRIVE SHAFT ASSEMBLY (CENTRE MOUNT) - PLATE 6 Item No. Part No. Description Qty. per Machine WX-0941 Bearing WX-1803 Fasteing Set WX-0147 WX-9466 Drive Shaft WX-1347 WX-10477 Transmission Cover WX-2703 Fastening Set WX-7562 Centrifugal Clutch WX-10557 Flexible Coupling Body WX-10657 Flexible Coupling Spider WX-10357... -
Page 26: Parts Illustration -Manual Engagement Assembly
PARTS ILLUSTRATION - MANUAL ENGAGEMENT ASSEMBLY PLATE 7... -
Page 27: Parts List - Manual Engagement Assembly
PARTS LIST - MANUAL ENGAGEMENT ASSEMBLY - PLATE 7 Item No. Part No. Description Qty. per Machine WX-0622 Circlip WX-1438 Bearing WX-3322 Split Pin WX-4758 Link ‘B’ WX-0903 Fastening Set WX-4658 Link ‘A’ WX11856 Latch WX-1003 Fastening Set WX-4558 Clutch Handle WX-3222 Coiled Pin WX-4358... -
Page 28: Parts Illustration / Parts List - Control Arm Option
PARTS ILLUSTRATION - CONTROL ARM OPTION PLATE 8 PARTS LIST - CONTROL ARM OPTION - PLATE 8 Item No. Part No. Description Qty. per Machine WX-12480 Control Arm WX-7002 ‘U’ Bolt WX-6756 Throttle / Cable... -
Page 29: Illustration -Af120 Belt Retainer Positioning
BELT RETAINER POSITIONING - PLATE 9 PLATE 9... -
Page 30: Illustration - Adjusting Screw Mount / Pivot Position For Adjusting Screw Assembly
ADJUSTING SCREW MOUNT - PLATE 10 PLATE 10 Pivot Position for Adjusting Screw Assembly 1. AF(C) 120, Side Wheel (STD) Position 1 2. AF(C) 120, Side Wheel (HTC) Position 1 3. AF(C) 120, Side Wheel (FLOTATION) Position 2 4. AF(C) 120, Rear Wheel Position 1 5. -
Page 31: Ce Certificate
AF & AFC 120 Flail Mower NOVEMBER 2010... - Page 32 Manufacturers and Distributors of Quality Equipment Broadwood International Trading Estate, Oakhanger Road, Bordon, Hampshire. GU35 9HH Telephone: 01420 478111 Fax 01420 483000 e-mail: sales@broadwoodintl.co.uk www.broadwoodintl.co.uk...
Need help?
Do you have a question about the AF120 and is the answer not in the manual?
Questions and answers