Table of Contents
Advertisement
Quick Links
Advertisement
Chapters
Table of Contents

Related Manuals for Domino G20I


Summary of Contents for Domino G20I
- Page 1 Domino G-Series Product Manual G20i...
- Page 2 THIS PAGE INTENTIONALLY LEFT BLANK EPT024619 Issue 1 June 2016...
-
Page 3: Part
DOMINO G-SERIES PRINTER PRODUCT MANUAL This manual, Domino Part No. EPT024619, is for use in the operation and maintenance of Domino G20i printers. For basic instructions on how to operate the printer, refer to the Domino G20i Operator’s Quick Reference Guide, Domino Part No. EPT024620. - Page 4 Manufacturers address: Bar Hill, Cambridge CB23 8TU. This declaration of conformity is issued under the sole responsibility of the manufacturer. Object of the declaration: Domino G20i Printer, from serial number E2176J1P001N125 The object of the declaration described above is in conformity with the...
- Page 5 EPT024619 Issue 1 June 2016...
-
Page 6: Part
FCC Notice This equipment has been tested and found to comply with the limits for a Class A digital device, pursuant to Part 15 of the Federal Communication Commission (FCC) Rules. These limits are designed to provide reasonable protection against harmful interference when the equipment is operated in a commercial environment. - Page 7 CONTENTS PART 1 HEALTH AND SAFETY PART 2 DESCRIPTION PART 3 OPERATION PART 4 FAULT FINDING PART 6 INSTALLATION EPT024619 Issue 1 June 2016...
-
Page 8: Part
AMENDMENT RECORD Amendment Date All Parts at issue 1 June 2016 EPT024619 Issue 1 June 2016... -
Page 9: Table Of Contents
PART 1 : HEALTH AND SAFETY CONTENTS Page INTRODUCTION ................... Basic Requirements ................. Fire Risk ................... Spillages and Disposal ..............G-SERIES SYMBOLS ................EPT024619 Issue 1 June 2016... - Page 10 HEALTH AND SAFETY THIS PAGE INTENTIONALLY LEFT BLANK EPT024619 Issue 1 June 2016...
-
Page 11: Introduction
They contain no user-serviceable parts. • Wear suitable protective equipment when operating the G20i. • The G20i is for indoor use only, do not operate the printer outdoors, or in an environment outside of the specified operating range. EPT024619 Issue 1 June 2016... - Page 12 (or clean water if saline solution is not available), taking care not to allow the water to run into an unaffected eye. Medical aid must be obtained immediately. Eyewash is available from Domino (Pt.No. 99200). • Certain G-Series inks contain solvents which may injure the skin. Good working practice must always be employed and risk assessments carried out.
-
Page 13: Fire Risk
HEALTH AND SAFETY Fire Risk For an electrical fire, do not use water. If water must be used, such as in the case of a Nitro-cellulose ink fire (see below) the power MUST BE REMOVED first. Fire risk is a most important consideration where printing inks are stored and used. -
Page 14: G-Series Symbols
HEALTH AND SAFETY G-SERIES SYMBOLS The following symbols are used in this manual. Where they appear next to a procedure or instruction, they have the significance and importance of written warnings and cautions. Eye protection must be worn. Protective clothing must be worn. Use adequate protective gloves. Consult the relevant Safety Data Sheet (SDS). - Page 15 PART 2 : DESCRIPTION CONTENTS Page INTRODUCTION ................... General ..................... PRINTER DESCRIPTION ..............Android Device Requirements ............PC Requirements ................Printer Specification ................. Printer Connections ................. Printer Status Lights ................. PRINTER CONTROL ................Wireless USB Keyboard Interface ............ Main Menu ................... Message Menu................
- Page 16 DESCRIPTION THIS PAGE INTENTIONALLY LEFT BLANK EPT024619 Issue 1 June 2016...
-
Page 17: Introduction
DESCRIPTION INTRODUCTION General This manual provides: • A basic introduction to the G20i. • Details of the menu structure. • Instruction for message creation. • Preventative maintenance procedures. • Fault finding and diagnosis. • Details on updating software, transforming messages, logos and fonts. -
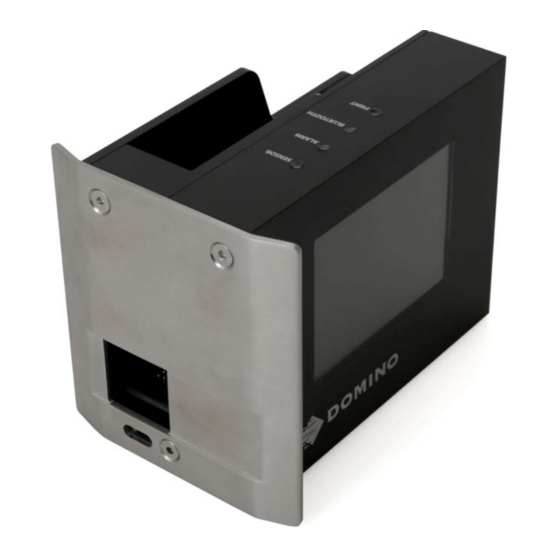
Page 18: Printer Description
DESCRIPTION PRINTER DESCRIPTION The G20i is a compact thermal ink jet printer, intended for printing data on user supplied products on manufacturing production lines. The G20i uses a Domino BK640 ink cartridge as the print engine. The G20i can be controlled with a wireless USB keyboard, an Android device via Bluetooth or a PC connected via USB. -
Page 19: Printer Specification
Maximum Power Consumption: Maximum Printing 600 X 600 DPI (When using a PC to control Resolution: the G20i) 300 X 300 DPI (When using an Android device or wireless USB keyboard to control the G20i) Print Speed: 76m/min at 300 x 300 dpi... -
Page 20: Printer Connections
DESCRIPTION Printer Connections Printer Connections 12V DC power supply input. Serial connection for an external product sensor, shaft encoder, alarm beacon, etc. USB-B port for PC connection. USB flash port for updating firmware, fonts and logos. USB port for the wireless USB keyboard receiver. EPT024619 Issue 1 June 2016... -
Page 21: Printer Status Lights
DESCRIPTION Printer Status Lights Printer Status Lights Sensor LED Activated when the printer receives a signal from a product sensor. Red light = Internal Product Sensor Green light = External Product Sensor Alarm LED Activated when an error occurs. Bluetooth LED Activated when a Bluetooth device is connected to the printer. -
Page 22: Printer Control
DESCRIPTION PRINTER CONTROL The G20i can be controlled using 3 different user interface types: LCD Screen Wireless USB 2.0 Keyboard and LCD Screen, as described on page 2-9. PC with the Domino G20i PC application installed, as described on page 2-14. -
Page 23: Wireless Usb Keyboard Interface
DESCRIPTION Wireless USB Keyboard Interface Main Menu When starting the printer, the following Main menu screen is displayed on the G20i’s LCD screen. Main menu Message menu, Message page 2-10. Operation menu, Operation page 2-11. Settings menu, Settings page 2-12. -
Page 24: Message Menu
DESCRIPTION Message Menu The Message menu contains the following items: Create New Create a new message. Open Open an existing message to print, edit or delete. Information Display the current printer settings: • Ink Level • Speed • Density • Resolution •... -
Page 25: Operation Menu
The Operation menu contains the following items: Start / Stop Start or Stop printing. Purge Purge the print head to clear blocked nozzles. Connect PC / Connect or Disconnect the G20i to a PC. Disconnect PC EPT024619 Issue 1 June 2016 2-11... -
Page 26: Settings Menu
Select the unit of measurement. (mm or inch) Bluetooth Enable, disable and setup the Bluetooth connection to control the G20i from an Android device. Update Font Update the font type. Rollover Enable or disable a different time value depending on the production shift schedule. - Page 27 DESCRIPTION Password Set password protection to prevent unauthorized access to printer settings. Default Reset the G20i to factory default settings. Language Select the interface language. IO signals Enable or Disable an optional remote start / stop button. Custom string Update and view custom text strings.
-
Page 28: Pc Interface
“PC Connection and Software Installation” on page 6-16. Printer Control Screen When starting the Domino G20i PC application, the following Printer Control screen is displayed. Domino G20i PC Software The Printer Control screen contains the following items: Sub Menu... - Page 29 DESCRIPTION Sub Menu Setting Name Explanation Print Head Switch nozzle Manually select which nozzle side will be used for printing. • Odd • Even Switch nozzle Automatically switch nozzle sides between prints. • Auto • Times Purge Purge the print head at regular intervals to prevent print head nozzles •...
- Page 30 DESCRIPTION Sub Menu Setting Name Explanation Printing Status Power On/Off Displays whether the printer is powered On or Off. Speed m/min Displays the current print speed. Page Displays the number of messages printed, compared to the number of messages still to print. Start page Select which page to start printing from.
-
Page 31: Designing Screen
DESCRIPTION Designing Screen The Designing screen contains the following items: New Template Create a new message template. Edit Template Edit an existing message template. Open Open a saved message template on the PC. Save Save the message template on the PC. Export to .tiff Export the message template as a .tiff file. - Page 32 DESCRIPTION Paste Paste an object. Select Tool Select and edit individual objects in the message template. Hand Pan Move the designing area to the left or right. Shapes Insert Lines, Rectangles, Squares, Circles and Ovals into the message template design. Static Text Insert static text and barcodes into the message template design.
-
Page 33: Tool Menu
Purge the print head, to clear blocked nozzles. Ink Cost Calculate the ink cost. Event Log View the printer’s event log. Convert Logo Convert a logo to a format which is compatible with the G20i. EPT024619 Issue 1 June 2016 2-19... -
Page 34: Android Device Interface
Android Device Interface To connect the G20i to an Android device, see “Android Device Connection” on page 6-20. When starting the Domino Printer G20i Android application, the following items will be displayed: start print Start printing. stop print Stop printing. - Page 35 DESCRIPTION printer settings View and change printer settings: • density • resolution • print direction • print mode • roll over hour • print speed • print delay • print side • sensor • purge • cartridge • system clock •...
- Page 36 • Auto change after • Printer name • Firmware settings View the following items: • Language • quick guide • about our store Go to the online store. contact us Contact the Domino technical support team. 2-22 EPT024619 Issue 1 June 2016...
- Page 37 PART 3 : OPERATION CONTENTS Page START UP ..................... Using the Wireless USB Keyboard ..........Using a PC ..................Using an Android Device ..............SHUT DOWN ..................3-10 Using the Wireless USB Keyboard ..........3-10 Using a PC ..................3-11 Using an Android Device ..............
- Page 38 OPERATION Shift Code..................3-31 Creating a Message Using a PC ............. 3-32 Static Text ................... 3-33 Barcode ..................3-34 Dynamic Barcode ................ 3-37 Shapes..................3-39 Image................... 3-40 Serial Number................3-41 Date / Time .................. 3-43 Expiry Date .................. 3-44 Shift Code..................3-45 Creating a Message Using an Android Device ........
- Page 39 OPERATION Using an Android Device ..............3-63 SAVING A MESSAGE ................3-64 Using the Wireless USB Keyboard ..........3-64 Using a PC ..................3-64 DELETING A MESSAGE ............... 3-65 Using the Wireless USB Keyboard ..........3-65 Using a PC ..................3-65 UPDATING LOGOS ................
- Page 40 OPERATION THIS PAGE INTENTIONALLY LEFT BLANK EPT024619 Issue 1 June 2016...
-
Page 41: Start Up
Using the Wireless USB Keyboard WARNING: Eye protection must be worn. To start up the G20i using the wireless USB keyboard: (1) Insert the USB keyboard receiver into the USB keyboard slot on the G20i. (2) Turn the keyboard on, using the on/off switch on the back of the keyboard. -
Page 42: Using A Pc
Eye protection must be worn. To start up the G20i using a PC: (1) Connect the PC to the G20i’s USB PC socket using a USB A-B cable. (2) Turn the PC on. (3) Insert the USB keyboard receiver into the USB keyboard slot on the G20i. - Page 43 See “Ink Cartridge Installation” on page 6-14. (7) From the printer’s main menu, highlight Operation. (8) Press the Enter button. (9) Highlight Connect PC. (10) Press the Enter button. (11) On the PC, open the Domino G20i software. EPT024619 Issue 1 June 2016...
-
Page 44: Using An Android Device
(2) Turn the keyboard on using the on/off switch on the back of the keyboard. (3) Turn the printer on using the in-line switch on the power adapter. (4) Insert an ink cartridge into the G20i. See “Ink Cartridge Installation” on page 6-14 (5) From the printer’s main menu, highlight Settings. - Page 45 (11) Open the Domino Printer G20i application on the Android device. (12) Select Printers. (13) Select Search to find the G20i. (14) When the G20i is found, it’s name will appear in the Printers list. (15) Select the G20i’s name. (16) Select Connect.
-
Page 46: Shut Down
OPERATION SHUT DOWN Using the Wireless USB Keyboard WARNING: Eye protection must be worn. CAUTION: To prevent the ink cartridge from drying out it must be properly stored. See “Ink Cartridge Storage” on page 5-2 To shut down the printer using the wireless USB keyboard: (1) From the printer’s main menu, highlight Operation. -
Page 47: Using A Pc
See “Ink Cartridge Storage” on page 5-2 To shut down the printer using a PC: (1) Open the Domino G20i software. (2) Open the Printer Control menu. (3) Click on the Stop icon to stop printing. (4) Turn the printer off using the in-line switch on the power adapter. -
Page 48: Using An Android Device
See “Ink Cartridge Storage” on page 5-2 To shut down the printer using an Android device: (1) Open the G20i application on the Android device. (2) Select Stop Print. (3) Turn the printer off using the in-line switch on the power adapter. -
Page 49: Start Printing
(3) Click on the Print icon to start printing. Using an Android Device WARNING: Eye protection must be worn. To start printing using an Android device: (1) Open the Domino Printer G20i application on the Android device. (2) Select Start Print. EPT024619 Issue 1 June 2016 3-13... -
Page 50: Stop Printing
(3) Click on the Stop icon to stop printing. Using an Android Device WARNING: Eye protection must be worn. To stop printing using an Android device: (1) Open the G20i application on the Android device. (2) Select Stop Print to stop printing. 3-14 EPT024619 Issue 1 June 2016... -
Page 51: Loading And Printing A Message
OPERATION LOADING AND PRINTING A MESSAGE Using the Wireless USB Keyboard WARNING: Eye protection must be worn. To load and print a message using the wireless USB keyboard: (1) From the main menu, highlight Message. (2) Press the Enter button. (3) Move the cursor to highlight Open. -
Page 52: Using A Pc
Note: When using a PC, messages will be saved locally on the PC’s hard drive. If the G20i is disconnected from the PC, the message will no longer be available to the G20i for printing. To load and print a message using a PC: (1) Open the Domino G20i software. -
Page 53: Using An Android Device
Android device are available for message selection. To load and print a message using an Android device: (1) Open the G20i Application on the Android device. (2) Select Messages. (3) Select a message from the Messages recent list. -
Page 54: Creating A Message
OPERATION CREATING A MESSAGE Creating a Message Using the Wireless USB Keyboard Note: To insert Chinese or other special characters into the message, a custom string must be used. See “Custom String (Chinese and Special Character Text)” on page 3-30. To create a message using the wireless USB keyboard: (1) From the printer’s main menu, move the cursor to highlight Message. -
Page 55: Barcode
OPERATION Barcode To ensure consistent barcode quality is maintained, a shaft encoder should be used to measure the production line speed. See “Shaft Encoder Connection” on page 6-27. To insert a barcode into the message design: (1) Whilst creating a new message, place the cursor where the barcode is required. -
Page 56: Dynamic Barcode
OPERATION Dynamic Barcode A dynamic barcode contains a counter in the barcode value. To insert a dynamic barcode into the message design: (1) Whilst creating a new message, place the cursor where the dynamic barcode is required. Note: If printing multiple lines of text, position the cursor on the bottom line. -
Page 57: Symbol
OPERATION Symbol The symbols shown in the table below can be added to the message as static text using the keyboard: “ ‘ < > Additional symbols, shown in the table below, can be added to the message by inserting a symbol: €... -
Page 58: Logo
OPERATION Logo Up to 4 logos can be saved in the printer’s internal memory and made available to insert in a message design. To update the 4 saved logos: See “Updating Logos” on page 3-66. To insert a logo into the message design: (1) Whilst creating a new message, place the cursor where the logo should appear. -
Page 59: Single Counter
OPERATION Single Counter Up to 6 different counters can be inserted into one message. In the event of a power failure, when power is restored the counter will restart from the point of shutdown. To insert a single counter into the message design: (1) Whilst creating a new message, place the cursor where the counter should appear. -
Page 60: Box/Lot Counter
OPERATION Box/Lot Counter A box/lot counter is a dual counter which can be used to print box and lot numbers. In the event of a power failure, the box/lot counter will continue counting from the same value when power is restored. To insert a box/lot counter into the message design: (1) Whilst creating a new message, place the cursor where the box/lot counter should appear. - Page 61 OPERATION (11) Press the Enter button. (12) Press the Insert button on the keyboard. (13) Move the cursor to highlight Counter. (14) Press the Enter button. (15) Move the cursor to highlight Box/Lot. (16) Press the Enter button. (17) Move the cursor to highlight Counter2. (18) Press the Enter button.
-
Page 62: Date
OPERATION Date Note: The printer’s system clock must be set up to print an accurate date value. See “Set The System Clock” on page 6-33. To insert today’s date into the message design: (1) Whilst creating a new message, place the cursor where the date should appear. -
Page 63: Expiry Date
OPERATION Expiry Date Note: The printer’s system clock must be set up to print an accurate expiry date value. See “Set The System Clock” on page 6-33 To insert an expiry date into the message design: (1) Whilst creating a new message, place the cursor where the expiry date should appear. -
Page 64: Time
OPERATION Time Note: The printer’s system clock must be set up to print an accurate time value. See “Set The System Clock” on page 6-33. To insert the current time into the message design: (1) Whilst creating a new message, place the cursor where the time should appear. -
Page 65: String
OPERATION String A string, is a string of text which has been saved in the printer’s internal memory and can be inserted into a message design. Up to 5 strings can be created and saved in the printer’s internal memory. Strings can contain up to 50 characters. -
Page 66: Custom String (Chinese And Special Character Text)
OPERATION Custom String (Chinese and Special Character Text) A custom string, is a string of text which can contain Chinese and other special characters. After a custom string has been created and saved, it can be selected and inserted into a message design. Up to 20 custom strings can be saved in the printers internal memory. -
Page 67: Shift Code
OPERATION Shift Code To insert a shift code into the message design: (1) Whilst creating a new message, place the cursor where the shift code should appear. (2) Press the Insert button on the keyboard. (3) Move the cursor to highlight Shiftcode. (4) Press the Enter button. -
Page 68: Creating A Message Using A Pc
OPERATION Creating a Message Using a PC Note: The PC and G20i must remain connected to print messages created on the PC. This is because messages created on the PC are stored on the PC’s hard drive. To create a new message using a PC: (1) Open the Domino G20i software on the PC. -
Page 69: Static Text
OPERATION Static Text To insert a static text field into the message design: (1) Click on the Static Text icon. (2) In the designing area, click where the static text should be placed. (3) The Static Text design window will now open, the following settings can be defined: Static Text Design Window Explanation... -
Page 70: Barcode
OPERATION Barcode To ensure consistent barcode quality is maintained, a shaft encoder should be used to measure the production line speed. See “Shaft Encoder Connection” on page 6-27. To insert a barcode into the message design: (1) Click on the Static Text icon. (2) Click in the message design area where the barcode is required, to open the Static Text window. - Page 71 OPERATION Barcode Types GS1 128 GS1 DataBar GS1 DataBar Expanded Expanded Stacked GS1 DataBar GS1 DataBar RSS14 GS1 DataBar Limited Stacked GS1 DataBar GS1 DataBar Han Xin Stacked Omni Truncated Directional HIBC LIC 128 HIBC LIC 3Of9 HIBC LIC CODABLOCK F HIBC LIC HIBC LIC MPDF417 HIBC LIC PDF417...
- Page 72 OPERATION Barcode Types UPC E UPC E 2 Digits UPC E 5 Digits USPS Intelligent USPS Intelligent USPS Postnet 10 Mail Mail Package ZIP 4 CD USPS Postnet 11 USPS Postnet 12 USPS Postnet 5 ZIP ZIP 4 2 ZIP 4 2 CD USPS Postnet 6 ZIP USPS Postnet 9 ZIP Vehicle Identification...
-
Page 73: Dynamic Barcode
OPERATION Dynamic Barcode A dynamic barcode contains a counter in the barcode value. To insert a dynamic barcode into the message design: (1) Click on the Serial Number icon. (2) Click in the message design area where the dynamic barcode is required. - Page 74 OPERATION Setting Name Explanation Add zero to lead Add leading zeros to the beginning of the dynamic barcode value. Add space to Add leading spaces to the beginning of the dynamic lead barcode value. Prefix Add text which will appear at the beginning of the dynamic barcode value.
-
Page 75: Shapes
OPERATION Shapes To insert a shape into the message design: (1) Click on the Shape icon. (2) Select either a Line, Rectangle, Square, Circle or Oval. (3) Click in the message design area where the shape is required. (4) Left-click on the shape to resize or drag the shape to a different position. -
Page 76: Image
OPERATION Image To insert an image into the message design: (1) Click on the Image icon. (2) Click in the message design area where the image is required. (3) Select the icon to search for, and select the required image file. (4) Adjust the Threshold value and select Preview, until the quality of the converted image is acceptable. -
Page 77: Serial Number
OPERATION Serial Number To insert a serial number into the message design: (1) Click on the Serial Number icon. (2) Click in the message design area where the serial number is required. (3) The Serial Number window will now open. Use the settings in the Serial Number window to define the serial number value: Setting Name Explanation... - Page 78 OPERATION Setting Name Explanation Add zeros to lead Add leading zeros to the beginning of the serial number. Add spaces to Add leading spaces to the beginning of the serial lead number. Prefix Add text which will appear at the beginning of the serial number.
-
Page 79: Date / Time
OPERATION Date / Time Note: The printer’s system clock must be set up to print an accurate date / time value. See “Set The System Clock” on page 6-33. To insert today’s date, or the current time into the message design: (1) Click on the Static Text icon. -
Page 80: Expiry Date
OPERATION Expiry Date Note: The printer’s system clock must be set up to print an accurate expiry date value. See “Set The System Clock” on page 6-33. To insert an expiry date into the message design: (1) Click on the Static Text icon. (2) In the designing area, click where the expiry date should be placed. -
Page 81: Shift Code
OPERATION Shift Code To insert a shift code into the message design: (1) Click on the Shift Code icon. (2) In the designing area, click where the shift code should be placed. (3) The Shift Code Options window will now open. The font type, font size, and bold, italic or underline text can be defined on the task bar. -
Page 82: Creating A Message Using An Android Device
OPERATION Creating a Message Using an Android Device To create a message using an Android device: (1) Open the Domino G20i application on the Android device. (2) Select messages. Static Text All 128 ASCII characters can be entered into the message as static text. To insert Chinese or other special character types using an Android device, a texting logo must be used. -
Page 83: Texting Logo (Chinese And Special Character Text)
G20i. To create, save and insert a texting logo into a message using an Android device: (1) Open the G20i application on the Android device. (2) Select logo. (3) Select create texting logo. (4) Input the required text on the Input text in any language here line. -
Page 84: Barcode
OPERATION Barcode To ensure consistent barcode quality is maintained, a shaft encoder should be used to measure the production line speed. See “Shaft Encoder Connection” on page 6-27. To insert a barcode into the message design: (1) Place the cursor where the barcode is required. Note: If printing on multiple lines of text, position the cursor on the bottom line. -
Page 85: Dynamic Barcode
OPERATION Dynamic Barcode To insert a dynamic barcode into the message design: (1) Place the cursor where the dynamic barcode is required. Note: If printing on multiple lines of text, position the cursor on the bottom line. This ensures that the barcode will be fully printed. (2) Select the Code icon. - Page 86 OPERATION Setting Name Explanation Width Select the width of the barcode from the following options: • 1 • 2 • 3 • 4 Height Select the height of the barcode from the following options: • 1 • 2 • 3 Enable text Enable or Disable human readable text.
-
Page 87: Time
OPERATION Time Note: The printer’s system clock must be set up to print an accurate time value. See “Set The System Clock” on page 6-33. To insert the current time into the message design: (1) Place the cursor where the time is required. (2) Select the Time icon. -
Page 88: Date
OPERATION Date Note: The printer’s system clock must be set up to print an accurate date value. See “Set The System Clock” on page 6-33. To insert today’s date into the message design: (1) Place the cursor where the date is required. (2) Select the Date icon. -
Page 89: Expiry Date
OPERATION Expiry Date Note: The printer’s system clock must be set up to print an accurate expiry date value. See “Set The System Clock” on page 6-33. To insert an expiry date into the message design: (1) Place the cursor where the expiry date is required. (1) Select the Date icon. -
Page 90: Single Counter
OPERATION Single Counter In the event of a power failure, when power is restored the counter will restart from the point of shutdown. To insert a counter into the message design: (1) Place the cursor where the counter is required. (2) Select the Count icon. -
Page 91: Box/Lot Counter
OPERATION Box/Lot Counter A box/lot counter is a dual counter which can be used to print box and lot numbers. In the event of a power failure, when power is restored the counter will restart from the point of shutdown. To insert a box/lot counter into the message design: (1) Place the cursor where the counter is required. -
Page 92: Shift Code
OPERATION Shift Code To insert a shift code into the message design: (1) Place the cursor where the shift code is required. (1) Select the Shift icon. (2) 5 shift codes can be defined in the settings table: Setting Name Explanation S.Code 0, 1 and 3 different time tables for shift codes can be defined... -
Page 93: Logo
OPERATION Logo Up to 4 logos can be saved in the printer’s internal memory, and made available to insert into a message design. To update the 4 saved logos: See “Updating Logos” on page 3-66. To insert a logo into the message design: (1) Place the cursor where the logo is required. -
Page 94: Opening And Editing A Message
OPERATION OPENING AND EDITING A MESSAGE Using the Wireless USB Keyboard Note: It is not possible to edit a message field using the wireless USB keyboard. The message field must be deleted, and a new message field created to replace it. To open and edit a message using the wireless USB keyboard: (1) From the main menu, highlight Message. -
Page 95: Using A Pc
OPERATION Using a PC To open and edit a message using the PC: (1) Start the Domino G20i software on the PC. (2) Open the Designing menu from the toolbar. (3) Select the Open icon. (4) Select the message which needs to be edited. -
Page 96: Using An Android Device
The message field must be deleted, and a new message field created to replace it. To open and edit a message using an Android device: (1) Open the G20i application on the Android device. (2) Select Messages. (3) Select a message from the Messages recent list. -
Page 97: Editing A Message Field
OPERATION EDITING A MESSAGE FIELD Using the Wireless USB Keyboard It is not possible to edit a message field using the wireless USB keyboard. The message field must be deleted, then a new message field can be created to replace it. Using a PC To edit a message field using the PC: (1) Double-click on the message field which needs to be edited. -
Page 98: Deleting A Message Field
OPERATION DELETING A MESSAGE FIELD Using the Wireless USB Keyboard To delete a message field using the wireless USB keyboard: (1) Move the cursor to the end of the field to be deleted. (2) Use the backspace button on the keyboard. Using a PC To delete a message field using a PC: (1) Click on the message field to be deleted. -
Page 99: Copying A Message Field
OPERATION COPYING A MESSAGE FIELD Using the Wireless USB Keyboard Note: This feature is not available. Using a PC To copy a message field using a PC: (1) Click on the message field to be copied. (2) Click on the Copy icon on the task bar. (3) Click on the Paste icon on the task bar. - Page 100 Using the Wireless USB Keyboard To save a message using the wireless USB keyboard: Note: Messages created using a wireless USB keyboard will be saved in the G20i’s internal memory. (1) Press the ESC button. (2) Highlight Save. (3) Press the Enter button.
- Page 101 OPERATION DELETING A MESSAGE Using the Wireless USB Keyboard To delete a message using the wireless USB keyboard: (1) From the main menu, highlight Message. (2) Press the Enter button. (3) Move the cursor to highlight Open. (4) Press the Enter button. (5) Highlight the message which needs to be deleted.
- Page 102 Notes: (1) The Convert Logo tool accepts .BMP .JPG .GIF .TIF file formats. (2) The image size must be 150 x 1600 pixels or less. To convert a logo: (1) Open the Domino G20i software. (2) Open the Tool menu. (3) Click on Convert Logo.
- Page 103 OPERATION (8) Choose the name of the logo, either LOGO1, LOGO2, LOGO3 or LOGO4. (9) Click on Save. (10) Save the converted logo to a USB flash drive. EPT024619 Issue 1 June 2016 3-67...
- Page 104 (1) Convert the logo to a format which can be used by the printer. “Convert Logo” on page 3-66 (2) Insert the USB flash drive which contains the logo file into the G20i’s USB flash port. (3) From the printer’s main menu, use the wireless USB keyboard to move the cursor down to highlight Settings.
- Page 105 OPERATION Using an Android Device To update a logo from an Android device: (1) Open the G20i Application on the Android device. (2) Select logo. (3) Select update logo. (4) Select Choose image... (5) Select the image to be used from the Android device’s memory.
- Page 106 Note: A wireless USB keyboard is required for this procedure. A string, is a string of text which can be saved to the G20i and made available to insert into message designs using the wireless USB keyboard. Up to 5 strings with a maximum of 50 characters can be saved.
- Page 107 To create and update a custom string: (1) Insert a USB flash drive into the PC’s USB port. (2) Open the Domino G20i software. (3) Open the Tool menu. (4) Click on Convert Logo.
- Page 108 OPERATION (11) Insert the USB flash disk into the G20i’s USB flash port. (12) From the printer’s main menu, use the wireless USB keyboard to move the cursor down to highlight Settings. (13) Press the Enter button. (14) Move the cursor to highlight Custom string.
- Page 109 A PC, wireless USB keyboard and a USB flash drive are required to update fonts. The G20i can only support 1 font type for each font size when creating messages using the wireless USB keyboard or Android device. The font files are saved in the G20i’s internal memory.
- Page 110 OPERATION THIS PAGE INTENTIONALLY LEFT BLANK 3-74 EPT024619 Issue 1 June 2016...
- Page 111 PART 4 : FAULT FINDING CONTENTS Page TROUBLESHOOTING ................Hardware Error Messages ............... Firmware Error Messages ..............Software Error Messages ..............PRINT QUALITY FAULTS ..............EPT024619 Issue 1 June 2016...
- Page 112 FAULT FINDING THIS PAGE INTENTIONALLY LEFT BLANK EPT024619 Issue 1 June 2016...
-
Page 113: Troubleshooting
Miss-press F12 key. Press the F12 key. updating language and others The printing A previous unknown Reset the G20i to factory result is not setting has confused the default. correct printer. Software Error Messages Use the table below to diagnose and solve software faults. - Page 114 FAULT FINDING PRINT QUALITY FAULTS Use the table below to diagnose and solve print quality faults. Problem Example Action Print face too far Lower the print head away from the until print quality is substrate. acceptable. Print face Raise the print head touching the until the print quality is substrate.
- Page 115 PART 5 : MAINTENANCE CONTENTS Page INK CARTRIDGE MAINTENANCE ............Ink Cartridge Storage ............... Ink Cartridge Cleaning ..............Why Ink Cartridges Require Cleaning ......... Clean the Ink Cartridge Print Head ..........Clean the Ink Cartridge Contacts..........Manual Nozzle Purge ..............Automatic Nozzle Purge...............
-
Page 116: Ink Cartridge Maintenance
MAINTENANCE INK CARTRIDGE MAINTENANCE Ink Cartridge Storage Interruptions to the printing cycle can affect the print quality. After prolonged periods of inactivity ink will begin to evaporate and cure on the nozzle plate and in the nozzle chamber. This blocks the chamber and can either restrict the firing of the ink drops or cause them to deviate from their correct course. -
Page 117: Ink Cartridge Cleaning
MAINTENANCE Ink Cartridge Cleaning Dirty working environments can contaminate the print heads and print cartridges, affecting the quality of printed messages. Why Ink Cartridges Require Cleaning • Cured ink on the nozzle plate blocks or restricts firing. Ethanol and aqueous varieties both have different De-Cap times; however, during periods of inactivity without capping cartridges all varieties of ink may begin to cure on the nozzle plate. -
Page 118: Clean The Ink Cartridge Print Head
MAINTENANCE Clean the Ink Cartridge Print Head WARNING: Eye protection must be worn. CAUTIONS: To avoid damaging the print head, do not apply excessive force. Do not shake or squeeze the ink cartridge. To avoid clogging the print head nozzles, use a lint free cloth and de-ionized water. -
Page 119: Clean The Ink Cartridge Contacts
MAINTENANCE Clean the Ink Cartridge Contacts In some instances rows of nozzles in the print head can stop firing, see the image below. In such situations, the electrical contacts sending signals to the ink cartridge may have been impeded by contamination. To clean the contacts: (1) Remove the cartridge from the print head. -
Page 120: Manual Nozzle Purge
Using an Android Device WARNING: Eye protection must be worn. To purge the ink cartridge using an Android device: (1) Open the Domino Printer G20i application on the Android device. (2) Select Purge. (3) Select purge now! EPT024619 Issue 1 June 2016... -
Page 121: Automatic Nozzle Purge
Set up Automatic Nozzle Purge using an Android device To set up an automatic nozzle purge using an Android device: (1) Open the Domino Printer G20i application on the Android device. (2) Select printer settings. (3) Select purge. -
Page 122: Automatic Nozzle Switching
Automatic Nozzle Switching The print head has 2 banks of nozzles. To increase the nozzle life, rather than use both or 1 nozzle bank for every print, the G20i can alternate nozzle banks for each print. Set up Automatic Nozzle Switching using the Wireless USB... - Page 123 MAINTENANCE Set up Automatic Nozzle Switching using an Android device To set up this feature using an Android device: (1) Open the Domino Printer G20i application on the Android device. (2) Select printer settings. (3) Select print side. (4) De-select the Manual mode tick box.
-
Page 124: Update Firmware
(3) Copy the new firmware file onto the USB flash drive. (4) Disconnect the USB flash drive from the PC. (5) Disconnect all of the inputs and outputs on the G20i except for the power supply and USB wireless keyboard. -
Page 125: Update Languages
MAINTENANCE UPDATE LANGUAGES Note: A USB wireless keyboard will be required to control the printer for this procedure. To update the languages on the printer: (1) Update the printer’s firmware. See “Update Firmware” on page 5-10. (2) From the printer’s main menu, move the cursor to highlight Settings. (3) Press the Enter button. -
Page 126: Reset To Factory Default Settings
RESET TO FACTORY DEFAULT SETTINGS Note: A wireless USB keyboard is required for this procedure. To reset the G20i back to the factory default settings: (1) From the main menu, highlight Settings. (2) Press the Enter button. (3) Move the cursor to highlight Default. - Page 127 CONTENTS Page INSTALLATION ..................Unpacking ..................Pack Contents ................Mounting the G20i to a Conveyor ............ Grounding the G20i ................6-11 Power Supply Connection ............... 6-12 Wireless USB Keyboard Connection ..........6-13 Ink Cartridge Installation ..............6-14 PC Connection and Software Installation ........6-16 Disable Driver Signature Enforcement .........
- Page 128 INSTALLATION Using an Android Device ............6-34 Set the Print Direction ..............6-35 Using the Wireless USB Keyboard ..........6-35 Using a PC .................. 6-35 Using an Android Device ............. 6-36 Set the Print Density ................ 6-37 Using the Wireless USB Keyboard ..........6-37 Using a PC ..................
-
Page 129: Installation
INSTALLATION INSTALLATION Unpacking Remove the G20i and accessories from the packaging. Check the contents of the package against the pack contents list, report any discrepancies to the supplier immediately. Pack Contents Quantity Description G20i Thermal Inkjet Printer Base Clamp Clamps... - Page 130 INSTALLATION Quantity Description Anti Shock Clamp 19 x 300mm Round Bar 19 x 200mm Round Bar Hex Cap Screw 8 x 20mm EPT024619 Issue 1 June 2016...
- Page 131 INSTALLATION Quantity Description Hex Cap Screw 8 x 15mm Hex Cap Screw 4 x 10mm Wireless USB Keyboard USB A-B Cable EPT024619 Issue 1 June 2016...
- Page 132 INSTALLATION Quantity Description Power Adapter Ground Cable with M3x5 Screw Screwdriver EPT024619 Issue 1 June 2016...
- Page 133 INSTALLATION Quantity Description 6mm Hex Key 3mm Hex Key EPT024619 Issue 1 June 2016...
-
Page 134: Mounting The G20I To A Conveyor
• 3mm hex key • 6mm hex key To mount the G20i to a conveyor: (1) Mount the Anti Shock Clamp to the side of the G20i. G20i Printer Anti Shock Clamp (2) Mount the Base Clamp and 19 x 200mm Round Bar to the side of the conveyor. - Page 135 INSTALLATION (3) Slide the 2 Clamps onto the 19 x 300mm Round Bar. 19 x 300mm Round Bar Clamps (4) Mount the 19 x 300mm Round Bar with Clamps onto the 19 x 200mm Round bar. EPT024619 Issue 1 June 2016...
- Page 136 INSTALLATION (5) Mount the G20i and Anti Shock Clamp onto the 19 x 300mm Round Bar. (6) Adjust position of the printer so that it is 3mm further forwards than the conveyor guide rail. Conveyor Product on Guide Rails Conveyor G20i Printer (7) Tighten all of the screws.
-
Page 137: Grounding The G20I
INSTALLATION Grounding the G20i To ground the G20i: (1) Attach the ground cable to the ground point, on the underside of the anti shock clamp using the M3x5 screw. G20i Ground Point (2) Attach the other end of the ground cable to suitable grounding point. -
Page 138: Power Supply Connection
INSTALLATION Power Supply Connection CAUTION: Only use the power adapter provided. (1) Plug the power adapter into the 12 VDC socket. Power Adapter Connection (2) Plug the power adapter into a wall outlet, or other power source. (3) Turn on the power adapter on using the in-line switch. In-line Power Switch 6-12 EPT024619 Issue 1 June 2016... -
Page 139: Wireless Usb Keyboard Connection
INSTALLATION Wireless USB Keyboard Connection (1) Insert the USB keyboard receiver into the printer’s USB keyboard slot. Wireless USB Keyboard Receiver (2) Insert 2 x AAA batteries into the keyboards battery compartment. Wireless USB Keyboard Batteries (3) Turn on the keyboard. Wireless USB Keyboard On/Off Switch EPT024619 Issue 1 June 2016 6-13... -
Page 140: Ink Cartridge Installation
INSTALLATION Ink Cartridge Installation To install an ink cartridge into the G20i: (1) Open the latch on the rear of the printer. Ink Cartridge Latch (2) Remove the cap from the ink cartridge. Ink Cartridge Cap 6-14 EPT024619 Issue 1 June 2016... - Page 141 INSTALLATION (3) Insert the ink cartridge into the printer. Insert Ink Cartridge (4) Close the latch on the rear of the printer. Close Ink Cartridge Latch EPT024619 Issue 1 June 2016 6-15...
-
Page 142: Pc Connection And Software Installation
To connect the G20i to a PC: (1) Save the Domino G20i software and driver files to a location on the (2) Connect the PC to the USB PC slot on the G20i using the USB A-B Cable. G20i Printer... - Page 143 (6) Move the cursor to highlight Connect PC. (7) Press the Enter button. (8) The PC should now detect the connection to the G20i and attempt to install the driver software, follow the on screen instructions. (9) If the PC does not automatically install the driver, the driver must be installed manually.
-
Page 144: Disable Driver Signature Enforcement
INSTALLATION Disable Driver Signature Enforcement If the PC to which the G20i is being connected uses the Windows 8 or 10 64 bit operating system, driver signature enforcement must be disabled. Windows 8 To disable driver signature enforcement in Windows 8: (1) Hold down the Windows button on the PC’s keyboard and press the... -
Page 145: Manual Driver Installation
INSTALLATION Manual Driver Installation To manually install the G20i driver: (1) Select the Windows start icon on the PC. (2) Right-click Computer and select Manage. (3) Select Device Manager in the left side bar. (4) Right-click on Thermal Inkjet Coder and select Update Driver Software. -
Page 146: Android Device Connection
(9) Type in a pin number which will be used to access the printer. (10) Press the Enter button. (11) Press ESC to return to the main menu. (12) Download the Domino Printer G20i application from the Google Play store onto the Android device. (13) Turn on Bluetooth on the Android device. -
Page 147: Input Connections
INSTALLATION INPUT CONNECTIONS NPN Input Signal Connection CAUTION: Turn off the G20i and disconnect the power before making any wiring connections. An NPN input signal can be connected to the Extended Port to trigger functions such as counter reset. Input... -
Page 148: External Product Sensors
External Product Sensors The G20i supports NPN, PNP and Push-Pull sensor types. When connected, the sensor will send a print trigger signal to the G20i when the leading edge of a product passes the sensor. When using an external product sensor, the product sensor type... -
Page 149: Pnp Product Sensor Connection
INSTALLATION PNP Product Sensor Connection CAUTION: Turn off the G20i and disconnect the power before making any wiring connections. Extended Port Sensor PNP Sensor to Printer Wiring Diagram (Powered from the printer) 5V Power Supply Extended Port Sensor PNP Sensor to Printer Wiring Diagram... -
Page 150: Push-Pull Product Sensor Connection
INSTALLATION Push-pull Product Sensor Connection CAUTION: Turn off the G20i and disconnect the power before making any wiring connections. Extended Push-pull Port Sensor Push-Pull Sensor to Printer Wiring Diagram (Powered from the printer) 5V Power Supply Extended Port Sensor Push-Pull Sensor to Printer Wiring Diagram... -
Page 151: Output Connections
INSTALLATION OUTPUT CONNECTIONS NPN Output Signal Connection CAUTION: Turn off the G20i and disconnect the power before making any wiring connections. The printer can generate an NPN output signal from the Extended Port after each print. Extended Port Output Signal... -
Page 152: Alarm Beacon Connection
INSTALLATION Alarm Beacon Connection CAUTION: Turn off the G20i and disconnect the power before making any wiring connections. An alarm beacon can be connected to allow operators to monitor the printer’s status from a distance. Beacon Signal Explanation There is a fault, printer has stopped. -
Page 153: Shaft Encoder Connection
Turn off the G20i and disconnect the power before making any wiring connections. A shaft encoder can be connected to the G20i to measure the production line speed. A shaft encoder is recommended if the speed of the production line varies during printing. -
Page 154: Shaft Encoder Wheel Diameter
INSTALLATION Shaft Encoder Wheel Diameter To calculate the required encoder wheel diameter (D), the required print resolution (R) must also be known. Perform the following calculation: 3600 ÷ (π x R) = D For example, if the required printer resolution is 600DPI, the calculation for the encoder wheel diameter is: 3600 ÷... -
Page 155: Shaft Encoder Set-Up
INSTALLATION SHAFT ENCODER SET-UP To use a shaft encoder, it must be set-up in the G20i’s settings. Using the Wireless USB Keyboard To set-up the shaft encoder using the wireless USB keyboard: (1) From the main menu, highlight Settings. (2) Press the Enter button. -
Page 156: Internal Product Sensor
INSTALLATION INTERNAL PRODUCT SENSOR The G20i is equipped with an internal product sensor to trigger message printing. Internal Product Sensor Location The internal product sensor will generate a print trigger signal when the leading edge of a product passes the product sensor. -
Page 157: Internal Product Sensor Calibration
INSTALLATION Internal Product Sensor Calibration To calibrate the internal product sensor: (1) Place a product or box in front of the G20i so that is covers the product sensor. Product / Box G20i Sensor Location (2) The Sensor LED should illuminate to indicate that a product has been detected. - Page 158 INSTALLATION (3) If the Sensor LED did not illuminate, use a small screwdriver to turn the adjustment screw clockwise, until the Sensor LED illuminates. Adjustment Screw (4) Remove the product or box from in front of the internal product sensor. (5) The Sensor LED should now turn off.
-
Page 159: Printer Settings
INSTALLATION PRINTER SETTINGS It is recommended to set the printer settings after the G20i has been installed. Printing must be stopped whilst the printer settings are changed. See “Stop Printing” on page 3-14. Set The System Clock The system clock must be set to ensure that time and date fields are printed correctly. -
Page 160: Set The Unit Of Measurement
(4) Select either Millimeters or Inches. Using an Android Device To set the measurement units using an Android device: (1) Open the G20i application on the Android device. (2) Select printer settings. (3) Select unit. (4) Select either Millimeter (mm) or Inches. -
Page 161: Set The Print Direction
(7) Press ESC to return to the main menu. Using a PC To set the print direction using a PC: (1) Open the Domino G20i software. (2) Open the Printer Control menu. (3) Select the Direction drop-down menu. (4) Select either Left to Right or Right to Left. -
Page 162: Using An Android Device
INSTALLATION Using an Android Device To set the print direction using an Android device: (1) Open the G20i application on the Android device. (2) Select printer settings. (3) Select print direction. (4) Select a print direction: (5) Select Cancel to return to the printer settings menu. -
Page 163: Set The Print Density
(3) Select a Density level from 1 to 5. Using an Android Device To set the print density using an Android device: (1) Open the G20i application on the Android device. (2) Select printer settings. (3) Select density. (4) Use the slider to select a density level from 1 to 5. -
Page 164: Set The Print Resolution (Dpi)
(7) Press ESC to return to the main menu. Using a PC To set the print resolution using a PC: (1) Open the Domino G20i software. (2) Open the Printer Control menu. (3) Select the Resolution DPI drop-down menu. (4) Select the required resolution: •... -
Page 165: Using An Android Device
INSTALLATION Using an Android Device To set the print resolution using an Android device: (1) Open the G20i application on the Android device. (2) Select printer settings. (3) Select resolution. (4) Select the required resolution: • 300x300 dpi • 300x150 dpi •... -
Page 166: Set The Print Speed
(7) Press ESC to return to the main menu. Using a PC To set the print speed using a PC: (1) Open the Domino G20i software. (2) Open the Printer Control menu. (3) In the Speed text box, type the speed of the production line conveyor (m/min). -
Page 167: Using An Android Device
INSTALLATION Using an Android Device To set the print speed using an Android device: (1) Open the G20i application on the Android device. (2) Select printer settings. (3) Select print speed. (4) Use the slider to select the speed of the production line conveyor (m/min). -
Page 168: Set The Product Sensor Type
Set the Product Sensor Type The procedures below, describe how to select either the internal or an external product sensor in the G20i’s settings. Using the Wireless USB Keyboard To set the product sensor type using the wireless USB keyboard: (1) From the main menu, highlight Settings. -
Page 169: Using An Android Device
INSTALLATION Using an Android Device To set the product sensor type using an Android device: (1) Open the Domino Printer G20i application on the Android device. (2) Select printer settings. (3) Select sensor. (4) Select either: • Internal sensor - To use an internal product sensor; or, •... -
Page 170: Set The Print Delay
The procedures below, describe how to set the print delay values. The print delay values, set the distance between when a print trigger signal is received by the G20i and the point when a message is printed. The print delay values also set the distance between printed messages. -
Page 171: Using An Android Device
INSTALLATION Using an Android Device To set the delay using an Android device: (1) Open the Domino Printer G20i application on the Android device. (2) Select printer settings. (3) Select print delay. (4) Change the Delay before print value to set the distance between when the print trigger is activated, and the point when the message will print. -
Page 172: Set The Print Mode
INSTALLATION Set the Print Mode The procedures below, describe how to set the G20i’s print mode. The G20i has 2 print modes: Print Mode Explanation Sensor Mode The G20i will print 1 or more messages after each pulsed input signal is received from a product sensor. - Page 173 Enable: Select either: Level - A sensor signal will be required to start printing. Immediate - The G20i will start printing immediately after Start is selected from the Message menu. (6) Press the Enter button. EPT024619 Issue 1 June 2016...
-
Page 174: Using A Pc
Using a PC Sensor Mode To set the print mode as Sensor using a PC: (1) Open the Domino G20i software. (2) Open the Printer Control menu. (3) Change the Printing Mode to Sensor. (4) The following settings can now be configured:... -
Page 175: Using An Android Device
Using an Android Device Sensor Mode To set the print mode as Sensor using an Android device (1) Open the G20i application on the Android device. (2) Select printer settings. (3) Select print mode. (4) Tick the Use sensor mode tick box. -
Page 176: Set Password Protection
INSTALLATION Set Password Protection The G20i can be password protected to prevent an unauthorised user accessing the printer settings. Notes: (1) By default the G20i’s password protection is disabled. (2) The default password is: 1234567890. (3) A password can be up to 10 alphanumeric characters in length. - Page 177 INSTALLATION EPT024619 Issue 1 June 2016 6-51...
- Page 178 INSTALLATION THIS PAGE INTENTIONALLY LEFT BLANK 6-52 EPT024619 Issue 1 June 2016...
Need help?
Do you have a question about the G20I and is the answer not in the manual?
Questions and answers