Advertisement
HRC –390 SERI ES
Indoor/Outdoor Touch Screen Controller
I N S T R U C T I O N M A N U A L
Models:
HRC-390-06-NA
HRC-390-12-NA
Model 04040-24 rC
DATE: 05/07/2014
DESIGNER: JC
ARTWORK №: 04040-24 rC
SOFTWARE: Adobe Indesign CS6
Orbit
®
K
1.801.299.5555
orbitonline.com
Dieline
PMS
2955
MARKETING: BT
Folded
Flat
L:
0.0"
W:
W:
6.89"
H:
H:
5.7"
Printers are responsible
for meeting print
Dims./
Product
production requirements.
Callout
Fold
Coverage
Glue
Any changes must be
approved by Orbit
PRINTERS ARE
REQUIRED TO MATCH
PMS
PMS
PMS
Printed piece must meet
ALL SPECIFIED
0000
0000
0000
designated specifications
PMS COLORS.
on this form.
Additional Information
© 2014 Orbit Inc.
This work is the property
∙
13.78"
of Orbit
∙
used, reproduced or
∙
5.7"
distributed in any way
∙
without their express
permission.
.
®
, and cannot be
®
Advertisement

Related Manuals for HYDRO-RAIN HRC-390-06-NA


Summary of Contents for HYDRO-RAIN HRC-390-06-NA
- Page 1 HRC –390 SERI ES Indoor/Outdoor Touch Screen Controller I N S T R U C T I O N M A N U A L Models: HRC-390-06-NA HRC-390-12-NA Model 04040-24 rC Orbit Printers are responsible ® 1.801.299.5555 for meeting print Dims./...
-
Page 2: Table Of Contents
Table of Contents Section 1: I N T RO D UC T I O N Thank you for selecting the Hydro-Rain ® HRC-390 Series sprinkler controller. Our designers have combined the Section 1: INTRODUCTION........02 simplicity of touch-screen programming with the flexibility... - Page 3 “Stacking” Feature Programming Information Stored Safely Occasionally you will inadvertently program one program in Non-Volatile Memory to water prior to another program finishing its watering All programming information for Programs A,B, and C are cycle. This could result in insufficient water flow neces- stored indefinitely in the HRC 390’s non-volatile memory.
-
Page 4: Getting Started
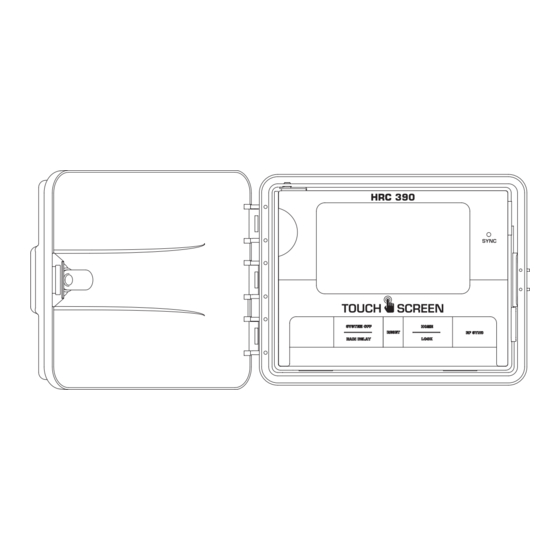
Push Buttons Rain Sensor In “Active” position the controller will monitor the These push buttons on the controller are used for rain sensor, in “Bypass” position the HRC 390 programming and other operations: sprinkler controller will ignore the rain sensor. (This switch is for hard wired sensors only and does not effect wireless rain sensors. -
Page 5: Programing Your Controller
Section 3: Set Water Days P R O G R A M M I NG YO U R C O N T R O L L E R • Press ODD, EVEN, INTERVAL (1-32 days using Walk through programming is available after pressing the or the specific days of the week (Su, Mo, Tu, We, Th, RESET button. - Page 6 BACK. If not, press ENTER. This will accept the To Change Settings From the programming and take you to the HOME/AUTO screen. HOME/AUTO Screen: Hydro-Rain has simplified the way to make modifications ® To Set Watering Cycles: to your controller programming. Just tap the setting you want changed in the HOME/AUTO screen.
- Page 7 This will allow you to water the stations in Program A To change the communication status between the control- for their pre-set durations. Press ENTER to begin ler controller and the wireless sensor do the following: watering. • Press the BUDGET button on the Home/Auto Screen.
-
Page 8: Installation
SYSTEM OFF button twice. The controller will be placed in OFF mode. To return to AUTO mode press the HOME/LOCK button. Section 4: I NS TA L L AT I O N NOTE: Before installation, please have the following tools on hand: •... - Page 9 IMPORTANT: All wires should be joined together using wire nuts, solder, and/or vinyl tape. In wet environments like a valve box it is recommended to use grease caps to prevent corrosion of the connection and for protection from water infiltration. Wiring Electric Valves Strip 1/2"...
- Page 10 Your controller is equipped with the simple “push-in” • Connect the source wires to the wires extending from the terminals for easy connection. Connect common wire sprinkler controller. to the common terminal. Connect remaining wires to • For USA: Take care to follow the correct color code. Con- corresponding terminal locations.
-
Page 11: Diagnostics Circuit Breaker
CAUTION: Do not connect the sprinkler controller to one Section 5: DI AG N O S T I CS C IR C UI T B R EA KE R PROGRAM phase of a three phase power system used by a pump or RAIN DELAY other electrical equipment. -
Page 12: Glossary Of Terms
Internal Auto-Resetting Electronic Whenever one of these conditions occurs, the electronic Circuit Breaker circuit breaker may trip, causing the station output from the sprinkler controller to be halted momentarily. The The sprinkler controller is equipped with an internal batteries will continue to activate the LCD. After a few electronic self-resetting circuit breaker. - Page 13 Determine a Watering Plan 3. Determine, based on step 2, the ideal watering option for each station. 1. For each watering station, write down the watering 4. Use this plan to program the controller. location, type of sprinkler head and types of plants to be watered.
-
Page 14: Trouble Shooting
Section 7: T R O U B L E S H O OT I NG Symptom Cause One or more stations do 1. Faulty Solenoid not turn on 2. Wire broken or not connected 3. Flow control stem screwed down, shutting valve off 4. - Page 15 We reserve the right to inspect the defective part prior installation. This equipment generates, uses and can to replacement. Hydro-Rain will not be responsible for ® radiate radio frequency energy and, if not installed and...
- Page 16 2 5 U n i o n A v e n u e N o r t h S a l t L a k e , U T 8 4 0 5 4 1. 8 88 . H Y D RORAI N www.hydrorain.com...
Need help?
Do you have a question about the HRC-390-06-NA and is the answer not in the manual?
Questions and answers