Table of Contents
Advertisement
Quick Links
Advertisement
Table of Contents

Subscribe to Our Youtube Channel
Related Manuals for Pulsar Imp 3


Summary of Contents for Pulsar Imp 3
- Page 1 IMP+ IMP+ IMP+ IMP+ NSTRUCTION ANUAL...
- Page 3 ARRANTY AND IABILITY Pulsar Process Measurement Limited guarantee for a period of 2 years from the date of delivery that it will either exchange or repair any part of this product returned to Pulsar Process Measurement Limited if it is found to be defective in material or workmanship, subject to the defect not being due to unfair wear and tear, misuse, modification or alteration, accident, misapplication or negligence.
-
Page 5: Table Of Contents
Contents Chapter 1 Start Here…............................1 About this Manual............................1 About the IMP+ Level Monitoring System ...................... 2 Functional Description ..........................2 Product Specification............................4 Physical..............................4 Environmental............................4 Performance............................. 4 Standard features............................4 Additional features - 3wires........................4 PC interface.............................. - Page 6 P100 Mode of Operation........................25 P104 Measurement Units........................25 P105 Empty Level..........................25 P106 Span ..............................26 P107 Near Blanking Distance.......................26 P108 Far Blanking Distance .........................26 Relay (rL) Menu............................27 P210 (Relay 1), P220 (Relay 2) - Relay Type..................27 Alarms..............................27 P213 (Relay 1), P223 (Relay 2) - Relay “ON” Setpoint..............28 P214 (Relay 1), P224 (Relay 2) - Relay “OFF”...
-
Page 7: Chapter 1 Start Here
Chapter 1 Start Here… IMP+ + + + Congratulations on your purchase of a Pulsar Level Monitoring System. This quality system has been developed over many years and represents the latest in high technology ultrasonic level measurement and control. It has been designed to give you years of trouble-free performance, and a few minutes spent reading this operating manual will ensure that your installation is as simple as possible. -
Page 8: About The Imp+ Level Monitoring System
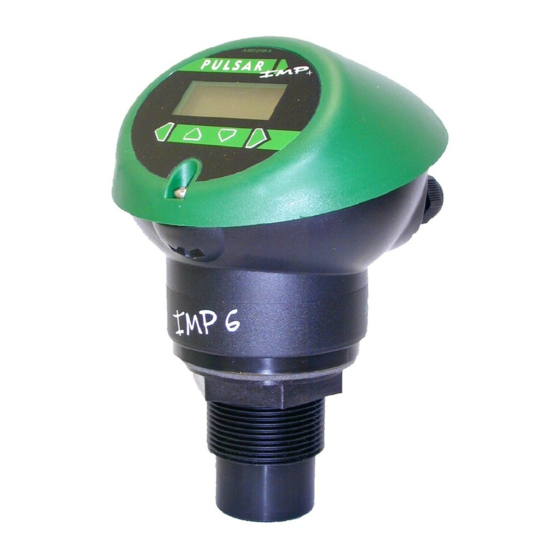
IMP+ IMP+ comes in three models: IMP 3 with a range from 0.20m (0.66 feet) to 3.00m (9.84 feet), IMP 6 with a range of 0.3m (0.98 feet) to 6.00m (19.69 feet) and IMP 10 with a range of 0.3m (0.98 feet) to 10.00m (32.81 feet). - Page 9 IMP+ IMP+ IMP+ IMP+ can show level, space, distance, on the display. The relays can be programmed to give an ‘ON’ and ‘OFF’ point for external control. There is a 4-20 mA output (non isolated in 3 wire mode) that can be connected to a remote chart recorder or PLC, to monitor level, space or distance, dependant on the measurement mode selected, and provides a ‘fault condition’...
-
Page 10: Product Specification
Product Specification Physical Dimensions 186mm (5.24 inches) O/A height x 133mm (7.32 inches) O/A diameter. Cable entry 2 off cable glands 4.5 -10mm. (Torque to 2NM) Mounting 1.5" BSP/NPT (IMP3 and 6 models) 2" BSP/NPT (IMP 10) Weight approx 1KG Environmental Temperature range -40 to +65°C. -
Page 11: Chapter 2 Installation
• The ultrasonic signal path should be free of falling material and obstructions such as pipes, beams etc. • The IMP 3 should be mounted at least 20cm (0.66 feet) above the maximum level of the material and be perpendicular to the surface. - Page 12 Dimensions IMP+ IMP+ IMP+ IMP+ The dimensions of the are as shown below. 1.5" BSP/NPT – IMP 3 & 6 2" BSP/NPT – IMP 10 Page 6...
- Page 13 Attention should also be taken, when mounting the unit, to ensure that strong windy conditions are avoided, wherever possible, to prevent abnormal operation. IMP+ IMP+ IMP+ IMP+ Range Blanking Model Imp 3 3 metres 200mm (9.84 feet) (0.66 feet) Imp 6 6 metres 300mm (19.69 feet) (0.98 feet)
- Page 14 Stand Pipe Installations IMP+ IMP+ IMP+ IMP+ When mounting the to a standpipe care should be taken to ensure that the standpipe is of sufficient diameter with reference to its length, see the table below for details: Dia. (D) Max. Length (L) inches inches When using a standpipe, fixed to the top of a vessel, ensure that the open...
- Page 15 Cable Entry IMP+ IMP+ IMP+ IMP+ Series has two M16 cable entries, fitted with a suitable gland, to ensure moisture protection is maintained. Terminal Connection Details IMP+ IMP+ IMP+ IMP+ ’s unique design allows for both 3 wire and 2 wire (loop powered) configuration within the same unit the terminal connections for both configurations are as detailed below.
- Page 16 3 Wire IMP+ IMP+ IMP+ IMP+ Source mode - the power for the loop is supplied by the Page 10...
-
Page 17: Terminal Connections
Terminal Connections 2 Wire Terminal 1 + ve: Direct Current (DC) input (11-30VDC) Terminal 2 - ve: Current Output (4-20mA) Loop Resistance For two wire operation the maximum cable resistance allowable can be calculated IMP+ IMP+ IMP+ IMP+ from the graph below. For example if an were supplied from 24v connected as a 2 wire unit (4-20mA only), the maximum total cable resistance is 590 ohms, for a typical 77 ohm /km cable this would mean a maximum cable length of... -
Page 18: Wire
3 Wire Terminal 1 + ve Current Output (4 – 20mA SINK MODE) (NOT USED IN SOURCE MODE) Terminal 2 - ve ground (4-20mA SINK MODE) Terminal 3 - ve: Direct Current (DC) input (11-30VDC) Terminal4 + ve: Direct Current (DC) input (11-30VDC) Terminal 5 + ve Current Output (4 –... -
Page 19: Maintenance
There is no user serviceable parts inside your , if you experience any problems with the unit, then please contact Pulsar Process Measurement for advice. To clean the equipment, wipe with a damp cloth. Do not use any solvents on the enclosure. -
Page 20: Chapter 3 How To Use Your Imp+ Level Monitoring System
IMP+ Chapter 3 How To Use Your Level Monitoring System Operating the Controls Display Whilst in the Run Mode, the 4 digit LCD, by default, will display the current level reading in metres, the display will also alternate between the reading and “LOE”... -
Page 21: Program Mode
Program Mode IMP+ IMP+ IMP+ IMP+ This mode is used to set up the or change information already set, this is achieved by using the 4 push buttons located below the display. Entering a value for each of the menu options that are relevant to your application provides all the programming information. -
Page 22: How To Access Program Mode
How to Access Program Mode To access the Program mode press the “ESC” and “Enter” button simultaneously, where upon the display will show PASS on the LCD display briefly, to prompt you to enter the password, the display will now show 0000, and the left hand digit will flash. -
Page 23: Parameter Defaults
Once you have reached the relevant menu, scroll through the parameters, and enter the necessary information. To enter the information, use the UP and DOWN keys to increment or decrement the digit, and the ENTER key to shift the flashing digit to the next position, once you have completed entering the value required pressing the ENTER button again will save the value. -
Page 24: Chapter 4 Getting Results With Your Imp
IMP+ Chapter 4 Getting Results With Your IMP+ IMP+ IMP+ IMP+ This chapter explains how to undertake the various functions of your Where specific parameters are used, consult Parameter Guide in Chapter 5. Setting up Your Application Empty Distance Empty Distance (P105) is the distance from the face of the transducer to the material at the bottom of the vessel. -
Page 25: Using The Relays
If the device connected to the mA output is out of calibration, and cannot be calibrated, then the low and high current levels can be trimmed by altering P838 (Low Trim) and P839 (High Trim). To do this, simply enter the value that ensures that 4 mA or 20 mA respectively are shown on the remote device. -
Page 26: Alarm Relay Set-Up
There are three types that each relay, individually, can be set to, for example, consider Relay 1, you can select parameter P210 from the following options: 0 = Not in Use relay will remain in the de-energised condition. 1=Alarm: relay will de-energise to set the alarm “ON”. 2=Control relay will energise to set the control “ON”. -
Page 27: Control Relay Set-Up
Control Relay Set-up The control relays are energised to turn the control “ON” (start process function), and de-energised to turn the control “OFF” (stop process function). In this way, loss of power will ensure that the pumps are turned “OFF”. To set a control relay, set the first parameter for the relay to equal 2 (for control). -
Page 28: Other Relay Parameters
Other Relay Parameters Fail-safe Mode IMP+ IMP+ IMP+ IMP+ Your has a general fail-safe parameter P808. This parameter will determine what state (level) both the display and the relays will assume in the case of a fault condition (Loss Of Echo). The fail-safe values for P808 are as follows: 1= Hold last known value, 2= Fail High, 3= Fail Low. -
Page 29: Changing The Passcode
IMP+ IMP+ IMP+ IMP+ The RS232 serial interface is used to communicate between the , and a PC using the optinal Pulsar IMP PC software, this software is used to obtain IMP+ IMP+ IMP+ IMP+ information from the so that echo traces can be viewed, parameters can be uploaded, downloaded and saved. - Page 30 Note IMP+ IMP+ IMP+ IMP+ When is wired as a 2 wire device connecting to the RS232 RJ11 port IMP+ IMP+ IMP+ IMP+ will cause the to draw 20mA, this is necessary to ensure correct operation of the RS232. Page 24...
-
Page 31: Chapter 5 Parameter Guide
P104 Measurement Units. Note this value affects span as well, so should be set before span. Default: IMP 3 = 3.00m (9.84 feet), IMP 6 = 6.00m (19.69 feet) and IMP 10 = 10.00m (32.81 feet). -
Page 32: P106 Span
Level (P105) to the maximum material level. It is automatically set to be equal to the Empty Level (P105) less the Near Blanking distance (P107), when you set the empty level. Default IMP 3 = 2.80m (9.19 feet), IMP 6 = 5.70m (18.70 feet) and IMP 10 = 9.70m (31.82 feet). -
Page 33: Relay (Rl) Menu
Relay (rL) Menu P210 (Relay 1), P220 (Relay 2) - Relay Type This parameter defines what type each relay should be, see the table below for available options. Option Description 0= Not in Use (Default) Relay not programmed. Relay is programmed as an alarm relay, 1= Alarm which will de-energise ON, and energise OFF. -
Page 34: P213 (Relay 1), P223 (Relay 2) - Relay "On" Setpoint
P213 (Relay 1), P223 (Relay 2) - Relay “ON” Setpoint This parameter determines the “ON” point for the alarm and should be set as follows, in Measurement Units P104 High Alarm Low Alarm P213/P223 “ON” Setpoint P213/P223 “ON” Setpoint Higher than Lower than P214/P224 “OFF”... -
Page 35: P213 (Relay 1), P223 (Relay 2) - Relay "On" Setpoint
P213 (Relay 1), P223 (Relay 2) - Relay “ON” Setpoint This parameter determines the “ON” point for the control relay and should be set as follows, in Measurement Units P104 Control Down Control Up P213/P223 “ON” Setpoint P213/P223 “ON” Setpoint Higher than Lower than P214/P224 “OFF”... -
Page 36: Volume (Uol) Menu
Volume (UoL) Menu P600 Vessel Shape This parameter determines which vessel shape is used when utilising “Volume Conversion”. The choices are as shown in the table below, along with the dimensions that are required to be entered (P601-P603). Dimensions Vessel Shape P600 Value Required P600=0 Cylindrical... - Page 37 Dimensions Vessel Shape P600 Value Required P600=6 Cylindrical Cylinder diameter Flat sloped base and height of bottom P600=7 Rectangular Width and Breadth Flat sloped base of rectangular section and height of bottom P600=8 Horizontal Cylinder diameter cylinder with flat ends and tank length P600=9 Horizontal Cylinder diameter,...
-
Page 38: P601-P603 Vessel Dimensions
P601-P603 Vessel Dimensions These three parameters are used to enter the dimension required to calculate the volume. The dimensions required are as shown below. Vessel Shape P601 P602 P603 P600=0 Cylinder Cylindrical Flat base Diameter P600=1 Width of Breadth of Rectangular Flat base rectangle rectangle... -
Page 39: P605 Volume Units
P605 Volume Units This parameter determines the units that will be used in calculating volume conversion. It is used in conjunction with P607 (maximum volume), please note that there is no provision for the volume units descriptor to be shown on the display. -
Page 40: Display (Disp) Menu
Display (DiSP) Menu P800 Display Units This parameter determines whether the reading displayed is in Measurement Units (P104), or as a percentage of span. Option Description 1 = Measured (Default) Display is in Measurement Units (P104) 2 = Percentage Display is in percentage of span. P801 Decimal Places This parameter determines the number of decimal places on the reading during run mode. -
Page 41: Ma Output (Loop) Menu
mA Output (LOOP) Menu P834 mA Low Level This parameter sets, in Measurement Units (P104), the value of ‘level’, ‘distance’ or ‘space’, depending on the selected Mode of Operation (P100), at which 4mA will occur. P835 mA High Level This parameter sets, in Measurement Units (P104), the value of ‘level’, ‘distance’... -
Page 42: P842 Voltage Output
P842 Voltage Output This parameter will determine the range of the voltage output. The voltage output will automatically be scaled to represent the Span P106 where 0volts represents 0% (empty) and maximum voltage 5 or 10 volts, depending on range selected, will represent 100% (full). Option Description 0 = 5 volts... -
Page 43: P854 Fixed Temperature
P854 Fixed Temperature This parameter sets the temperature, in degrees centigrade to be used if P852 (Temperature Source) =3. Default = 20 P860 Sound Velocity This option allows for the velocity of sound to be changed according to the atmosphere the transducer is operating in. By default the velocity is set for 342.72m/sec which is the speed of sound travelling in air at a temperature of The table below gives details of the velocity of sound in various gaseous atmospheres In all cases the velocity indicated is that in a 100% gaseous... -
Page 44: Stability (Sta) Menu
Default = 10.000 metres/minute (32.81 feet/minute) System (SyS1) Menu The following three parameters do not affect how the unit performs, but details, contained in them, may be required, by Pulsar, when making technical enquiries. P921 Enable Code Enables the passcode (P922), which means the passcode must be entered to go into program mode. -
Page 45: P930 Factory Defaults
P930 Factory Defaults This parameter resets all parameter values to the original Factory Set values that were installed when the unit was tested, before despatch to you. To reset parameters, enter 1 and press ENTER ENTER ENTER ENTER, all parameters, with the exception of the mA trims, will be restored to the factory settings (including the DATEM trace) and on completion Stor (Store) will be displayed after which you can ESC out of this parameter and continue programming the... -
Page 46: Chapter 6 Troubleshooting
Chapter 6 Troubleshooting This section describes many common symptoms, with suggestions as to what to do. Symptom What to Do Display blank, transducer not Check power supply firing. Display shows “L0E”. No valid echo being received and unit has gone into fault condition. Check material level is not out of range, sensor is perpendicular to material surface. -
Page 47: Parameter Record
Parameter Record (APP) M PPLICATION Parameter Details Entered Values Description Default P100 Mode 1 = Dist. Model Dependant P104 Measurement Units Model Dependant P105 Empty Level Model Dependant P106 Span Model Dependant P107 Near Blanking P108 Far Blanking 10.0% (rL) M ELAYS Parameter Details Entered Values... - Page 48 (DisP) M ISPLAY Parameter Details Entered Values Description Default P800 Display Units 1 = measured P801 Decimal Places P808 Fail Mode 1 = Known P809 Fail Time 2.0 mins mA O (LOOP) M UTPUT Parameter Details Entered Values Description Default P834 Low Level 0.000...
Need help?
Do you have a question about the Imp 3 and is the answer not in the manual?
Questions and answers