Table of Contents

Related Manuals for Delmhorst navigator pro


Summary of Contents for Delmhorst navigator pro
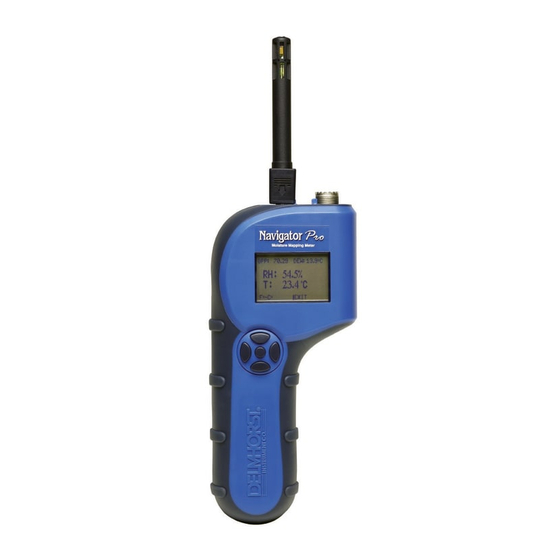
- Page 1 NAVIGATOR PRO MOISTURE MAPPING METER/THERMO-HYGROMETER Owner’s Manual Version 3.01 For Nav-Pro Meters starting with Serial #14642 Test Equipment Depot - 800.517.8431 - 99 Washington Street Melrose, MA 02176 - TestEquipmentDepot.com...
-
Page 2: Table Of Contents
TABLE OF CONTENTS PAGE GENERAL DESCRIPTION & FEATURES OPERATING INSTRUCTIONS NAVIGATION INSTALLING THE BATTERY LOW BATTERY TO POWER THE METER ON METER USE BASIC & ENHANCED MODES USING THE METER IN BASIC MODE To Take Pin Readings in Basic Mode To Set the Alarm in Basic Pin Mode To Change the Temperature Correction To Take Scan Readings in Basic Mode... - Page 3 TESTING WOOD USING THE 0 -100 REFERENCE SCALE TESTING CONCRETE SLABS MEASURING RH IN CONCRETE SLABS TESTING INSULATION TESTING DRYWALL 25-26 CARE OF YOUR METER WARRANTY APPENDIX A: ROOM LIST...
-
Page 4: General Description/Features
It provides the user with a host of data acquisition capabilities, and offers the latest in features and functionality. Even with its wide range of functions, Navigator Pro is intuitive and easy to operate. We recommend that you read the following pages in detail to take full advantage of all that Navigator Pro has to offer. -
Page 5: Operating Instructions
OPERATING INSTRUCTIONS -User Guide- This guide provides step-by-step instructions on powering up, using and powering down the meter. NAVIGATION: The meter uses an on-screen, menu-driven approach to navigate through the meter features, allowing for an intuitive understanding of keypad functions. Each screen presents the user with a number of selectable options. -
Page 6: Installing The Battery
INSTALLING THE BATTERY: The battery compartment is located on the underside of the case, at the bottom of the handle. 1. Open the battery compartment by sliding the lid back while pressing on the release indent. 2. Ensure correct polarity, and push the battery in flush with the bottom board until the connectors snap together on both sides. -
Page 7: To Power The Meter On
ENHANCED mode to allow for on screen reading recall or download to a PC. USING THE METER IN BASIC MODE: Navigator Pro is shipped from the factory set to BASIC mode. Use this option if you wish to use the meter for scan or pin readings without having to set up a job. -
Page 8: To Set The Alarm In Basic Pin Mode
3. Use the key to highlight the default material (Oak) if you wish to change it to a different material. Press the SELECT key to get into the SELECT MATERIAL sub menu. 4. Use the keys to highlight the material you are testing. Press the SELECT key to choose that material. -
Page 9: To Change The Temperature Correction
TO CHANGE THE TEMPERATURE CORRECTION: Navigator Pro defaults to a temperature of 70ºF. As wood temperature increases, its electrical resistance decreases and indicated moisture content rises. Lower wood temperatures result in lower indicated moisture content. A correction is necessary if the wood temperature is outside the range of 50ºF (10ºC) to 90ºF (32ºC). -
Page 10: To Set The Alarm In Basic Scan Mode
2. You may begin taking readings by firmly pressing the back of the meter onto the material. This will display a relative reading that ranges between 0 and 300. If you wish to hold a reading on screen, press the SELECT key; otherwise move the meter to another area to take continued readings. -
Page 11: To Reset The Meter To Default Settings In Basic Mode
JOB DEFINITION: Using Navigator Pro in ENHANCED mode allows you to define up to 5 jobs, and select locations and materials being tested for each location. In this mode, Navigator Pro also stores each reading and allows you to download the data to a PC or laptop via Infrared connection. -
Page 12: To Choose Between Residential & Commercial
1. From the Enhanced Main Menu, use the keys to highlight JOB DEF. 2. Select a job number (from 1 to 5), using the keys. 3. Press the key and highlight DONE. Press SELECT. If the job was previously defined and used, you will be asked if you want to “Update” the job. -
Page 13: To Set The Id Number
SELECT key after choosing the ID#. TO SET TEMPERATURE CORRECTION: Navigator Pro defaults to a temperature of 70ºF. As wood temperature increases, its electrical resistance decreases and indicated moisture content rises. Lower wood temperatures result in lower indicated moisture content. A correction is necessary if the wood temperature is outside the range of 50ºF (10ºC) to 90ºF (32ºC). - Page 14 Commercial jobs show a list of 32 numerical locations as listed below: 3. With NEXT and BACK you will be able to scroll five pages of room listings. APPENDIX A contains the list of all available rooms and the abbreviation used for each of them. To save your settings, use ...
-
Page 15: To Take Scan Readings In Enhanced Mode
After you have scrolled through all five room pages, select DONE if satisfied with your selections. This will take you back to the CREATE JOB sub menu. Press DONE to save the job. This will bring you back to the main menu. TO TAKE SCAN READINGS IN ENHANCED MODE TO SET THE ALARM IN ENHANCED SCAN MODE: 1. -
Page 16: To Take Pin Readings In Enhanced Mode
You may begin taking readings by firmly pressing the back of the meter onto the material. This will display a relative reading that ranges between 0 and 300. Once you are satisfied with the value indicated for the selected location, press the SELECT key to store a reading. -
Page 17: To Take A Pin Reading
The default status of the alarm is OFF. Press the SELECT key to turn it on. 4. After the alarm is turned on, use the keys to scroll up or down to a higher or lower alarm value. 5. After you have selected the alarm value, use the key to highlight DONE. Press SELECT to get back to the SET ALARM sub menu. -
Page 18: To Take Temp/Rh Readings In Enhanced Mode
At any time, you may modify Temperature (T), location (LOC), or switch to SCAN mode (GOTO SCAN). The EXIT option in both SCAN and PIN MODE menus will cancel the measurement process and will put the meter in the MAIN MENU TO TAKE TEMP/RH READINGS IN ENHANCED MODE: Before entering the RH-T mode, firmly insert the RH/T-S1 sensor into the top of the meter, making sure to align the pin-out on the DIN connector. - Page 19 1. By using the keys you may select which job and location you wish to view. After you have made your selection, scroll to DONE and press the SELECT key. Below are three examples of possible screens at this point: 3.
-
Page 20: Ir Link
Start Menu). 2. Once the Navigator Pro and base unit are lined up and the base unit is connected to a USB port (a green LED should be lit), select the IR LINK option in the Main Menu. The meter will display the message “Linking…”... -
Page 21: Setup Menu
No connection to the PC. The Base Unit must be connected to the PC through a USB cable. Check connection. b. KBD: This message occurs when the user presses a key during communications. Do not push any key on the meter during data transfer. The meter interprets this as a request to escape this activity and returns to the Main Menu. -
Page 22: Setup Menu
moves forward through weekdays using the key and backward using the key. The SELECT (center) key is only active when menu selection is applied to HOURS, DONE or CANCEL. Selecting DONE exits this screen back to the SETUP MENU and updates the clock with the newly chosen values. -
Page 23: Taking A Reading - Practical Applications
TAKING A READING – PRACTICAL APPLICATIONS The following application notes are intended for use with the meter in PIN MODE. TESTING WOOD: Mount the 26-ES directly to the external connector. Set the meter’s parameters as described previously in the owners’ manual. If the species (construction-grade only) is unknown, set the meter to the reference calibration, Douglas Fir and take the readings at face value. -
Page 24: Testing Concrete Slabs
TESTING CONCRETE SLABS: Moisture meters are an effective tool to check comparative moisture conditions in concrete. They can tell you where there may be excess moisture and help determine if you need to conduct further testing, and identify specific areas on which that testing should be performed. Meters do not provide quantitative results as a basis for acceptance of a slab for installation of moisture- sensitive flooring systems. -
Page 25: Measuring Rh In Concrete Slabs
MEASURING RH IN CONCRETE SLABS IN ACCORDANCE WITH ASTM F- 2170: Navigator Pro can be used to measure the RH in a concrete slab in accordance with the ASTM F- 2170 Standard Test Method for Determining Relative Humidity in Concrete Floor Slabs. - Page 26 Note: Readings between 0.1% and 0.5% indicate a sufficiently dry moisture level. Readings between 0.5% and 1% indicate a borderline situation. Readings greater than 1% indicate material that is too wet for painting or wallpaper. A reading above 1% also indicates enough moisture present to allow mold growth to occur but only if other factors are also present such as a high RH level and food source.
-
Page 27: Care Of Your Meter
CARE OF YOUR METER Store your meter in a clean, dry place. The protective carrying case provided is an ideal storage place when the meter is not in use. If the meter has been left in a hot or cold environment overnight or for an extended period, the calibration of the pin less mode may be adversely affected. - Page 28 Blank page...
-
Page 29: Warranty
At our option, we may replace or repair the meter. Delmhorst shall not be liable for incidental or consequential damages for the breach of any express or implied warranty with respect to this product or its calibration. With proper care and maintenance the meter should stay in calibration;... -
Page 30: Appendix A: Room List
APPENDIX A: Room list – Residential Jobs Number Abbreviation Description Page 1 Living Room Dining Room Kitchen Entry Rear Entry BATH1 Bathroom 1 BATH2 Bathroom 2 Page 2 BATH3 Bathroom 3 BATH4 Bathroom 4 Bedroom 1 Bedroom 2 Bedroom 3 Bedroom 4 Bedroom 5 Page 3...
Need help?
Do you have a question about the navigator pro and is the answer not in the manual?
Questions and answers