Table of Contents
Advertisement
Available languages
Available languages
Quick Links
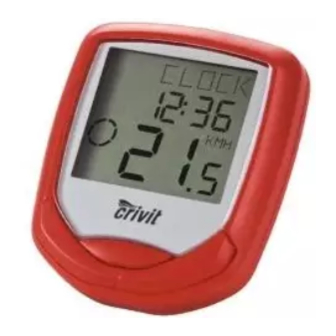
BIKE COMPUTER
Operation and Safety Notes
CYKELCOMPUTER
1a
Brugs- og sikkerhedsanvisninger
3
4
A
Z31335
Bike Computer
– Odometer (countdown or forwards)
– Total odometer and total cycling time display
Proper use
– Calories
– Fat-burning
The product is intended for use as a cycle computer.
– Scan indicator (functions displayed in
Not for commercial use.
continuous loop)
– Automatic switch to clock mode
Functions
– Backlight
Description of parts
– Menu languages: GB, DE, FR, NL, IT, ES
– Clock
– Stopwatch
1a
Bracket
– Temperature °C / °F
Sensor
1b
– Memory function for min. and max. temperature
2
Magnet
– Current speed (0–99.9 km / h)
Battery 3 V
, type CR2032 button cell
3
– Mean speed (0–99.9 km / h)
Cable tie
4
– Highest speed (0–99.9 km / h)
Bike computer's battery compartment cover
5
– Speed comparison
Bike computer
6
– Acceleration and deceleration
LC display
7
– Trip timer (max. 9:59:59) (countdown or forwards)
Function indicator
8
GB/IE
in mm. Press the MODE button repeatedly until
ATB26 x1.4
1995 mm
the desired number appears as the first digit.
ATB26 x1.5
2030 mm
Confirm your choice by pressing the SET button.
ATB26 x1.75
2045 mm
Repeat this process for each of the three
ATB26x2 (650B)
2099 mm
remaining digits.
27"x1
2138 mm
Note: You can calculate your tyre circumference
27"x1 1 / 4
2155 mm
by multiplying your tyre diameter by 3.1416.
The following list contains the tyre circumferences
Now select your desired unit of distance. Press
of the most common cycle tyres.
the MODE button repeatedly until SET KM or
Tyre diameter
Tyre circumference
SET MILE appears in the LC display.
20"
1598 mm
Confirm your choice by pressing the SET button.
22"
1759 mm
You move on to entering your age.
24"
1916 mm
A two-digit number appears in the LC display.
26" (650 A)
2073 mm
Now enter your age. Press the MODE button
26.5" (tubular)
2117 mm
repeatedly until the desired number appears
26.6" (700x25C)
2124 mm
as the first digit.
26.8" (700x28C)
2136 mm
Confirm your choice by pressing the SET button.
27" (700x32C)
2155 mm
Repeat this process for the remaining digit. You
28" (700B)
2237 mm
move on to selecting the unit of weight.
ATB24"x1.75
1888 mm
GB/IE
A 5-digit number appears in the LC display. Enter
Repeat this process for all the remaining digits.
the desired distance. Press the MODE button
SCAN: Scan
repeatedly until the desired number appears
Note: The scan mode automatically switches
as the first digit.
between the trip distance, highest speed, average
Confirm your choice by pressing the SET button.
speed and trip time displays.
Repeat this process for all the remaining digits.
Note: Refer to the section on "Basic settings" to
TIME: Timer
see how you make or change settings.
Press the SET button and keep it pressed to
CUSTOMIZE mode
change the timer settings.
The LC display shows the symbol for counting
Apart from the ADVANCE and EASY mode, you
forwards or backwards (+ or - respectively).
can make your individual adjustments in the
Press the MODE button repeatedly until the
CUSTOMIZE mode (see procedure).
desired symbol is shown.
Confirm your choice by pressing the SET button.
Press and hold the light button
You move on to the time settings of the timer.
CUSTOMIZE mode.
A 5-digit number appears in the LC display.
Note: By repeatedly pressing the MODE
Enter the desired time. Press the MODE button
button
11
, you can toggle between the
repeatedly until the desired number appears
ADVANCE and EASY modes.
as the first digit.
In the EASY mode, press and hold the SET
13
Confirm your choice by pressing the SET button.
button
. Press the MODE button to switch
GB/IE
79107_cri_Fahrradcomputer_GB-IE-DK.indd 1
B
C
1b
2
5
3
6
Included items
9
Secondary function value display
Primary function value display
10
11
MODE button
1 Bike computer
Light button
1 Bike computer bracket
12
SET button
1 Magnet
13
SCAN indicator
1 Sensor
14
Servicing interval indicator
6 Cable ties
15
Speed comparison indicator
1 Battery 3 V
16
Acceleration / deceleration indicator:
1 Operating instructions
17
Acceleration – anticlockwise rotation
Deceleration – clockwise rotation
18
Battery state indicator
Technical data
KEEP ALL THE SAFETY ADVICE AND INSTRUC-
TIONS IN A SAFE PLACE FOR FUTURE REFERENCE!
Battery:
3 V
(CR2032 button cell)
Children or persons who lack the knowledge or
experience to use the device or whose physical,
sensory or intellectual capacities are limited must
never be allowed to use the device without
GB/IE
GB/IE
Press the MODE button repeatedly until SET
Confirm your choice by pressing the SET button.
KG or SET LB appears in the LC display.
Repeat this process for all the remaining digits.
Confirm your choice by pressing the SET button.
You move on to selecting the servicing interval.
You move on to entering your weight.
Press the MODE button repeatedly until the
A three-digit number appears in the LC display.
desired number of units of distance to your next
Now enter your weight. Press the MODE button
intended bicycle service appears in the LC
repeatedly until the desired number appears
display.
as the first digit.
Note: You have the choice of 200, 400, 600
Confirm your choice by pressing the SET button.
or 800 km or miles.
Repeat this process for all the remaining digits.
Confirm your choice by pressing the SET button.
You move on to selecting the time format.
You move on to selecting the unit of temperature.
Press the MODE button repeatedly until 12 for
Press the MODE button repeatedly until °C or
the 12-hour format or 24 for the 24-hour format
°F appears in the LC display.
appears in the LC display.
Confirm your choice by pressing the SET button.
Confirm your choice by pressing the SET button.
You have now completed the the basic settings.
You move on to setting the time.
Using the bike computer
A four-digit number appears in the LC display.
Enter the current time. Press the MODE button
Note: If the bike computer remains unused for
repeatedly until the desired number appears
more than 5 minutes, it automatically switches
as the first digit.
into the stand-by mode. Press any button to
GB/IE
GB/IE
Using the backlight
the settings on or off (e.g. time). Choose „On",
to add the chosen adjustment to the EASY
Press the light button
modes. Choose „Off", if you do not want to
light temporarily. The backlight automatically
add the adjustments.
extinguishes after a short period.
Press the SET button, to confirm your entry.
12
to enter the
GB/IE
GB/IE
D
1b
E
1b
supervision or instruction by a person responsible
for their safety. Children must be supervised so
that they do not play with the product.
Please note that the warranty does not cover
damage arising from improper treatment, non-
observance of the operating instructions and
safety advice or unauthorised use.
, type CR2032 button cell
Safety advice concerning
batteries
General safety advice
RISK OF LOSS OF LIFE!
If batteries are swallowed, it can lead to loss of
life. Seek medical attention if a battery is swallowed.
Remove the battery if the product is not to be
used for a long period.
CAUTION! RISK OF EXPLO-
SION! Never recharge single-use
batteries!
GB/IE
GB/IE
reactivate the computer. The function indicator
8
shows the current mode.
Press the MODE button
repeatedly to
11
page through the various modes.
Press the SET button
to change into the sec-
13
ondary function for any function.
Press the SET button and keep it pressed to call
or reset up any saved values.
The bike computer has the following
functions:
Advanced users' functions:
CLOCK > TOTALODO > TOTAL-TM > TRIPDIST >
MAXSPEED > AVGSPEED > TRIPTIME > TEMP >
STPWATCH > CAL RATE > CALORIE > FAT-BURN >
KM+/- > TIME+/- > SCAN
Beginners' functions:
TRIPDIST > AVGSPEED > TRIPTIME
GB/IE
GB/IE
Resetting the bike computer
to switch on the back-
Press the MODE button
and SET button
12
11
at the same time and keep them pressed until
{{----}} appears in the LC display
.
7
Now press the MODE button and keep it
pressed. This resets all the settings.
Note: All stored data will be deleted.
Changing the battery
Note: The battery of the bike computer must be
replaced when the battery symbol
appears on
18
the LC display
7
.
Press the MODE key
and the SET key
11
at the same time and keep them pressed until
the {{-----}} symbol appears in the LC display
To replace the battery, proceed as shown in
figure A. Make sure you fit the battery the right
way round (polarity). This is shown inside the
battery compartment.
GB/IE
GB/IE
F
H
1b
2 1b
4
2
G
I
4
2
2
CAUTION! DANGER OF EXPLO-
affected area with water and / or seek the
SION! Always replace all batteries
advice of a doctor!
at the same time and only use batteries
Before use
of the same type.
If the battery is exhausted, remove it from the
device immediately. Otherwise the battery is
Remove the protective foil from the LC display
more likely to leak.
before first use.
Make sure you insert the battery the right way
Inserting the battery
round (polarity).
Keep the battery away from children. Do not
To insert the battery
throw the battery into a fire. Never short-circuit
Fig. A.
it or take it apart.
Attaching the bike computer
If your battery leaks, remove it from the device
immediately to prevent the device from being
To attach the device, proceed as shown in
damaged.
Figs. B to I.
Do not let the fluid from a leaking battery come
into contact with your skin, eyes or mucous
Note: Make sure the cable is attached properly. It
membranes. In the event of contact with fluid
must not get caught in the spokes or trail along them.
leaking from a battery, thoroughly flush the
GB/IE
Using functions
Press the SET button and keep it pressed for
Note: All the functions and secondary functions
3 seconds to reset the maximum speed display
are described in the following list.
to 0.
CLOCK: - Displays the time
AVGSPEED: Average speed
Press the SET button
and keep it pressed for
TRIPTIME: Trip time
13
3 seconds to access the time settings.
TEMP: Thermometer
TOTALODO: - Total odometer
Press the SET button and keep it pressed to
Press the SET button and keep it pressed for
switch between °C and °F.
3 seconds to access the wheel size settings
Press the SET button to display the highest tem-
and total distance.
perature (HI) measured so far.
TOTAL-TM: Total time cycling
Press the SET button again to display the low-
Press the SET button and keep it pressed for
est temperature (LO) measured so far.
3 seconds to make changes to the saved total
Press and hold down the SET button while the
time cycling.
highest or lowest temperature is displayed to
TRIPDIST: Trip distance
switch back to the current temperature to
Press the SET button and keep it pressed for
reset the saved data.
3 seconds to reset the trip distance, the
STPWATCH: Stopwatch
average speed and the trip time displays to 0.
Press the SET button to start the stopwatch.
MAXSPEED: Highest speed
Press the SET button again to stop the stop-
watch.
GB/IE
Press the SET key and keep it pressed to return
Problem
to normal operating mode.
13
Note: Once the batteries are removed, all stored
Empty LC-display or no
data will be erased after approx. 20 seconds.
response after putting
the battery in again
Troubleshooting
Note: This device has delicate electronic compo-
+
-
nents. Therefore interference may occur when it is
near devices which transmit radio signals.
RESET
- If errors occur in the display, remove any such
devices from the vicinity of the product. In the case
of such malfunctions, remove the battery briefly and
then reinsert again.
13
.
7
GB/IE
J
7
18
8
16
9
17
15
10
14
12
1b
13
11
Preparing for use
Basic settings
Note: The LC display
comes on automatically
7
approx. 2 seconds after the battery
is inserted.
3
You are immediately offered a choice of languages.
7
Press the MODE-button
repeatedly until the
11
desired language appears.
Confirm your choice by pressing the SET but-
3
, proceed as shown in
ton
13
. You move on automatically to select
the user profile.
Press the MODE button repeatedly until the
desired user profile (ADVANCE or EASY)
appears.
Confirm your choice by pressing the SET but-
ton. Now you can choose the wheel size (SET
WS).
A four-digit number appears in the LC display.
Now enter the tyre circumference of your wheel
GB/IE
GB/IE
Press the SET button and keep it pressed to
reset the stopwatch to 0.
CAL RATE: Current calorie consumption
CALORIE: Calorie meter
Press the SET button and keep it pressed to
reset the calorie counter to 0.
FAT-BURN: Fat burning in grams
Press the SET button and keep it pressed to
reset the fat burning value to 0.
KM: Odometer
Press the SET button and keep it pressed to
change the odometer settings.
The LC display
7
shows the symbol for count-
ing forwards or backwards (+ or - respectively).
Press the MODE button
repeatedly until the
11
desired symbol is shown.
Confirm your choice by pressing the SET button.
You move on to setting the distance on the
odometer.
GB/IE
GB/IE
Solution
Speed or distance are
Adjust magnet and
not displayed.
sensor correctly.
Remove battery. In the
- Check that the battery
area marked RESET of
is inserted with the
the battery compartment,
poles arranged the
touch the plus and minus
right way round.
terminals at the same
time using a screwdriver.
Display is black
The ambient temperature
Insert a 3V battery into
is too high or the bicycle
the battery compartment
computer was exposed
in such a way that the +
to direct sunlight for too
terminal points upwards.
long. Remove appliance
Replace the battery cover
from direct sunlight and
on the battery compart-
let it cool off for a while.
ment. The microprocessor
The LC-display shows
Remove battery and
is reset and restarted.
irregular symbols.
replace it again.
GB/IE
GB/IE
09.10.12 09:02
Advertisement
Table of Contents

Subscribe to Our Youtube Channel
Related Manuals for Crivit Z31335


Summary of Contents for Crivit Z31335
- Page 1 BIKE COMPUTER 2 1b Operation and Safety Notes CYKELCOMPUTER Brugs- og sikkerhedsanvisninger Z31335 Bike Computer Included items Preparing for use – Odometer (countdown or forwards) Secondary function value display supervision or instruction by a person responsible CAUTION! DANGER OF EXPLO- affected area with water and / or seek the –...
- Page 2 Batterier må ikke bortskaffes med husholdningsaf- Model No. Z31335 påny. Din kommune oplyser om muligheder for bortskaf- fald. De kan indeholde giftige tungmetaller og er Version: 11 / 2012 felse af det udtjente produkt.
Need help?
Do you have a question about the Z31335 and is the answer not in the manual?
Questions and answers