Moxa Technologies AWK-4121 Installation Manual
Hide thumbs
Also See for AWK-4121:
- User manual (89 pages) ,
- Quick installation manual (18 pages) ,
- Quick installation manual (15 pages)
Table of Contents
Advertisement
Quick Links
Download this manual
See also:
User Manual
Advertisement
Table of Contents

Related Manuals for Moxa Technologies AWK-4121


Summary of Contents for Moxa Technologies AWK-4121
- Page 1 AWK-4121 Hardware Installation Guide Moxa AirWorks Fourth Edition, October 2010 P/N: 1802041210013...
-
Page 2: Notes For The Reader
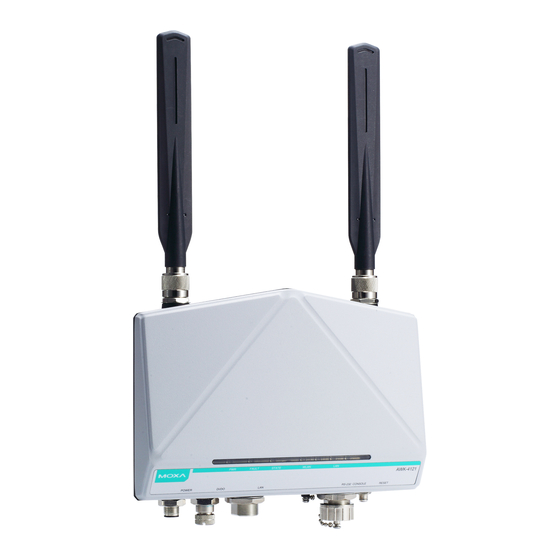
NOTE Highlights important information related to this product. Package Checklist Moxa’s AWK-4121 is shipped with the following items. If any of these items is missing or damaged, please contact your customer service representative for assistance. •... - Page 3 NOTE To make the change effective, you must save the change and then click Restart Save and Restart button to apply all changes. Panel Layout of the AWK-4121 Front Panel View 1. MAIN antenna port. 2. AUX antenna port.
-
Page 4: Dimensions (Unit = Mm)
Rubber plate Antenna Metal N-type Step 1: Use your fingers and hold the antenna metal N-type connector. Step 2: Screw the antenna N-type connector (male) onto the AWK-4121 device’s N-type connector (female) Caution Do not hold the rubber plate to screw the antenna on to the AWK-4121 device. -
Page 5: Wall Mounting
Wall Mounting In most applications, wall mount provides an easier installation. You will find it quite easy to mount AWK-4121 on the wall, as illustrated below. STEP 1: STEP 2: Attach the wall-mounting kit Mounting the AWK-4121 on the wall with M4 screws, as shown in requires 4 screws. -
Page 6: Din-Rail Mounting (Optional)
AWK-4121. A pair of DK-DC50131s is needed for DIN-Rail mounting. To install the DIN-Rail mounting kits, tightly attach the two DIN-Rail mounting kits on the rear panel of AWK-4121 with 12 screws. (6 screws for each kit) To Install STEP 1:... -
Page 7: Wiring Requirements
802.3af compliant power source or an IEC60950 compliant limited power source. When AWK-4121 is powered via DC power, the M12 A-coding connector on the bottom panel is used for the AWK-4121’s two redundant inputs. The pin assignment is shown below:... -
Page 8: Communication Connections
Wiring the Digital Inputs and Relay Contact (Digital Output) The AWK-4121 has two sets of digital input—DI1 and DI2. Each DI comprises two contacts of the 8-pin M12 connector on the AWK-4121’s bottom panel. These two digital inputs can be connected to digital-output-enabled sensors for on-site status monitoring. - Page 9 Signal Signal RS-232 Connection The AWK-4121 has one RS-232 (8-pin RJ45) console port located on the bottom panel. Use either an RJ45-to-DB9 or RJ45-to-DB25 cable to connect the Moxa AWK-4121’s console port to your PC’s COM port. You may then use a console terminal program to access the AWK-4121 for console configuration.
-
Page 10: Waterproof Rj45 Plug
Tightly screw the clamp ring ④ to the housing and check to make sure that the plug is securely fastened. (NOTE: for a tighter connection, you can connect the RJ-45 plug to the AWK-4121 before STEP 4.) - 10 -... -
Page 11: Led Indicators
LED Indicators The front panel of the Moxa AWK-4121 contains several LED indicators. The function of each LED is described in the table below. Color State Description Green Power is being supplied (from power input 1 or 2, or PoE). - Page 12 Protocols General Protocols: Proxy ARP, DNS, HTTP, HTTPS, IP, ICMP, SNTP, TCP, UDP, RADIUS, SNMP, RTP, AP-only Protocols: ARP, BOOTP, DHCP, STP/RSTP (IEEE 802.1D/w) Transmission Rates 802.11b 1, 2, 5.5, 11 Mbps 802.11a/g 6, 9, 12, 18, 24, 36, 48, 54 Mbps TX Transmit Power (for hardware revision 1.1) 802.11b Typ.
-
Page 13: Power Requirements
5 years Details: See http://www.moxa.com/warranty ATTENTION The AWK-4121 is NOT a portable mobile device and should be located 20cm away from the human body. The AWK-4121 is NOT designed for the general public. To deploy AWK-4121s and establish a wireless network safely, a...
Need help?
Do you have a question about the AWK-4121 and is the answer not in the manual?
Questions and answers