Table of Contents
Advertisement
Advertisement
Table of Contents

Related Manuals for Nilox MINI F


Summary of Contents for Nilox MINI F
- Page 1 USER MANUAL...
-
Page 2: Table Of Contents
UMMARY PREFACE ................................. 4 PRECAUTIONS ..............................4 DESCRIPTION............................... 4 TECHNICAL SPECIFICATIONS ........................5 STRUCTURE ................................6 MINI-F Structure ............................... 6 Status led ................................6 OPERATING INSTRUCTIONS ......................... 7 Charge ................................. 7 Inserting and removing the memory card ....................7 LEGENDA ................................8 Photo mode ................................ - Page 3 Burst mode ............................... 15 Sharpness ................................16 Effects ................................. 16 Date stamp ............................... 17 Detection ................................17 Digital zoom ..............................17 SETUP PARAMETER SETTINGS ........................18 Auto review ..............................18 Power frequency ............................. 18 video format ..............................18 media format ..............................20 Power save................................
-
Page 4: Preface
PREFACE Thank you for choosing MINI F Wi-Fi, the high-definition digital camera. Easy to use, compact and with an integrated design. With its high-definition and dynamic image capturing technology it can record your daily activities at anytime and anywhere, so you can remember your experiences and share them with your family and friends. -
Page 5: Technical Specifications
TECHNICAL SPECIFICATIONS MINI-F camera has the following specifications: • Image sensor: 5.0 mega-pixel CMOS • Functions: Video recording, photos, preview • Zoom: 8x digital • Screen: LCD 2.0” • Photo resolution: 12M (4000x3000), 8M (3264x2448), 5M (2592 x1944), 3M (2048 x1536) •... -
Page 6: Structure
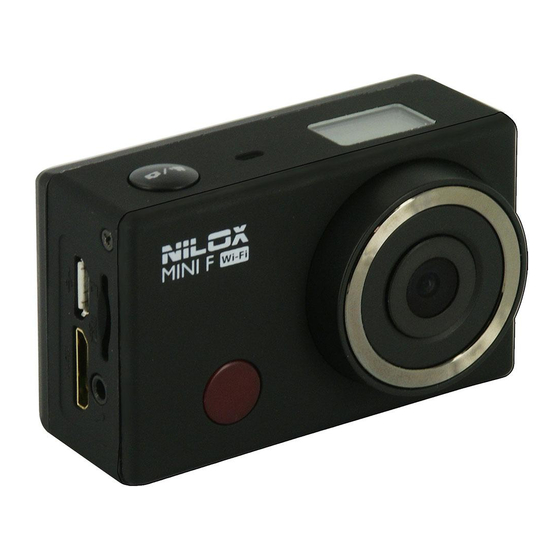
STRUCTURE MINI-F S TRUCTURE 1) Shutter; activate and stop recordings, take photos 2) Microphone 3) On/off switch, change from photo to video or to preview mode 4) LED Battery charge indicator 5) LED use Indicator 6) LED Display 7) Reset 8) MicroSD Slot 9) Charger and Micro SD data transmission device... -
Page 7: Operating Instructions
OPERATING INSTRUCTIONS HARGE Turn on the video camera and check battery status; if low, charge it. Either a computer USB port of power adapter (not included) can be used to charge it. Generally, it takes 2-4 hours to complete the charge cycle. NSERTING AND REMOVING THE MEMORY CARD The MINI-F video camera supports TF memory cards with capacity up to 32 GB. -
Page 8: Legenda
LEGENDA The camera has 3 operating modes: • Video recording mode • Photo mode • Video and photo view mode. Press the key to switch between the various modes. The camera is set to video mode by default when turned on. Following are some of the symbols that most commonly appear on the screen. -
Page 9: Parameters Setting
PARAMETERS SETTING To set video camera parameters, use key and navigate the menu with keys , then confirm selections by pressing key If the MINI-F is in video mode before the key is pressed, video and general settings can be edited;... -
Page 10: Video Parameters Setting
VIDEO PARAMETERS SETTING OVIE SIZE It allows to select the desired resolution for the video recording. 2. Press the key to reach the item Movie size 3. Press to confirm 4. Choose the desired item and press the key to confirm The choices for the video resolution are the following: •... -
Page 11: Seamless
EAMLESS It lets you break videos down into several sections. This makes video dimensions smaller and easier to view. 2. Press the key to reach the item Seamless 3. Press to confirm 4. Choose the desired item and press key to confirm Possible choices are: •... -
Page 12: Effect
• Central • Multiarea • Spot Central mode provides an average measurement between the exterior and central zone, with the central zone taking prevalence, multiarea mode takes an average on the entire exposure zone while spot mode only considers the central part. FFECT Special video effects. -
Page 13: Photo Parameter Settings
PHOTO PARAMETER SETTINGS ESOLUTION It lets you set photo resolution. 2. Press the key to reach the item Resolution 3. Press key to confirm 4. Choose the desired item and press key to confirm Possible choices are: • 12 M (4000x3000) •... -
Page 14: Metering
ETERING This lets you specify the method the exposure meter uses to measure lighting. 2. Press the key to reach the item Metering 3. Press key to confirm 4. Choose the desired item and press the key to confirm Possible choices are: •... -
Page 15: Exposure
3. Press key to confirm 4. Choose the desired item and press key to confirm Possible choices are: • Auto • 50 • 100 • 200 • XPOSURE It lets you manually increase or decrease light exposure. This mode is especially helpful when extreme conditions mislead the camera exposure meter (back lighting for example). -
Page 16: Sharpness
2. Press the keys to reach the item Burst mode 3. Press to confirm 4. Choose the desired item and press key to confirm Possible choices are: • Off, 3, 5,10 HARPNESS It lets you adjust photo contour contrast. 2. Press the key to reach the item Sharpness 3. -
Page 17: Date Stamp
ATE STAMP Prints the date and time on the photo. 2. Press the key to reach the item Date stamp 3. Press key to confirm 4. Choose the desired item and press key to confirm Possible choices are: • Off •... -
Page 18: Setup Parameter Settings
SETUP PARAMETER SETTINGS UTO REVIEW Only available for photo mode. After shooting, the photo remains on the screen for the set time. 2. Press the keys to reach the item Auto review 3. Press to confirm 4. Choose the desired item and press the key to confirm Possible choices are: •... -
Page 20: Media Format
MEDIA FORMAT The video encapsulation format can be set. 2. Press the key to reach the item Media format 3. Press to confirm 4. Choose the desired item and press the key to confirm Possible choices are: • Avi, Mpg OWER SAVE It lets you set the camera disuse time before it automatically turns off. -
Page 21: Usb
Language 3. Press to confirm 4. Choose the desired item and confirm by pressing Possible choices are: • English, French, Spanish, Italian, Portuguese, German It lets you set the USB interface mode. 2. Press the key to reach the item 3. - Page 22 4. Choose the desired item and press the key to confirm Possible choices are: • Yes, No WARNING, RESET RETURNS THE MENU TO ENGLISH.
-
Page 23: View Parameter Settings
VIEW PARAMETER SETTINGS Switch your MINI-F to view mode; pressed repeatedly in standby, the camera will switch from video mode to photo mode to view mode ROTECT It lets you protect photos or videos against being accidentally deleted. 2. Press the key to reach the item Protect 3. -
Page 24: Photo Effect
Possible choices are: • Start: to start displaying effects • Interval: values range from 1 to 9 seconds; change by pressing the key • Transition: 5 different transition effects from one photo to the next, here to, press the key to change •... - Page 25 It lets you shrink the size of the photo. 2. Press the key to reach the item Resize 3. Press to confirm 4. Choose the desired item and press key to confirm Possible choices are: • 8M, 5M, 3M, 1M OBVIOUSLY, PHOTO RESOLUTION CAN ONLY BE DOWNGRADED.
-
Page 26: Computer Connection
COMPUTER CONNECTION The MINI-F camera has 1 USB micro port. Use this port to connect the camera to a computer to charge or download photos and videos from the memory card. MSDC appears on the screen when connected to the computer. The internal MINI-F card is displayed as an external disk drive. -
Page 27: Precautions
• Before using the 3M dual-side foam tape, clean the surface and heat the foam tape, using for instance an electric blower, especially in a place where temperature is lower than 0°C. Before using MINI F WI-FI video camera, pay attention to the following notice information: •... -
Page 28: Included In The Pack
INCLUDED IN THE PACK The articles included in the pack are the following: 1 MINI-F complete with underwater 1 remote controller case 1 flat plate and 1 1 microSD card curved plate 1 hook support... -
Page 29: Warranty And Legal Notes
WARRANTY AND LEGAL NOTES MINI-F is equipped with a rechargeable lithium ion polymer battery. To reduce the risk of fire, please avoid tampering, falls, contact with water or fire. To avoid personal injury, electric shock, fire or damage to various parts of the product, please follow the following instructions: Do not immerse the product without its waterproof case into water Personal Safety. - Page 30 • This warranty is referred to in the event a conformity defect occurs, referred to product features. • Product support and warranty. Visit www.nilox.com to learn more. Warranty restrictions: this warranty does not apply in the following cases: • No proof of purchase (invoice or receipt).
- Page 31 Brief Declaration of Conformity This device was tested and meets European Parliament and European Commission Directive 2011/65/EC and 1999/5/EC concerning radio equipment and peripheral devices for telecommunications and their mutual recognition. The declaration of conformity is available at our offices. This device can thus be used in all EEC countries and in all countries where Directive 1999/5/EC applies, without restrictions, except for: Norway (NO): device not to be used within 20 km of Ny Alesund.
Need help?
Do you have a question about the MINI F and is the answer not in the manual?
Questions and answers